light HONDA CROSSTOUR 2015 1.G Owner's Manual
[x] Cancel search | Manufacturer: HONDA, Model Year: 2015, Model line: CROSSTOUR, Model: HONDA CROSSTOUR 2015 1.GPages: 573
Page 110 of 573
109
uuSecurity System uSecurity System Alarm
Controls
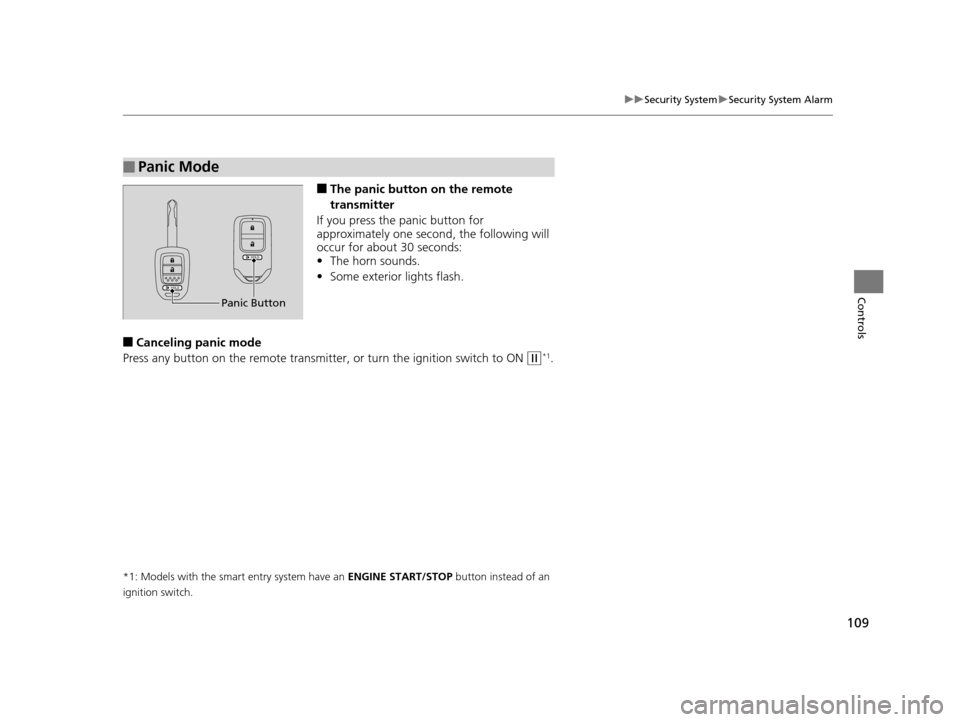
■The panic button on the remote
transmitter
If you press the panic button for
approximately one second, the following will
occur for about 30 seconds:
• The horn sounds.
• Some exterior lights flash.
■Canceling panic mode
Press any button on the remote transmitter, or turn the ignition switch to ON
(w*1.
*1: Models with the smart entry system have an ENGINE START/STOP button instead of an
ignition switch.
■Panic Mode
Panic Button
15 CROSSTOUR-31TP66500.book 109 ページ 2014年7月31日 木曜日 午後3時23分
Page 111 of 573
110
Controls
Opening and Closing the Windows
Opening/Closing the Power Windows
The power windows can be opened and closed when the ignition switch is in ON
(w*1, using the switches on the doors. The driver side switches can be used to open
and close all of the windows.
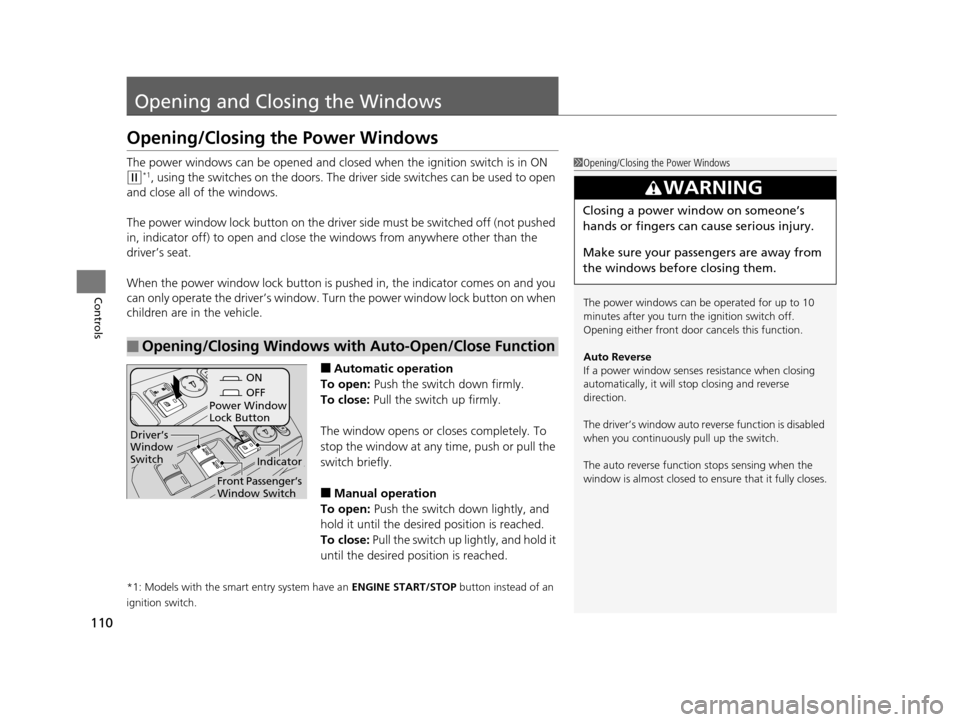
The power window lock button on the driver side must be switched off (not pushed
in, indicator off) to open and close th e windows from anywhere other than the
driver’s seat.
When the power window lock button is pu shed in, the indicator comes on and you
can only operate the driver’s window. Turn the power window lock button on when
children are in the vehicle.
■Automatic operation
To open: Push the switch down firmly.
To close: Pull the switch up firmly.
The window opens or cl oses completely. To
stop the window at any time, push or pull the
switch briefly.
■Manual operation
To open: Push the switch down lightly, and
hold it until the desired position is reached.
To close: Pull the switch up lightly, and hold it
until the desired position is reached.
*1: Models with the smart entry system have an ENGINE START/STOP button instead of an
ignition switch.
■Opening/Closing Windows with Auto-Open/Close Function
1 Opening/Closing the Power Windows
The power windows can be operated for up to 10
minutes after you turn the ignition switch off.
Opening either front door cancels this function.
Auto Reverse
If a power window senses resistance when closing
automatically, it will stop closing and reverse
direction.
The driver’s window auto re verse function is disabled
when you continuously pull up the switch.
The auto reverse function stops sensing when the
window is almost closed to en sure that it fully closes.
3WARNING
Closing a power window on someone’s
hands or fingers can cause serious injury.
Make sure your passengers are away from
the windows before closing them.
ON
OFF
Power Window
Lock Button
Indicator
Driver’s
Window
Switch
Front Passenger’s
Window Switch
15 CROSSTOUR-31TP66500.book 110 ページ 2014年7月31日 木曜日 午後3時23分
Page 114 of 573
113
Controls
Opening and Closing the Moonroof
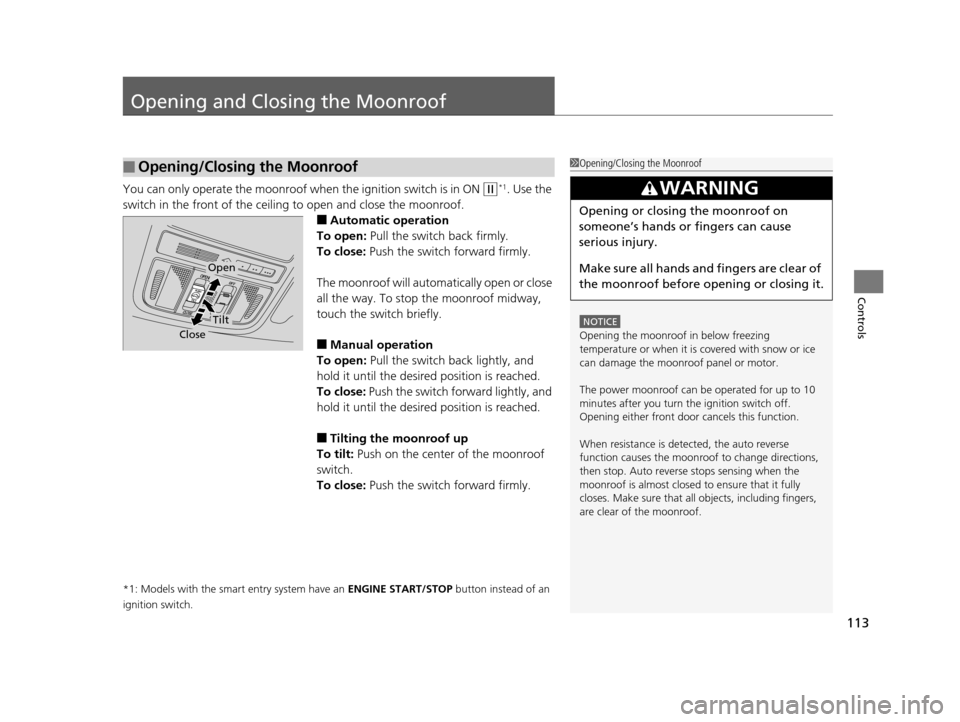
You can only operate the moonroof when the ignition switch is in ON (w*1. Use the
switch in the front of the ceiling to open and close the moonroof.
■Automatic operation
To open: Pull the switch back firmly.
To close: Push the switch forward firmly.
The moonroof will automatically open or close
all the way. To stop the moonroof midway,
touch the switch briefly.
■Manual operation
To open: Pull the switch back lightly, and
hold it until the desired position is reached.
To close: Push the switch forward lightly, and
hold it until the desired position is reached.
■Tilting the moonroof up
To tilt: Push on the center of the moonroof
switch.
To close: Push the switch forward firmly.
*1: Models with the smart entry system have an ENGINE START/STOP button instead of an
ignition switch.
■Opening/Closing the Moonroof1 Opening/Closing the Moonroof
NOTICE
Opening the moonroof in below freezing
temperature or when it is covered with snow or ice
can damage the moonr oof panel or motor.
The power moonroof can be operated for up to 10
minutes after you turn the ignition switch off.
Opening either front door cancels this function.
When resistance is detected, the auto reverse
function causes the moonroof to change directions,
then stop. Auto reverse stops sensing when the
moonroof is almost closed to ensure that it fully
closes. Make sure that al l objects, including fingers,
are clear of the moonroof.
3WARNING
Opening or closing the moonroof on
someone’s hands or fingers can cause
serious injury.
Make sure all hands and fingers are clear of
the moonroof before opening or closing it.
Open
Close
Tilt
15 CROSSTOUR-31TP66500.book 113 ページ 2014年7月31日 木曜日 午後3時23分
Page 120 of 573
119
uuOperating the Switches Around the Steering Wheel uTurn Signals
Continued
Controls
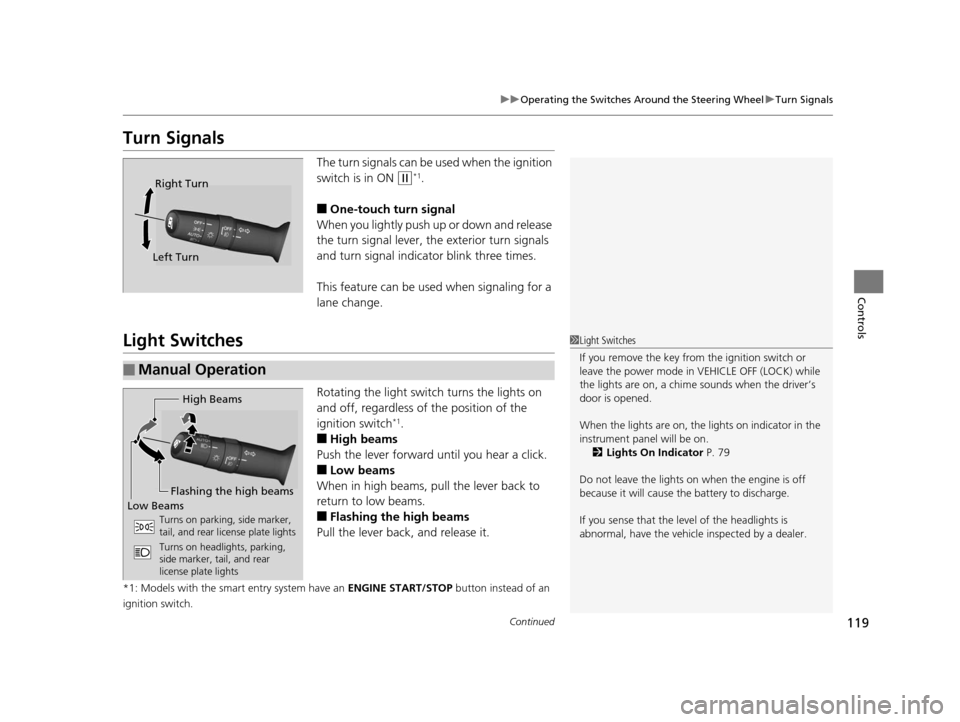
Turn Signals
The turn signals can be used when the ignition
switch is in ON
(w*1.
■One-touch turn signal
When you lightly push up or down and release
the turn signal lever, th e exterior turn signals
and turn signal indicator blink three times.
This feature can be used when signaling for a
lane change.
Light Switches
Rotating the light switch turns the lights on
and off, regardless of the position of the
ignition switch
*1.
■High beams
Push the lever forward until you hear a click.
■Low beams
When in high beams, pull the lever back to
return to low beams.
■Flashing the high beams
Pull the lever back, and release it.
*1: Models with the smart entry system have an ENGINE START/STOP button instead of an
ignition switch.
Right Turn
Left Turn
■Manual Operation
1 Light Switches
If you remove the key from the ignition switch or
leave the power mode in VEHICLE OFF (LOCK) while
the lights are on, a chime sounds when the driver’s
door is opened.
When the lights are on, the lights on indicator in the
instrument pane l will be on.
2 Lights On Indicator P. 79
Do not leave the lights on when the engine is off
because it will cause the battery to discharge.
If you sense that the le vel of the headlights is
abnormal, have the vehicl e inspected by a dealer.
High Beams
Flashing the high beams
Low Beams
Turns on parking, side marker,
tail, and rear license plate lights
Turns on headlights, parking,
side marker, tail, and rear
license plate lights
15 CROSSTOUR-31TP66500.book 119 ページ 2014年7月31日 木曜日 午後3時23分
Page 121 of 573
uuOperating the Switches Around the Steering Wheel uLight Switches
120
Controls
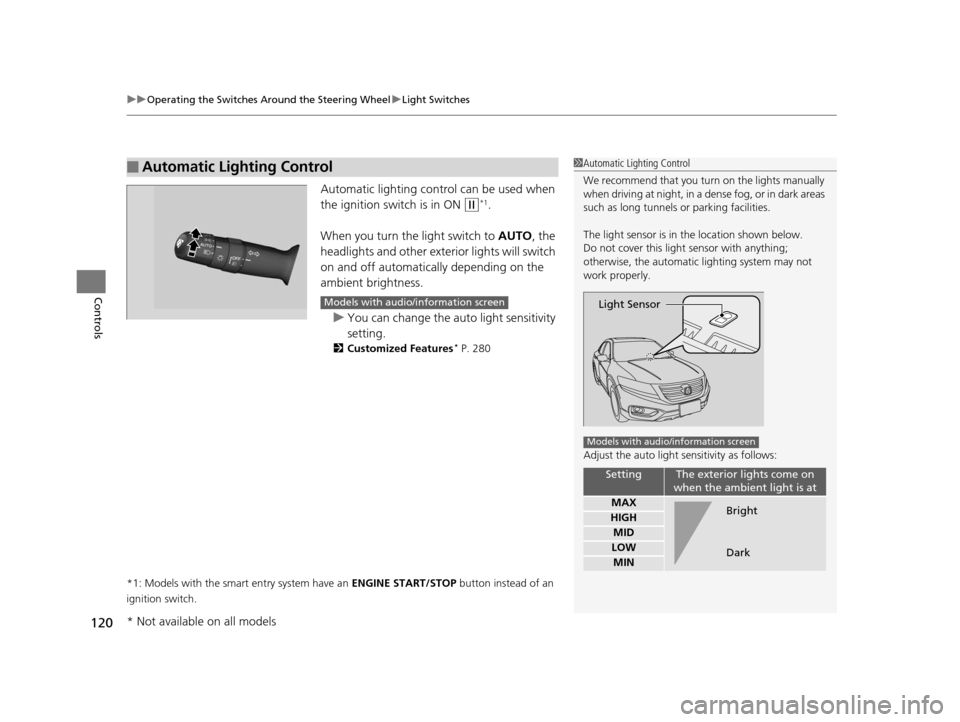
Automatic lighting control can be used when
the ignition switch is in ON
(w*1.
When you turn the light switch to AUTO, the
headlights and other exterior lights will switch
on and off automatica lly depending on the
ambient brightness.
u You can change the au to light sensitivity
setting.
2 Customized Features* P. 280
*1: Models with the smart entry system have an ENGINE START/STOP button instead of an
ignition switch.
■Automatic Lighting Control1 Automatic Lighting Control
We recommend that you tu rn on the lights manually
when driving at night, in a dense fog, or in dark areas
such as long tunnels or parking facilities.
The light sensor is in the location shown below.
Do not cover this light sensor with anything;
otherwise, the automatic lighting system may not
work properly.
Adjust the auto light sensitivity as follows:
SettingThe exterior lights come on
when the ambient light is at
MAX
HIGH
MID
LOW
MIN
Light Sensor
Models with audio/information screen
Bright
Dark
Models with audio/information screen
* Not available on all models
15 CROSSTOUR-31TP66500.book 120 ページ 2014年7月31日 木曜日 午後3時23分
Page 122 of 573
121
uuOperating the Switches Around the Steering Wheel uLight Switches
Controls
The headlights, all other exterior lights, a nd the instrument panel lights turn off 15
seconds after you remove the key or set the power mode to VEHICLE OFF (LOCK),
take the remote with you, and close the driver’s door.
If you turn the igniti on switch to LOCK
(0*1 with the headlight switch on, but do
not open the door, the lights turn off afte r 10 minutes (three minutes, if the switch
is in the AUTO position).
The lights turn on again when you unlock or open the driver’s door. If you unlock
the door, but do not open it within 15 seconds, the lights go off. If you open the
driver’s door, you will hear a lights on reminder chime.
*1: Models with the smart entry system have an ENGINE START/STOP button instead of an
ignition switch.
■Automatic Lighting Off Feature1 Automatic Lighting Off Feature
You can change the headlight auto off timer setting.
2 Customized Features
* P. 280
Models with smart entry system
* Not available on all models
15 CROSSTOUR-31TP66500.book 121 ページ 2014年7月31日 木曜日 午後3時23分
Page 123 of 573
122
uuOperating the Switches Around the Steering Wheel uFog Lights
Controls
Fog Lights
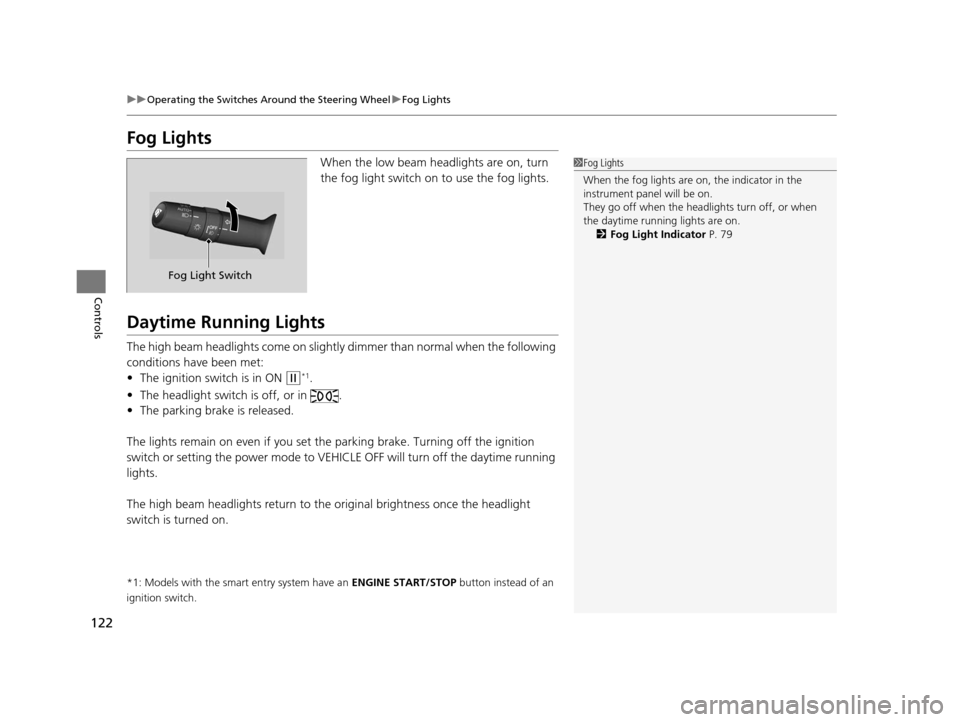
When the low beam headlights are on, turn
the fog light switch on to use the fog lights.
Daytime Running Lights
The high beam headlights come on slightly dimmer than normal when the following
conditions have been met:
• The ignition switch is in ON
(w*1.
• The headlight switch is off, or in .
• The parking brake is released.
The lights remain on even if you set th e parking brake. Turning off the ignition
switch or setting the power mode to VEHI CLE OFF will turn off the daytime running
lights.
The high beam headlights re turn to the original brightness once the headlight
switch is turned on.
*1: Models with the smart entry system have an ENGINE START/STOP button instead of an
ignition switch.
1 Fog Lights
When the fog lights are on, the indicator in the
instrument pane l will be on.
They go off when the headlights turn off, or when
the daytime running lights are on. 2 Fog Light Indicator P. 79
Fog Light Switch
15 CROSSTOUR-31TP66500.book 122 ページ 2014年7月31日 木曜日 午後3時23分
Page 126 of 573
125
uuOperating the Switches Around the Steering Wheel uBrightness Control
Controls
Brightness Control
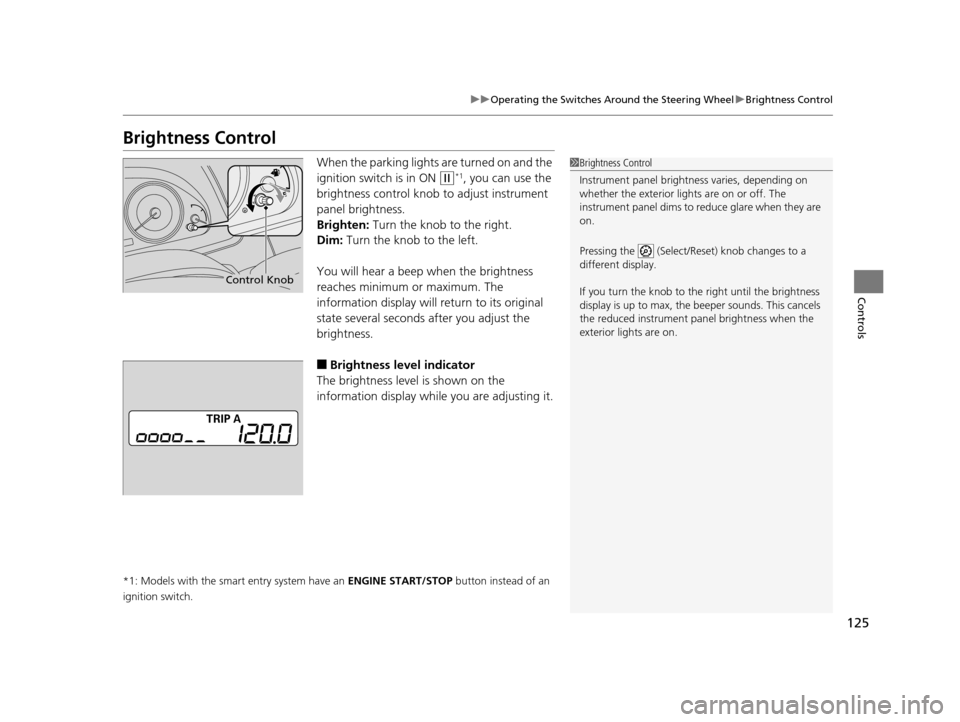
When the parking lights are turned on and the
ignition switch is in ON
(w*1, you can use the
brightness control knob to adjust instrument
panel brightness.
Brighten: Turn the knob to the right.
Dim: Turn the knob to the left.
You will hear a beep when the brightness
reaches minimum or maximum. The
information display will return to its original
state several seconds after you adjust the
brightness.
■Brightness level indicator
The brightness level is shown on the
information display whil e you are adjusting it.
*1: Models with the smart entry system have an ENGINE START/STOP button instead of an
ignition switch.
1 Brightness Control
Instrument panel brightne ss varies, depending on
whether the exterior lights are on or off. The
instrument panel dims to reduce glare when they are
on.
Pressing the (Select/Reset) knob changes to a
different display.
If you turn the knob to the right until the brightness
display is up to max, the beeper sounds. This cancels
the reduced instrument panel brightness when the
exterior lights are on.
Control Knob
15 CROSSTOUR-31TP66500.book 125 ページ 2014年7月31日 木曜日 午後3時23分
Page 129 of 573
uuOperating the Switches Around the Steering Wheel uDriving Position Memory System*
128
Controls
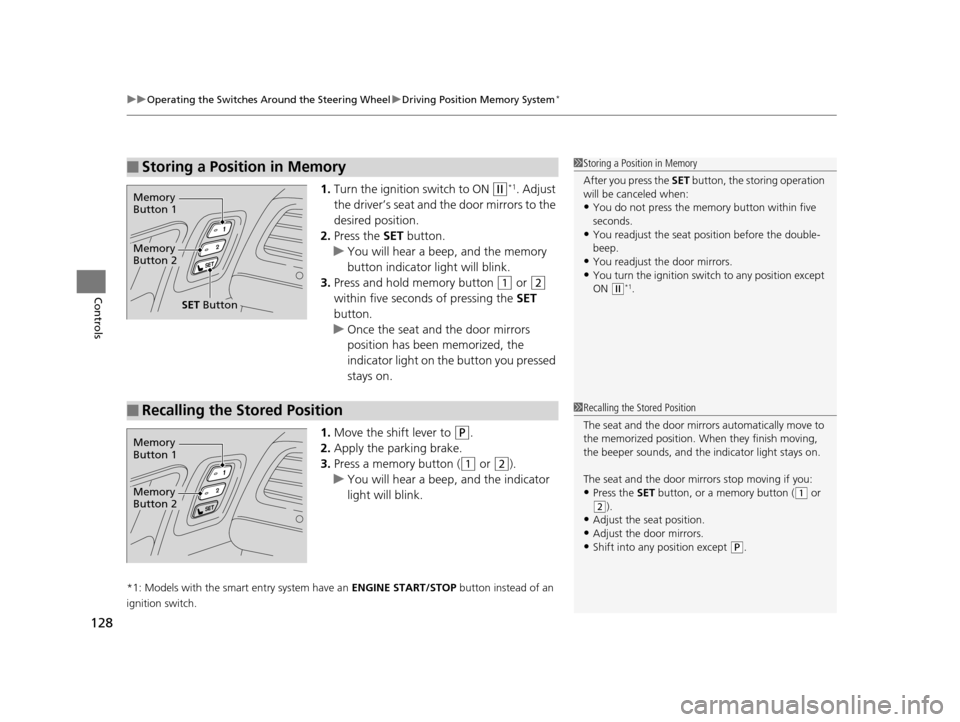
1. Turn the ignition switch to ON (w*1. Adjust
the driver’s seat and th e door mirrors to the
desired position.
2. Press the SET button.
u You will hear a beep, and the memory
button indicator light will blink.
3. Press and hold memory button
(1 or (2
within five seconds of pressing the SET
button.
u Once the seat and the door mirrors
position has been memorized, the
indicator light on the button you pressed
stays on.
1. Move the shift lever to
(P.
2. Apply the parking brake.
3. Press a memory button (
(1 or (2).
u You will hear a beep, and the indicator
light will blink.
*1: Models with the smart entry system have an ENGINE START/STOP button instead of an
ignition switch.
■Storing a Position in Memory1 Storing a Position in Memory
After you press the SET button, the storing operation
will be canceled when:
•You do not press the memory button within five
seconds.
•You readjust the seat position before the double-
beep.
•You readjust the door mirrors.•You turn the ignition switch to any position except
ON
( w*1.
Memory
Button 1
Memory
Button 2
SET Button
■Recalling the Stored Position1 Recalling the Stored Position
The seat and the door mirrors automatically move to
the memorized position. Wh en they finish moving,
the beeper sounds, and the indicator light stays on.
The seat and the door mirrors stop moving if you:
•Press the SET button, or a memory button ((1 or
(2).
•Adjust the seat position.•Adjust the door mirrors.
•Shift into any position except ( P.
Memory
Button 1
Memory
Button 2
15 CROSSTOUR-31TP66500.book 128 ページ 2014年7月31日 木曜日 午後3時23分
Page 131 of 573
130
Controls
Adjusting the Mirrors
Interior Rearview Mirror
Adjust the angle of the rearview mirror when you are sitting in the correct driving
position.
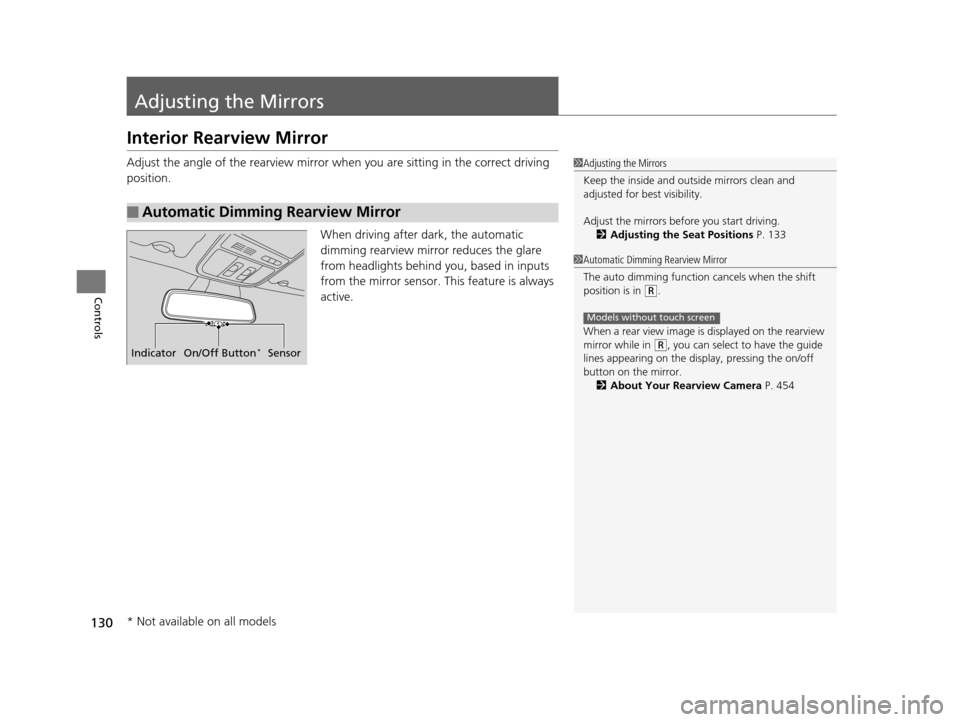
When driving after dark, the automatic
dimming rearview mirror reduces the glare
from headlights behind you, based in inputs
from the mirror sensor. This feature is always
active.
■Automatic Dimming Rearview Mirror
1Adjusting the Mirrors
Keep the inside and out side mirrors clean and
adjusted for best visibility.
Adjust the mirrors befo re you start driving.
2 Adjusting the Seat Positions P. 133
Indicator On/Off Button*Sensor
1Automatic Dimming Rearview Mirror
The auto dimming function cancels when the shift
position is in
(R.
When a rear view image is displayed on the rearview
mirror while in
( R, you can select to have the guide
lines appearing on the display, pressing the on/off
button on the mirror.
2 About Your Rearview Camera P. 454
Models without touch screen
* Not available on all models
15 CROSSTOUR-31TP66500.book 130 ページ 2014年7月31日 木曜日 午後3時23分