sensor HONDA CRV 2023 Repair Manual
[x] Cancel search | Manufacturer: HONDA, Model Year: 2023, Model line: CRV, Model: HONDA CRV 2023Pages: 719, PDF Size: 13.43 MB
Page 555 of 719
554
uuHonda Sensing ®u Road Departure Mitigation System
Driving
Road Departure Mitigation System
Alerts and helps assist you when the syst em detects a possibility of your vehicle
crossing over detected lane markings, or approaching the outer edge of the
pavement (into grass or gravel border) or a detected oncoming vehicle.
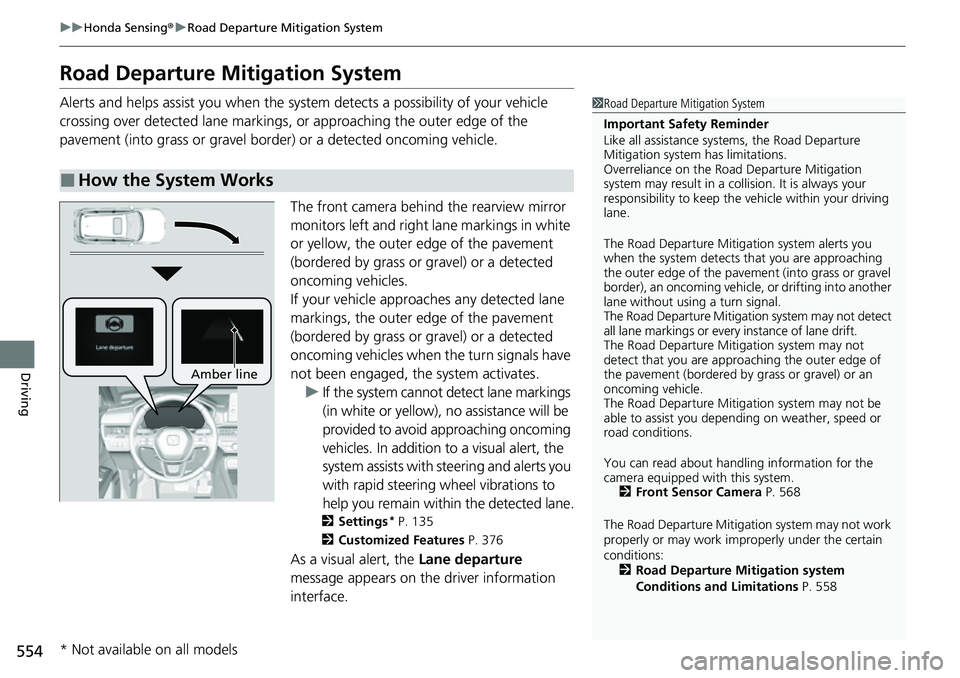
The front camera behind the rearview mirror
monitors left and right lane markings in white
or yellow, the outer edge of the pavement
(bordered by grass or gravel) or a detected
oncoming vehicles.
If your vehicle approaches any detected lane
markings, the outer edge of the pavement
(bordered by grass or gravel) or a detected
oncoming vehicles when the turn signals have
not been engaged, the system activates.u If the system cannot de tect lane markings
(in white or yellow), no assistance will be
provided to avoid approaching oncoming
vehicles. In addition to a visual alert, the
system assists with steering and alerts you
with rapid steering wheel vibrations to
help you remain within the detected lane.
2 Settings* P. 135
2 Customized Features P. 376
As a visual alert, the Lane departure
message appears on the driver information
interface.
■How the System Works
1 Road Departure Mitigation System
Important Safety Reminder
Like all assistance systems, the Road Departure
Mitigation system has limitations.
Overreliance on the Road Departure Mitigation
system may result in a collision. It is always your
responsibility to keep the vehicle within your driving
lane.
The Road Departure Mitiga tion system alerts you
when the system detects that you are approaching
the outer edge of the paveme nt (into grass or gravel
border), an oncoming vehicle, or drifting into another
lane without using a turn signal.
The Road Departure Mitigation system may not detect
all lane markings or ever y instance of lane drift.
The Road Departure Miti gation system may not
detect that you are approa ching the outer edge of
the pavement (bordered by grass or gravel) or an
oncoming vehicle.
The Road Departure Mitiga tion system may not be
able to assist you depend ing on weather, speed or
road conditions.
You can read about handling information for the
camera equipped with this system. 2 Front Sensor Camera P. 568
The Road Departure Mitigati on system may not work
properly or may work im properly under the certain
conditions: 2 Road Departure Mitigation system
Conditions and Limitations P. 558
Amber line
* Not available on all models
Page 563 of 719
562
uuHonda Sensing ®u Traffic Sign Recognition System
Driving
Traffic Sign Recognition System
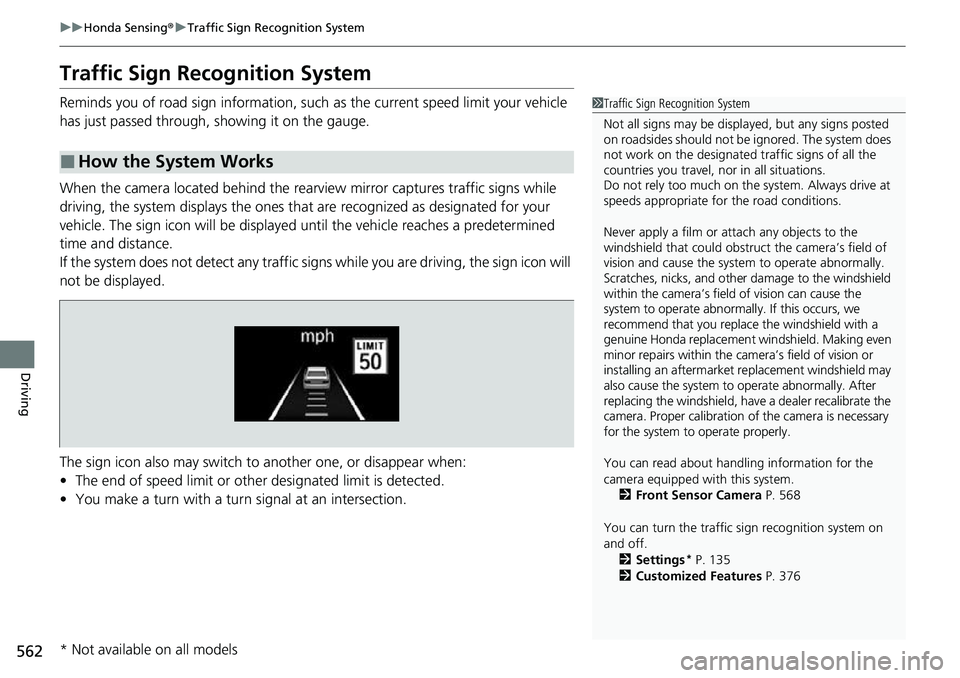
Reminds you of road sign information, such as the current speed limit your vehicle
has just passed through, showing it on the gauge.
When the camera located behind the rear view mirror captures traffic signs while
driving, the system displays the ones that are recognized as designated for your
vehicle. The sign icon will be displayed until the vehicle reaches a predetermined
time and distance.
If the system does not detect any traffic signs while you are driving, the sign icon will
not be displayed.
The sign icon also may switch to another one, or disappear when:
• The end of speed limit or other designated limit is detected.
• You make a turn with a turn signal at an intersection.
■How the System Works
1Traffic Sign Recognition System
Not all signs may be displa yed, but any signs posted
on roadsides should not be ignored. The system does
not work on the designated traffic signs of all the
countries you travel, nor in all situations.
Do not rely too much on the system. Always drive at
speeds appropriate fo r the road conditions.
Never apply a film or attach any objects to the
windshield that could obstruc t the camera’s field of
vision and cause the system to operate abnormally.
Scratches, nicks, and othe r damage to the windshield
within the camera’s field of vision can cause the
system to operate abnormally. If this occurs, we
recommend that you replace the windshield with a
genuine Honda replacement windshield. Making even
minor repairs within the ca mera’s field of vision or
installing an aftermarket replacement windshield may
also cause the system to operate abnormally. After
replacing the windshield, have a dealer recalibrate the
camera. Proper calibration of the camera is necessary
for the system to operate properly.
You can read about handling information for the
camera equipped with this system.
2 Front Sensor Camera P. 568
You can turn the traffic sign recognition system on
and off. 2 Settings
* P. 135
2 Customized Features P. 376
* Not available on all models
Page 569 of 719
568
uuHonda Sensing ®u Front Sensor Camera
Driving
Front Sensor Camera
The camera, used in systems such as La ne Keeping Assist System (LKAS), Road
Departure Mitigation system, Adaptive Cruise Control (ACC) with Low Speed
Follow, Traffic Sign Recognition system, Collision Mitigation Braking System
TM
(CMBSTM), and Traffic Jam Assist, is designed to detect an object that triggers any of
the systems to operate their functions.
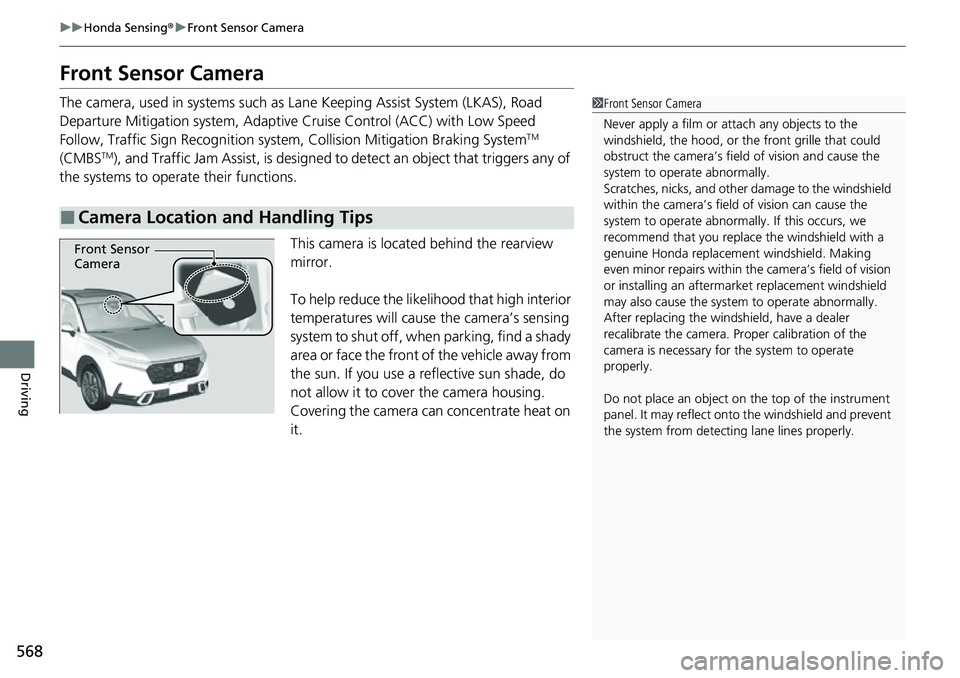
This camera is located behind the rearview
mirror.
To help reduce the likelihood that high interior
temperatures will cause the camera’s sensing
system to shut off, when parking, find a shady
area or face the front of the vehicle away from
the sun. If you use a reflective sun shade, do
not allow it to cover the camera housing.
Covering the camera can concentrate heat on
it.
■Camera Location and Handling Tips
1 Front Sensor Camera
Never apply a film or attach any objects to the
windshield, the hood, or th e front grille that could
obstruct the camera’s fiel d of vision and cause the
system to operate abnormally.
Scratches, nicks, and othe r damage to the windshield
within the camera’s fiel d of vision can cause the
system to operate abnormall y. If this occurs, we
recommend that you replac e the windshield with a
genuine Honda replacem ent windshield. Making
even minor repairs within th e camera’s field of vision
or installing an aftermarket replacement windshield
may also cause the system to operate abnormally.
After replacing the winds hield, have a dealer
recalibrate the camera. Pr oper calibration of the
camera is necessary for the system to operate
properly.
Do not place an object on the top of the instrument
panel. It may reflect onto the windshield and prevent
the system from detecting lane lines properly.
Front Sensor
Camera
Page 570 of 719
569
uuHonda Sensing ®u Front Sensor Camera
Driving
1Front Sensor Camera
If the Some driver assist systems cannot operate:
Camera temperature too high message appears:
•Use the climate control system to cool down the
interior and, if necessary, also use defroster mode
with the airflow directed towards the camera.
•Start driving the vehicle to lower the windshield
temperature, which cool s down the area around
the camera.
If the Some driver assist systems cannot operate:
Clean front windshield or poor viewing
condition. message appears:
•Park your vehicle in a safe place, and make sure the
windshield is clean.
Clean the windshield if it is dirty. If the message
does not disappear after dr iven for a while, have
your vehicle checked by a dealer.
Page 571 of 719
570
uuHonda Sensing ®u Radar Sensor
Driving
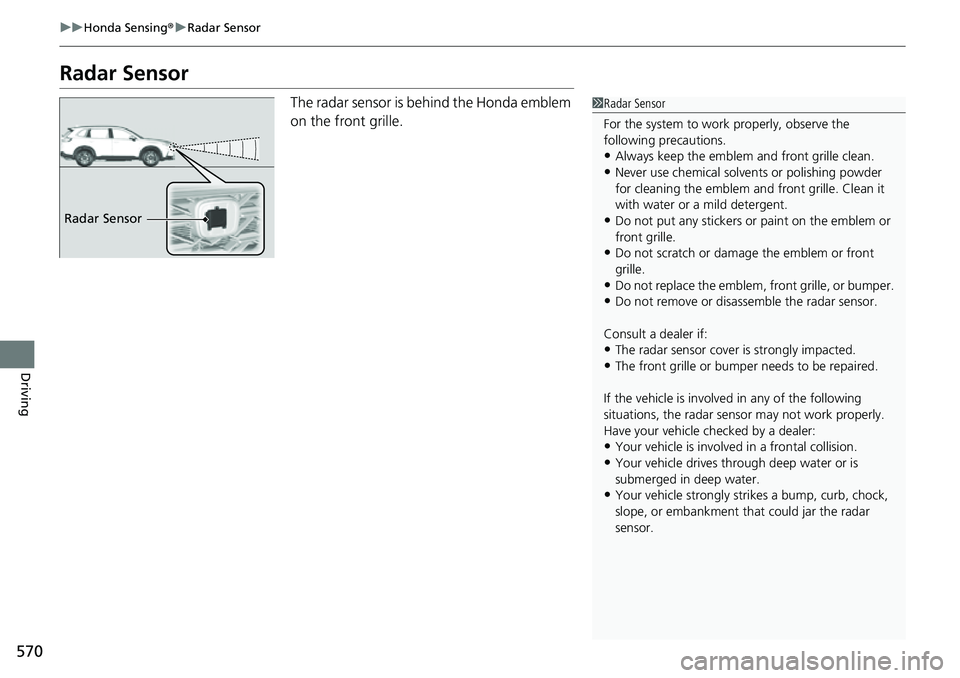
Radar Sensor
The radar sensor is behind the Honda emblem
on the front grille.1Radar Sensor
For the system to work properly, observe the
following precautions.
•Always keep the emblem and front grille clean.
•Never use chemical solvents or polishing powder
for cleaning the emblem a nd front grille. Clean it
with water or a mild detergent.
•Do not put any stickers or paint on the emblem or
front grille.
•Do not scratch or damage the emblem or front
grille.
•Do not replace the emblem , front grille, or bumper.
•Do not remove or disassemble the radar sensor.
Consult a dealer if:
•The radar sensor cover is strongly impacted.
•The front grille or bumpe r needs to be repaired.
If the vehicle is involved in any of the following
situations, the radar sensor may not work properly.
Have your vehicle checked by a dealer:
•Your vehicle is involved in a frontal collision.
•Your vehicle drives th rough deep water or is
submerged in deep water.
•Your vehicle strongly strikes a bump, curb, chock,
slope, or embankment th at could jar the radar
sensor.
Radar Sensor
Page 572 of 719
571
uuHonda Sensing ®u Sonar Sensors*
Driving
Sonar Sensors*
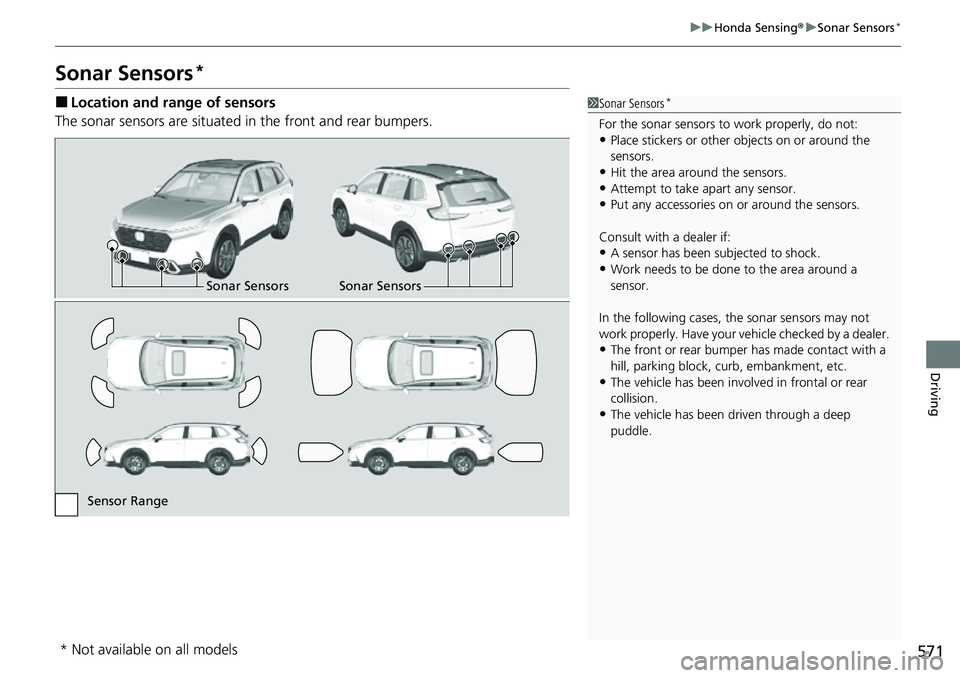
■Location and range of sensors
The sonar sensors are situated in the front and rear bumpers.1Sonar Sensors*
For the sonar sensors to work properly, do not:•Place stickers or other objects on or around the
sensors.
•Hit the area around the sensors.•Attempt to take apart any sensor.
•Put any accessories on or around the sensors.
Consult with a dealer if:
•A sensor has been subjected to shock.
•Work needs to be done to the area around a
sensor.
In the following cases, the sonar sensors may not
work properly. Have your ve hicle checked by a dealer.
•The front or rear bumper has made contact with a
hill, parking block, curb, embankment, etc.
•The vehicle has been involv ed in frontal or rear
collision.
•The vehicle has been driven through a deep
puddle.
Sonar Sensors Sonar Sensors
Sensor Range
* Not available on all models
Page 585 of 719
584
uuParking Your Vehicle uParking Sensor System*
Driving
Parking Sensor System*
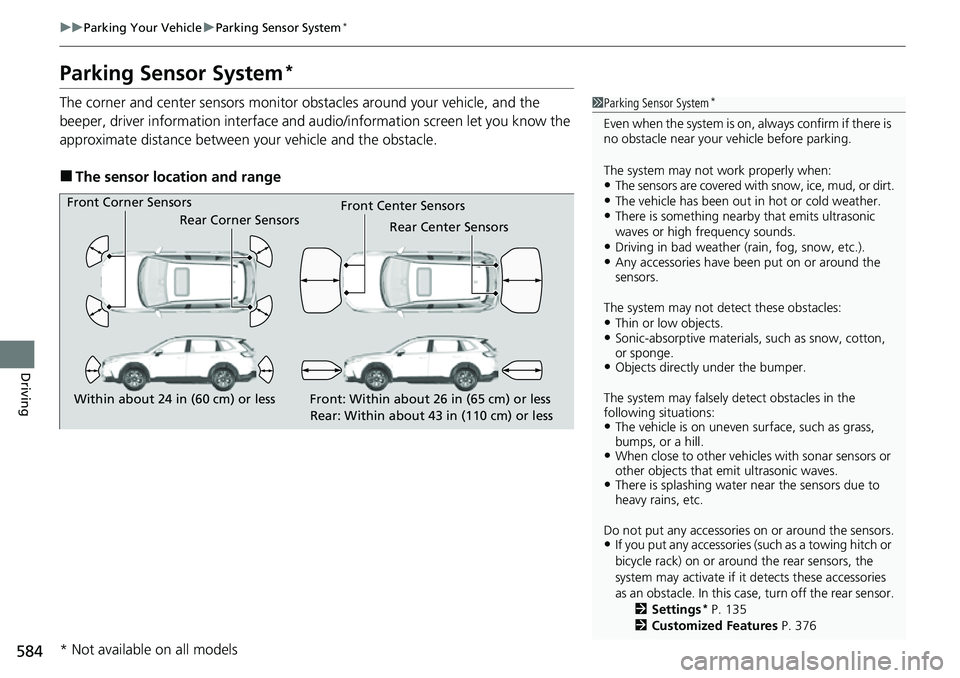
The corner and center sensors monitor obstacles around your vehicle, and the
beeper, driver information interface and audio/informatio n screen let you know the
approximate distance between your vehicle and the obstacle.
■The sensor location and range
1 Parking Sensor System*
Even when the system is on, always confirm if there is
no obstacle near your ve hicle before parking.
The system may not work properly when:
•The sensors are covered with snow, ice, mud, or dirt.•The vehicle has been out in hot or cold weather.•There is something nearby that emits ultrasonic
waves or high frequency sounds.
•Driving in bad weather (rain, fog, snow, etc.).•Any accessories have been put on or around the
sensors.
The system may not de tect these obstacles:
•Thin or low objects.•Sonic-absorptive materials, such as snow, cotton,
or sponge.
•Objects directly under the bumper.
The system may falsely de tect obstacles in the
following situations:
•The vehicle is on uneven su rface, such as grass,
bumps, or a hill.
•When close to other vehicl es with sonar sensors or
other objects that em it ultrasonic waves.
•There is splashing water near the sensors due to
heavy rains, etc.
Do not put any accessories on or around the sensors.
•If you put any accessories (such as a towing hitch or
bicycle rack) on or around the rear sensors, the
system may activate if it detects these accessories
as an obstacle. In this case, turn off the rear sensor. 2Settings
* P. 135
2 Customized Features P. 376
Front Corner Sensors
Rear Corner Sensors Rear Center Sensors
Front Center Sensors
Within about 24 in (60 cm) or less Front: Within about 26 in (65 cm) or less
Rear: Within about 43 in (110 cm) or less
* Not available on all models
Page 586 of 719
Continued585
uuParking Your Vehicle uParking Sensor System*
Driving
■Parking sensor system on and off
You can turn the system on and off using the driver information interface.
2 Switching the Display P. 117
2 Safety Support P. 130
The front corner, rear corner and rear cent er sensors start to detect an obstacle
when the transmission is in
(R, and the vehicle speed is less than 5 mph (8 km/h).
The front corner and front center sensor s start to detect an obstacle when the
transmission is in any position other than
(P or (R, and the vehicle speed is less
than 5 mph (8 km/h).
1 Parking Sensor System*
When you set the power mode to ON, the system will
be in the previously selected condition.
You can turn the rear park ing sensor system on and
off using the audio/information screen.
2 Customized Features P. 376
* Not available on all models
Page 587 of 719
586
uuParking Your Vehicle uParking Sensor System*
Driving
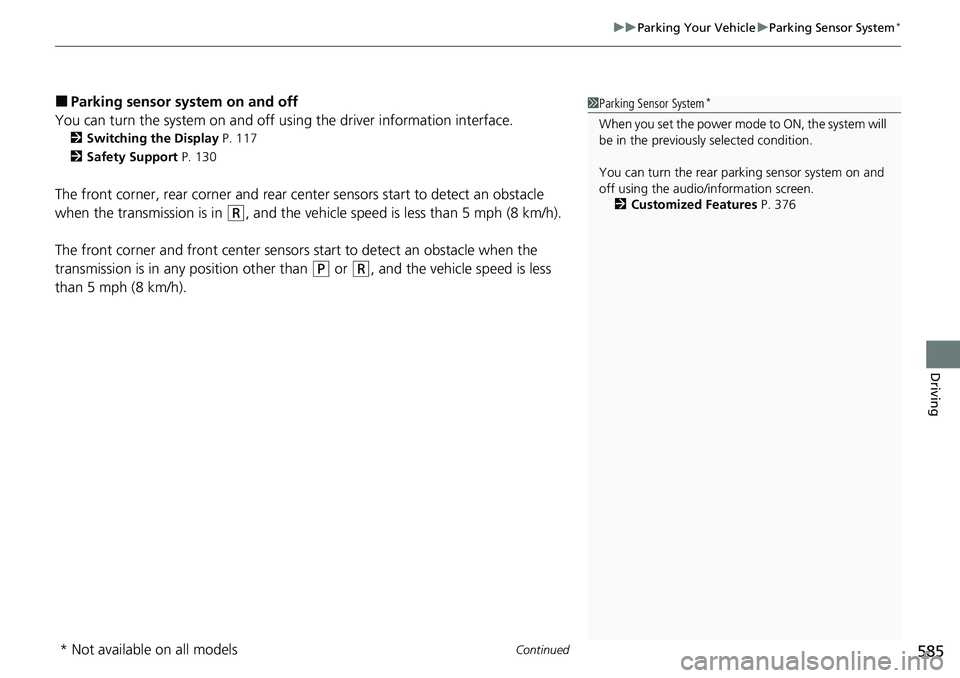
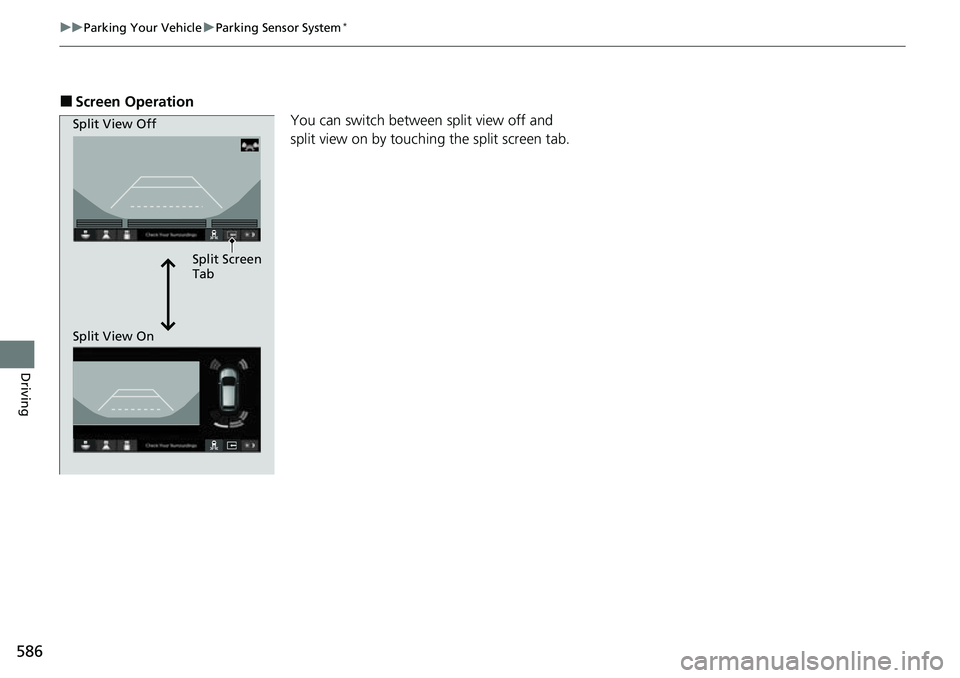
■Screen Operation
You can switch between split view off and
split view on by touching the split screen tab.
Split Screen
Tab
Split View Off
Split View On
Page 588 of 719
587
uuParking Your Vehicle uParking Sensor System*
Continued
Driving
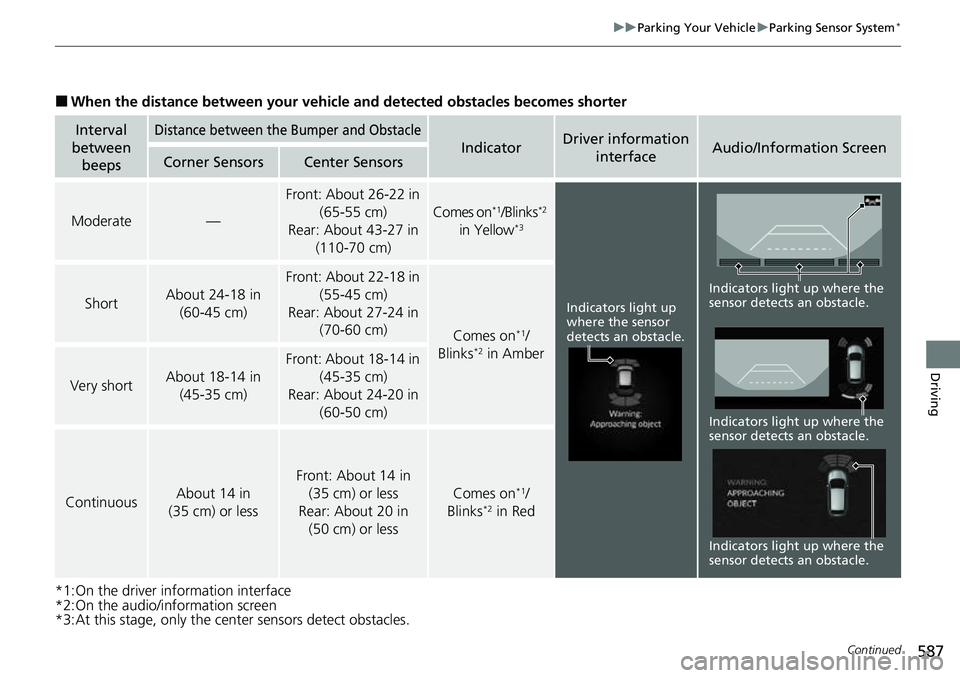
■When the distance between your vehicle and detected obstacles becomes shorter
*1:On the driver information interface
*2:On the audio/information screen
*3:At this stage, only the center sensors detect obstacles.
Interval
between beepsDistance between the Bumper and Obstacle
IndicatorDriver information
interfaceAudio/Information ScreenCorner SensorsCenter Sensors
Moderate—
Front: About 26-22 in (65-55 cm)
Rear: About 43-27 in (110-70 cm)
Comes on*1/Blinks*2
in Yellow*3
ShortAbout 24-18 in (60-45 cm)
Front: About 22-18 in
(55-45 cm)
Rear: About 27-24 in (70-60 cm)
Comes on*1/
Blinks*2 in Amber
Very shortAbout 18-14 in (45-35 cm)
Front: About 18-14 in
(45-35 cm)
Rear: About 24-20 in (60-50 cm)
ContinuousAbout 14 in
(35 cm) or less
Front: About 14 in (35 cm) or less
Rear: About 20 in (50 cm) or less
Comes on*1/
Blinks*2 in Red
Indicators light up
where the sensor
detects an obstacle.
Indicators light up where the
sensor detects an obstacle. Indicators light up where the
sensor detects an obstacle.
Indicators light up where the
sensor detects an obstacle.