key HONDA ELEMENT 2009 1.G Navigation Manual
[x] Cancel search | Manufacturer: HONDA, Model Year: 2009, Model line: ELEMENT, Model: HONDA ELEMENT 2009 1.GPages: 150, PDF Size: 4.16 MB
Page 1 of 150
Navigation System1
Table of Contents
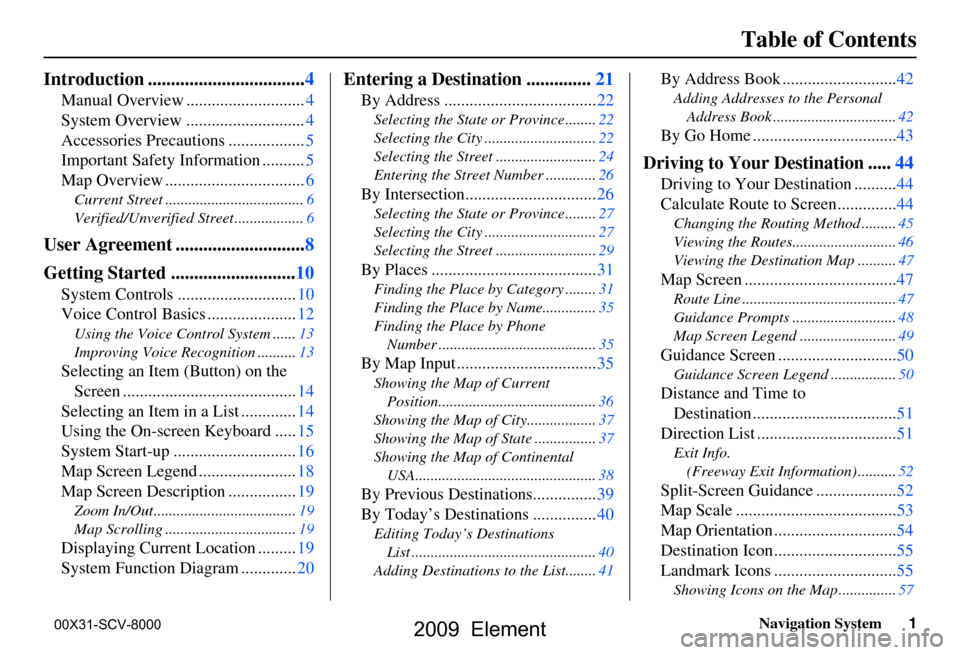
Introduction ..................................4
Manual Overview ............................4
System Overview ............................4
Accessories Precautions ..................5
Important Safety Information ..........5
Map Overview .................................6
Current Street ....................................6
Verified/Unverified Street ..................6
User Agreement ............................8
Getting Started ...........................10
System Controls ............................10
Voice Control Basics .....................12
Using the Voice Control System ......13
Improving Voice Recognition ..........13
Selecting an Item (Button) on the
Screen .........................................14
Selecting an Item in a List .............14
Using the On-screen Keyboard .....15
System Start-up .............................16
Map Screen Legend .......................18
Map Screen Description ................19
Zoom In/Out.....................................19
Map Scrolling ..................................19
Displaying Current Location .........19
System Function Diagram .............20
Entering a Destination ..............21
By Address ....................................22
Selecting the State or Province ........22
Selecting the City .............................22
Selecting the Street ..........................24
Entering the Street Number .............26
By Intersection...............................26
Selecting the State or Province ........27
Selecting the City .............................27
Selecting the Street ..........................29
By Places .......................................31
Finding the Place by Category ........31
Finding the Place by Name..............35
Finding the Place by Phone
Number .........................................35
By Map Input .................................35
Showing the Map of Current
Position.........................................36
Showing the Map of City..................37
Showing the Map of State ................37
Showing the Map of Continental
USA...............................................38
By Previous Destinations...............39
By Today’s Destinations ...............40
Editing Today’s Destinations
List ................................................40
Adding Destinations to the List........41
By Address Book ...........................42
Adding Addresses to the Personal
Address Book ................................42
By Go Home ..................................43
Driving to Your Destination .....44
Driving to Your Destination ..........44
Calculate Route to Screen..............44
Changing the Routing Method .........45
Viewing the Routes...........................46
Viewing the Destination Map ..........47
Map Screen ....................................47
Route Line ........................................47
Guidance Prompts ...........................48
Map Screen Legend .........................49
Guidance Screen ............................50
Guidance Screen Legend.................50
Distance and Time to
Destination ..................................51
Direction List .................................51
Exit Info.
(Freeway Exit Information) ..........52
Split-Screen Guidance ...................52
Map Scale ......................................53
Map Orientation .............................54
Destination Icon .............................55
Landmark Icons .............................55
Showing Icons on the Map ...............57
00X31-SCV-8000
2009 Element
Page 2 of 150
2Navigation System
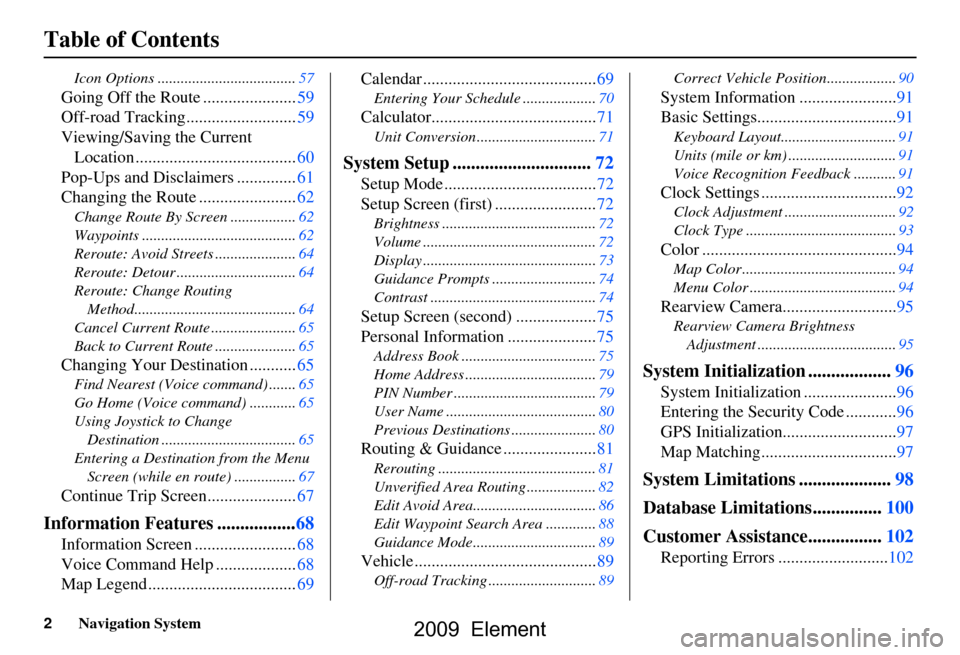
Table of Contents
Icon Options ....................................57
Going Off the Route ......................59
Off-road Tracking..........................59
Viewing/Saving the Current Location ......................................60
Pop-Ups and Disclaimers ..............61
Changing the Route .......................62
Change Route By Screen .................62
Waypoints ........................................62
Reroute: Avoid Streets .....................64
Reroute: Detour ...............................64
Reroute: Change Routing
Method..........................................64
Cancel Current Route ......................65
Back to Current Route .....................65
Changing Your Destination ...........65
Find Nearest (Voice command) .......65
Go Home (Voice command) ............65
Using Joystick to Change Destination ...................................65
Entering a Destination from the Menu Screen (while en route) ................67
Continue Trip Screen.....................67
Information Features .................68
Information Screen ........................68
Voice Command Help ...................68
Map Legend ...................................69 Calendar .........................................69
Entering Your Schedule ...................70
Calculator.......................................71
Unit Conversion ...............................71
System Setup ..............................72
Setup Mode ....................................72
Setup Screen (first) ........................72
Brightness ........................................72
Volume .............................................72
Display .............................................73
Guidance Prompts .......
....................74
Contrast ...........................................74
Setup Screen (second) ...................75
Personal Information .....................75
Address Book ...................................75
Home Address ..................................79
PIN Number .....................................79
User Name .......................................80
Previous Destinations ......................80
Routing & Guidance ......................81
Rerouting .........................................81
Unverified Area Routing ..................82
Edit Avoid Area................................86
Edit Waypoint Search Area .............88
Guidance Mode.... ..................... .......89
Vehicle ...........................................89
Off-road Tracking ........ ....................89 Correct Vehicle Position..................90
System Information .......................91
Basic Settings.................................91
Keyboard Layout..
............................91
Units (mile or km) ............................91
Voice Recognition Fe edback ...........91
Clock Settings ................................92
Clock Adjustment .............................92
Clock Type .......................................93
Color ..............................................94
Map Color ........................................94
Menu Color ......................................94
Rearview Camera...........................95
Rearview Camera Brightness
Adjustment ....................................95
System Initialization ..................96
System Initializat ion ......................96
Entering the Security Code ............96
GPS Initialization ...........................97
Map Matching................................97
System Limitations ....................98
Database Limitations...............100
Customer Assistance................102
Reporting Errors ..........................102
2009 Element
Page 11 of 150
Navigation System11
Getting Started
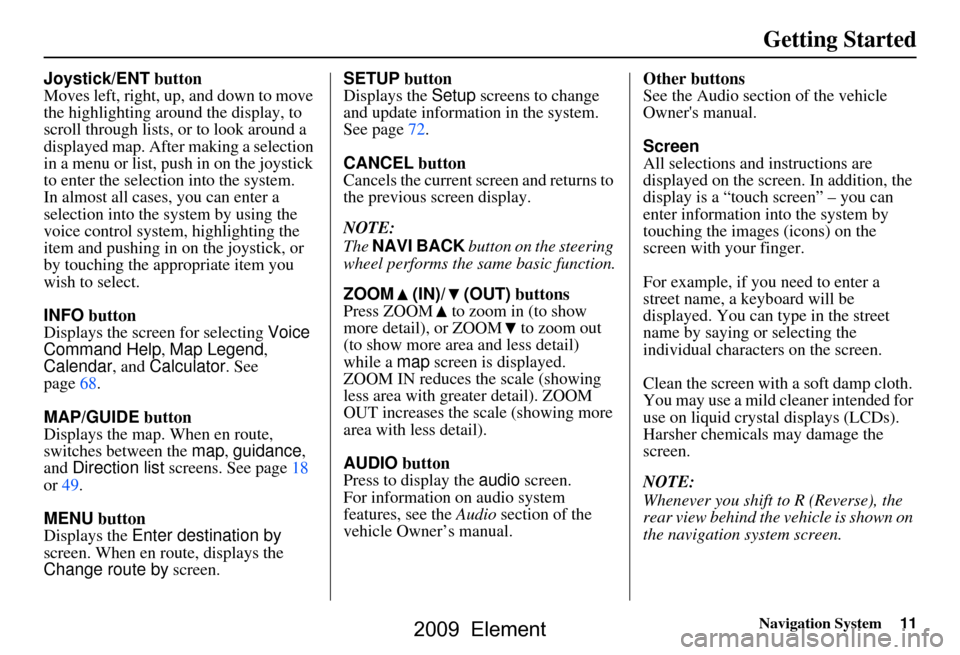
Joystick/ENT button
Moves left, right, up, and down to move
the highlighting around the display, to
scroll through lists, or to look around a
displayed map. After making a selection
in a menu or list, push in on the joystick
to enter the selection into the system.
In almost all cases, you can enter a
selection into the system by using the
voice control system, highlighting the
item and pushing in on the joystick, or
by touching the appropriate item you
wish to select.
INFO button
Displays the screen for selecting Voice
Command Help , Map Legend,
Calendar, and Calculator. See
page
68.
MAP/GUIDE button
Displays the map. When en route,
switches between the map, guidance ,
and Direction list screens. See page
18
or 49.
MENU button
Displays the Enter destination by
screen. When en r oute, displays the
Change route by screen. SETUP button
Displays the
Setup screens to change
and update informa tion in the system.
See page
72 .
CANCEL button
Cancels the current sc reen and returns to
the previous screen display.
NOTE:
The NAVI BACK button on the steering
wheel performs the same basic function.
ZOOM (IN)/ (OUT) buttons
Press ZOOM to zoom in (to show
more detail), or ZOOM to zoom out
(to show more area and less detail)
while a map screen is displayed.
ZOOM IN reduces the scale (showing
less area with greater detail). ZOOM
OUT increases the scale (showing more
area with less detail).
AUDIO button
Press to display the audio screen.
For information on audio system
features, see the Audio section of the
vehicle Owner’s manual. Other buttons
See the Audio sectio
n of the vehicle
Owner's manual.
Screen
All selections and instructions are
displayed on the screen. In addition, the
display is a “touch screen” – you can
enter information into the system by
touching the images (icons) on the
screen with your finger.
For example, if you need to enter a
street name, a keyboard will be
displayed. You can type in the street
name by saying or selecting the
individual character s on the screen.
Clean the screen with a soft damp cloth.
You may use a mild cl eaner intended for
use on liquid crystal displays (LCDs).
Harsher chemicals may damage the
screen.
NOTE:
Whenever you shift to R (Reverse), the
rear view behind the vehicle is shown on
the navigation system screen.
2009 Element
Page 15 of 150
Navigation System15
Getting Started
Using the On-screen
Keyboard
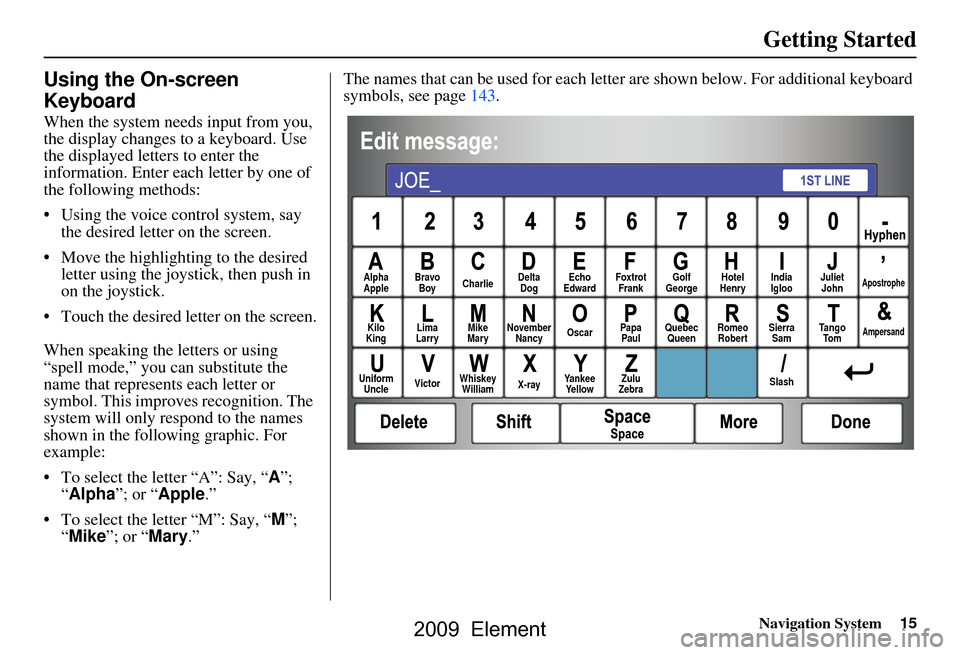
When the system needs input from you,
the display changes to a keyboard. Use
the displayed letters to enter the
information. Enter each letter by one of
the following methods:
Using the voice control system, say the desired letter on the screen.
Move the highlighting to the desired letter using the joystick, then push in
on the joystick.
Touch the desired le tter on the screen.
When speaking the letters or using
“spell mode,” you can substitute the
name that represents each letter or
symbol. This improves recognition. The
system will only re spond to the names
shown in the following graphic. For
example:
To select the letter “A”: Say, “ A”;
“ Alpha ”; or “Apple .”
To select the letter “M”: Say, “ M”;
“ Mike”; or “Mary.” The names that can be used for each lette
r are shown below. For additional keyboard
symbols, see page143.
Alpha
Apple Bravo
Boy Charlie Delta
Dog Echo
Edward Foxtrot
Frank Golf
George Hotel
Henry Juliet
JohnApostrophe
Kilo
King Lima
Larry Mike
Mary November
Nancy Oscar
Papa
Paul Quebec
Queen Romeo
Robert Sierra
Sam Ta n g o
To mAmpersand
Uniform Uncle Victor
Whiskey
William X-rayYankee
Ye l l o w Zulu
Zebra SlashIndia
Igloo
2009 Element
Page 16 of 150
16Navigation System
Getting Started
Each entered letter will appear at the top
of the display. Say or select Space to
enter a space between words. Say or
select Delete to erase a letter entered
incorrectly.
When entering an address, the system
searches the database for words that
match the letters you are entering. As a
result, you will notice that some letters
are no longer available.
When the system finds only one entry
that matches, it completes the entry of
the name for you. If the system finds
more than one entry that matches your
input, the system displays a list.
Tip:
If you are unsure of the spelling of a
name, enter the lette rs that you are sure
of, and then select List. The system
displays a list of names that most closely
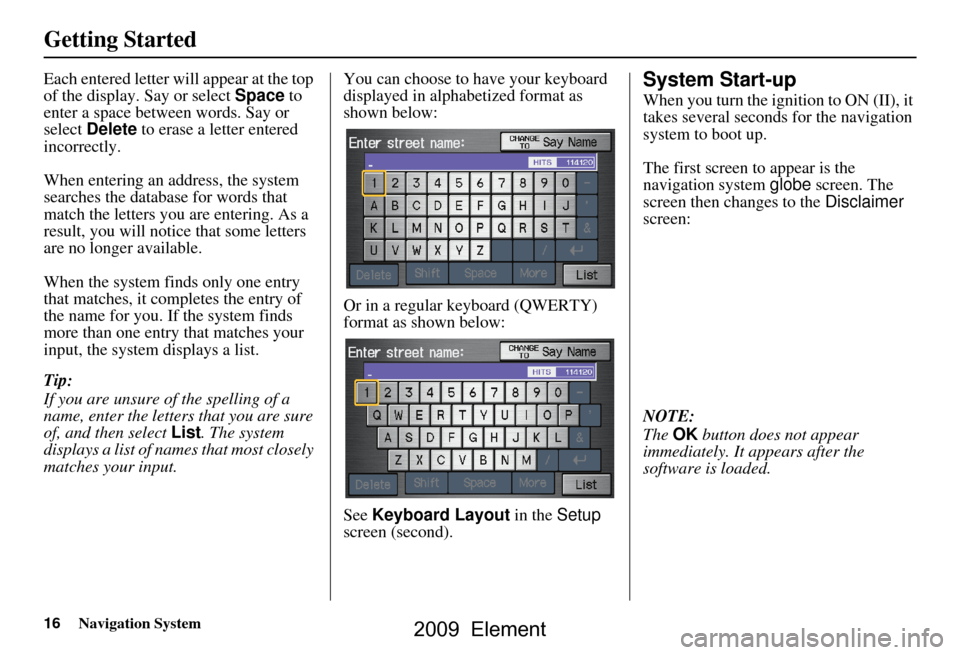
matches your input. You can choose to have your keyboard
displayed in alphabetized format as
shown below:
Or in a regular keyboard (QWERTY)
format as shown below:
See
Keyboard Layout in the Setup
screen (second).System Start-up
When you turn the ignition to ON (II), it
takes several seconds for the navigation
system to boot up.
The first screen to appear is the
navigation system globe screen. The
screen then changes to the Disclaimer
screen:
NOTE:
The OK button does not appear
immediately. It appears after the
software is loaded.
2009 Element
Page 20 of 150
20Navigation System
Getting Started
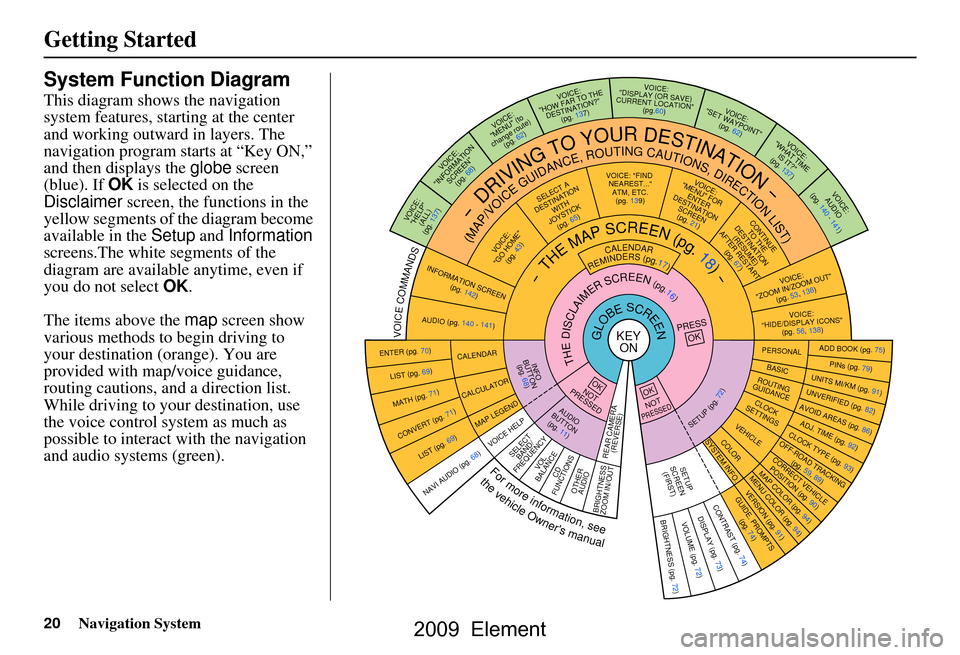
System Function Diagram
This diagram shows the navigation
system features, starting at the center
and working outward in layers. The
navigation program starts at “Key ON,”
and then displays the globe screen
(blue). If OK is selected on the
Disclaimer screen, the functions in the
yellow segments of the diagram become
available in the Setup and Information
screens.The white segments of the
diagram are available anytime, even if
you do not select OK.
The items above the map screen show
various methods to begin driving to
your destination (orange). You are
provided with map/voice guidance,
routing cautions, and a direction list.
While driving to your destination, use
the voice control system as much as
possible to interact with the navigation
and audio syst ems (green).
KEY
ONGLOBESCREENPRESS
OK
OKNOT
PRESSED
THEDISCLAIMERSCREEN(pg.16)
CALENDAR
REMINDERS(pg.17)-THEMAPSCREEN(pg.18)-
AUDIO
BUTTO N
(pg. 11)
INFO
BUTTON (pg. 68)
Formoreinformation,see
thevehicleOwner'smanual
VOICECOMMANDS
NAVI AUDI O (pg. 68)
ENTER (pg. 70)
LIST (pg. 69)
MATH (pg. 71)
CONVERT (pg. 71)
LIST (pg. 69)
CALENDAR
CALCULATOR
MAP LEGEND
VOICE: "FIND
NEAREST..." ATM, ETC.
(pg. 139)
SELECT A
DESTINATION WITH
JOYSTICK (pg. 65)
VOICE:
"GO HOME" (pg. 43)
VOICE:
"MENU" FOR ENTER
DESTINATION SCREEN(pg. 21)
CONTINUE TO THE
DESTINATION (RESUME)
AFTER RESTART
(pg. 67)
VOICE HELPSELECTBAND/
FREQUENCYVOL
BALANCECD
FUNCTIONSOTHER AUDIO
VOICE:
"ZOOM IN/ZOO M OUT"
(pg. 53, 138)
VOICE:
"HIDE/DISP LAY ICONS"
(pg. 56, 138)
INFORMATION SCREEN (pg. 142)
AUDIO (pg. 140 - 141)
-DRIVINGTOYOURDESTINATION-
(MAP/VOICEGUIDANCE,ROUTINGCAUTIONS,DIRECTIONLIST)
VOICE:"HELP" (ALL)
(pg. 137)
VOICE:
"INFORM ATION
SCREEN" (pg. 68)
VOICE:
"MENU" (to
change route) (pg. 62)
VOICE:
"HOW FAR TO THE DESTINATION?" (pg. 137)VOICE:
"DISPLAY (OR SAVE)
CURRENT LOCATION" (pg.60)
VOICE:"SET WAYPOINT"(pg. 62)
VOICE:
"WHAT TIME IS IT?"
(pg. 137)
VOICE:
AUDIO
(pg. 140 - 141)
ADD BOOK (pg. 75)PINs (pg. 79)UNITS MI/KM (pg. 91)
PERSONALBASIC
UNVERIFIED (p g. 82)AVOID AREAS (pg. 86)ADJ. TIME (pg. 92)CLOCK TYPE (pg. 93)
ROUTING
GUIDANCE
CLOC K
SETTINGS
OFF-ROAD TRA CKING
(pg. 59, 89)CORRECT VEHICL E
POSITION (pg. 90)MAP COLOR (pg. 94)MENU COLOR (pg. 94)
VEHICLECOLOR
GUIDE. PROMPTS
(pg. 74)
SETUP
SCREEN (FIRST)
OKNOTPRESSED
VERSION ( pg. 91)
SYSTEM INF O.
BRIGHTNESS (pg. 72)VOLUME (pg. 72)DISPLAY (pg . 73)CONTRAST (pg. 74)
SETUP(pg.72)
BRIGHTNESS
ZOOM IN/OUT REAR CAMERA
(REVERSE)
2009 Element
Page 22 of 150
22Navigation System
By Address
After you select Address from the
Enter destination by screen, the
display changes to:
Tip:
When entering an address by voice, it is more efficient to say the city name
first, then the street name.
When entering an address by touch, it is usually easier to enter the street
first. A city or cities that the street
appears in will be displayed. For
your convenience, you do not have to
enter both city and street. NOTE:
If you find that your city is not listed,
it may be part of a larger
metropolitan area. Try entering the
street first.
Prior to departure, you can set areas to avoid. The system then includes
them in its calculations for the
destination you have entered. See
Edit Avoid Area on page86.
Selecting the State or Province
The state you are in is displayed at the
top of the screen. If your desired
destination is in another state, select
Change State.
The display then changes to the Enter
state name screen. Use the voice
control system and say the name of the
state or use the on-s creen keyboard to
enter the name of the state.
Selecting the City
This is helpful if the street runs through
several cities, and you know what city
includes the street. The city you are in is
displayed on the screen. If the city you
want is displayed on the screen, say
“Select current city.” If your desired
destination is in another city, say or
enter that city.
By Voice Control:
Say “City” on the Find address by
screen, and the display changes to the
Say city name screen. Say the city
name and the searching will begin.
NOTE:
To improve voice recognition when
saying the city name, pronounce the
syllables as clearly as possible.
Entering a Destination
2009 Element
Page 23 of 150
Navigation System23
To enter the city name by voice spelling,
say or select CHANGE TO Spell
Mode on the Say city name screen,
and the display will change to the Enter
city name screen. Say the city name by
saying individual letters, or words that
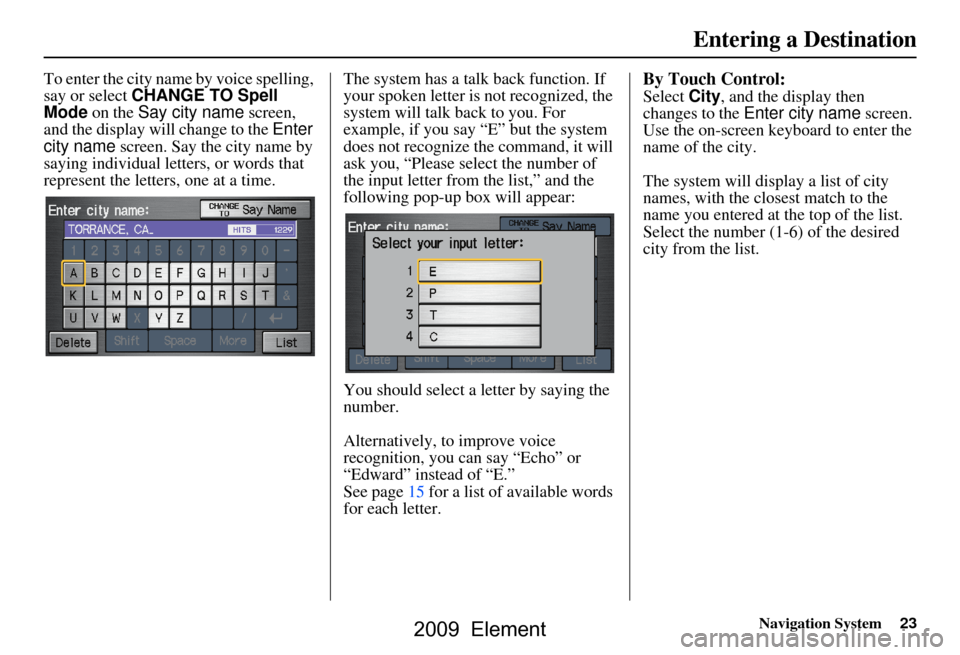
represent the letters, one at a time. The system has a talk back function. If
your spoken letter is
not recognized, the
system will talk back to you. For
example, if you say “E” but the system
does not recognize the command, it will
ask you, “Please select the number of
the input letter from the list,” and the
following pop-up box will appear:
You should select a letter by saying the
number.
Alternatively, to improve voice
recognition, you can say “Echo” or
“Edward” instead of “E.”
See page15 for a list of available words
for each letter.By Touch Control:
Select City, and the display then
changes to the Enter city name screen.
Use the on-screen keyb oard to enter the
name of the city.
The system will display a list of city
names, with the closest match to the
name you entered at the top of the list.
Select the number (1-6) of the desired
city from the list.
Entering a Destination
2009 Element
Page 25 of 150
Navigation System25
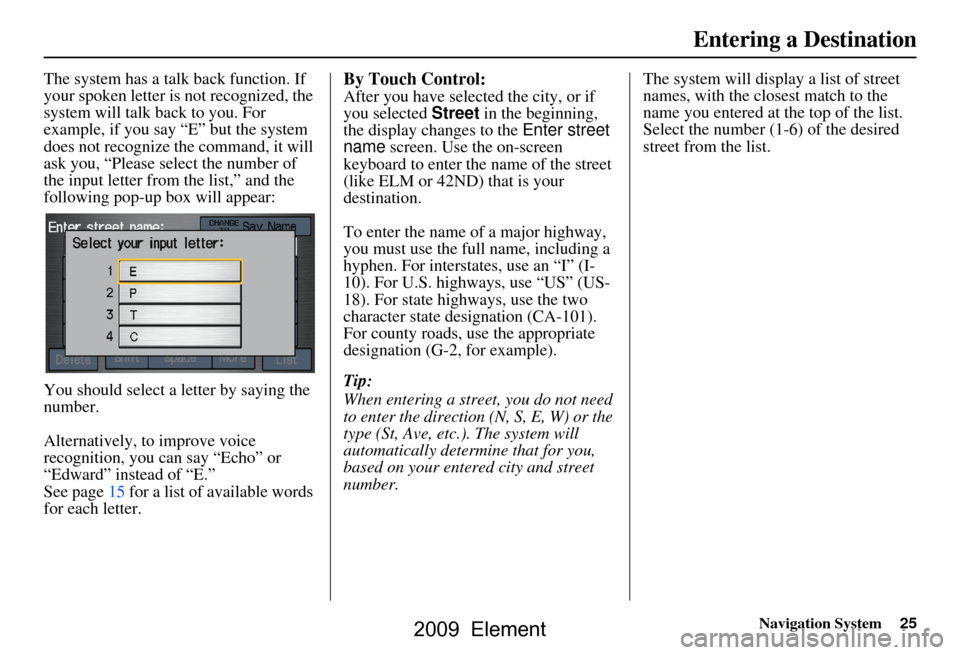
The system has a talk back function. If
your spoken letter is not recognized, the
system will talk back to you. For
example, if you say “E” but the system
does not recognize the command, it will
ask you, “Please select the number of
the input letter from the list,” and the
following pop-up box will appear:
You should select a letter by saying the
number.
Alternatively, to improve voice
recognition, you can say “Echo” or
“Edward” instead of “E.”
See page15 for a list of available words
for each letter.By Touch Control:
After you have selected the city, or if
you selected Street in the beginning,
the display changes to the Enter street
name screen. Use the on-screen
keyboard to enter the name of the street
(like ELM or 42ND) that is your
destination.
To enter the name of a major highway,
you must use the full name, including a
hyphen. For interstates, use an “I” (I-
10). For U.S. highways, use “US” (US-
18). For state highways, use the two
character state designation (CA-101).
For county roads, use the appropriate
designation (G-2, for example).
Tip:
When entering a street, you do not need
to enter the direction (N, S, E, W) or the
type (St, Ave, etc.). The system will
automatically determine that for you,
based on your entered city and street
number. The system will display a list of street
names, with the closest match to the
name you entered at the top of the list.
Select the number (1-6) of the desired
street from the list.
Entering a Destination
2009 Element
Page 26 of 150
26Navigation System
Entering the Street Number
After you have completed the street
name, the display changes to the Enter
street number screen. Use the voice
control system and say the address
number as a continuous string of
numbers. For example, the address 1527
should be spoken as “One, five, two,
seven.” You can also use the on-screen
keyboard to enter the street number.
Some address numbers may not be
available on the selected street. For
example, let’s say the individual address
ranges for a selected street name are 1 -
20 and 9,000 - 10,000, with an overall
range shown on the display of 1 to
10,000. If you try to enter a number
outside the individual address ranges
such as 500, the syst em will show this
number as unavailable (grayed out).
When using the on-screen keyboard, the system only a llows you to choose
available address numbers.
When using voice control, the system beeps if you try to select an
unavailable (grayed out) address
number. If you did not select a city in the
beginning, the street name you selected
might appear in more
than one city. The
system will give you a list of cities that
the street appears in. Select the desired
city from the list. The system then
displays the Calculate route to screen
(see Driving to Your Destination on
page44).
Tip:
If the particular address you want
cannot be found, select Map Input and
use the joystick to se lect the appropriate
location on the map (see By Map Input
on page35).
Select View Dest. Map and use the
joystick to select an icon, approximate
area, or street you wish to choose as
your destination. Otherwise, a central
location of the street will be selected. If
you select a point of interest (POI) or
road in an unverified area, you may or
may not have routing in these areas. See
Map Overview on page6.
By Intersection
After you select Intersection from the
Enter destination by screen, the
display changes to:
Tip:
When entering an address, it is usually
easier to enter the st reet first. A city or
cities that the street appears in will be
displayed. For your convenience, you
do not have to enter both city and street.
Entering a Destination
2009 Element