ignition HONDA ELEMENT 2010 1.G Navigation Manual
[x] Cancel search | Manufacturer: HONDA, Model Year: 2010, Model line: ELEMENT, Model: HONDA ELEMENT 2010 1.GPages: 153, PDF Size: 3.12 MB
Page 97 of 153

96Navigation System
System Setup
Rearview Camera
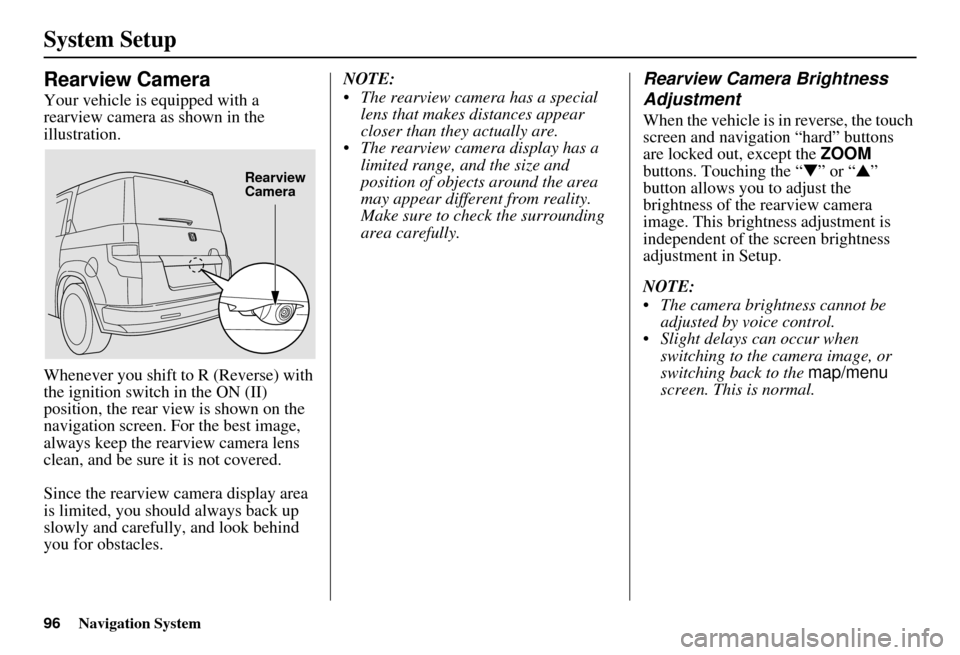
Your vehicle is equipped with a
rearview camera as shown in the
illustration.
Whenever you shift to R (Reverse) with
the ignition switch in the ON (II)
position, the rear view is shown on the
navigation screen. For the best image,
always keep the rearview camera lens
clean, and be sure it is not covered.
Since the rearview camera display area
is limited, you should always back up
slowly and carefully, and look behind
you for obstacles.NOTE:
The rearview camera has a special
lens that makes distances appear
closer than they actually are.
The rearview camera display has a limited range, and the size and
position of objects around the area
may appear different from reality.
Make sure to check the surrounding
area carefully.
Rearview Camera Brightness
Adjustment
When the vehicle is in reverse, the touch
screen and navigation “hard” buttons
are locked out, except the ZOOM
buttons. Touching the “ ▼” or “▲ ”
button allows you to adjust the
brightness of the rearview camera
image. This brightness adjustment is
independent of the screen brightness
adjustment in Setup.
NOTE:
The camera brightness cannot be adjusted by voice control.
Slight delays can occur when switching to the ca mera image, or
switching back to the map/menu
screen. This is normal.
Rearview
Camera
Page 98 of 153

Navigation System97
System Initialization
System Initialization
If for any reason you lose power to the
navigation system (e.g., the battery was
disconnected), the navigation system
will require initialization. Once
completed, your system will be ready to
use.
This initialization requires the
following:
• Entry of the 4-digit anti-theft security code.
• GPS initialization (may not be needed depending on the le ngth of time the
system was without power).
• Map matching to align the GPS coordinates to a place on the map
(displays current street at the bottom
of the map).
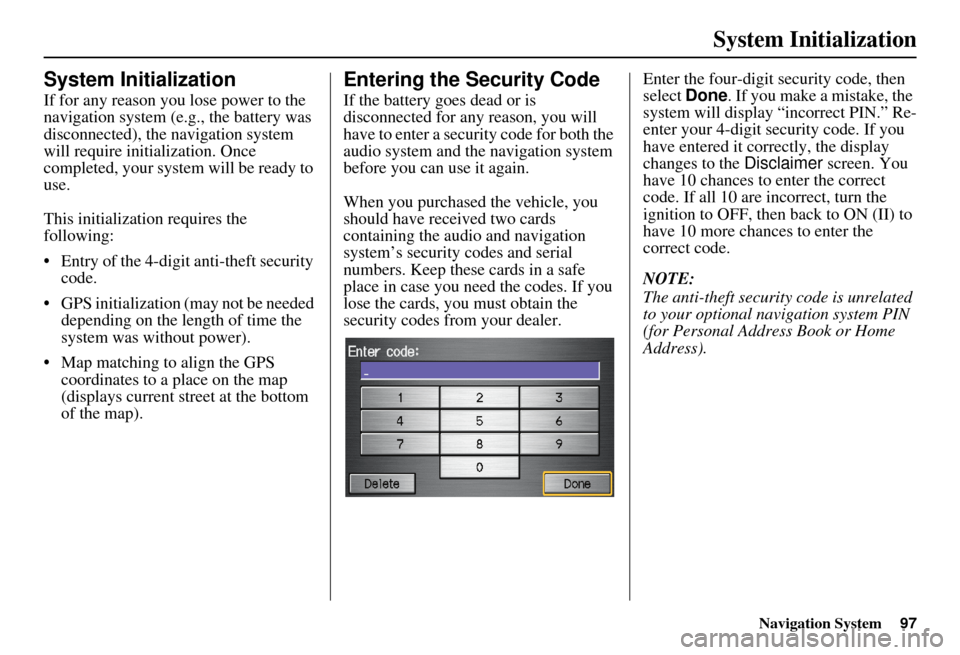
Entering the Security Code
If the battery goes dead or is
disconnected for any reason, you will
have to enter a secur ity code for both the
audio system and the navigation system
before you can use it again.
When you purchased the vehicle, you
should have received two cards
containing the audio and navigation
system’s security codes and serial
numbers. Keep these cards in a safe
place in case you need the codes. If you
lose the cards, you must obtain the
security codes from your dealer. Enter the four-digit security code, then
select
Done. If you make a mistake, the
system will display “incorrect PIN.” Re-
enter your 4-digit security code. If you
have entered it corr ectly, the display
changes to the Disclaimer screen. You
have 10 chances to enter the correct
code. If all 10 are incorrect, turn the
ignition to OFF, then back to ON (II) to
have 10 more chances to enter the
correct code.
NOTE:
The anti-theft security code is unrelated
to your optional navigation system PIN
(for Personal Address Book or Home
Address).
Page 106 of 153

Navigation System105
Customer Assistance
Changing the DVD
NOTE:
The system’s database is stored on a
removable DVD. The system will not
work without the DVD. Ensure the door
remains closed at all times.
1. Remove the DVD wh ile the ignition
switch is in the ACCESSORY (I)
position or in the ON (II) position.
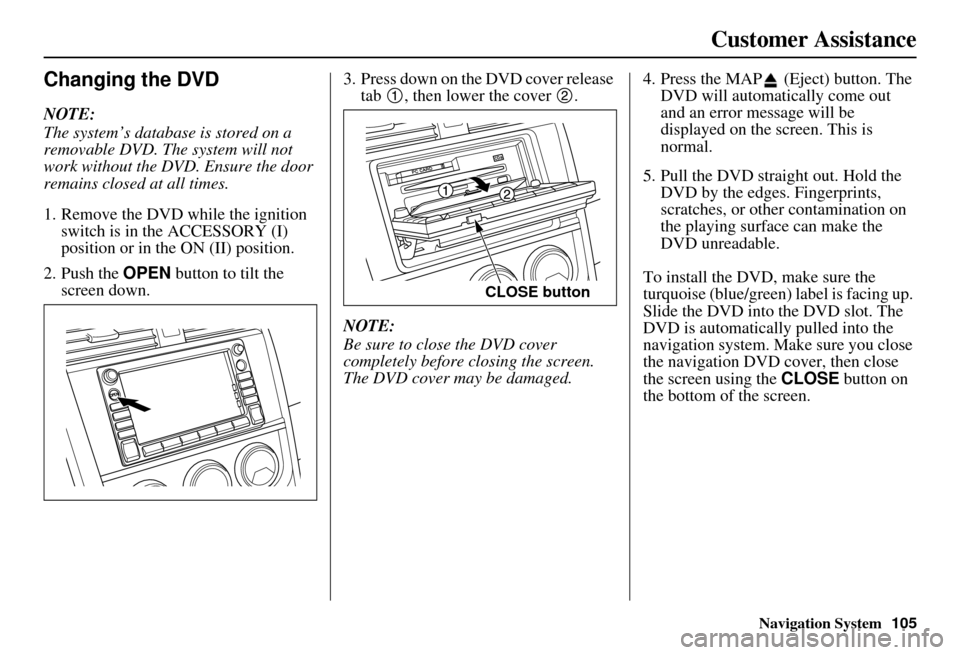
2. Push the OPEN button to tilt the
screen down. 3. Press down on the DVD cover release
tab , then lower the cover .
NOTE:
Be sure to close the DVD cover
completely before closing the screen.
The DVD cover may be damaged. 4. Press the MAP (Eject) button. The
DVD will automatically come out
and an error message will be
displayed on the screen. This is
normal.
5. Pull the DVD straight out. Hold the DVD by the edges. Fingerprints,
scratches, or other contamination on
the playing surface can make the
DVD unreadable.
To install the DVD, make sure the
turquoise (blue/green) label is facing up.
Slide the DVD into the DVD slot. The
DVD is automatically pulled into the
navigation system. Make sure you close
the navigation DVD cover, then close
the screen using the CLOSE button on
the bottom of the screen.
CLOSE button