dashboard HONDA ELEMENT 2010 1.G User Guide
[x] Cancel search | Manufacturer: HONDA, Model Year: 2010, Model line: ELEMENT, Model: HONDA ELEMENT 2010 1.GPages: 342, PDF Size: 5.76 MB
Page 69 of 342

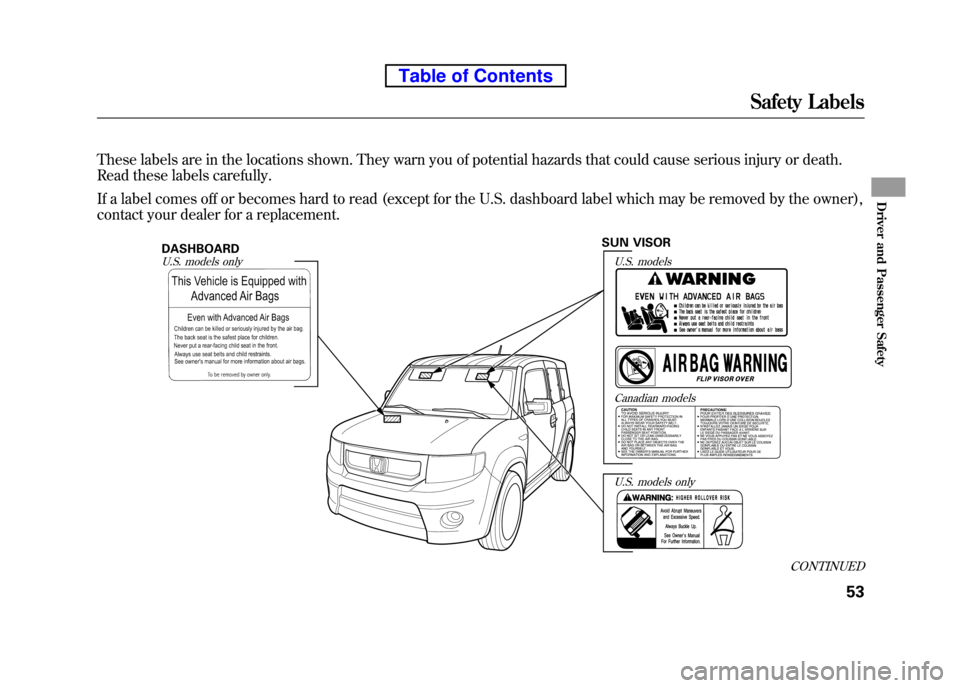
These labels are in the locations shown. They warn you of potential hazards that could cause serious injury or death.
Read these labels carefully.
If a label comes off or becomes hard to read (except for the U.S. dashboard label which may be removed by the owner),
contact your dealer for a replacement.
U.S. models only
Canadian models
U.S. models
SUN VISOR
DASHBOARD
U.S. models only
CONTINUED
Safety Labels
53
Driver and Passenger Safety
Table of Contents
Page 116 of 342

Accessory Power Sockets
Your vehicle has one, two, or three
accessory power sockets, depending
on the model. All models have a front
accessory power socket on the
dashboard above the glove box.
EX and SC models have an accessory
power socket in the cargo area on
the passenger's side.
The SC model has one additional
socket in the center console.
These sockets are intended to supply
power for 12 volt DC accessories that
are rated 120 watts or less (10 amps).
None of the sockets will power an
automotive type cigarette lighter
element. When more than one
socket is being used, the combined
power rating of the accessories
should be 120 watts or less (10 amps).Glove Box
Open the glove box by pulling the
bottom of the handle. Close it with a
firm push. Lock or unlock the glove
box with the master key.
An open glove box can cause
serious injury to your passenger
in a crash, even if the
passenger is wearing the seat belt.
Always keep the glove box
closed while driving.
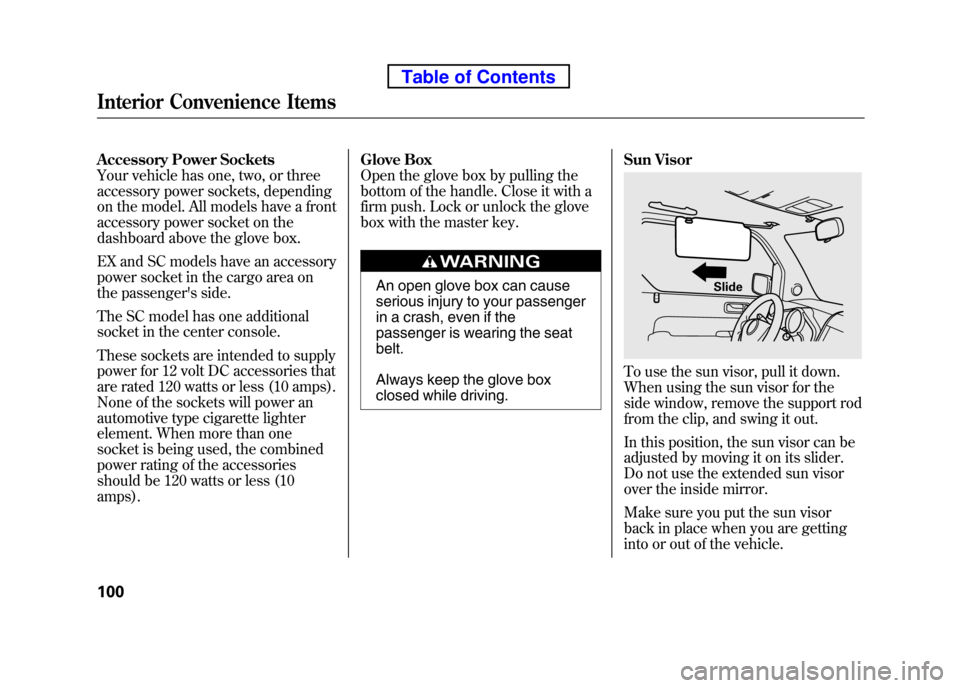
Sun Visor
To use the sun visor, pull it down.
When using the sun visor for the
side window, remove the support rod
from the clip, and swing it out.
In this position, the sun visor can be
adjusted by moving it on its slider.
Do not use the extended sun visor
over the inside mirror.
Make sure you put the sun visor
back in place when you are getting
into or out of the vehicle.
Slide
Interior Convenience Items
100
Table of Contents
Page 121 of 342

Air Flow Controls
Fan Control Dial
Turn this dial clockwise to increase
the fan speed and airflow.
Temperature Control Dial
Turning this dial clockwise increases
the temperature of the airflow.
Air Conditioning (A/C) Button
This button turns the air
conditioning on and off. The
indicator in the button is on when the
A/C is on.
Recirculation Button
When the recirculation indicator is
on, air from the vehicle's interior is
sent throughout the system again.
When the indicator is off, air is
brought in from the outside of the
vehicle (fresh air mode).The outside air intakes for the
heating and cooling system are at the
base of the windshield. Keep this
area clear of leaves and other debris.
The system should be left in fresh air
mode under almost all conditions.
Keeping the system in recirculation
mode, particularly with the A/C off,
can cause the windows to fog up.
Switch to recirculation mode when
driving through dusty or smoky
conditions, then return to fresh air mode.
Rear Window Defogger Button
This button turns the rear window
defogger on and off (see page 74).
Mode Control Dial
Use the mode control dial to select
the vents the air flows from. Some air
will flow from the dashboard vents in
all modes.
The system automatically turns
on the A/C and switches to
recirculation mode. Air flows from
the center and side vents in the
dashboard (see page 106).
Air flows from the center and
corner vents in the dashboard.
Airflow is divided between the
vents in the dashboard and the floor vents.
Air flows from the floor vents.
When you select
, the system
automatically switches to fresh air mode.
Airflow is divided between the
floor vents and the defroster vents at
the base of the windshield.
CONTINUED
Vents, Heating, and A/C
105
Features
Table of Contents
Page 124 of 342

To Remove Exterior Frost or Ice
From the Windows1. Select
. The system
automatically switches to fresh air
mode and turns on the A/C. The
A/C indicator does not come on if
the A/C was off to start with.
2. Select
.
3. Set the fan and temperature controls to maximum level.
4. Select
to help clear the rear
window.
To clear the windows faster, you can
close the dashboard corner vents by
rotating the tab below each vent.
This sends more warm air to the
windshield defroster vents. Once the
windshield is clear, select fresh air
mode to avoid fogging the windows.
For your safety, make sure you have
a clear view through all the windows
before driving. To Turn Everything Off
Turning the fan speed control dial all
the way to the left shuts the systemoff.
● Keep the system off for short
periods only.
● To keep stale air and mustiness
from collecting, you should have
the fan running at all times.
Vents, Heating, and A/C
108
Table of Contents
Page 216 of 342

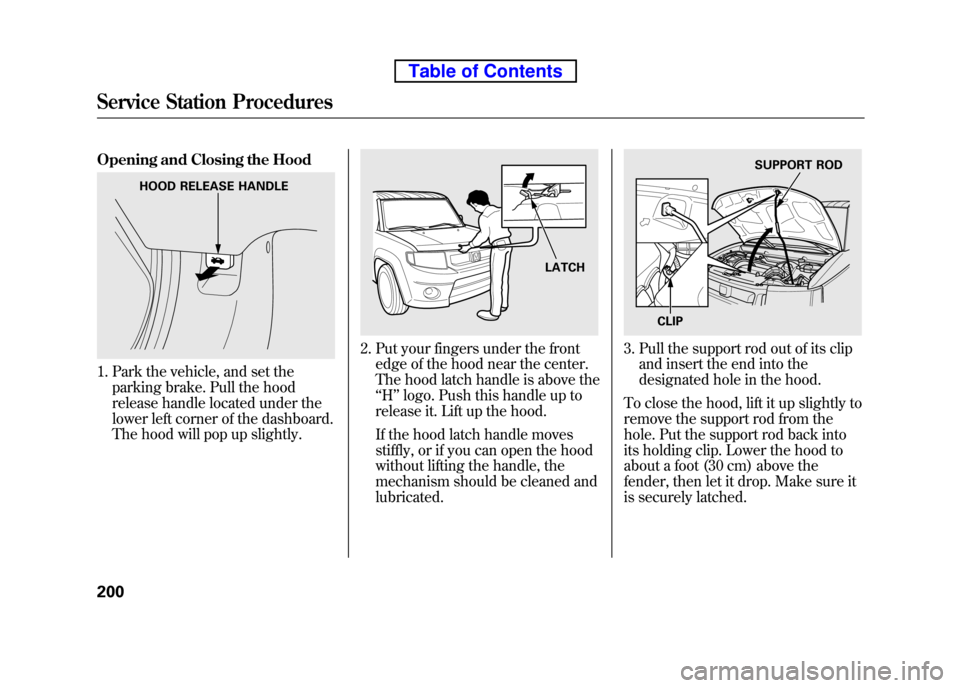
Opening and Closing the Hood
1. Park the vehicle, and set theparking brake. Pull the hood
release handle located under the
lower left corner of the dashboard.
The hood will pop up slightly.
2. Put your fingers under the frontedge of the hood near the center.
The hood latch handle is above the‘‘H ’’logo. Push this handle up to
release it. Lift up the hood.
If the hood latch handle moves
stiffly, or if you can open the hood
without lifting the handle, the
mechanism should be cleaned andlubricated.3. Pull the support rod out of its clip and insert the end into the
designated hole in the hood.
To close the hood, lift it up slightly to
remove the support rod from the
hole. Put the support rod back into
its holding clip. Lower the hood to
about a foot (30 cm) above the
fender, then let it drop. Make sure it
is securely latched.
HOOD RELEASE HANDLE
LATCH
SUPPORT ROD
CLIP
Service Station Procedures
200
Table of Contents
Page 322 of 342

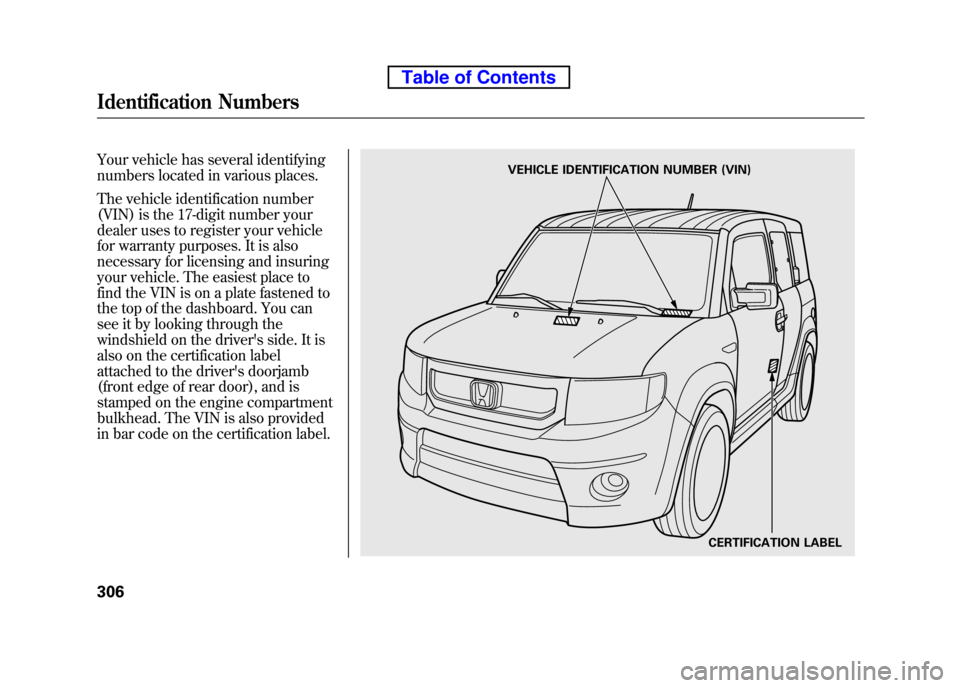
Your vehicle has several identifying
numbers located in various places.
The vehicle identification number
(VIN) is the 17-digit number your
dealer uses to register your vehicle
for warranty purposes. It is also
necessary for licensing and insuring
your vehicle. The easiest place to
find the VIN is on a plate fastened to
the top of the dashboard. You can
see it by looking through the
windshield on the driver's side. It is
also on the certification label
attached to the driver's doorjamb
(front edge of rear door), and is
stamped on the engine compartment
bulkhead. The VIN is also provided
in bar code on the certification label.VEHICLE IDENTIFICATION NUMBER (VIN)CERTIFICATION LABEL
Identification Numbers
306
Table of Contents