sensor HONDA FIT 2017 3.G User Guide
[x] Cancel search | Manufacturer: HONDA, Model Year: 2017, Model line: FIT, Model: HONDA FIT 2017 3.GPages: 465, PDF Size: 26.52 MB
Page 75 of 465
74
uuIndicators u
Instrument Panel
*1:Models with the smart entry system have an ENGINE START/STOP button instead of an ignition switch.
IndicatorNameOn/BlinkingExplanation
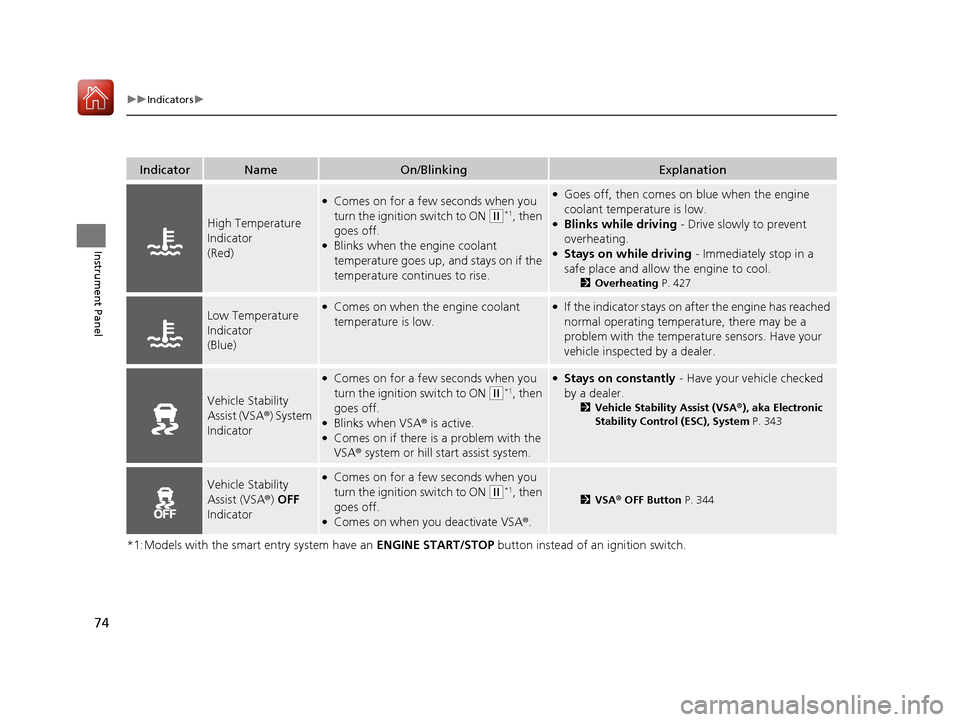
High Temperature
Indicator
(Red)
●Comes on for a few seconds when you
turn the ignition switch to ON
(w*1, then
goes off.
●Blinks when the engine coolant
temperature goes up, and stays on if the
temperature continues to rise.
●Goes off, then comes on blue when the engine
coolant temperature is low.
●Blinks while driving - Drive slowly to prevent
overheating.
●Stays on while driving - Immediately stop in a
safe place and allow the engine to cool.
2 Overheating P. 427
Low Temperature
Indicator
(Blue)●Comes on when the engine coolant
temperature is low.●If the indicator stays on after the engine has reached
normal operating temperature, there may be a
problem with the temperature sensors. Have your
vehicle inspected by a dealer.
Vehicle Stability
Assist (VSA®) System
Indicator
●Comes on for a few seconds when you
turn the ignition switch to ON
(w*1, then
goes off.
●Blinks when VSA ® is active.●Comes on if there is a problem with the
VSA® system or hill start assist system.
●Stays on constantly - Have your vehicle checked
by a dealer.
2 Vehicle Stability Assist (VSA® ), aka Electronic
Stability Control (ESC), System P. 343
Vehicle Stability
Assist (VSA ®) OFF
Indicator●Comes on for a few seconds when you
turn the ignition switch to ON
(w*1, then
goes off.
●Comes on when you deactivate VSA ®.
2VSA ® OFF Button P. 344
17 FIT -31T5A6200.book 74 ページ 2016年5月27日 金曜日 午後6時33分
Page 83 of 465
82
uuIndicators uInformation Display Warning and Information Messages
Instrument Panel
Information Display Warning and Information Messages
The following messages appear only on the information display.
MessageConditionExplanation
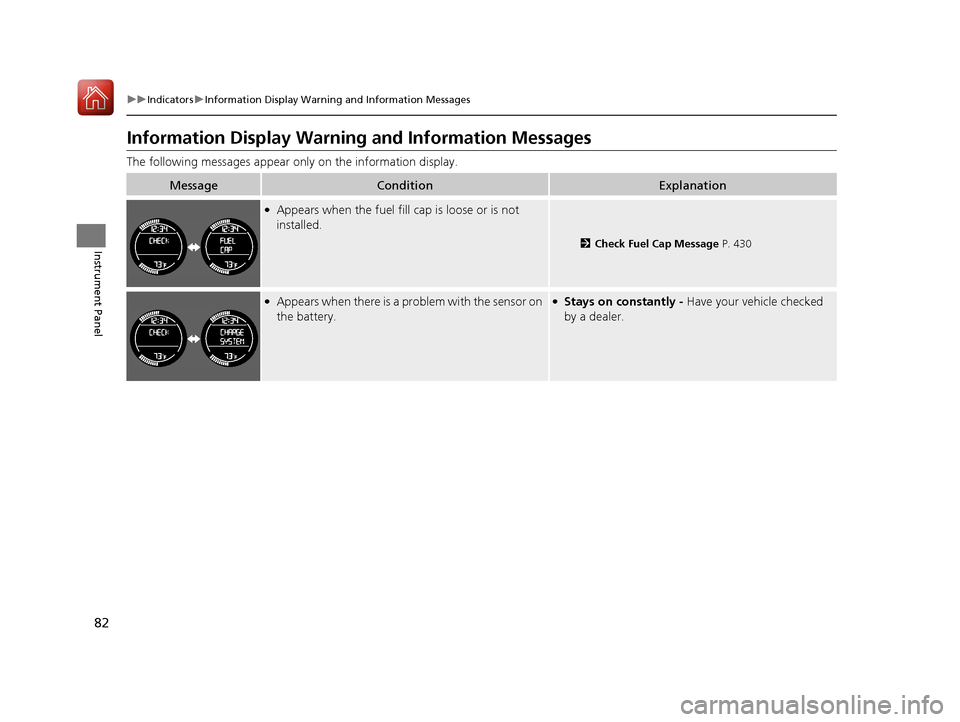
●Appears when the fuel fill cap is loose or is not
installed.
2Check Fuel Cap Message P. 430
●Appears when there is a problem with the sensor on
the battery.●Stays on constantly - Have your vehicle checked
by a dealer.
17 FIT -31T5A6200.book 82 ページ 2016年5月27日 金曜日 午後6時33分
Page 89 of 465
uuGauges and Displays uInformation Display
88
Instrument Panel
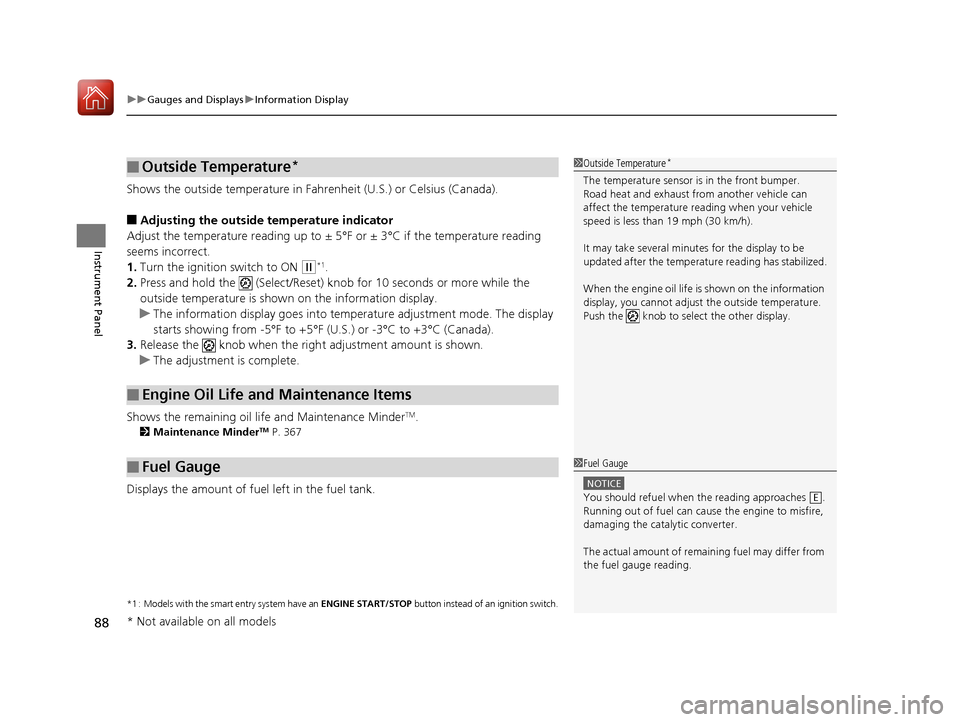
Shows the outside temperature in Fahr enheit (U.S.) or Celsius (Canada).
■Adjusting the outside temperature indicator
Adjust the temperature reading up to ± 5°F or ± 3°C if the temperature reading
seems incorrect.
1. Turn the ignition switch to ON
(w*1.
2. Press and hold the (Select/Reset) knob for 10 seconds or more while the
outside temperature is show n on the information display.
u The information display goes into temp erature adjustment mode. The display
starts showing from -5°F to +5°F (U .S.) or -3°C to +3°C (Canada).
3. Release the knob when the righ t adjustment amount is shown.
u The adjustment is complete.
Shows the remaining oil life and Maintenance Minder
TM.
2 Maintenance MinderTM P. 367
Displays the amount of fuel left in the fuel tank.
*1 : Models with the smart entry system have an ENGINE START/STOP button instead of an ignition switch.
■Outside Temperature*
■Engine Oil Life and Maintenance Items
■Fuel Gauge
1Outside Temperature*
The temperature sensor is in the front bumper.
Road heat and exhaust from another vehicle can
affect the temperature reading when your vehicle
speed is less than 19 mph (30 km/h).
It may take several minutes for the display to be
updated after the temperature reading has stabilized.
When the engine oil life is shown on the information
display, you cannot adjust the outside temperature.
Push the knob to select the other display.
1 Fuel Gauge
NOTICE
You should refuel when the reading approaches .
Running out of fuel can cause the engine to misfire,
damaging the cata lytic converter.
The actual amount of remain ing fuel may differ from
the fuel gauge reading.E
* Not available on all models
17 FIT -31T5A6200.book 88 ページ 2016年5月27日 金曜日 午後6時33分
Page 90 of 465
89
Controls
This chapter explains how to operate the various controls necessary for driving.
Clock.............................................................. 90
Locking and Unlocking the Doors Key Types and Functions ............................. 92
Low Smart Entry Remote Signal Strength*.......94Locking/Unlocking the Doors from the Outside ....95
Locking/Unlocking the Doors from the Inside .....101
Childproof Door Locks .............................. 104
Auto Door Locking/Unlocking*................. 105
Opening and Closing the Tailgate ............ 109
Security System .......................................... 112
Immobilizer System ......... ..................... ..... 112
Security System Alarm ............................... 112
Opening and Closing the Windows .......... 115
Opening and Closing the Moonroof
*....... 117 Operating the Switches Around the Steering
Wheel
Ignition Switch.......................................... 118
ENGINE START/STOP Button ..................... 119
Ignition Switch and Power Mode Comparison ... 122Turn Signals .............................................. 123
Light Switches .......................................... 123
Fog Lights
*............................................... 126
Daytime Running Lights ............................ 127
Wipers and Washers ................................. 128
Brightness Control .................................... 130
Rear Defogger/Heated Door Mirror* Button ...... 131Adjusting the Steering Wheel ................... 132
Models without smart entry system
Models with smart entry system
Adjusting the Mirrors .................................133
Interior Rearview Mirror .............................133
Power Door Mirrors ...................................133
Adjusting the Seats .................................... 135
Front Seats ................................................135
Rear Seats .................................................139
Interior Lights/Interior Convenience Items....... 147Interior Lights ............................................147
Interior Convenience Items ........................149
Heating and Cooling System
*....................157
Using Vents, Heating and A/C*.................157
Climate Control System*............................160
Using Automatic Climate Control ..............160
Automatic Climate Control Sensors ...........163
* Not available on all models
17 FIT -31T5A6200.book 89 ページ 2016年5月27日 金曜日 午後6時33分
Page 96 of 465
95
uuLocking and Unlocking the Doors uLocking/Unlocking the Doors from the Outside
Continued
Controls
Locking/Unlocking the Doors from the Outside
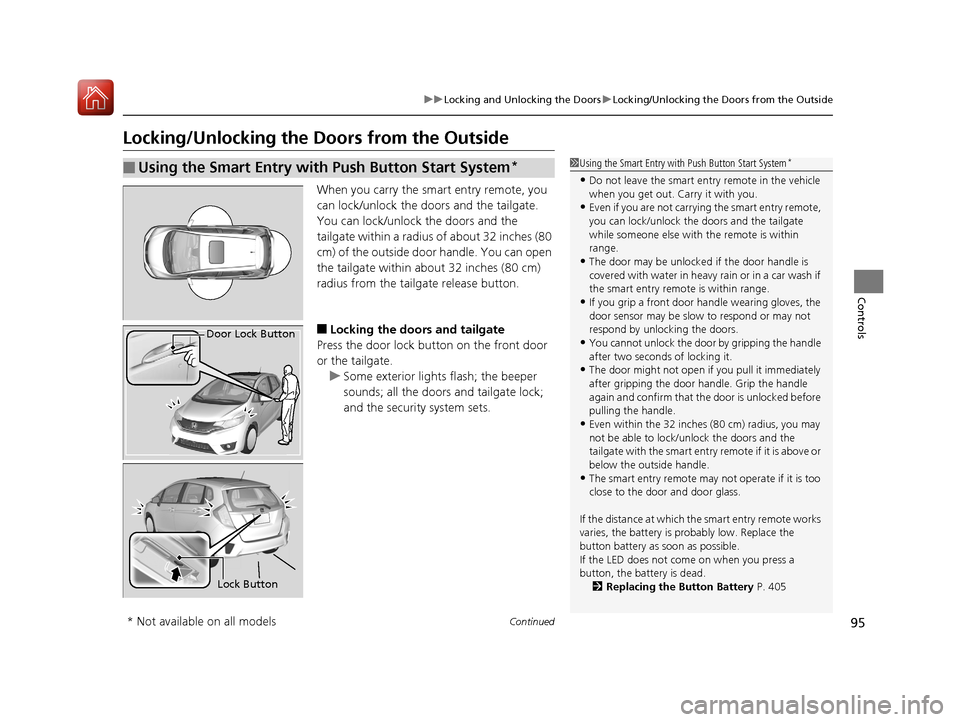
When you carry the sm art entry remote, you
can lock/unlock the doors and the tailgate.
You can lock/unlock the doors and the
tailgate within a radius of about 32 inches (80
cm) of the outside door handle. You can open
the tailgate within about 32 inches (80 cm)
radius from the tailgate release button.
■Locking the doors and tailgate
Press the door lock button on the front door
or the tailgate.
u Some exterior lights flash; the beeper
sounds; all the doors and tailgate lock;
and the security system sets.
■Using the Smart Entry with Push Button Start System*1Using the Smart Entry with Push Button Start System*
•Do not leave the smart entry remote in the vehicle
when you get out. Carry it with you.
•Even if you are not carrying the smart entry remote,
you can lock/unlock the doors and the tailgate
while someone else with the remote is within
range.
•The door may be unlocked if the door handle is
covered with water in heavy rain or in a car wash if
the smart entry remote is within range.
•If you grip a front door handle wearing gloves, the
door sensor may be slow to respond or may not
respond by unlocking the doors.
•You cannot unlock the door by gripping the handle
after two seconds of locking it.
•The door might not open if you pull it immediately
after gripping the door handle. Grip the handle
again and confirm that th e door is unlocked before
pulling the handle.
•Even within the 32 inches (80 cm) radius, you may
not be able to lock/unlock the doors and the
tailgate with the smart entry remote if it is above or
below the outside handle.
•The smart entry remote may not operate if it is too
close to the door and door glass.
If the distance at which the smart entry remote works
varies, the battery is probably low. Replace the
button battery as soon as possible.
If the LED does not come on when you press a
button, the battery is dead. 2 Replacing the Button Battery P. 405
Door Lock Button
Lock Button
* Not available on all models
17 FIT -31T5A6200.book 95 ページ 2016年5月27日 金曜日 午後6時33分
Page 125 of 465
uuOperating the Switches Around the Steering Wheel uLight Switches
124
Controls
Automatic lighting control can be used when
the ignition switch is in ON
(w*1.
When you turn the light switch to AUTO, the
headlights and other exterior lights will switch
on and off automatically depending on the
ambient brightness.
*1 : Models with the smart entry system have an ENGINE START/STOP button instead of an ignition switch.
■Automatic Operation (automatic lighting control)*1Automatic Operation (aut omatic lighting control)*
We recommend that you tu rn on the lights manually
when driving at night, in a dense fog, or in dark areas
such as long tunnels or parking facilities.
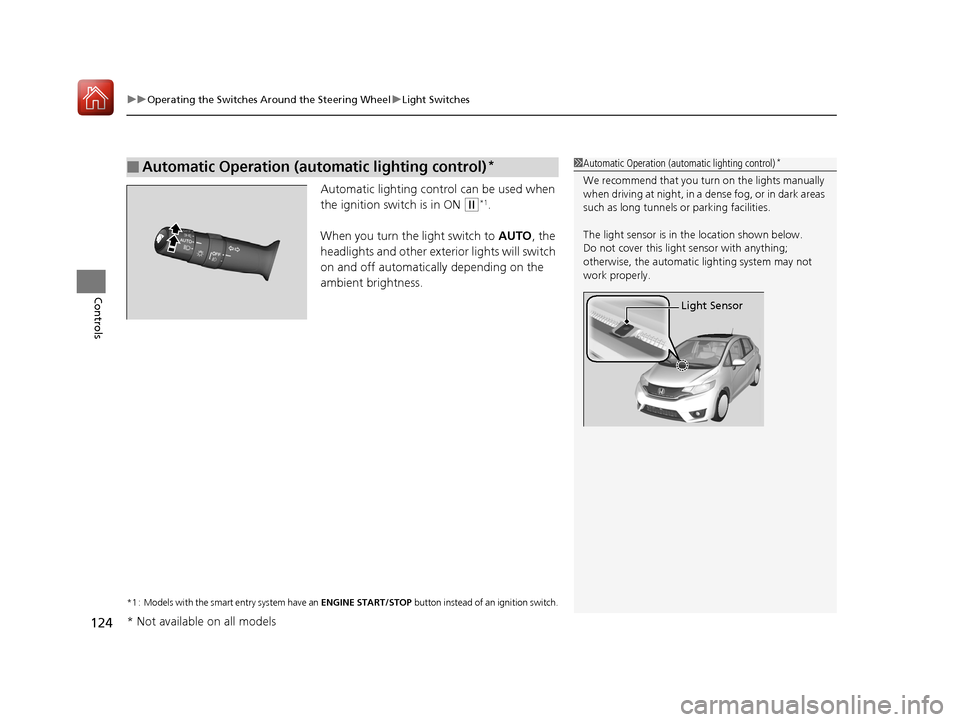
The light sensor is in the location shown below.
Do not cover this light sensor with anything;
otherwise, the automatic lighting system may not
work properly.
Light Sensor
* Not available on all models
17 FIT -31T5A6200.book 124 ページ 2016年5月27日 金曜日 午後6時33分
Page 141 of 465
uuAdjusting the Seats uRear Seats
140
Controls
The rear seats can be folded down separate ly to allow for additional storage space.
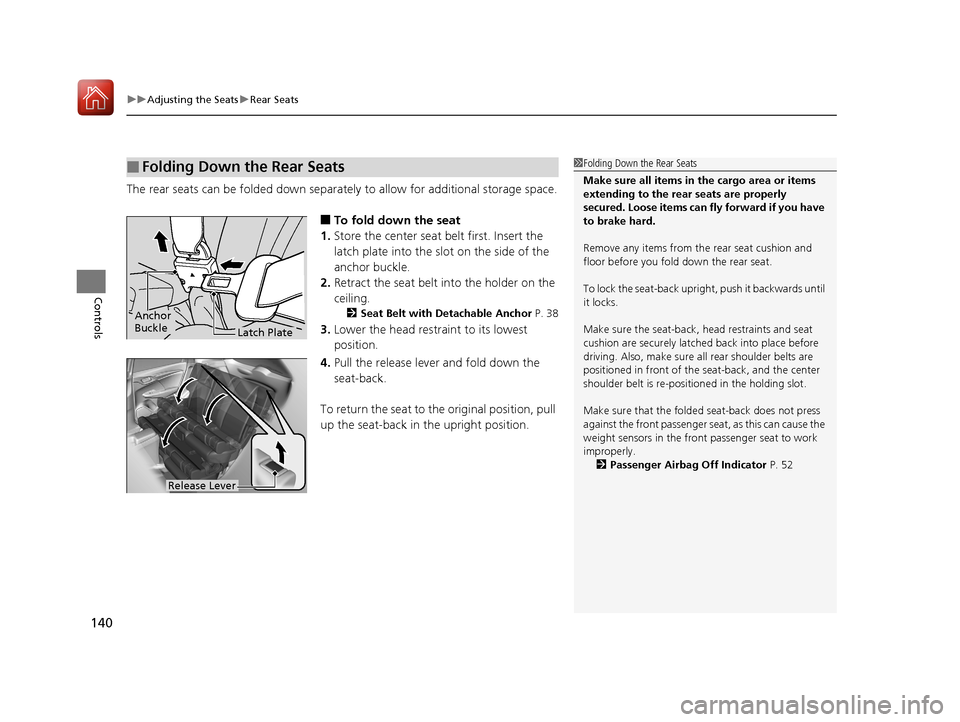
■To fold down the seat
1. Store the center seat belt first. Insert the
latch plate into the slot on the side of the
anchor buckle.
2. Retract the seat belt into the holder on the
ceiling.
2 Seat Belt with Detachable Anchor P. 38
3.Lower the head restra int to its lowest
position.
4. Pull the release lever and fold down the
seat-back.
To return the seat to th e original position, pull
up the seat-back in the upright position.
■Folding Down the Rear Seats1 Folding Down the Rear Seats
Make sure all items in the cargo area or items
extending to the rear seats are properly
secured. Loose items can fly forward if you have
to brake hard.
Remove any items from th e rear seat cushion and
floor before you fold down the rear seat.
To lock the seat-back upri ght, push it backwards until
it locks.
Make sure the seat-back, head restraints and seat
cushion are securely latche d back into place before
driving. Also, make sure all rear shoulder belts are
positioned in front of the seat-back, and the center
shoulder belt is re-posit ioned in the holding slot.
Make sure that the folded seat-back does not press
against the front passenger seat, as this can cause the
weight sensors in the front passenger seat to work
improperly.
2 Passenger Airbag Off Indicator P. 52
Anchor
Buckle
Latch Plate
Release Lever
17 FIT -31T5A6200.book 140 ページ 2016年5月27日 金曜日 午後6時33分
Page 164 of 465
163
uuClimate Control System*uAutomatic Climate Control Sensors
Controls
Automatic Climate Control Sensors
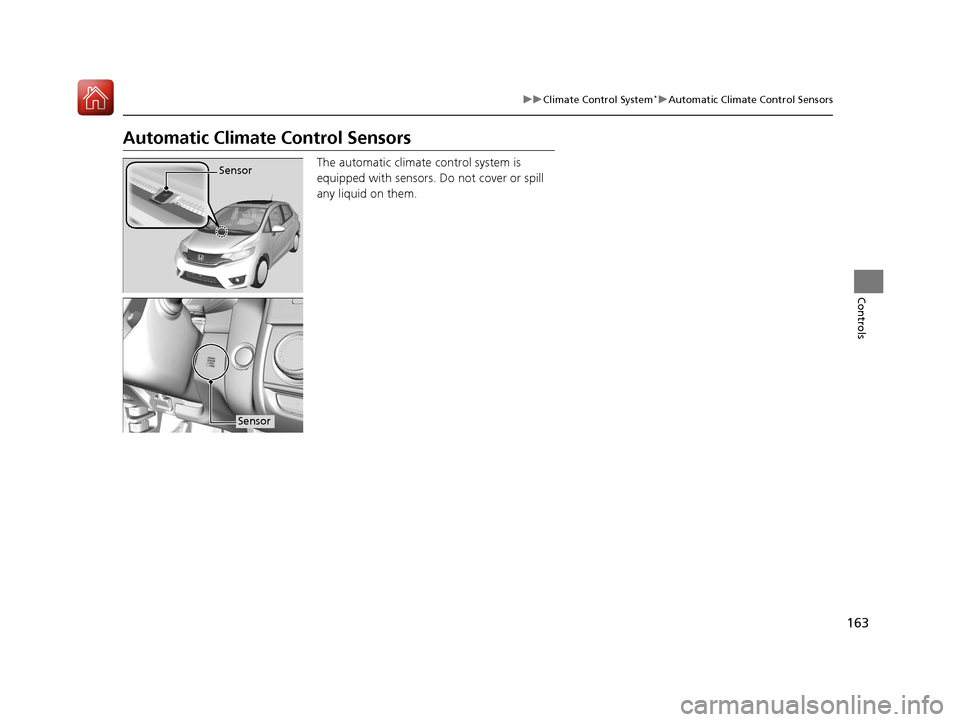
The automatic climate control system is
equipped with sensors. Do not cover or spill
any liquid on them.Sensor
Sensor
17 FIT -31T5A6200.book 163 ページ 2016年5月27日 金曜日 午後6時33分
Page 309 of 465
308
uuBefore Driving uDriving Preparation
Driving
• Be sure items placed on the floor behind the front seats cannot roll under the
seats.
u They can interfere with the driver’s ability to operate the pedals, the operation
of the seats, or the operation of the sensors under the seats.
• Everyone in the vehicle must fasten their seat belt.
2Fastening a Seat Belt P. 35
•Make sure that the indicators in the ins trument panel come on when you start the
vehicle, and go off soon after.
u Always have a dealer check the vehicle if a problem is indicated.
2 Indicators P. 70
17 FIT -31T5A6200.book 308 ページ 2016年5月27日 金曜日 午後6時33分
Page 383 of 465
382
uuMaintenance Under the Hood uRefilling Window Washer Fluid
Maintenance
Refilling Window Washer Fluid
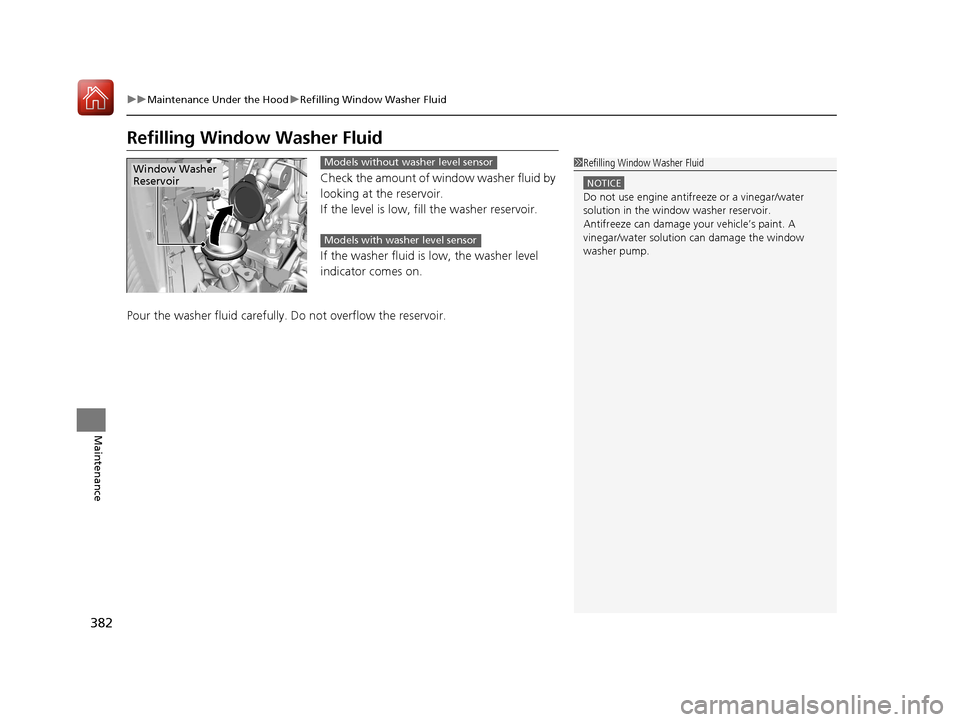
Check the amount of window washer fluid by
looking at the reservoir.
If the level is low, fill the washer reservoir.
If the washer fluid is low, the washer level
indicator comes on.
Pour the washer fluid carefully. Do not overflow the reservoir.
1Refilling Window Washer Fluid
NOTICE
Do not use engine antifreeze or a vinegar/water
solution in the window washer reservoir.
Antifreeze can damage y our vehicle’s paint. A
vinegar/water solution can damage the window
washer pump.
Window Washer
ReservoirModels without washer level sensor
Models with washer level sensor
17 FIT -31T5A6200.book 382 ページ 2016年5月27日 金曜日 午後6時33分