HONDA FIT 2019 Owner's Manual (in English)
Manufacturer: HONDA, Model Year: 2019, Model line: FIT, Model: HONDA FIT 2019Pages: 599, PDF Size: 53.09 MB
Page 181 of 599
179
uuAdjusting the Seats uRear Seats
Continued
Controls
Rear Seats
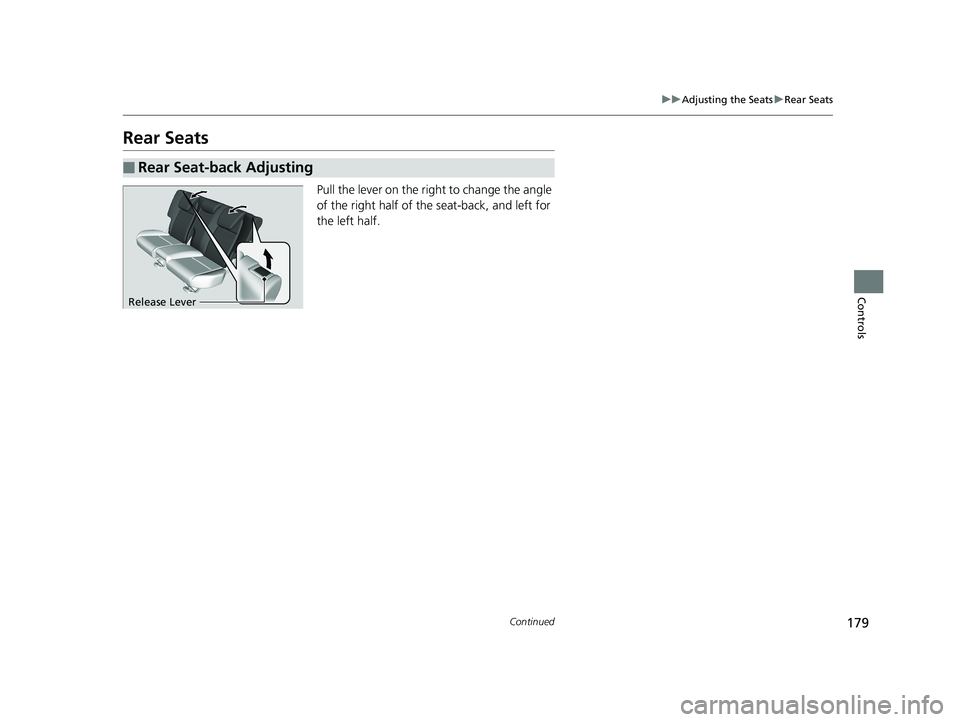
Pull the lever on the right to change the angle
of the right half of the seat-back, and left for
the left half.
■Rear Seat-back Adjusting
Release Lever
19 FIT JAZZ-31T5A6400.book 179 ページ 2018年2月26日 月曜日 午後4時30分
Page 182 of 599
uuAdjusting the Seats uRear Seats
180
Controls
The rear seats can be folded down separate ly to allow for additional storage space.
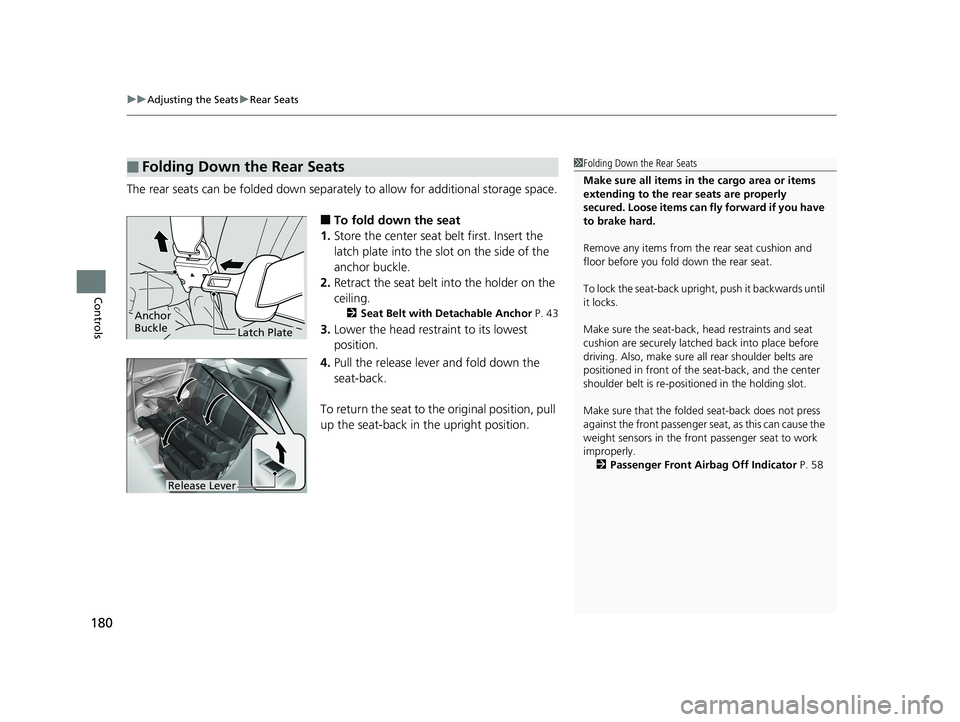
■To fold down the seat
1. Store the center seat belt first. Insert the
latch plate into the slot on the side of the
anchor buckle.
2. Retract the seat belt into the holder on the
ceiling.
2 Seat Belt with Detachable Anchor P. 43
3.Lower the head restra int to its lowest
position.
4. Pull the release lever and fold down the
seat-back.
To return the seat to th e original position, pull
up the seat-back in the upright position.
■Folding Down the Rear Seats1 Folding Down the Rear Seats
Make sure all items in the cargo area or items
extending to the rear seats are properly
secured. Loose items can fly forward if you have
to brake hard.
Remove any items from th e rear seat cushion and
floor before you fold down the rear seat.
To lock the seat-back upri ght, push it backwards until
it locks.
Make sure the seat-back, head restraints and seat
cushion are securely latche d back into place before
driving. Also, make sure all rear shoulder belts are
positioned in front of the seat-back, and the center
shoulder belt is re-posit ioned in the holding slot.
Make sure that the folded seat-back does not press
against the front passenger se at, as this can cause the
weight sensors in the front passenger seat to work
improperly.
2 Passenger Front Airbag Off Indicator P. 58
Anchor
Buckle
Latch Plate
Release Lever
19 FIT JAZZ-31T5A6400.book 180 ページ 2018年2月26日 月曜日 午後4時30分
Page 183 of 599
181
uuAdjusting the Seats uRear Seats
Controls
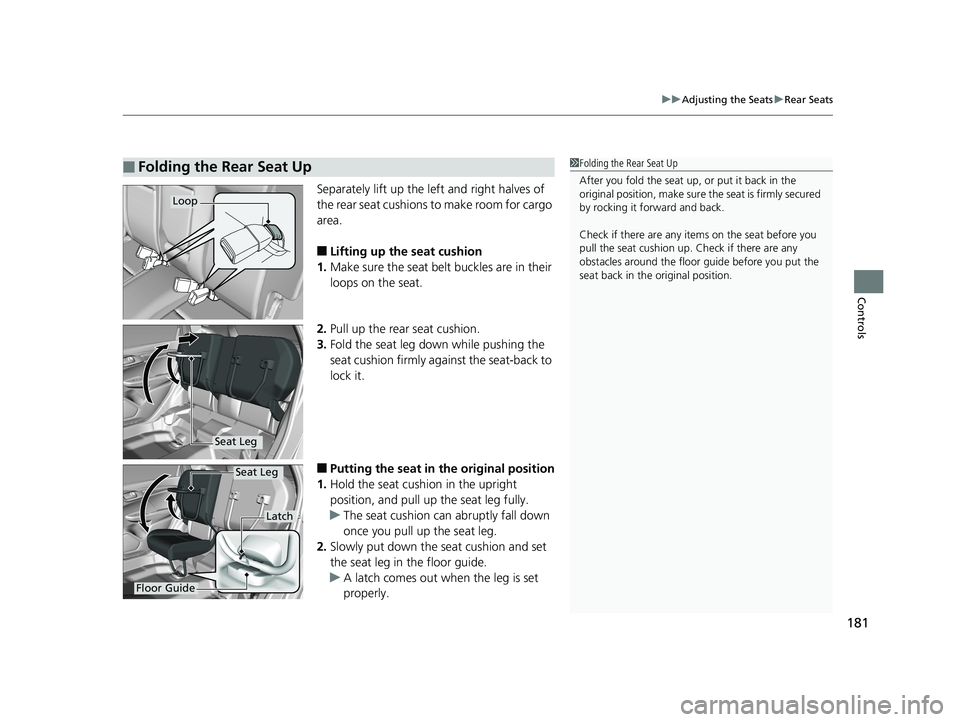
Separately lift up the left and right halves of
the rear seat cushions to make room for cargo
area.
■Lifting up the seat cushion
1. Make sure the seat belt buckles are in their
loops on the seat.
2. Pull up the rear seat cushion.
3. Fold the seat leg do wn while pushing the
seat cushion firmly against the seat-back to
lock it.
■Putting the seat in the original position
1. Hold the seat cushion in the upright
position, and pull up the seat leg fully.
u The seat cushion can abruptly fall down
once you pull up the seat leg.
2. Slowly put down the seat cushion and set
the seat leg in the floor guide.
u A latch comes out when the leg is set
properly.
■Folding the Rear Seat Up1Folding the Rear Seat Up
After you fold the seat up, or put it back in the
original position, make sure the seat is firmly secured
by rocking it forward and back.
Check if there are any items on the seat before you
pull the seat cushion up. Check if there are any
obstacles around the floor guide before you put the
seat back in the original position.
Loop
Seat Leg
Floor Guide
Latch
Seat Leg
19 FIT JAZZ-31T5A6400.book 181 ページ 2018年2月26日 月曜日 午後4時30分
Page 184 of 599
182
uuAdjusting the Seats uHead Restraints
Controls
Head Restraints
Your vehicle is equipped with head restraints in all seating positions.
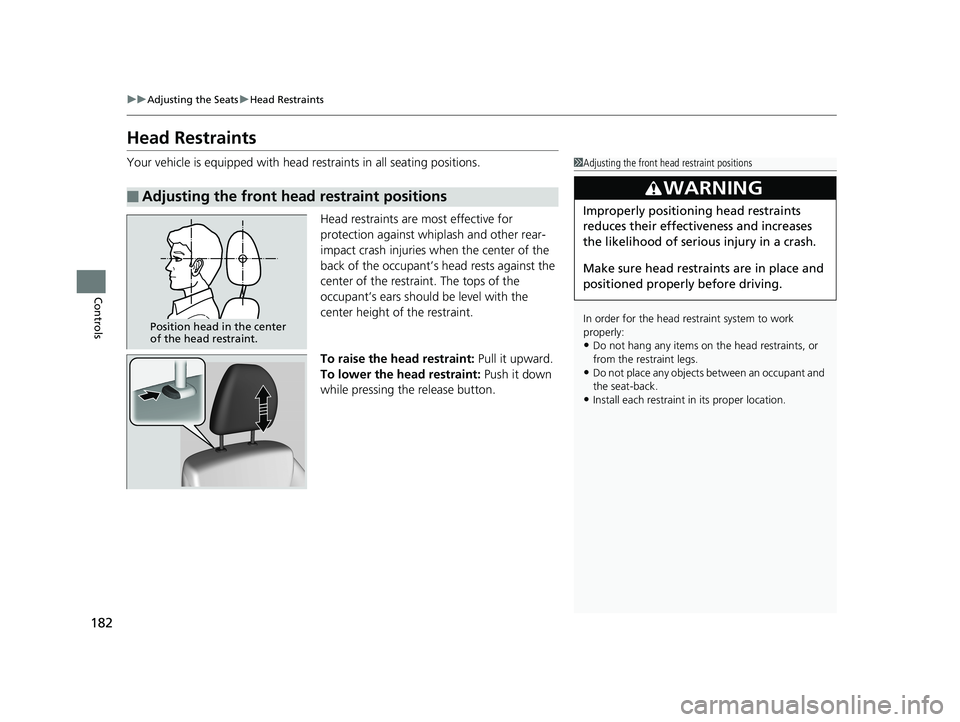
Head restraints are most effective for
protection against whiplash and other rear-
impact crash injuries when the center of the
back of the occupant’s head rests against the
center of the restraint. The tops of the
occupant’s ears should be level with the
center height of the restraint.
To raise the head restraint: Pull it upward.
To lower the head restraint: Push it down
while pressing the release button.
■Adjusting the front head restraint positions
1 Adjusting the front head restraint positions
In order for the head restraint system to work
properly:
•Do not hang any items on the head restraints, or
from the restraint legs.
•Do not place any objects between an occupant and
the seat-back.
•Install each restraint in its proper location.
3WARNING
Improperly positioning head restraints
reduces their effectiveness and increases
the likelihood of serious injury in a crash.
Make sure head restraints are in place and
positioned properly before driving.
Position head in the center
of the head restraint.
19 FIT JAZZ-31T5A6400.book 182 ページ 2018年2月26日 月曜日 午後4時30分
Page 185 of 599
183
uuAdjusting the Seats uHead Restraints
Continued
Controls
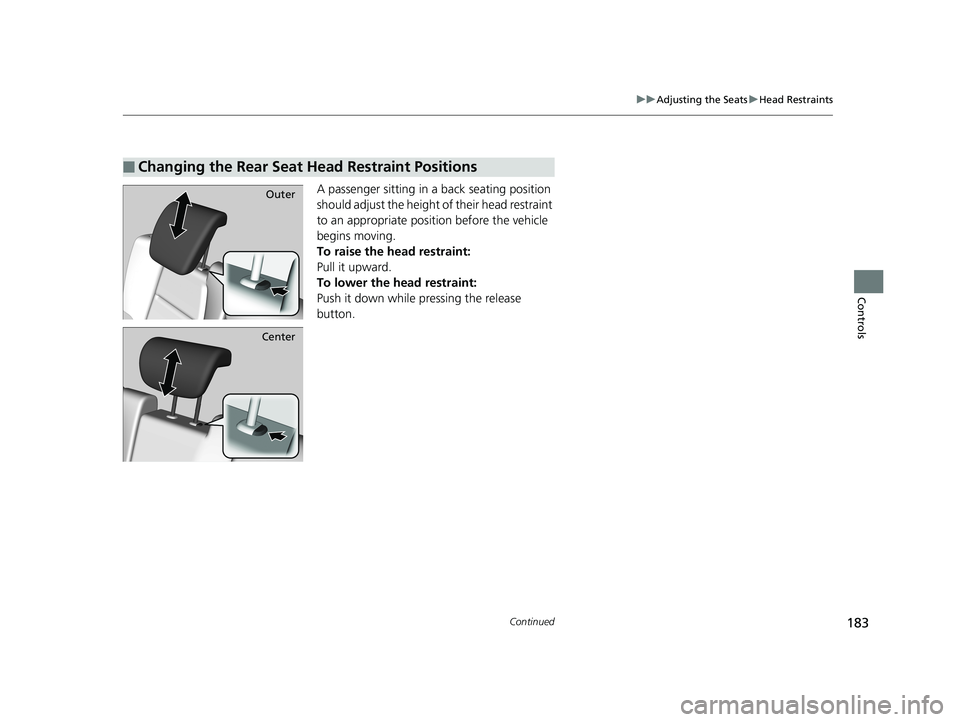
A passenger sitting in a back seating position
should adjust the height of their head restraint
to an appropriate position before the vehicle
begins moving.
To raise the head restraint:
Pull it upward.
To lower the head restraint:
Push it down while pressing the release
button.
■Changing the Rear Seat Head Restraint Positions
Outer
Center
19 FIT JAZZ-31T5A6400.book 183 ページ 2018年2月26日 月曜日 午後4時30分
Page 186 of 599
uuAdjusting the Seats uHead Restraints
184
Controls
Head restraints can be removed for cleaning or repair.
To remove a head restraint:
Pull the restraint up as far as it will go. Then push the release button, and pull the
restraint up and out.
To reinstall a head restraint:
Insert the legs back in place, then adjust the head restraint to an appropriate height
while pressing the release button. Pull up on the restraint to make sure it is locked
in position.
■Removing and Reinstalling the Head Restraints1 Removing and Reinstalling the Head Restraints
To remove and install the rear outer head restraint,
recline the seat-back slightly forward as the space
between the ceili ng and the seat-back is limited.
3WARNING
Failure to reinstall, or correctly reinstall, the
head restraints can result in severe injury
during a crash.
Always replace the he ad restraints before
driving.
19 FIT JAZZ-31T5A6400.book 184 ページ 2018年2月26日 月曜日 午後4時30分
Page 187 of 599
185
uuAdjusting the Seats uMaintain a Proper Sitting Position
Controls
Maintain a Proper Sitting Position
After all occupants have adjusted their s eats and head restraints, and put on their
seat belts, it is very important that they continue to sit upright, well back in their
seats, with their feet on the floor, until the vehicle is safe ly parked and the engine is
off.
Sitting improperly can increase the chance of injury during a crash. For example, if
an occupant slouches, lies down, turns si deways, sits forward, leans forward or
sideways, or puts one or both feet up, the chance of injury during a crash is greatly
increased.
In addition, an occupant who is out of posi tion in the front seat can be seriously or
fatally injured in a crash by striking interior parts of the vehicle or being struck by an
inflating front airbag.1 Maintain a Proper Sitting Position
3WARNING
Sitting improperly or out of position can
result in serious injury or death in a crash.
Always sit upright, well back in the seat,
with your feet on the floor.
19 FIT JAZZ-31T5A6400.book 185 ページ 2018年2月26日 月曜日 午後4時30分
Page 188 of 599
186
uuAdjusting the Seats uArmrest*
Controls
Armrest*
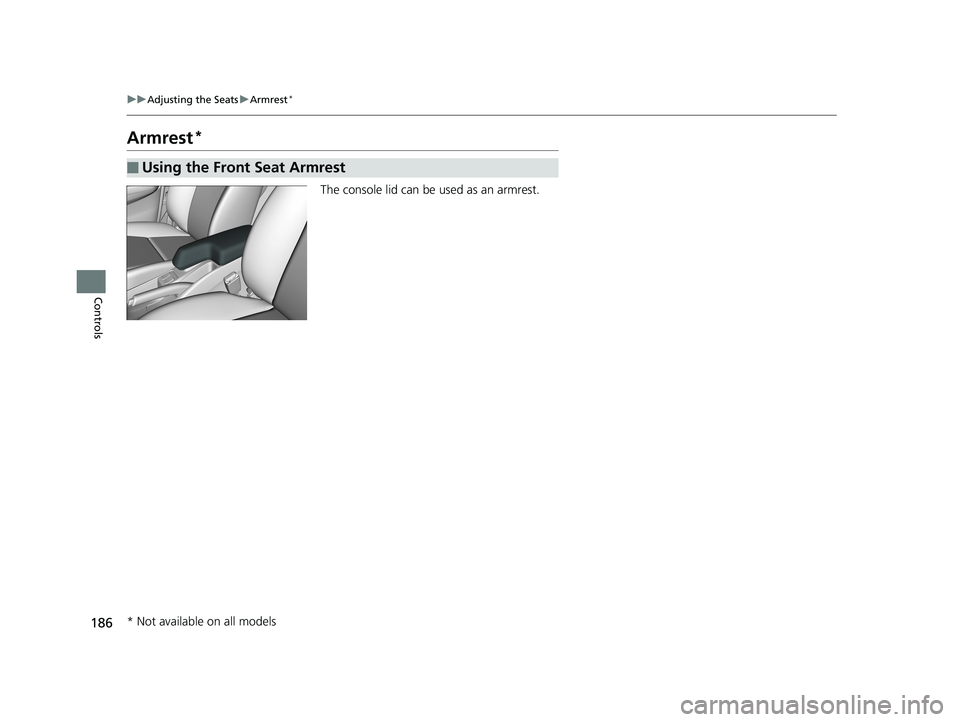
The console lid can be used as an armrest.
■Using the Front Seat Armrest
* Not available on all models
19 FIT JAZZ-31T5A6400.book 186 ページ 2018年2月26日 月曜日 午後4時30分
Page 189 of 599
187Continued
Controls
Interior Lights/Interior Convenience Items
Interior Lights
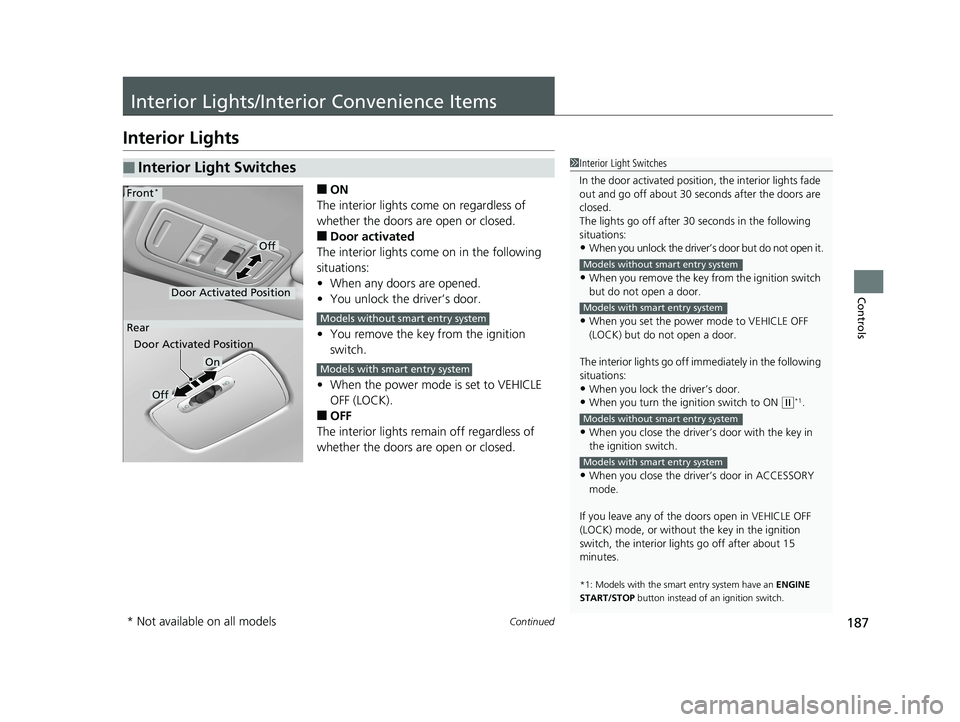
■ON
The interior lights come on regardless of
whether the doors are open or closed.
■Door activated
The interior lights come on in the following
situations:
• When any doors are opened.
• You unlock the driver’s door.
• You remove the key from the ignition
switch.
• When the power mode is set to VEHICLE
OFF (LOCK).
■OFF
The interior lights remain off regardless of
whether the doors are open or closed.
■Interior Light Switches1 Interior Light Switches
In the door activated position, the interior lights fade
out and go off about 30 se conds after the doors are
closed.
The lights go off after 30 seconds in the following
situations:
•When you unlock the driver’s door but do not open it.
•When you remove the key from the ignition switch
but do not open a door.
•When you set the power mode to VEHICLE OFF
(LOCK) but do not open a door.
The interior lights go off i mmediately in the following
situations:
•When you lock the driver’s door.
•When you turn the ignition switch to ON ( w*1.
•When you close the driver’s door with the key in
the ignition switch.
•When you close the driver’s door in ACCESSORY
mode.
If you leave any of the doors open in VEHICLE OFF
(LOCK) mode, or without the key in the ignition
switch, the interior li ghts go off after about 15
minutes.
*1: Models with the sma rt entry system have an ENGINE
START/STOP button instead of an ignition switch.
Models without smart entry system
Models with smart entry system
Models without smart entry system
Models with smart entry system
On
Off
Door Activated Position
Front*
Rear
Door Activated Position
Off
Models without smart entry system
Models with smart entry system
* Not available on all models
19 FIT JAZZ-31T5A6400.book 187 ページ 2018年2月26日 月曜日 午後4時30分
Page 190 of 599
uuInterior Lights/Interior Convenience Items uInterior Lights
188
Controls
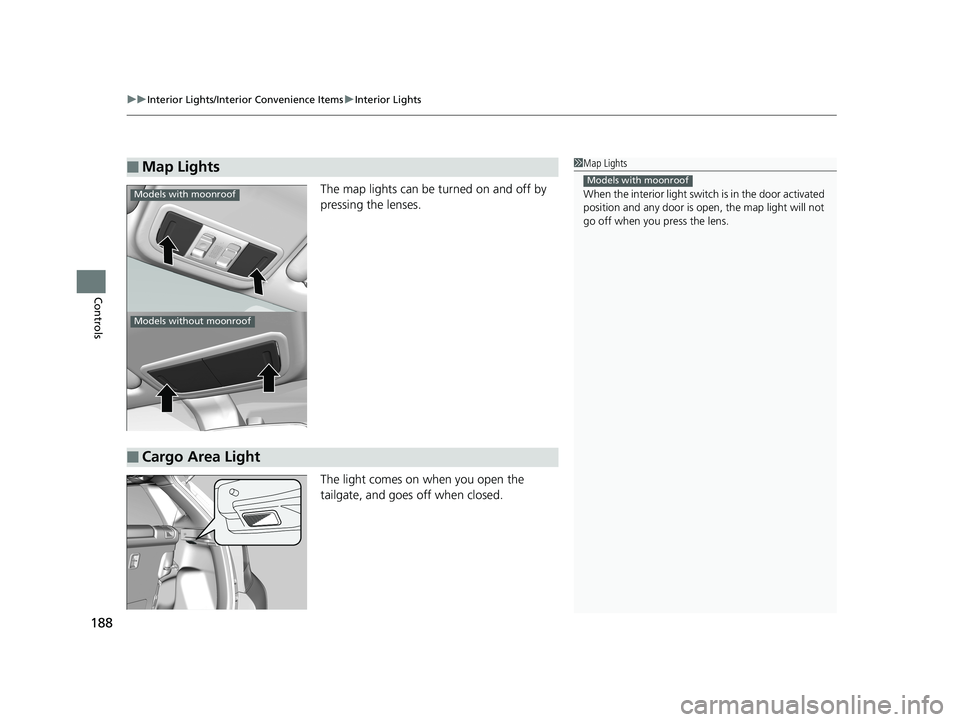
The map lights can be turned on and off by
pressing the lenses.
The light comes on when you open the
tailgate, and goes off when closed.
■Map Lights1Map Lights
When the interior light swit ch is in the door activated
position and any door is open, the map light will not
go off when you press the lens.
Models with moonroof
Models with moonroof
Models without moonroof
■Cargo Area Light
19 FIT JAZZ-31T5A6400.book 188 ページ 2018年2月26日 月曜日 午後4時30分