ignition HONDA HR-V 2019 (in English) Repair Manual
[x] Cancel search | Manufacturer: HONDA, Model Year: 2019, Model line: HR-V, Model: HONDA HR-V 2019Pages: 631, PDF Size: 39.76 MB
Page 220 of 631
uuClimate Control System*uUsing Automatic Climate Control
218
Controls
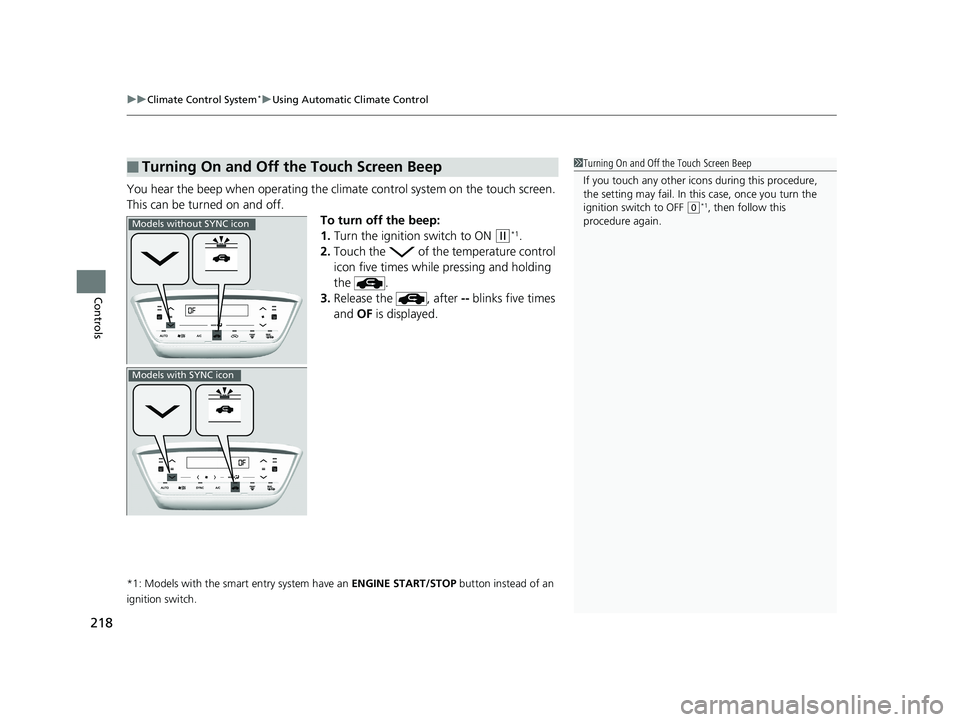
You hear the beep when operating the clim ate control system on the touch screen.
This can be turned on and off. To turn off the beep:
1.Turn the ignition switch to ON
(w*1.
2. Touch the of the temperature control
icon five times while pressing and holding
the .
3. Release the , after -- blinks five times
and OF is displayed.
*1: Models with the smart entry system have an ENGINE START/STOP button instead of an
ignition switch.
■Turning On and Off the Touch Screen Beep1 Turning On and Off the Touch Screen Beep
If you touch any other icon s during this procedure,
the setting may fail. In this case, once you turn the
ignition switch to OFF
( 0*1, then follow this
procedure again.
Models without SYNC icon
Models with SYNC icon
19 HR-V HDMC HDMG-31T7A6300.book 218 ページ 2018年6月1日 金曜日 午後1時14分
Page 221 of 631
219
uuClimate Control System*uUsing Automatic Climate Control
Continued
Controls
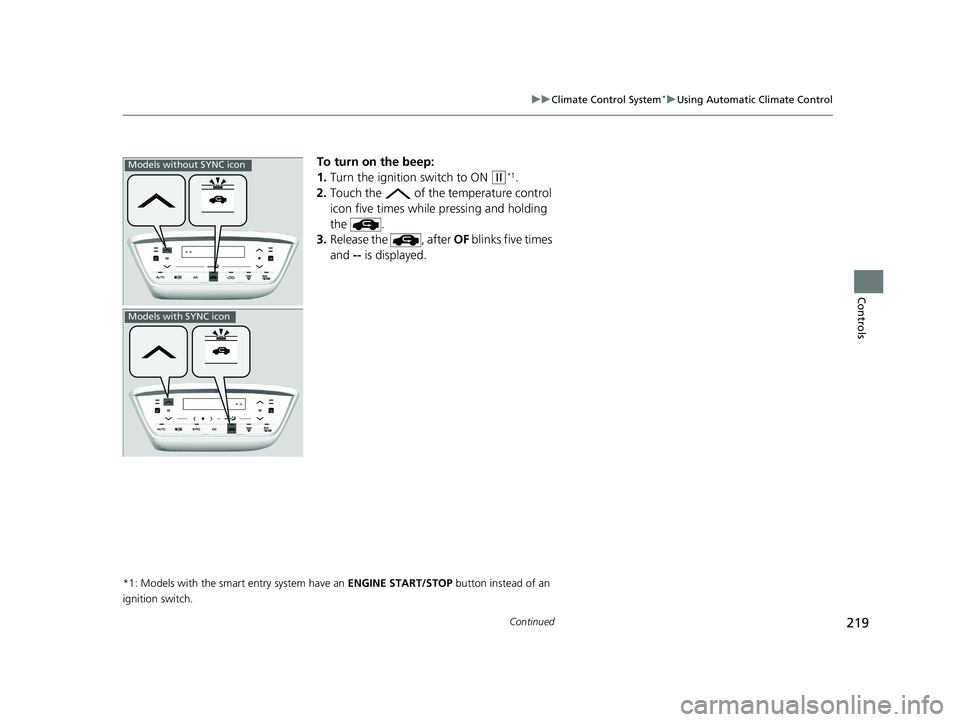
To turn on the beep:
1. Turn the ignition switch to ON
(w*1.
2. Touch the of the temperature control
icon five times while pressing and holding
the .
3. Release the , after OF blinks five times
and -- is displayed.
*1: Models with the smart entry system have an ENGINE START/STOP button instead of an
ignition switch.
Models without SYNC icon
Models with SYNC icon
19 HR-V HDMC HDMG-31T7A6300.book 219 ページ 2018年6月1日 金曜日 午後1時14分
Page 222 of 631
uuClimate Control System*uUsing Automatic Climate Control
220
Controls
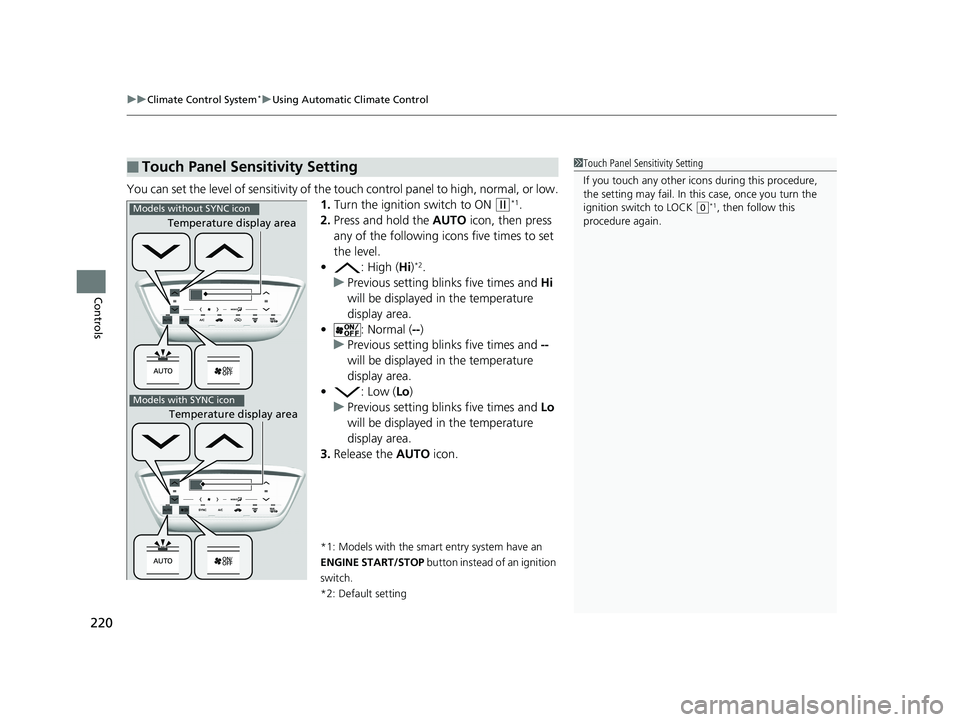
You can set the level of sensitivity of the touch control panel to high, normal, or low.
1.Turn the ignition switch to ON
(w*1.
2. Press and hold the AUTO icon, then press
any of the following icons five times to set
the level.
• : High (Hi)
*2.
u Previous setting blinks five times and Hi
will be displayed in the temperature
display area.
• : Normal ( --)
u Previous setting blinks five times and --
will be displayed in the temperature
display area.
• : Low (Lo)
u Previous setting blinks five times and Lo
will be displayed in the temperature
display area.
3. Release the AUTO icon.
*1: Models with the smart entry system have an
ENGINE START/STOP button instead of an ignition
switch.
*2: Default setting
■Touch Panel Sensitivity Setting1 Touch Panel Sensitivity Setting
If you touch any other icon s during this procedure,
the setting may fail. In this case, once you turn the
ignition switch to LOCK
( 0*1, then follow this
procedure again.
Temperature display area
Temperature display area
Models without SYNC icon
Models with SYNC icon
19 HR-V HDMC HDMG-31T7A6300.book 220 ページ 2018年6月1日 金曜日 午後1時14分
Page 227 of 631
225
uuAudio System uUSB Port(s)
Features
USB Port(s)
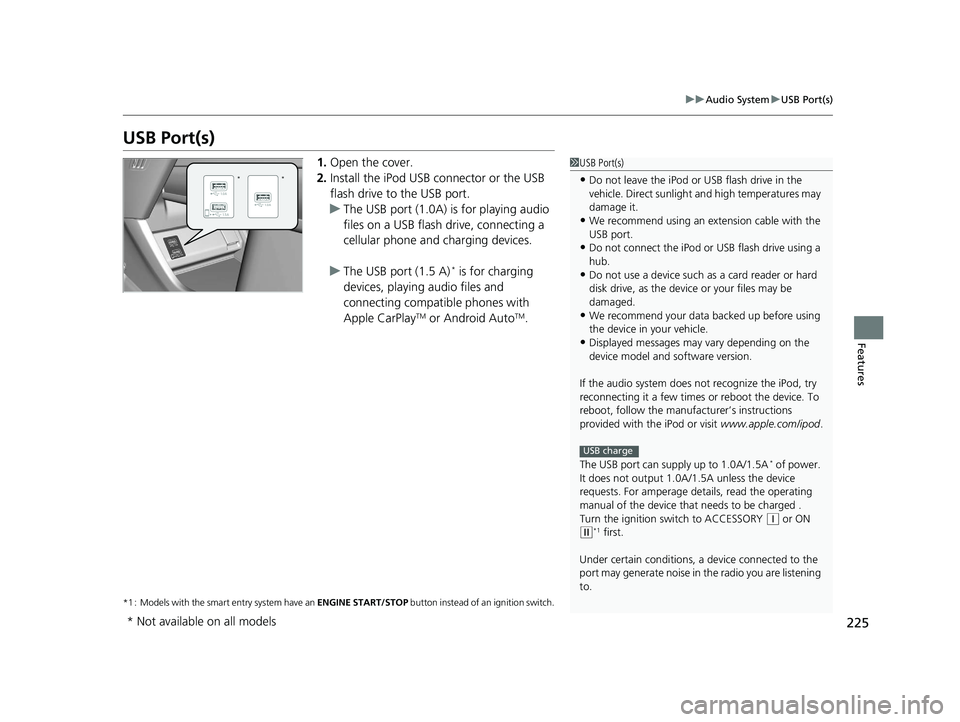
1. Open the cover.
2. Install the iPod USB connector or the USB
flash drive to the USB port.
u The USB port (1.0A) is for playing audio
files on a USB flash drive, connecting a
cellular phone and charging devices.
u The USB port (1.5 A)
* is for charging
devices, playing audio files and
connecting compatib le phones with
Apple CarPlay
TM or Android AutoTM.
*1 : Models with the smart entry system have an ENGINE START/STOP button instead of an ignition switch.
1USB Port(s)
•Do not leave the iPod or USB flash drive in the
vehicle. Direct sunlight and high temperatures may
damage it.
•We recommend using an ex tension cable with the
USB port.
•Do not connect the iPod or USB flash drive using a
hub.
•Do not use a device such as a card reader or hard
disk drive, as the device or your files may be
damaged.
•We recommend your data backed up before using
the device in your vehicle.
•Displayed messages may vary depending on the
device model and software version.
If the audio system does not recognize the iPod, try
reconnecting it a few times or reboot the device. To
reboot, follow the manufac turer’s instructions
provided with the iPod or visit www.apple.com/ipod.
The USB port can supply up to 1.0A/1.5A
* of power.
It does not output 1.0A/1 .5A unless the device
requests. For amperage de tails, read the operating
manual of the device that needs to be charged .
Turn the ignition switch to ACCESSORY
( q or ON (w*1 first.
Under certain condi tions, a device connected to the
port may generate noise in the radio you are listening
to.
USB charge
**
* Not available on all models
19 HR-V HDMC HDMG-31T7A6300.book 225 ページ 2018年6月1日 金曜日 午後1時14分
Page 228 of 631
226
uuAudio System uAudio System Theft Protection
Features
Audio System Theft Protection
The audio system is disabled when it is di sconnected from the power source, such as
when the battery is disconnected or goes dead. In certain conditions, the system
may display a code entry screen. If this occurs, reactivate the audio system.
■Reactivating the audio system
1. Turn the ignition switch to ON
(w*1.
2. Turn on the audio system.
3. Press and hold the audio system power button for more than two seconds.
u The audio system is reac tivated when the audio co ntrol unit establishes a
connection with the vehicle control unit. If the control unit fails to recognize
the audio unit, you must go to a dealer and have the audio unit checked.
*1: Models with the smart entry system have an ENGINE START/STOP button instead of an
ignition switch.
19 HR-V HDMC HDMG-31T7A6300.book 226 ページ 2018年6月1日 金曜日 午後1時14分
Page 232 of 631
230
Features
Audio System Basic Operation
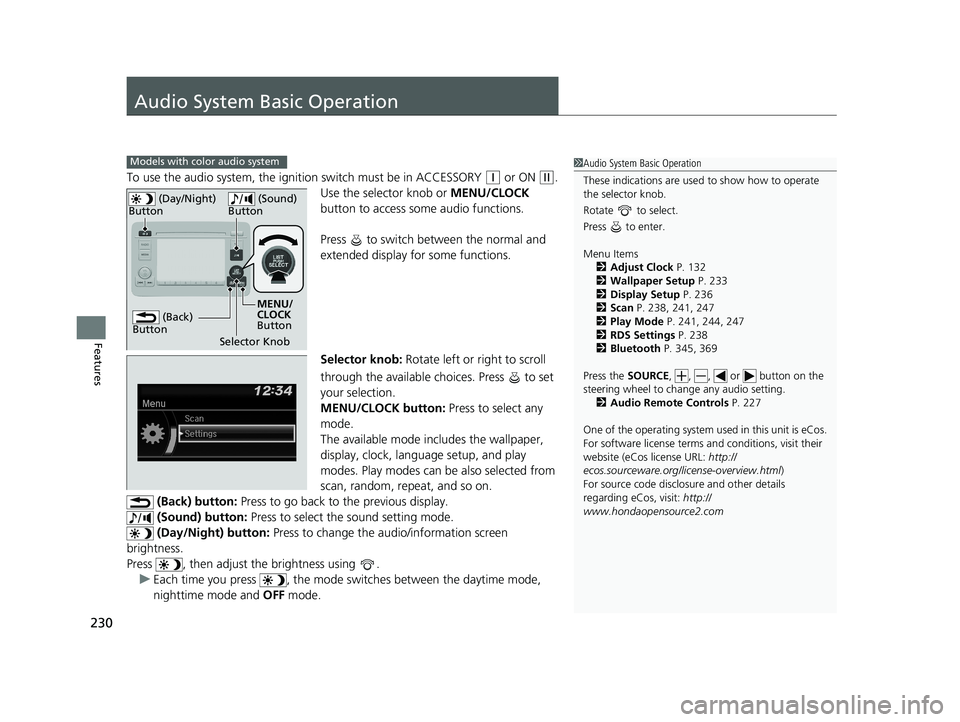
To use the audio system, the ignition switch must be in ACCESSORY (q or ON (w.
Use the selector knob or MENU/CLOCK
button to access some audio functions.
Press to switch between the normal and
extended display fo r some functions.
Selector knob: Rotate left or right to scroll
through the available choices. Press to set
your selection.
MENU/CLOCK button: Press to select any
mode.
The available mode includes the wallpaper,
display, clock, langu age setup, and play
modes. Play modes can be also selected from
scan, random, rep eat, and so on.
(Back) button: Press to go back to the previous display.
(Sound) button: Press to select the sound setting mode.
(Day/Night) button: Press to change the audio/information screen
brightness.
Press , then adjust th e brightness using .
u Each time you press , the mode switches between the daytime mode,
nighttime mode and OFF mode.
Models with color audio system1Audio System Basic Operation
These indications are used to show how to operate
the selector knob.
Rotate to select.
Press to enter.
Menu Items 2 Adjust Clock P. 132
2 Wallpaper Setup P. 233
2 Display Setup P. 236
2 Scan P. 238, 241, 247
2 Play Mode P. 241, 244, 247
2 RDS Settings P. 238
2 Bluetooth P. 345, 369
Press the SOURCE, , , or button on the
steering wheel to cha nge any audio setting.
2 Audio Remote Controls P. 227
One of the operating system us ed in this unit is eCos.
For software license terms and conditions, visit their
website (eCos license URL: http://
ecos.sourceware.org/li cense-overview.html)
For source code disclo sure and other details
regarding eCos, visit: http://
www.hondaopensource2.com
(Back)
Button
Selector Knob MENU/
CLOCK
Button
(Day/Night)
Button
(Sound)
Button
19 HR-V HDMC HDMG-31T7A6300.book 230 ページ 2018年6月1日 金曜日 午後1時14分
Page 253 of 631
251
Features
Audio System Basic Operation
To use the audio system function, the ignition swit ch must be in ACCESSORY (q or
ON
(w*1.
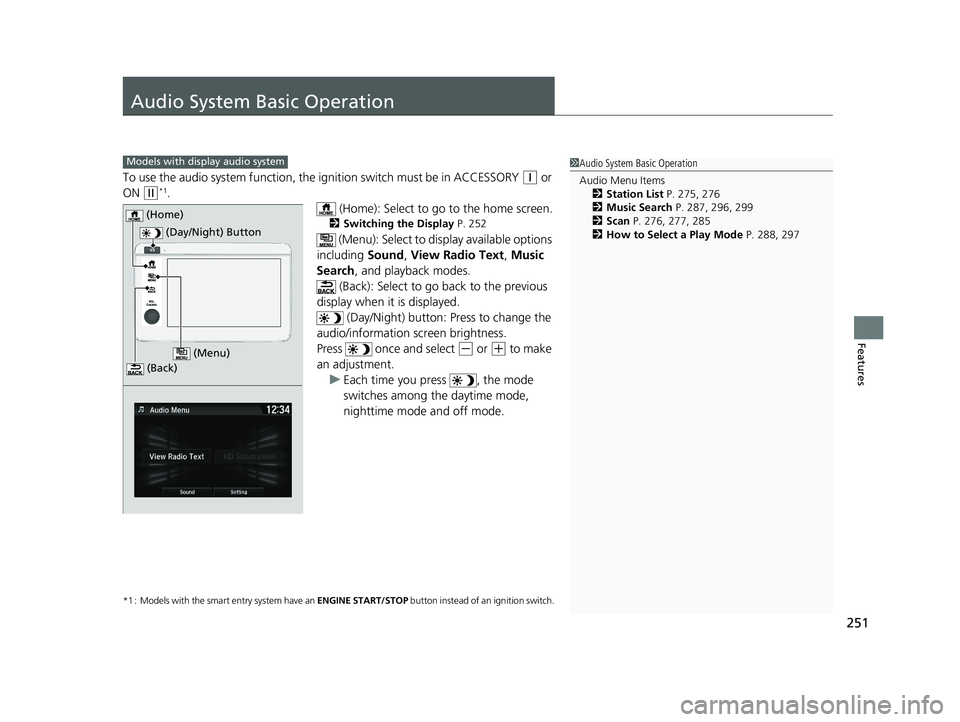
(Home): Select to go to the home screen.
2Switching the Display P. 252
(Menu): Select to disp lay available options
including Sound, View Radio Text , Music
Search , and playback modes.
(Back): Select to go back to the previous
display when it is displayed. (Day/Night) button: Press to change the
audio/information screen brightness.
Press once and select
(- or (+ to make
an adjustment. u Each time you press , the mode
switches among the daytime mode,
nighttime mode and off mode.
*1 : Models with the smart entry system have an ENGINE START/STOP button instead of an ignition switch.
1Audio System Basic Operation
Audio Menu Items
2 Station List P. 275, 276
2 Music Search P. 287, 296, 299
2 Scan P. 276, 277, 285
2 How to Select a Play Mode P. 288, 297Models with display audio system
(Day/Night) Button
(Home)
(Menu)
(Back)
19 HR-V HDMC HDMG-31T7A6300.book 251 ページ 2018年6月1日 金曜日 午後1時14分
Page 343 of 631
341Continued
Features
Customized Features
Use the audio/information screen to customize certain features.
■How to customize
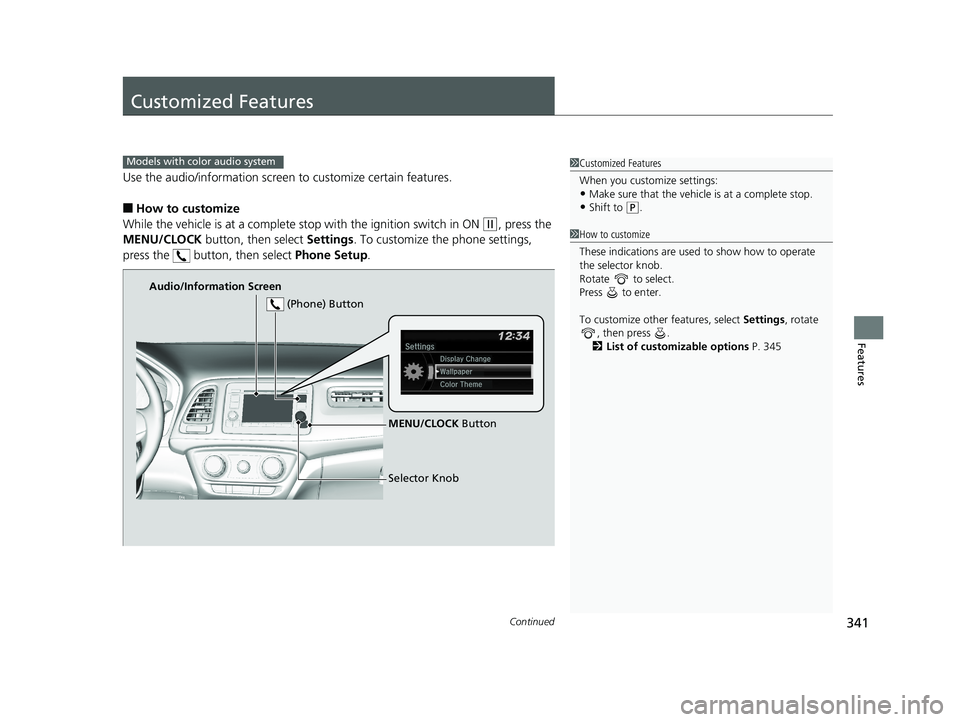
While the vehicle is at a complete st op with the ignition switch in ON
(w, press the
MENU/CLOCK button, then select Settings. To customize the phone settings,
press the button, then select Phone Setup.
1Customized Features
When you customize settings:
•Make sure that the vehicle is at a complete stop.
•Shift to (P.
Models with color audio system
1 How to customize
These indications are used to show how to operate
the selector knob.
Rotate to select.
Press to enter.
To customize other features, select Settings , rotate
, then press .
2 List of customizable options P. 345
Audio/Information Screen
MENU/CLOCK Button
Selector Knob
(Phone) Button
19 HR-V HDMC HDMG-31T7A6300.book 341 ページ 2018年6月1日 金曜日 午後1時14分
Page 350 of 631
348
Features
Customized Features
Use the audio/information screen to customize certain features.
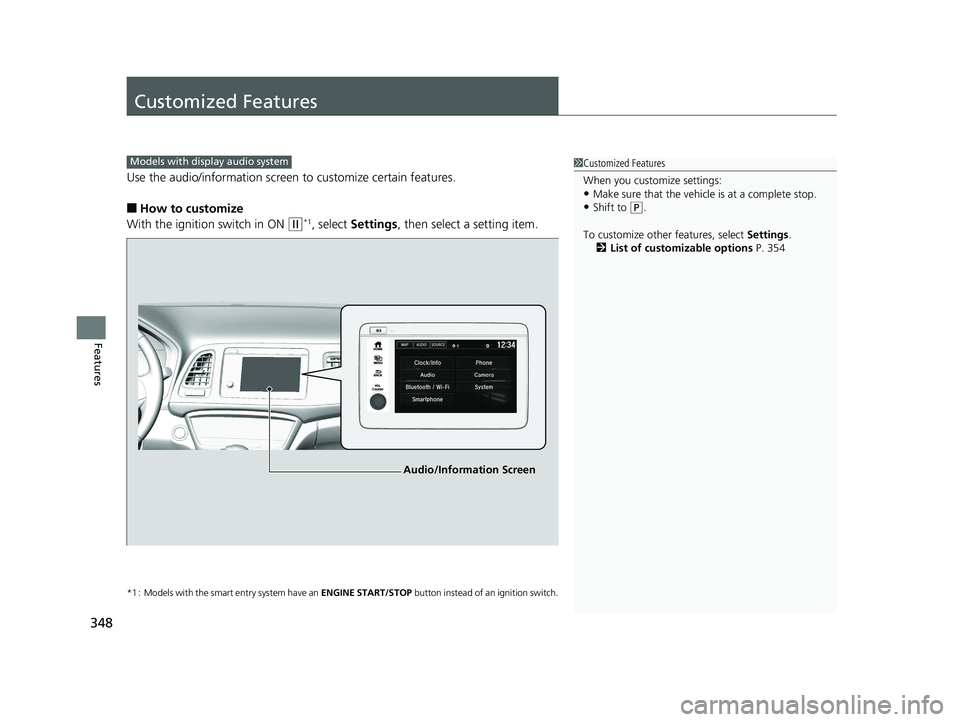
■How to customize
With the ignition switch in ON
(w*1, select Settings , then select a setting item.
*1 : Models with the smart entry system have an ENGINE START/STOP button instead of an ignition switch.
1Customized Features
When you customize settings:
•Make sure that the vehicle is at a complete stop.
•Shift to (P.
To customize other features, select Settings.
2 List of customizable options P. 354
Models with display audio system
Audio/Information Screen
19 HR-V HDMC HDMG-31T7A6300.book 348 ページ 2018年6月1日 金曜日 午後1時14分
Page 362 of 631
360
uuCustomized Features u
Features
*1:Default Setting
*2: Models with the smart entry system have an ENGINE START/STOP button instead of an ignition switch
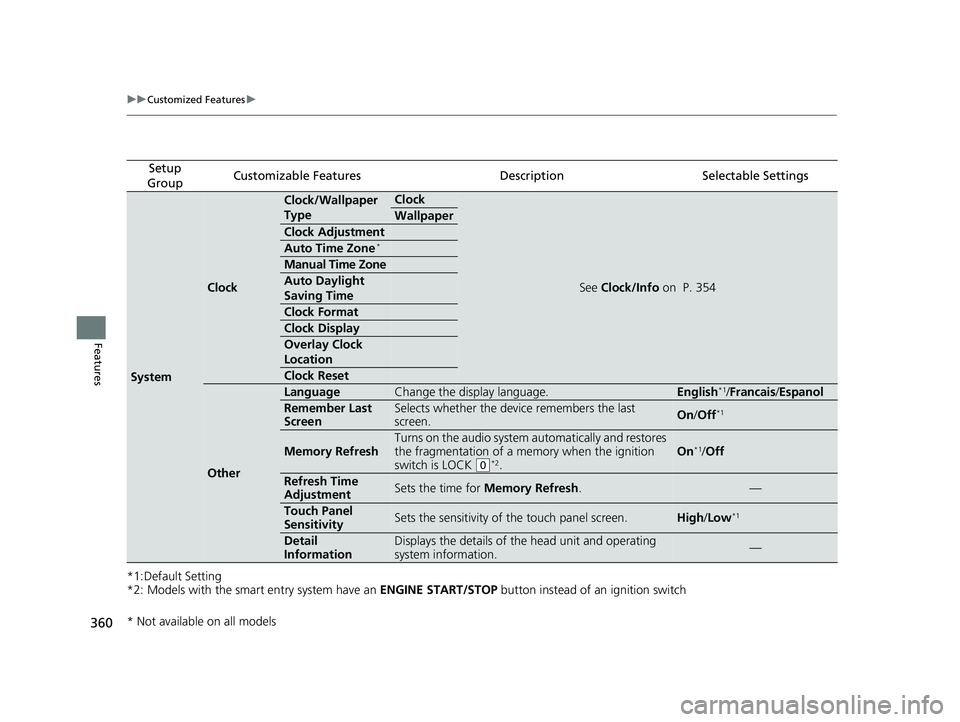
Setup
GroupCustomizable FeaturesDescriptionSelectable Settings
System
Clock
Clock/Wallpaper
TypeClock
See Clock/Info on P. 354
Wallpaper
Clock Adjustment
Auto Time Zone*
Manual Time Zone
Auto Daylight
Saving Time
Clock Format
Clock Display
Overlay Clock
Location
Clock Reset
Other
LanguageChange the display language.English*1/Francais /Espanol
Remember Last
ScreenSelects whether the device remembers the last
screen.On /Off*1
Memory Refresh
Turns on the audio system automatically and restores
the fragmentation of a memory when the ignition
switch is LOCK
(0*2.
On*1/ Off
Refresh Time
AdjustmentSets the time for Memory Refresh .—
Touch Panel
SensitivitySets the sensitivity of the touch panel screen.High/Low*1
Detail
InformationDisplays the details of th e head unit and operating
system information.—
* Not available on all models
19 HR-V HDMC HDMG-31T7A6300.book 360 ページ 2018年6月1日 金曜日 午後1時14分