clock HONDA INSIGHT 2003 1.G User Guide
[x] Cancel search | Manufacturer: HONDA, Model Year: 2003, Model line: INSIGHT, Model: HONDA INSIGHT 2003 1.GPages: 411, PDF Size: 5.22 MB
Page 328 of 411
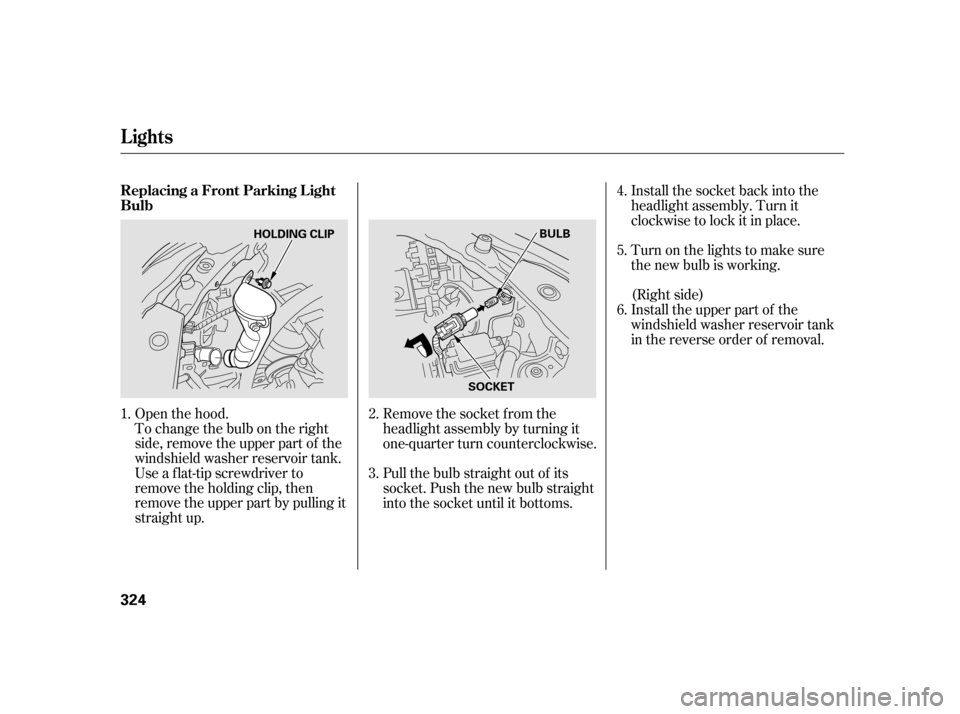
Open the hood.
To change the bulb on the right
side, remove the upper part of the
windshield washer reservoir tank.
Use a f lat-tip screwdriver to
remove the holding clip, then
remove the upper part by pulling it
straight up.Remove the socket from the
headlight assembly by turning it
one-quarter turn counterclockwise.
Pull the bulb straight out of its
socket. Push the new bulb straight
into the socket until it bottoms.Install the socket back into the
headlight assembly. Turn it
clockwise to lock it in place.
Turn on the lights to make sure
the new bulb is working.
Install the upper part of the
windshield washer reservoir tank
in the reverse order of removal. (Right side)
6.
1. 2.
3.4.
5.
Lights
Replacing a Front Parking L ight
Bulb
324
BULB
HOLDING CLIP
SOCKET
Page 329 of 411
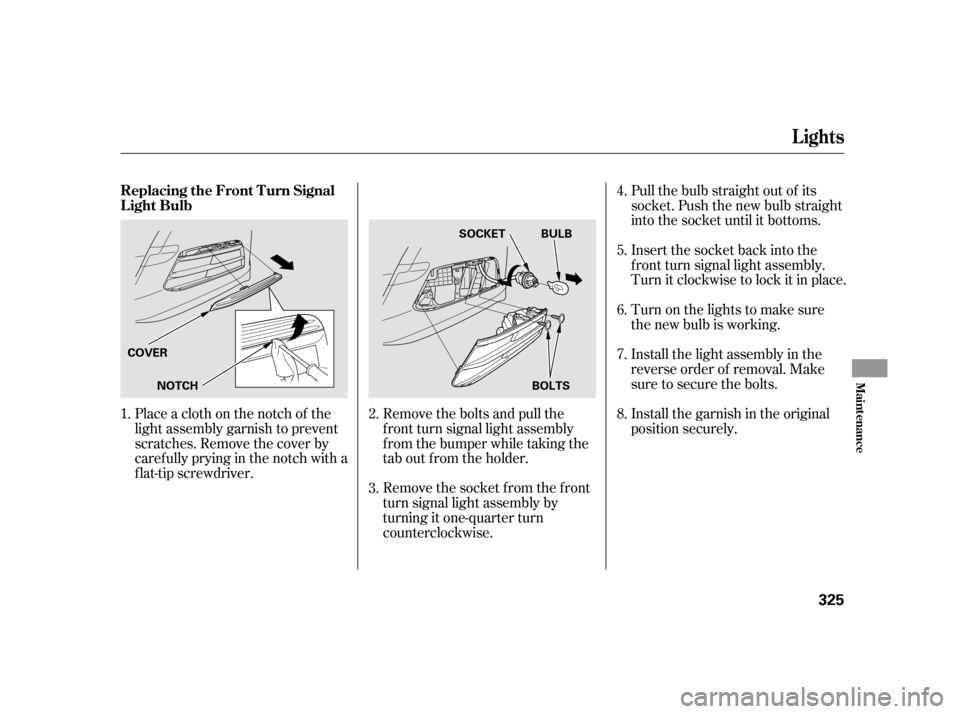
Remove the socket f rom the f ront
turn signal light assembly by
turning it one-quarter turn
counterclockwise.Pull the bulb straight out of its
socket. Push the new bulb straight
into the socket until it bottoms.
Insert the socket back into the
f ront turn signal light assembly.
Turn it clockwise to lock it in place.
Turn on the lights to make sure
the new bulb is working.
Install the garnish in the original
position securely.
Placeaclothonthenotchof the
light assembly garnish to prevent
scratches. Remove the cover by
caref ully prying in the notch with a
f lat-tip screwdriver. Remove the bolts and pull the
f ront turn signal light assembly
from the bumper while taking the
tab out from the holder.Install the light assembly in the
reverse order of removal. Make
sure to secure the bolts.
5.
6.
1. 7.
8.
3. 4.
2.
Lights
Replacing the Front T urn Signal
Light Bulb
Maint enance
325
NOTCH
COVER
BOLTSBULB
SOCKET
Page 330 of 411
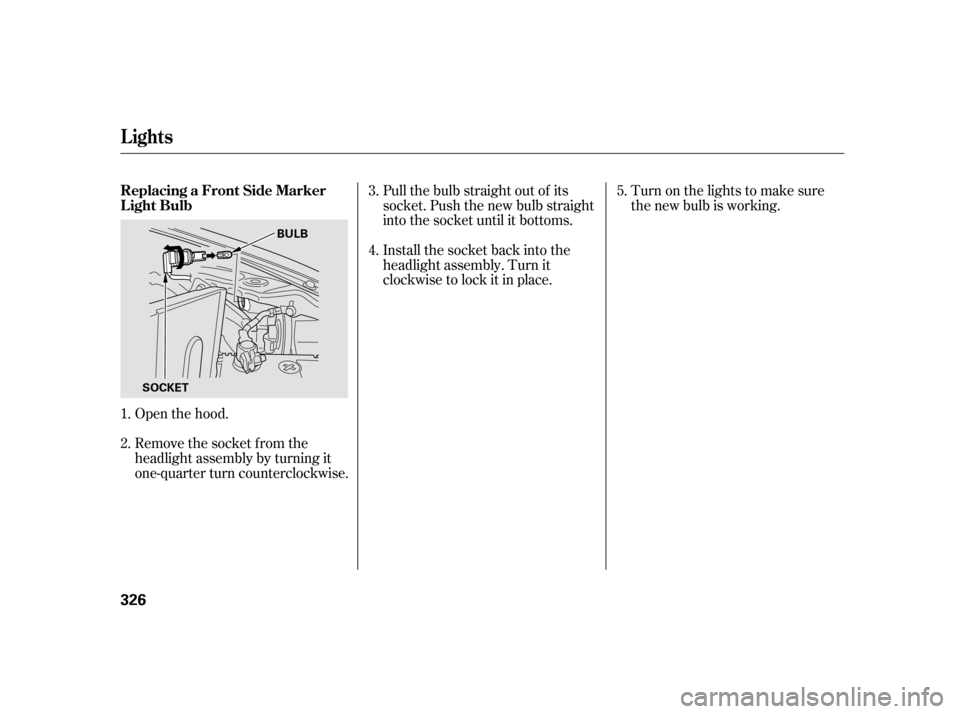
Open the hood.
Remove the socket from the
headlight assembly by turning it
one-quarter turn counterclockwise.Pull the bulb straight out of its
socket. Push the new bulb straight
into the socket until it bottoms.
Install the socket back into the
headlight assembly. Turn it
clockwise to lock it in place.
Turn on the lights to make sure
the new bulb is working.
2. 3.
4.
5.
1.
Lights
Replacing a Front Side Marker
Light Bulb
326
BULB
SOCKET
Page 332 of 411
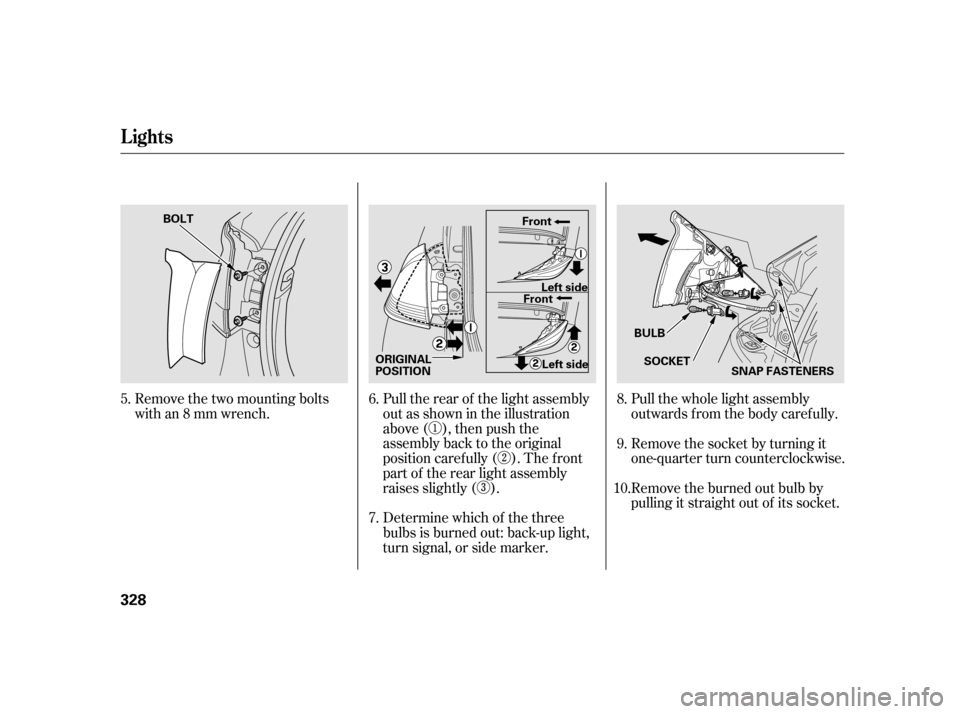
Remove the two mounting bolts
with an 8 mm wrench.Pull the rear of the light assembly
out as shown in the illustration
above ( ), then push the
assembly back to the original
position caref ully ( ). The f ront
part of the rear light assembly
raises slightly ( ).
Determine which of the three
bulbs is burned out: back-up light,
turn signal, or side marker.Pull the whole light assembly
outwards f rom the body caref ully.
Remove the socket by turning it
one-quarter turn counterclockwise.
Remove the burned out bulb by
pulling it straight out of its socket.
6.
7.
5.
8.
9.
10.
Lights
328
BOLT
ORIGINAL
POSITIONFront
Front
Left side BULBSOCKET SNAP FASTENERS
Left side
Page 333 of 411
Install the new bulb in the socket
by pushing it straight in the socket
until it bottoms.
Reinstall the socket into the light
assembly. Turn it clockwise to
lock it in place.
Testthelightstomakesurethe
new bulb is working.
When reinstalling the taillight
assembly, align and pop the snap
f asteners in place. Reinstall and
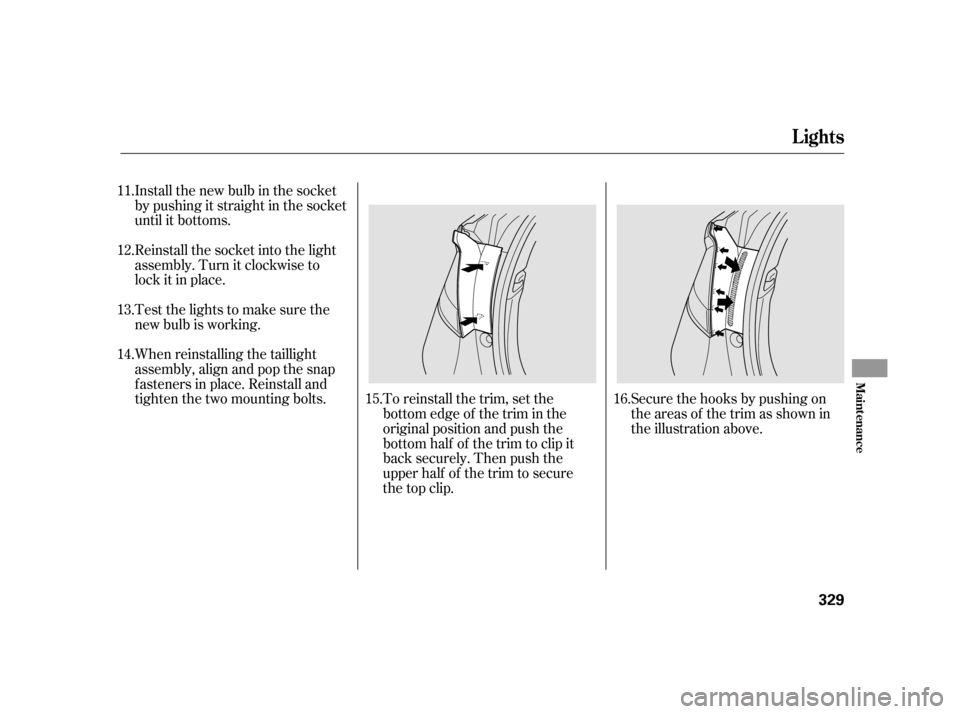
tighten the two mounting bolts. To reinstall the trim, set thebottom edge of the trim in the
original position and push the
bottom half of the trim to clip it
back securely. Then push the
upperhalfofthetrimtosecure
the top clip.Secure the hooks by pushing on
the areas of the trim as shown in
the illustration above.
11.
12.
13.
14.
15.16.
Lights
Maint enance
329
Page 335 of 411
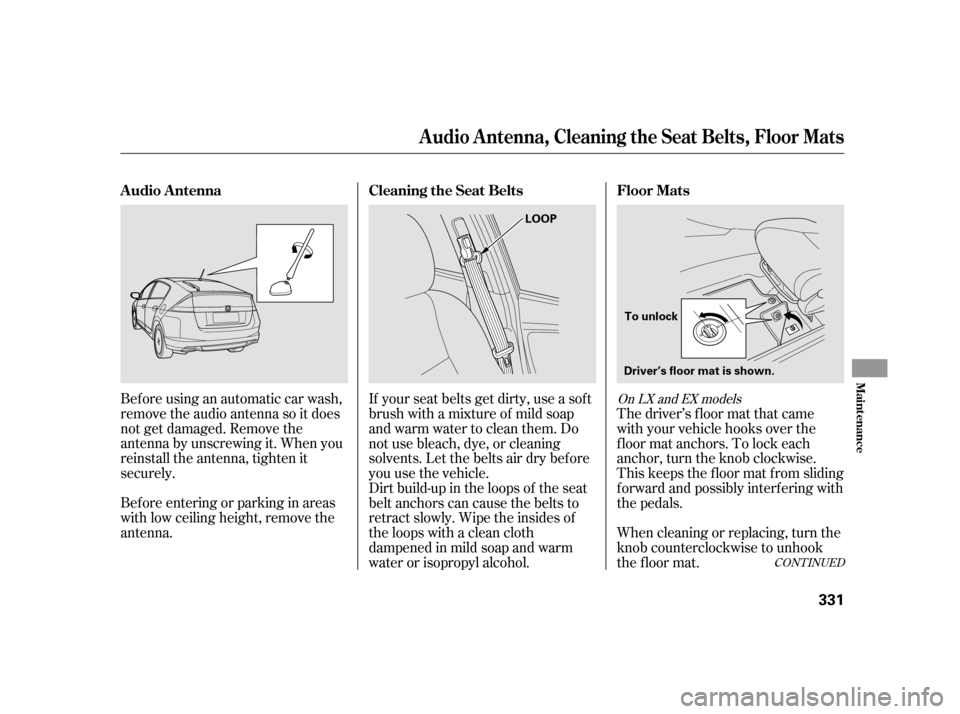
Beforeusinganautomaticcarwash,
remove the audio antenna so it does
not get damaged. Remove the
antenna by unscrewing it. When you
reinstall the antenna, tighten it
securely.
Bef ore entering or parking in areas
with low ceiling height, remove the
antenna.The driver’s f loor mat that came
with your vehicle hooks over the
f loor mat anchors. To lock each
anchor, turn the knob clockwise.
This keeps the f loor mat f rom sliding
f orward and possibly interf ering with
the pedals.
If your seat belts get dirty, use a sof t
brush with a mixture of mild soap
and warm water to clean them. Do
not use bleach, dye, or cleaning
solvents. Let the belts air dry bef ore
you use the vehicle.
Dirt build-up in the loops of the seat
belt anchors can cause the belts to
retract slowly. Wipe the insides of
the loops with a clean cloth
dampened in mild soap and warm
water or isopropyl alcohol.
When cleaning or replacing, turn the
knob counterclockwise to unhook
the floor mat.
CONT INUED
On LX and EX models
Floor Mats
Cleaning the Seat Belts
A udio A ntenna
A udio A ntenna, Cleaning the Seat Belts, Floor Mats
Maint enance
331
LOOP
To unlock
Driver’s floor mat is shown.
Page 354 of 411
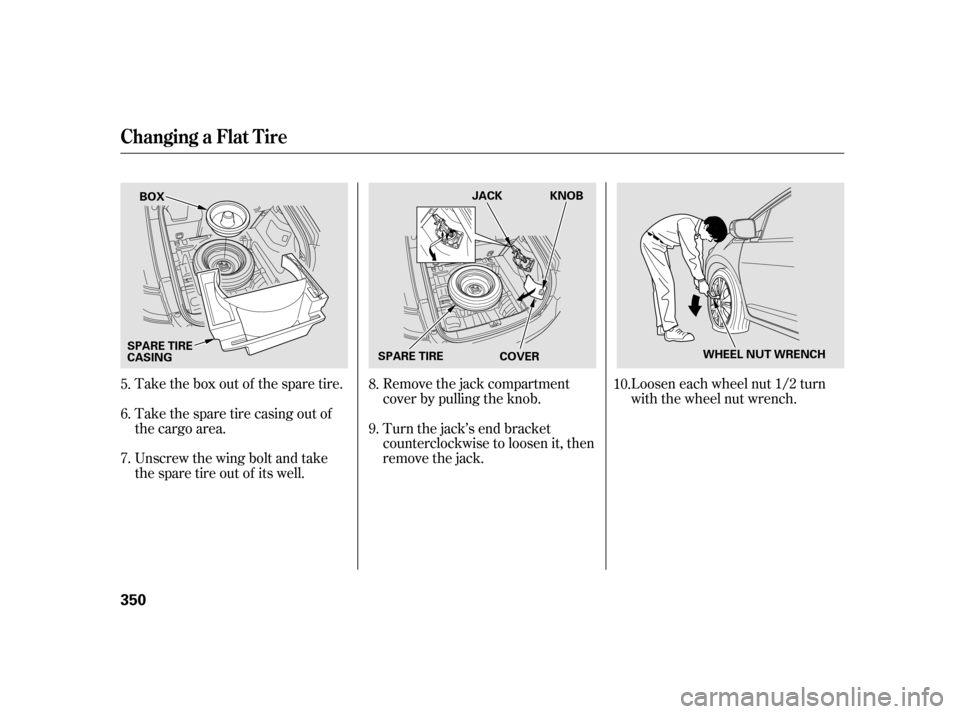
Loosen each wheel nut 1/2 turn
with the wheel nut wrench.
Take the box out of the spare tire.
Take the spare tire casing out of
the cargo area.
Unscrew the wing bolt and take
the spare tire out of its well. Remove the jack compartment
cover by pulling the knob.
Turn the jack’s end bracket
counterclockwise to loosen it, then
remove the jack.
6.
7. 10.
5. 8.
9.
Changing a Flat T ire
350
WHEEL NUT WRENCH
BOX
JACK
KNOB
COVER
SPARE TIRE
CASING
SPARE TIRE
Page 355 of 411
CONT INUED
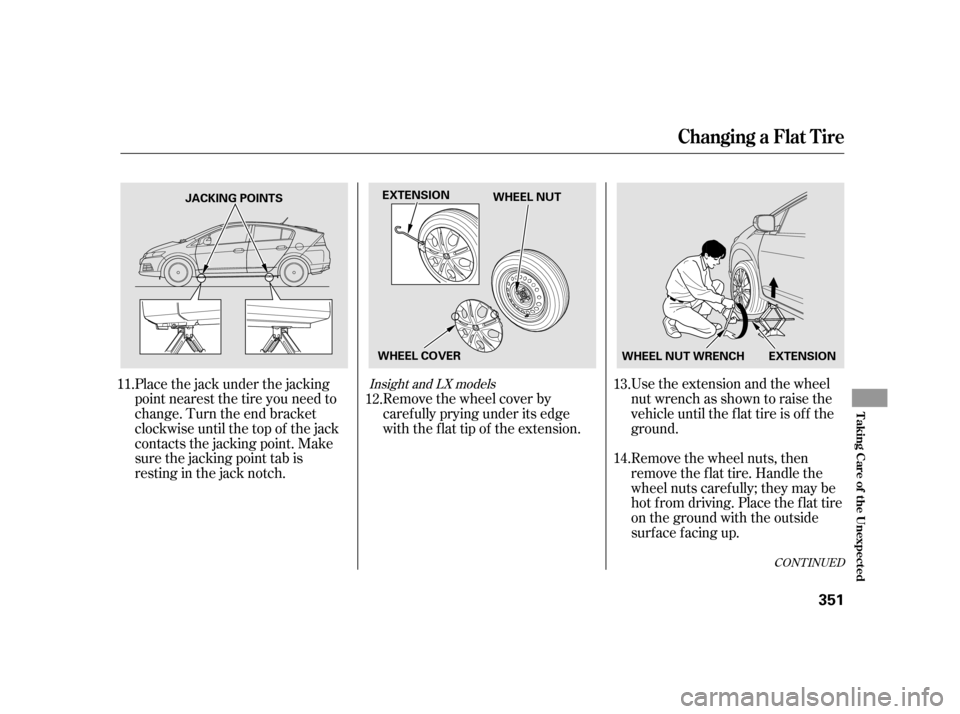
Remove the wheel nuts, then
remove the f lat tire. Handle the
wheel nuts caref ully; they may be
hot f rom driving. Place the f lat tire
on the ground with the outside
surface facing up. Use the extension and the wheel
nut wrench as shown to raise the
vehicle until the f lat tire is of f the
ground.
Place the jack under the jacking
point nearest the tire you need to
change. Turn the end bracket
clockwise until the top of the jack
contacts the jacking point. Make
sure the jacking point tab is
restinginthejacknotch. Remove the wheel cover by
caref ully prying under its edge
with the flat tip of the extension.
11.
13.
14.
12.
Insight and LX models
Changing a Flat T ire
T aking Care of t he Unexpect ed
351
WHEEL NUT WRENCH EXTENSION
JACKING POINTS
EXTENSION
WHEEL NUT
WHEEL COVER
Page 358 of 411
Your vehicle’s original tire has a
tire pressure monitoring system
sensor. To replace a tire, ref er to(see
page ).
Store the center cap in the cargo
area. Make sure it does not get
scratched or damaged.
Store the tools in the spare tire
casing and the jack in its holder.
Turn the jack’s end bracket
clockwise to lock it in place, and
reinstall the cover.
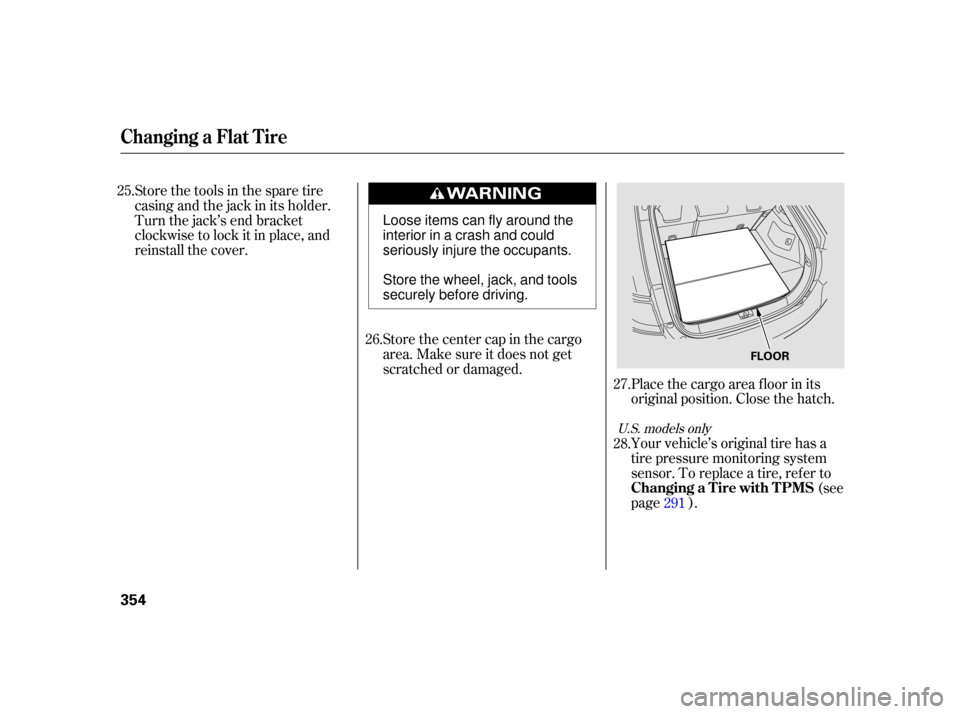
Place the cargo area f loor in its
original position. Close the hatch.
25.
26.27.
28.
291
U.S. models only
Changing a Flat T ire
Changing a T ire with T PMS
354
FLOOR
Loose items can fly around the
interior in a crash and could
seriously injure the occupants.
Store the wheel, jack, and tools
securely before driving.
Page 366 of 411
Using gloves or a large heavy
cloth, turn the radiator cap
counterclockwise, without pushing
down, to the f irst stop. Af ter the
pressure releases, push down on
the cap, and turn it until it comes
off.If the temperature stays normal,
check the coolant level in the
radiator reserve tank. If it has
gone down, add coolant to the
MAX mark. Put the cap back on
tightly.
Start the engine, and set the
temperature to maximum heat
(climate control to AUTO at
‘‘ ’’). Add coolant to the
radiator up to the base of the f iller
neck. If you do not have the
proper coolant mixture available,
you can add plain water.
Remember to have the cooling
system drained and ref illed with
the proper mixture as soon as you
can.
Put the radiator cap back on
tightly. Run the engine, and check
the high temperature indicator. If
it begins to blink or comes on
again, the engine needs repair
(see
on page
).
8. 9.
10. 11.
374
If theEngineOverheats
Emergency T owing
362
Removing the radiator cap
while the engine is hot can
cause the coolant to spray out,
seriously scalding you.
Always let the engine and
radiator cool down before
removing the radiator cap.