check engine light HONDA INSIGHT 2021 Owner's Manual (in English)
[x] Cancel search | Manufacturer: HONDA, Model Year: 2021, Model line: INSIGHT, Model: HONDA INSIGHT 2021Pages: 687, PDF Size: 37.14 MB
Page 37 of 687
35
Quick Reference Guide
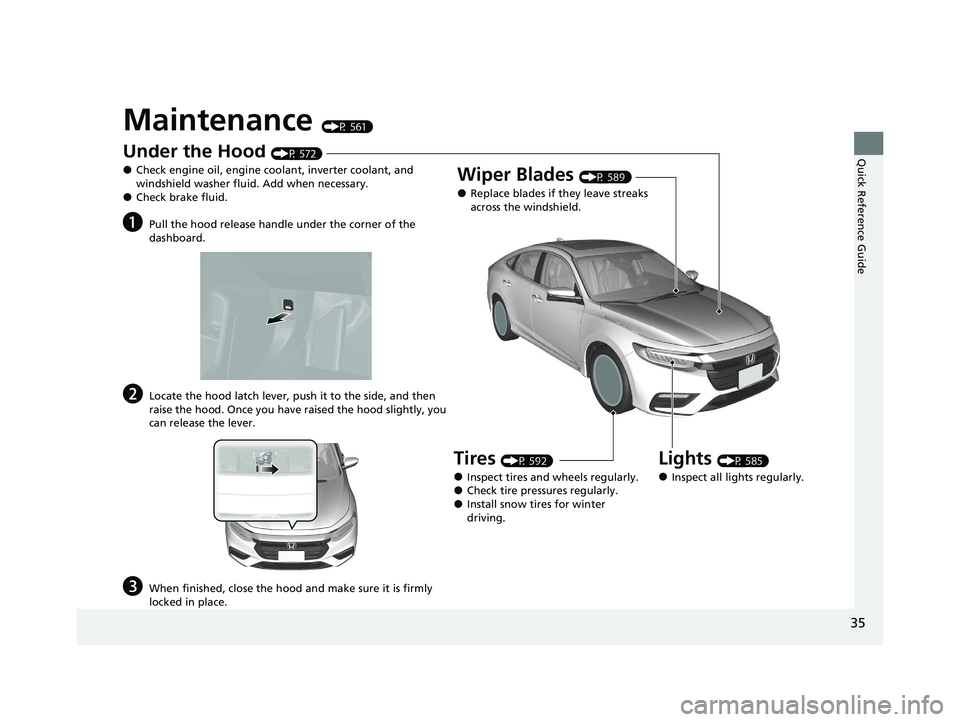
Maintenance (P 561)
Under the Hood (P 572)
●Check engine oil, engine coolant, inverter coolant, and
windshield washer fluid. Add when necessary.
●Check brake fluid.
aPull the hood release handle under the corner of the
dashboard.
bLocate the hood latch lever, push it to the side, and then
raise the hood. Once you have raised the hood slightly, you
can release the lever.
cWhen finished, close the hood and make sure it is firmly
locked in place.
Lights (P 585)
●Inspect all lights regularly.
Wiper Blades (P 589)
●Replace blades if they leave streaks
across the windshield.
Tires (P 592)
●Inspect tires and wheels regularly.●Check tire pressures regularly.●Install snow tires for winter
driving.
21 INSIGHT-31TXM6200.book 35 ページ 2020年2月5日 水曜日 午前10時0分
Page 450 of 687
448
Driving
Before Driving
Driving Preparation
Check the following items before you start driving.
• Make sure there are no obstructions on th e windows, door mirrors, exterior
lights, or other parts of the vehicle.
u Remove any frost, snow, or ice.
u Remove any snow on the roof, as this can slip down and obstruct your field of
vision while driving. If frozen solid , remove ice once it has softened.
u When removing ice from around the wheel s, be sure not to damage the wheel
or wheel components.
• Make sure the hood is securely closed.
u If the hood opens while driving, your front view will be blocked.
• Make sure the tires are in good condition.
u Check air pressures, and check for damage and excessive wear.
2Checking and Maintaining Tires P. 592
•Make sure there are no people or ob jects behind or around the vehicle.
u There are blind spots from the inside.
■Exterior Checks1Exterior Checks
NOTICE
When doors are frozen s hut, use warm water around
the door edges to melt any ice. Do not try to force
them open, as this can damage the rubber trim
around the doors. When done, wipe dry to avoid
further freezing.
Do not pour warm water into the key cylinder.
You will be unable to insert the key if the water
freezes in the hole.
Heat from the engine and exhaust can ignite
flammable material s left under the hood, causing a
fire. If you’ve parked y our vehicle for an extended
period, inspect and remove any debris that may have
collected, such as dried grass and leaves that have
fallen or have been carried in for use as a nest by a
small animal. Also check under the hood for leftover
flammable materials after you or someone else has
performed maintenance on your vehicle.
21 INSIGHT-31TXM6200.book 448 ページ 2020年2月5日 水曜日 午前10時0分
Page 456 of 687
454
Driving
When Driving
Turning on the Power
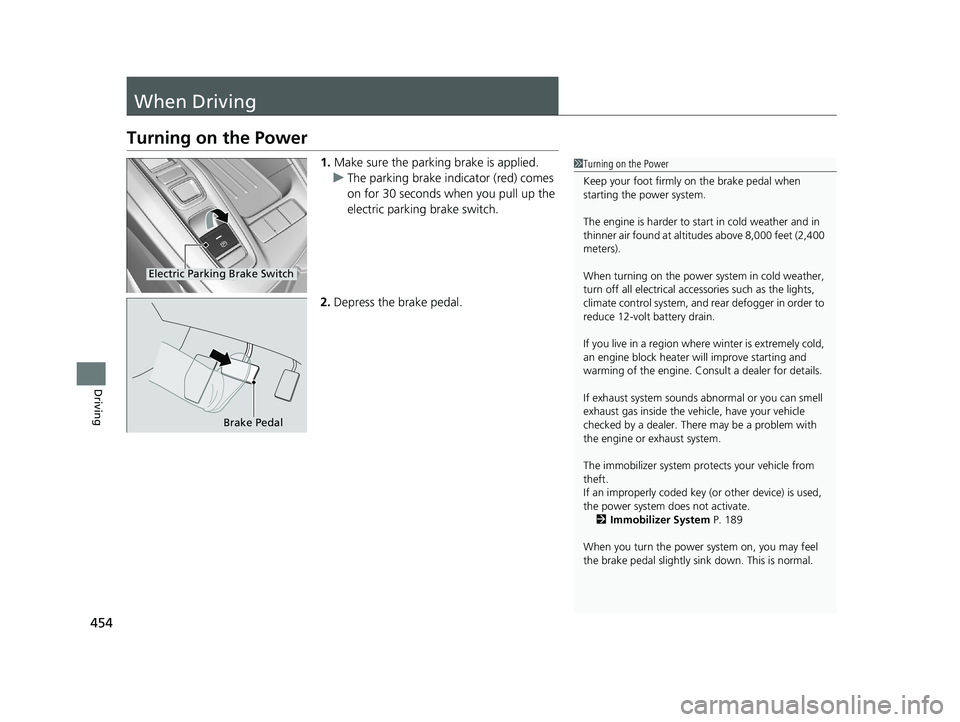
1.Make sure the parking brake is applied.
u The parking brake indicator (red) comes
on for 30 seconds when you pull up the
electric parking brake switch.
2. Depress the brake pedal.1Turning on the Power
Keep your foot firmly on the brake pedal when
starting the power system.
The engine is harder to st art in cold weather and in
thinner air found at altit udes above 8,000 feet (2,400
meters).
When turning on the power system in cold weather,
turn off all electrical accessories such as the lights,
climate control system, and rear defogger in order to
reduce 12-volt battery drain.
If you live in a region where winter is extremely cold,
an engine block heater will improve starting and
warming of the engine. Cons ult a dealer for details.
If exhaust system sounds abnormal or you can smell
exhaust gas inside the vehi cle, have your vehicle
checked by a dealer. There may be a problem with
the engine or exhaust system.
The immobilizer system pr otects your vehicle from
theft.
If an improperly c oded key (or other device) is used,
the power system does not activate. 2 Immobilizer System P. 189
When you turn the power system on, you may feel
the brake pedal slightly sink down. This is normal.
Electric Parking Brake Switch
Brake Pedal
21 INSIGHT-31TXM6200.book 454 ページ 2020年2月5日 水曜日 午前10時0分
Page 458 of 687
uuWhen Driving uTurning on the Power
456
Driving
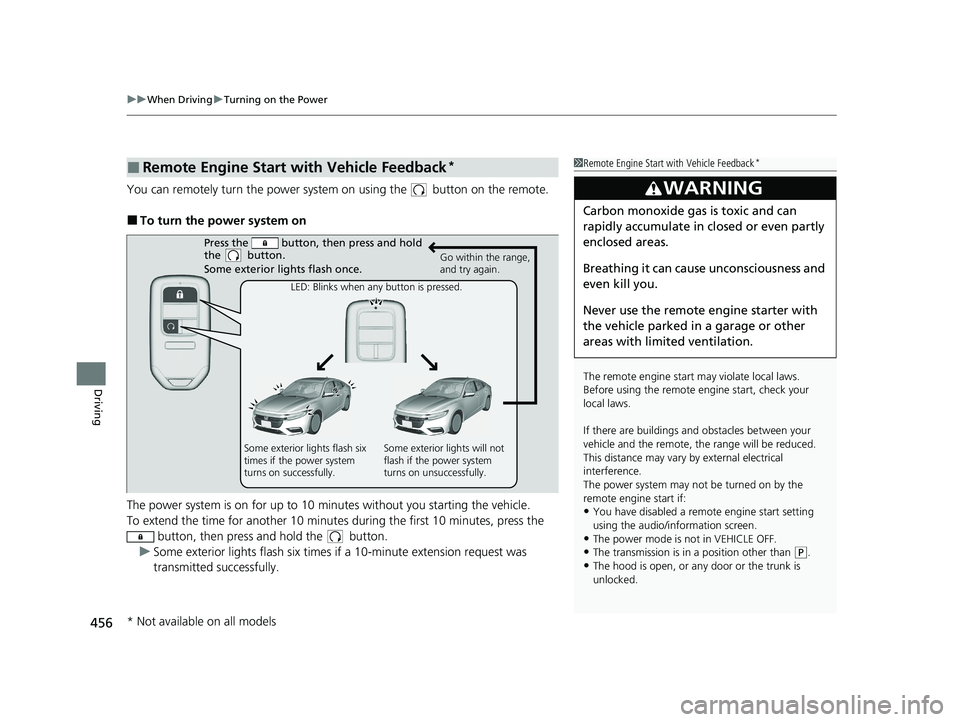
You can remotely turn the power system on using the button on the remote.
■To turn the power system on
The power system is on for up to 10 minutes without you starting the vehicle.
To extend the time for another 10 minute s during the first 10 minutes, press the
button, then press and hold the button.
u Some exterior lights flash six times if a 10-minute extension request was
transmitted successfully.
■Remote Engine Start with Vehicle Feedback*1Remote Engine Start with Vehicle Feedback*
The remote engine start may violate local laws.
Before using the remote e ngine start, check your
local laws.
If there are buildings an d obstacles between your
vehicle and the remote, th e range will be reduced.
This distance may vary by external electrical
interference.
The power system may not be turned on by the
remote engine start if:
•You have disabled a remo te engine start setting
using the audio/information screen.
•The power mode is not in VEHICLE OFF.
•The transmission is in a position other than ( P.
•The hood is open, or any door or the trunk is
unlocked.
3WARNING
Carbon monoxide ga s is toxic and can
rapidly accumulate in closed or even partly
enclosed areas.
Breathing it can cause unconsciousness and
even kill you.
Never use the remote engine starter with
the vehicle parked in a garage or other
areas with limited ventilation.
Press the button, th en press and hold
the button.
Some exterior lights flash once.
Go within the range,
and try again.
LED: Blinks when any button is pressed.
Some exterior lights flash six
times if the power system
turns on successfully. Some exterior lights will not
flash if the power system
turns on unsuccessfully.
* Not available on all models
21 INSIGHT-31TXM6200.book 456 ページ 2020年2月5日 水曜日 午前10時0分
Page 563 of 687
561
Maintenance
This chapter discusses basic maintenance.
Before Performing MaintenanceInspection and Maintenance ............ 562
Safety When Performing Maintenance ...563Parts and Fluids Used in Maintenance Service ........................................... 564
Maintenance Minder
TM..................... 565
Maintenance Under the Hood Maintenance Items Under the Hood .. 572
Opening the Hood ........................... 573
Recommended Engine Oil ................ 574
Oil Check ......................................... 575
Adding Engine Oil ............................ 576
Changing the Engine Oil and Oil Filter ..... 577
Cooling System ................................ 579
Inverter Coolant ............................... 581
Transmission Fluid ............................ 582
Brake Fluid ....................................... 583
Refilling Window Washer Fluid......... 584
Replacing Light Bulbs ....................... 585
Checking and Maintaining Wiper
Blades .......................................... 589
Checking and Maintaining Tires
Checking Tires ................................. 592
Tire and Loading Information Label .. 593
Tire Labeling .................................... 593
DOT Tire Quality Grading (U.S. Vehicles) .. 595
Wear Indicators ............................... 597
Tire Service Life ................................ 597
Tire and Wheel Replacement ........... 598
Tire Rotation .................................... 599
Winter Tires ..................................... 600
12-Volt Battery ................................. 601
Remote Transmitter Care Replacing the Button Battery ........... 603
Climate Control System Maintenance.. 604Cleaning
Interior Care .................................... 605
Exterior Care.................................... 607
Accessories and Modifications ........ 611
21 INSIGHT-31TXM6200.book 561 ページ 2020年2月5日 水曜日 午前10時0分
Page 580 of 687
uuMaintenance Under the Hood uChanging the Engine Oil and Oil Filter
578
Maintenance
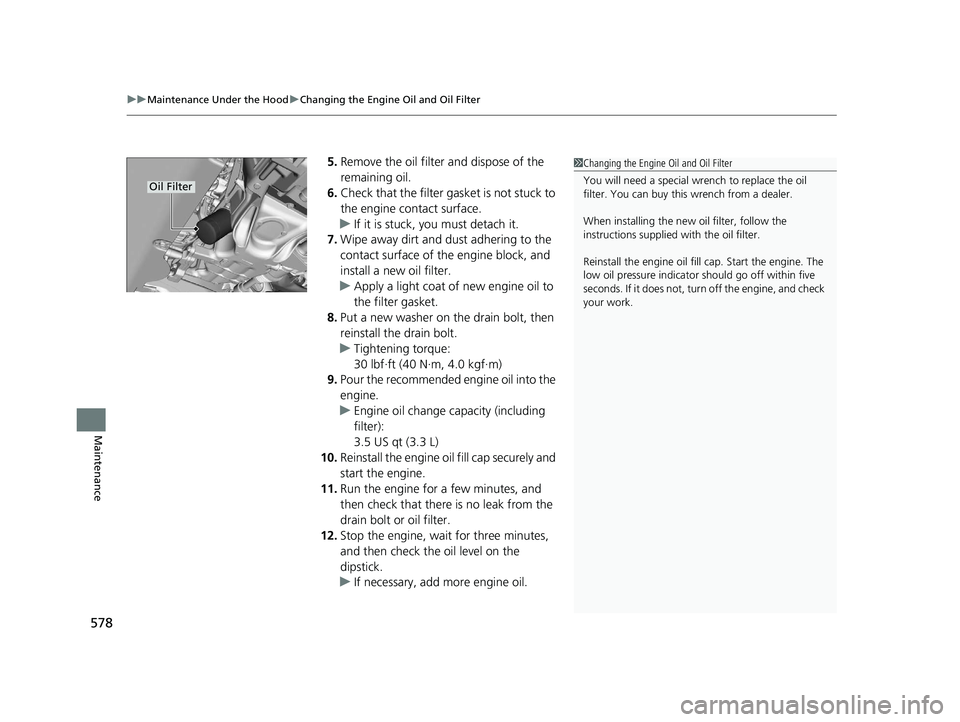
5. Remove the oil filter and dispose of the
remaining oil.
6. Check that the filter ga sket is not stuck to
the engine contact surface.
u If it is stuck, you must detach it.
7. Wipe away dirt and dust adhering to the
contact surface of the engine block, and
install a new oil filter.
u Apply a light coat of new engine oil to
the filter gasket.
8. Put a new washer on the drain bolt, then
reinstall the drain bolt.
u Tightening torque:
30 lbf∙ft (40 N∙m, 4.0 kgf∙m)
9. Pour the recommended engine oil into the
engine.
u Engine oil change capacity (including
filter):
3.5 US qt (3.3 L)
10. Reinstall the engine oi l fill cap securely and
start the engine.
11. Run the engine for a few minutes, and
then check that ther e is no leak from the
drain bolt or oil filter.
12. Stop the engine, wait for three minutes,
and then check the oil level on the
dipstick.
u If necessary, add more engine oil.1Changing the Engine Oil and Oil Filter
You will need a special wrench to replace the oil
filter. You can buy this wrench from a dealer.
When installing the new oil filter, follow the
instructions supplied with the oil filter.
Reinstall the engine oil fill cap. Start the engine. The
low oil pressure indicator should go off within five
seconds. If it does not, turn off the engine, and check
your work.
Oil Filter
21 INSIGHT-31TXM6200.book 578 ページ 2020年2月5日 水曜日 午前10時0分
Page 641 of 687
Continued639
uuJump Starting u
Handling the Unexpected
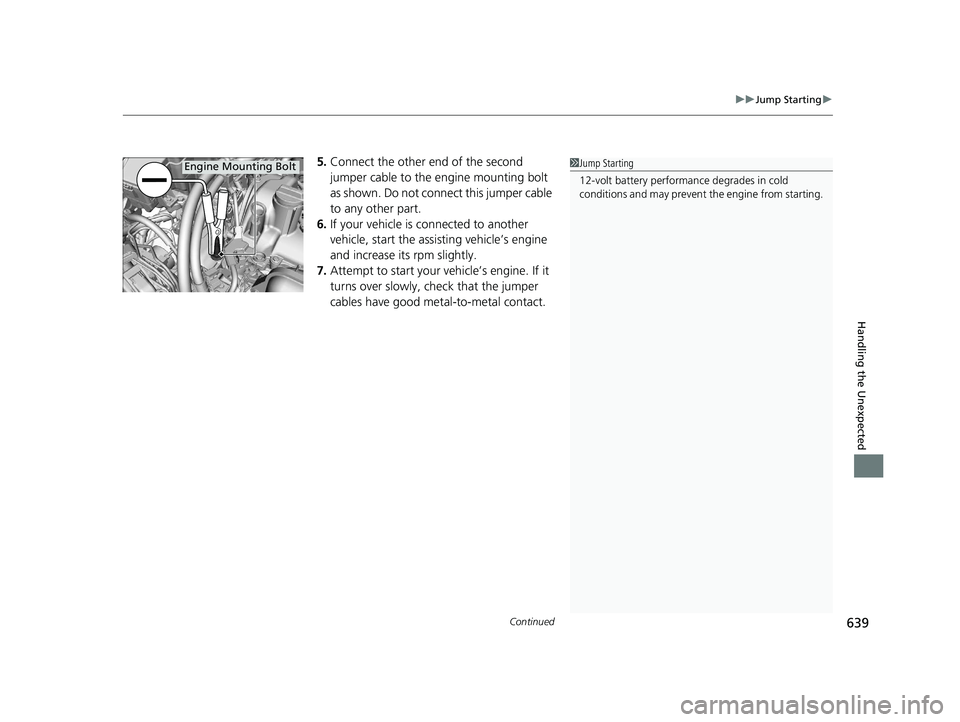
5.Connect the other end of the second
jumper cable to the engine mounting bolt
as shown. Do not connect this jumper cable
to any other part.
6. If your vehicle is connected to another
vehicle, start the assisting vehicle’s engine
and increase its rpm slightly.
7. Attempt to start your ve hicle’s engine. If it
turns over slowly, check that the jumper
cables have good metal-to-metal contact.1 Jump Starting
12-volt battery performa nce degrades in cold
conditions and may prevent the engine from starting.Engine Mounting Bolt
21 INSIGHT-31TXM6200.book 639 ページ 2020年2月5日 水曜日 午前10時0分
Page 645 of 687
643
Handling the Unexpected
Indicator, Coming On/Blinking
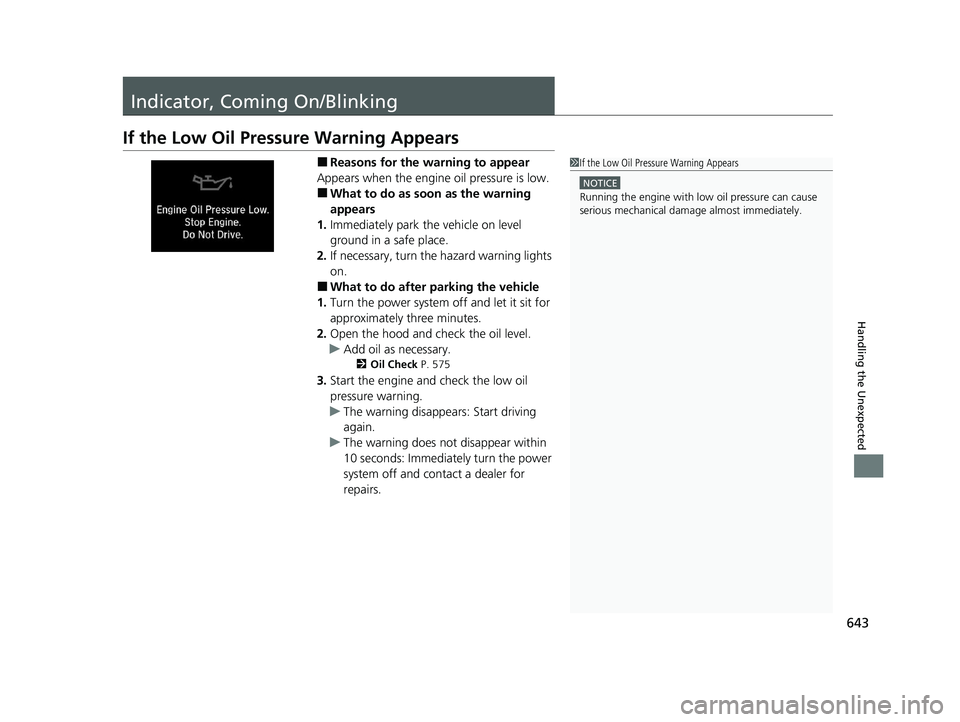
If the Low Oil Pressure Warning Appears
■Reasons for the warning to appear
Appears when the engine oil pressure is low.
■What to do as soon as the warning
appears
1. Immediately park the vehicle on level
ground in a safe place.
2. If necessary, turn the hazard warning lights
on.
■What to do after parking the vehicle
1. Turn the power system off and let it sit for
approximately three minutes.
2. Open the hood and ch eck the oil level.
u Add oil as necessary.
2 Oil Check P. 575
3.Start the engine and check the low oil
pressure warning.
u The warning disappears: Start driving
again.
u The warning does not disappear within
10 seconds: Immediately turn the power
system off and contact a dealer for
repairs.
1If the Low Oil Pressure Warning Appears
NOTICE
Running the engine with low oil pressure can cause
serious mechanical damage almost immediately.
21 INSIGHT-31TXM6200.book 643 ページ 2020年2月5日 水曜日 午前10時0分
Page 658 of 687
656
uuFuses uInspecting and Changing Fuses
Handling the Unexpected
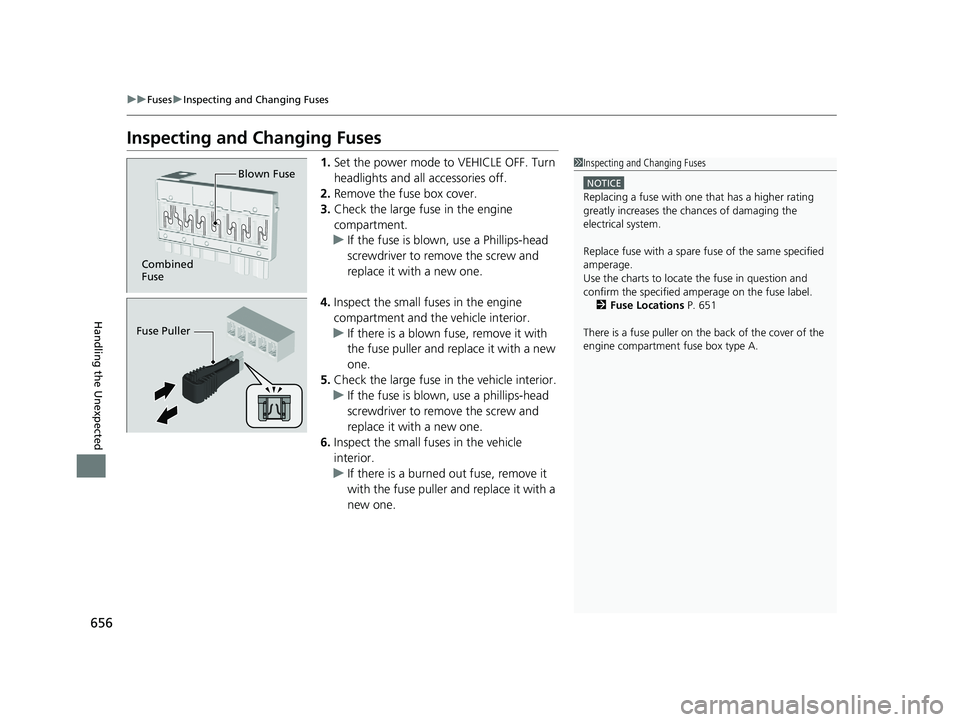
Inspecting and Changing Fuses
1. Set the power mode to VEHICLE OFF. Turn
headlights and all accessories off.
2. Remove the fuse box cover.
3. Check the large fuse in the engine
compartment.
u If the fuse is blown, use a Phillips-head
screwdriver to remo ve the screw and
replace it with a new one.
4. Inspect the small fuses in the engine
compartment and the vehicle interior.
u If there is a blown fuse, remove it with
the fuse puller and replace it with a new
one.
5. Check the large fuse in the vehicle interior.
u If the fuse is blown, use a phillips-head
screwdriver to remo ve the screw and
replace it with a new one.
6. Inspect the small fuses in the vehicle
interior.
u If there is a burned out fuse, remove it
with the fuse puller and replace it with a
new one.1Inspecting and Changing Fuses
NOTICE
Replacing a fuse with on e that has a higher rating
greatly increases the chances of damaging the
electrical system.
Replace fuse with a spare fuse of the same specified
amperage.
Use the charts to locate the fuse in question and
confirm the specified amperage on the fuse label. 2 Fuse Locations P. 651
There is a fuse puller on the back of the cover of the
engine compartment fuse box type A.
Combined
Fuse Blown Fuse
Fuse Puller
21 INSIGHT-31TXM6200.book 656 ページ 2020年2月5日 水曜日 午前10時0分
Page 669 of 687
667
Information
Emissions Testing
Testing of Readiness Codes
Your vehicle has readiness code as part of the onboard self diagnostic system.
Some states use these codes for testing to verify whether your vehicle’s emissions
components are working properly.
The codes may not be read properly if te sting is performed just after the 12-volt
battery has gone dead or been disconnected.
To check if they are set, set the power mo de to ON, without starting the engine. The
malfunction indicator lamp will come on for several seconds. If it then goes off, the
readiness codes are set. If it blinks fi ve times, the readiness codes are not set.
If you are required to have your vehicle te sted before the readiness codes are ready,
prepare the vehicle for retest ing by doing the following:
1. Fill the gas tank to approximately 3/4 full.
2. Park the vehicle and leave the power system off for six hours or more.
3. Make sure the ambient temperature is between 40°F and 95°F (4°C and 35°C).
4. Turn the power system on.
5. Select a nearby, lightly traveled major hi ghway where you can maintain a speed
of 50 to 60 mph (80 to 97 km/h) for at least 20 minutes. Drive on the highway in
(D. Do not use cruise control. When traffi c allows, drive for 90 seconds without
moving the accelerator pedal. (V ehicle speed may vary slightly; this is okay.) If you
cannot do this for a continuous 90 seconds because of traffic conditions, drive for
at least 30 seconds, then repeat it two more times (for a total of 90 seconds).
6. Drive in city/suburban traffic for at leas t 10 minutes. When traffic conditions
allow, let the vehicle coast for several se conds without using the accelerator pedal
or the brake pedal.
7. Park the vehicle and leave the power system off for six hours.
1Testing of Readiness Codes
The readiness codes are erased when the 12-volt
battery is disconnected, and set again only after
several days of driving unde r a variety of conditions.
If a testing facility determines that the readiness
codes are not set, you may be requested to return at
a later date to complete the test.
If the testing facility determines the readiness codes
are still not set, see a dealer.
21 INSIGHT-31TXM6200.book 667 ページ 2020年2月5日 水曜日 午前10時0分