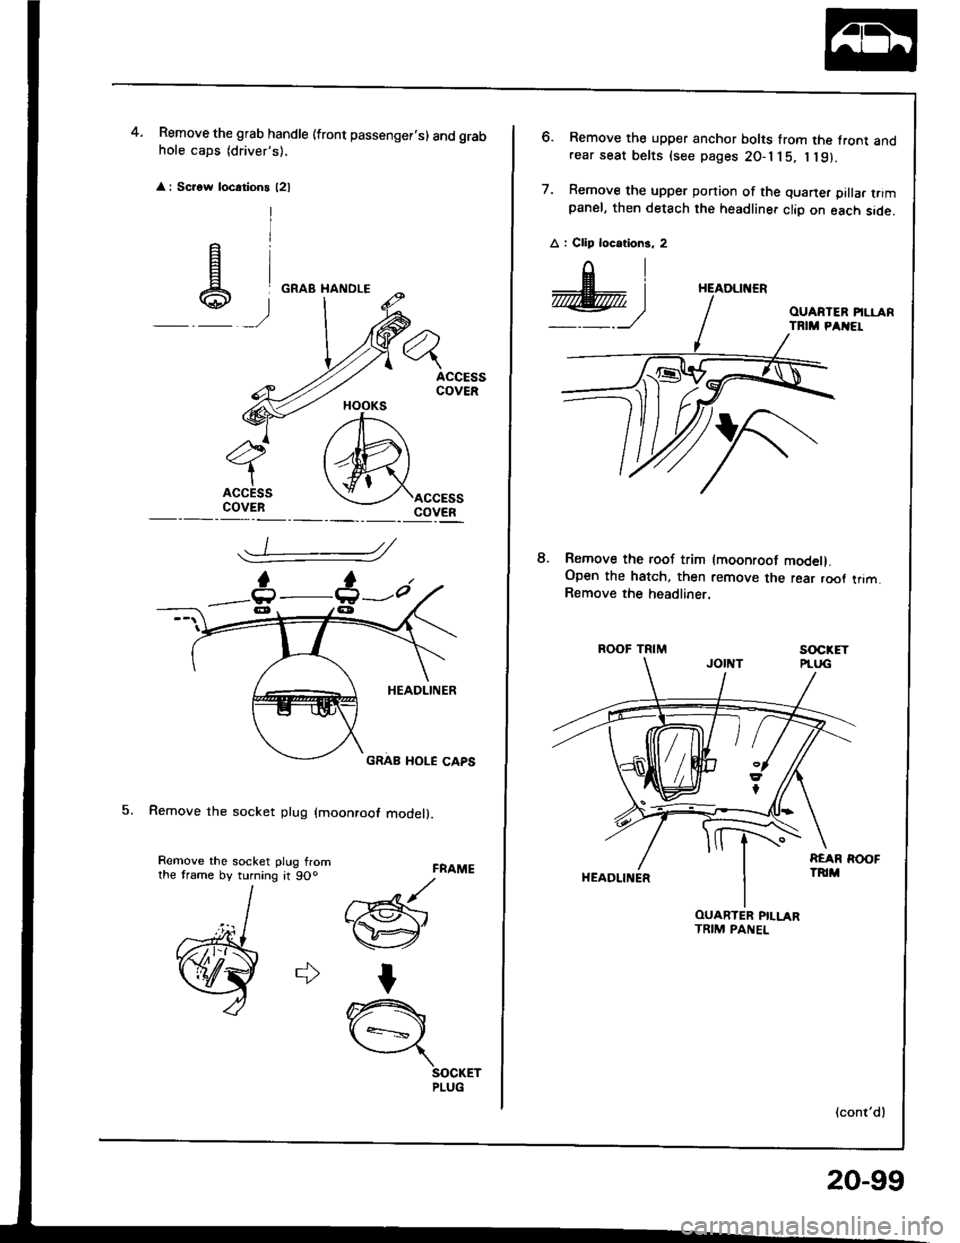
Remove the grab handle (front passenger.s) and grabhole caps (driver's),
: Scrow locations l2l
5. Remove the socket plug (moonroof model).
4.
FRAME
//Gr-@'
I
n{ +=s ,
SOCKETPLUG
HOOKS
_t :
e)
Remove the roof trim (moonroot model).Open the hatch, then remove the rear root trim.Remove the headliner.
ROOF TRIMsocxET
HEADLII{ER
(cont'dl
6. Remove the upper anchor bolts from the front andrear seat belts (see pages 2O-l j 5, I l9).
7. Remove the upper ponion of the quaner pilla. trimpanel, then detach the headliner clio on each side.
A : Clip locotions, 2
8.
HEADLINER
OUARTER PILLARTRIM PANEL
20-99
Hatch
Replacement
NOTE:
a An assistant is helpful when removing the hatch.
a Take care not to damage the hatch and body.
a Take care not to scratch the hatch side trims and hatch
tnm paner.
a Open the hatch.
a Remove the high mount brake light {see section 23).
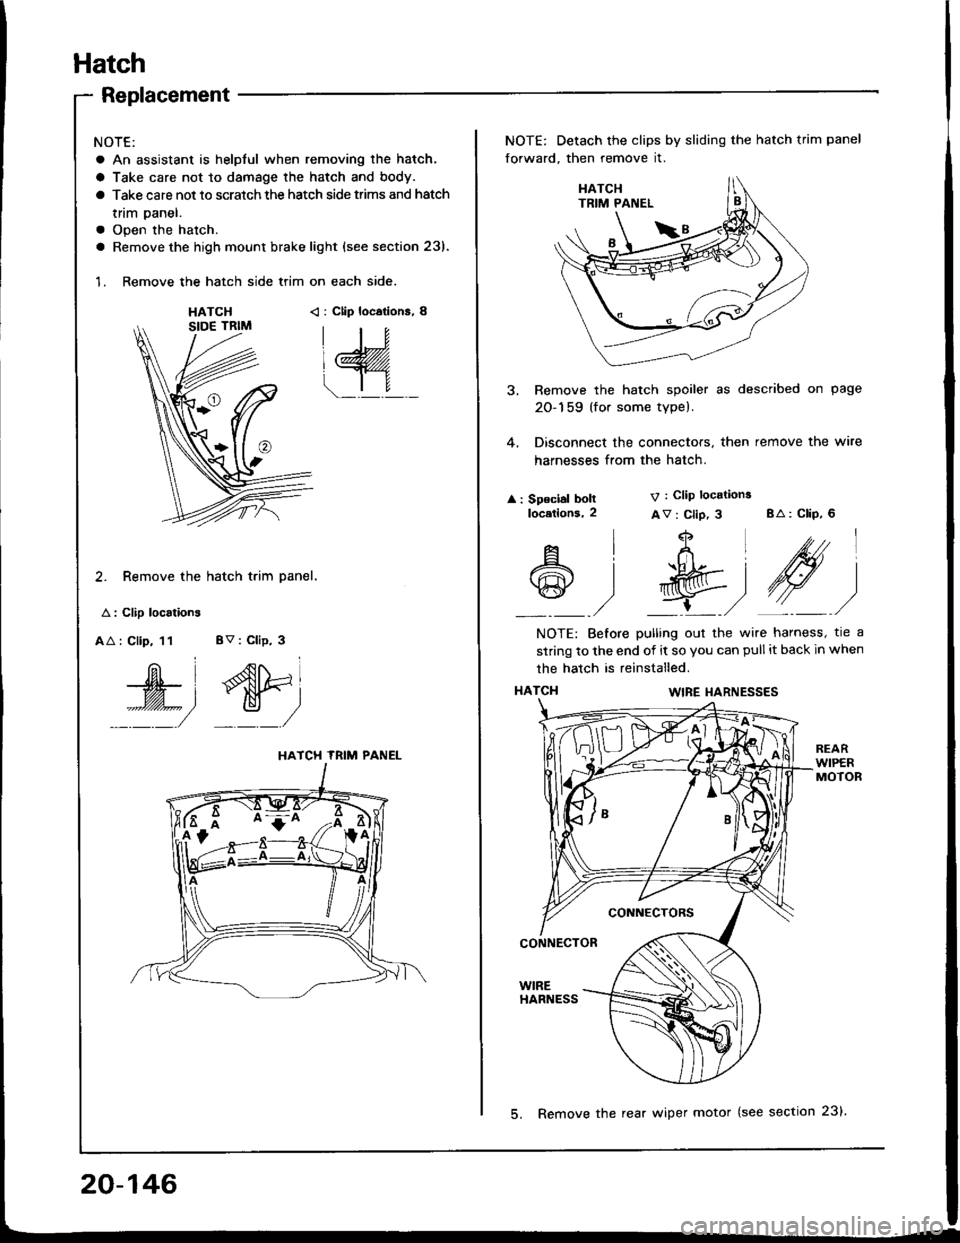
1. Remove the hatch side trim on each side.
HATCH< : Clip locations, 8
2. Remove the hatch trim panel.
A : Clip localions
AA : Clip, 11 BV : Clip, 3
W', dtri
::::/ _:_/
HATCH TRIM PANEL
NOTE: Detach the clips by sliding the hatch trim panel
forward, then remove it.
3. Remove the hatch spoiler as described on page
20-159 (for some type).
4. Disconnect the connectors, then remove the wire
harnesses from the hatch.
: Speclal boltlocetlons,2
V : Clip locations
Av : Clip, 3 BA: CliP, 6
4
t+Ltfrl
l'R@t
,/ L,/
A
@
l
)
NOTE: Before pulling out the wire harness, tre a
strinq to the end of it so you can pull it back in when
the hatch is reinstalled.
HATCI{WIRE I{ARNESSES
CONNECTORS
CONNECTOR
WIREHARNESS
20-146
5. Remove the rear wiper motor (see section 23).

