immobilizer HONDA ODYSSEY 1999 Owners Manual
[x] Cancel search | Manufacturer: HONDA, Model Year: 1999, Model line: ODYSSEY, Model: HONDA ODYSSEY 1999Pages: 343, PDF Size: 3.73 MB
Page 56 of 343
Instruments and Controls
This section gives information about
the controls and displays that
contribute to the daily operation of
your Honda. All the essential
controls are within easy reach.
Control Locations............................ 56
Indicator Lights................................ 57
Gauges.............................................. 62
Controls Near the Steering
Wheel........................................65
Headlights...................................
. 66
Automatic Lightin g
Off
Feature......................................67
Daytime Running Lights............. 67
Instrument Panel Brightness..... 67
Turn Signals................................. 68
Windshield Wipers.....................
. 68
Windshield Washers..................
. 70
Rear Windo w
Wiper and
Washer......................................70
Hazard Warning........................... 70
Rear Window Defogger.............. 71
Steering Wheel Adjustment....... 72
Steering Wheel Controls ................ 73
Cruise Control.............................. 73
Remote Audio Controls .............. 76
Keys and Locks................................ 76
Keys............................................... 76
Immobilizer System..................... 77
Ignition Switch............................. 78
Power Door Locks....................... 79
Remote Transmitter.................... 81Childproof Door Locks............... 85
Tailgate......................................... 85
Glove Box..................................... 87
Sliding Doors.................................... 88
Manual Sliding Doors.................. 88
Power Sliding Doors.................... 90
Important Safety Precautions.... 94
HomeLink Universal Transmitter.................................. 95
Seats.................................................. 99
Passenger Seating....................... 99
Seat Adjustments....................... 100
Driver's Seat Power
Adjustments........................... 102
Armrests..................................... 103
Head Restraints......................... 104
Third Seat Access...................... 105 Moving the Second Row Bucket Seat............................ 106
Removing the Bucket Seats in the Second Row................. 108
Removing the Bench Seat in the Second Row................. 109
Folding the Third Seat.............. 110
Power Windows............................. 113
Mirrors............................................ 115 Parking Brake................................ 116
Digital Clock................................... 117
Center Table................................... 117
Beverage Holder............................ 118
Sunglasses Holder......................... 120
Sun Visor......................................... 121
Vanity Mirror................................. 121 Rear Compartment........................ 122Center Pocket................................ 122
Coin Holder.................................... 122
Storage Box.................................... 123 Coat Hook....................................... 123
Accessory Power Sockets............. 124 Interior Lights................................ 125
Instruments and ControlsProCarManuals.comMain Menu s t
Page 58 of 343
Indicator Lights
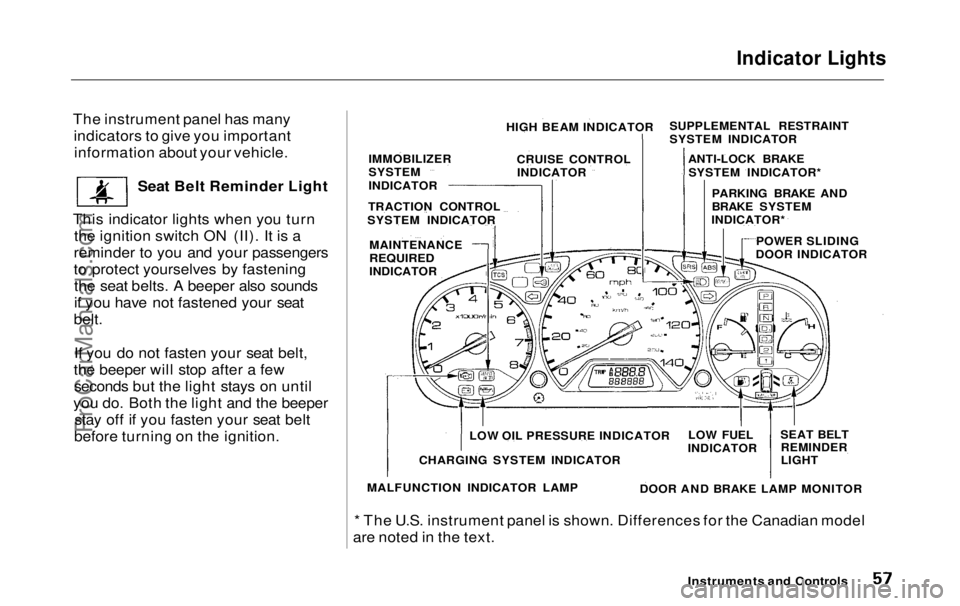
The instrument panel has many indicators to give you importantinformation about your vehicle.
Seat Belt Reminder Light
This indicator lights when you turn the ignition switch ON (II). It is a
reminder to you and your passengers
to protect yourselves by fastening the seat belts. A beeper also sounds
if you have not fastened your seat
belt.
If you do not fasten your seat belt,
the beeper will stop after a few seconds but the light stays on until
you do. Both the light and the beeper stay off if you fasten your seat belt
before turning on the ignition.
* The U.S. instrument panel is shown. Differences for the Canadian model
are noted in the text.
Instruments and Controls
HIGH BEAM INDICATOR
CRUISE CONTROLINDICATOR
IMMOBILIZER
SYSTEM
INDICATOR
TRACTION CONTROL
SYSTEM INDICATOR
MAINTENANCE
REQUIRED
INDICATOR SUPPLEMENTAL RESTRAINT
SYSTEM INDICATOR
ANTI-LOCK BRAKESYSTEM INDICATOR*
PARKING BRAKE AND
BRAKE SYSTEM
INDICATOR*
POWER SLIDING
DOOR INDICATOR
SEAT BELTREMINDER
LIGHT
LOW FUEL
INDICATOR
DOOR AND BRAKE LAMP MONITOR
LOW OIL PRESSURE INDICATOR
CHARGING SYSTEM INDICATOR
MALFUNCTION INDICATOR LAMPProCarManuals.comMain Menu Table of Contents s t
Page 60 of 343
Indicator Lights
U.S.
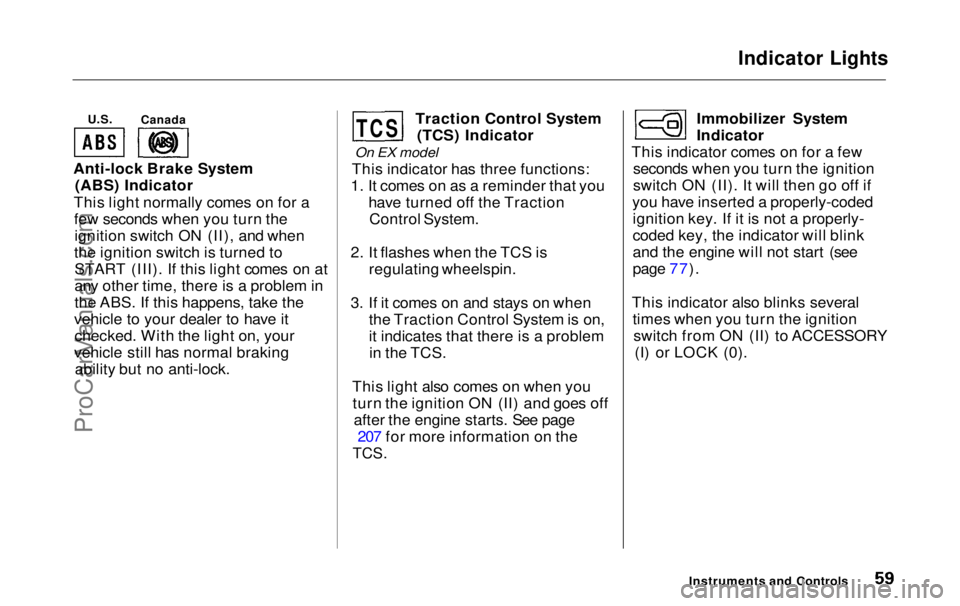
Anti-lock Brake System (ABS) Indicator
This light normally comes on for a few seconds when you turn theignition switch ON (II), and when
the ignition switch is turned to START (III). If this light comes on at
any other time, there is a problem in
the ABS. If this happens, take the
vehicle to your dealer to have it checked. With the light on, your
vehicle still has normal braking ability but no anti-lock. Traction Control System
(TCS) Indicator
On EX model
This indicator has three functions:
1. It comes on as a reminder that you have turned off the TractionControl System.
2. It flashes when the TCS is regulating wheelspin.
3. If it comes on and stays on when the Traction Control System is on,
it indicates that there is a problemin the TCS.
This light also comes on when you turn the ignition ON (II) and goes off after the engine starts. See page 207 for more information on the
TCS.
Immobilizer System
Indicator
This indicator comes on for a few seconds when you turn the ignition
switch ON (II). It will then go off if
you have inserted a properly-coded ignition key. If it is not a properly-
coded key, the indicator will blink
and the engine will not start (see
page 77).
This indicator also blinks several times when you turn the ignitionswitch from ON (II) to ACCESSORY (I) or LOCK (0).
Instruments and Controls
Canada
TCSProCarManuals.comMain Menu Table of Contents s t
Page 78 of 343

Keys and Locks
These keys contain electronic circuits that are activated by the
Immobilizer System. They will not
work to start the engine if the circuits are damaged. Protect the keys from direct
sunlight, high temperature, and
high humidity. Do not drop the keys or set heavy
objects on them.
Keep the keys away from liquids.
If they get wet, dry them immedi-
ately with a soft cloth.
The keys do not contain batteries. Do not try to take them apart.
Remote Transmitter
Some models also come with a
remote transmitter; see page 81 for
an explanation of its operation.
Immobilizer System
The Immobilizer System protects your vehicle from theft. A properly-coded master or valet key must be
used in the ignition switch for theengine to start. If an improperly-
coded key (or other device) is used,
the engine's fuel system is disabled.
When you turn the ignition switch to ON (II), the Immobilizer System
indicator should come on for a few seconds, then go out. If the indicator
starts to blink, it means the system does not recognize the coding of the
key. Turn the ignition switch to LOCK (0), remove the key, reinsert
it, and turn the switch to ON (II)
again.
The system may not recognize your
key's coding if any other immobilizer
key is near the ignition switch. To make sure the system recognizes the
key code, keep each immobilizer key on a separate ring.
If the system repeatedly does not
recognize the coding of your key, contact your Honda dealer.
This indicator will also blink several times when you turn the ignitionswitch from ON (II) to ACCESSORY (I) or LOCK (0).
Do not attempt to alter this system
or add other devices to it. Electrical
problems could result that may make
your vehicle undriveable.
If you have lost your key and you
cannot start the engine, contact your
Honda dealer.
Instruments and Controls CONTINUEDProCarManuals.comMain Menu Table of Contents s t
Page 80 of 343
Keys and Locks
ACCESSORY (I) — In this position, you can operate the audio system and the accessory power socket.
ON (II) — This is the normal key
position when driving. All features and accessories on the vehicle are
usable. Several of the lights on the
instrument panel come on as a test
when you turn the ignition switch from ACCESSORY to ON (see page 57). START (III) — Use this position
only to start the engine. The switch
returns to ON (II) when you let go of
the key.
The engine will not start if the Immobilizer System does not
recognize the key's coding (see page
77).
You will hear a reminder beeper if
you leave the key in the ignition switch in the LOCK (0) or
ACCESSORY (I) position and open the driver's door. Remove the key to
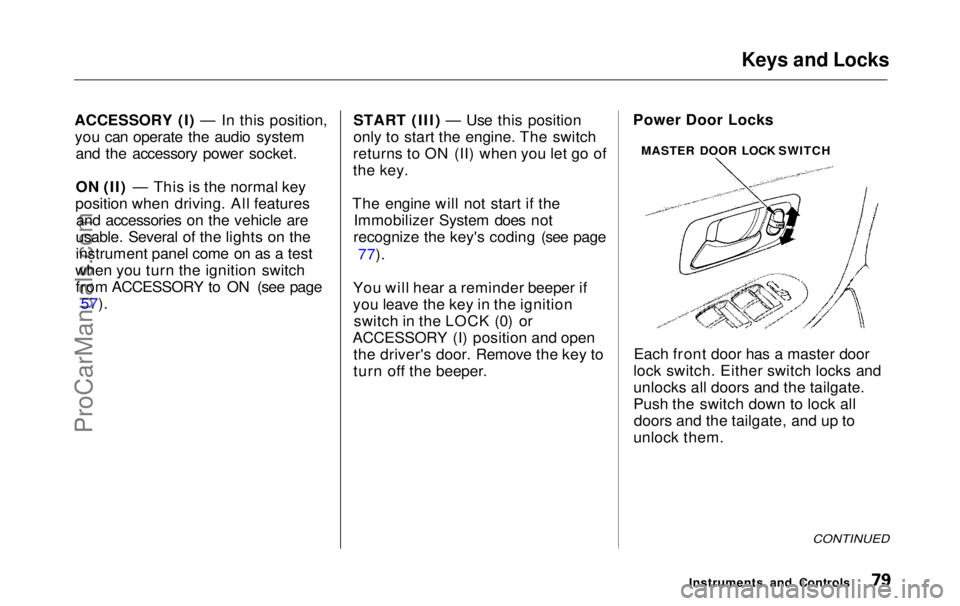
turn off the beeper. Power Door Locks
Each front door has a master door
lock switch. Either switch locks and
unlocks all doors and the tailgate.
Push the switch down to lock all doors and the tailgate, and up to
unlock them.
CONTINUED
Instruments and Controls
MASTER DOOR LOCK SWITCHProCarManuals.comMain Menu Table of Contents s t
Page 296 of 343
If Your Engine Won't Start, Jump Starting
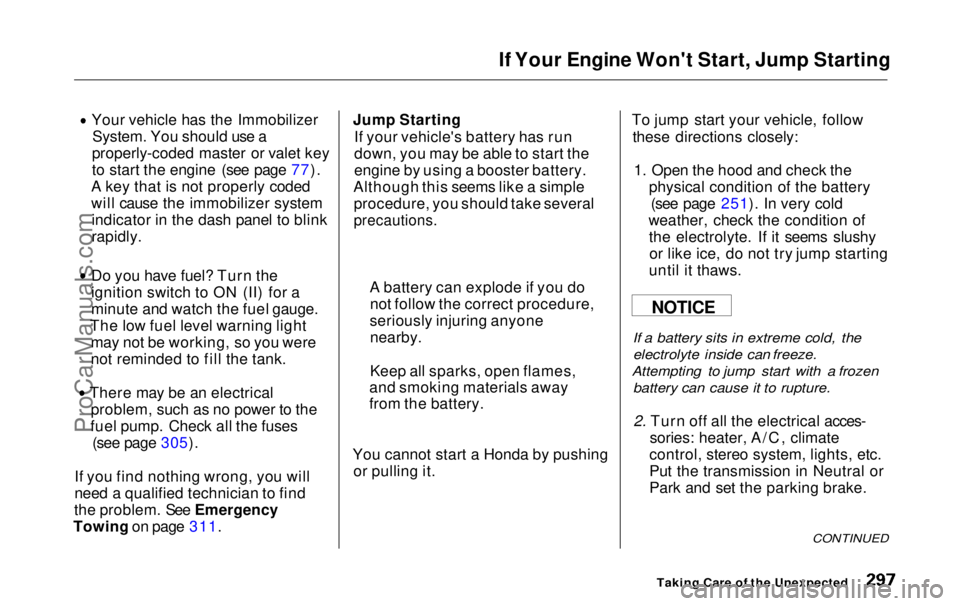
Your vehicle has the Immobilizer
System. You should use a
properly-coded master or valet key
to start the engine (see page 77).
A key that is not properly coded
will cause the immobilizer system indicator in the dash panel to blink
rapidly. Do you have fuel? Turn the
ignition switch to ON (II) for a
minute and watch the fuel gauge.
The low fuel level warning light may not be working, so you were
not reminded to fill the tank. There may be an electrical
problem, such as no power to the
fuel pump. Check all the fuses (see page 305).
If you find nothing wrong, you will
need a qualified technician to find
the problem. See Emergency
Towing on page 311. Jump Starting
If your vehicle's battery has run
down, you may be able to start the
engine by using a booster battery.
Although this seems like a simple procedure, you should take several
precautions.
You cannot start a Honda by pushing or pulling it. To jump start your vehicle, follow
these directions closely:
1. Open the hood and check the physical condition of the battery(see page 251). In very cold
weather, check the condition of the electrolyte. If it seems slushyor like ice, do not try jump starting
until it thaws.
If a battery sits in extreme cold, the
electrolyte inside can freeze.
Attempting to jump start with a frozen
battery can cause it to rupture.
2. Turn off all the electrical acces- sories: heater, A/C, climate
control, stereo system, lights, etc.
Put the transmission in Neutral or
Park and set the parking brake.
CONTINUED
Taking Care of the Unexpected
A battery can explode if you do
not follow the correct procedure,
seriously injuring anyone nearby.
Keep all sparks, open flames,
and smoking materials away
from the battery.
NOTICEProCarManuals.comMain Menu Table of Contents s t
Page 337 of 343
Index
GAWR (Gross Axle Weight
Rating)........................................ 213
GCWR (Gross Combined Weight
Rating)........................................ 213
Gearshift Lever Positions............. 199
Glass Cleaning............................... 281
Glove Box......................................... 87
GVWR (Gross Vehicle Weight
Rating) ........................................ 213
Halogen Headlight Bulbs.............. 266
Hazard Warning Flashers............... 70
Headlights......................................... 66 Aiming......................................... 266
Automatic Lighting Off............... 67
Daytime Running Lights............. 67
High Beam Indicator................... 61
High Beams, Turning on............ 66
Low Beams, Turning on............. 66
Reminder Chime.......................... 66
Replacing Halogen Bulbs ......... 266
Turning on.................................... 66
Head Restraints............................. 104
Heated Mirror................................ 116 Heating and Cooling...................... 130
High Altitude, Starting at.............. 197
High-Low Beam Switch .................. 66
HomeLink Universal
Transmitter.................................. 95
Hood Latch..................................... 248
Hood, Opening the ........................ 184
Horn................................................... 65
Hot Coolant, Warning about........ 237
Hydroplaning.................................. 211
Identification Number, Vehicle.... 314
If Your Vehicle Has to be
Towed......................................... 311
Ignition
Keys...............................................76
Switch............................................78
Timing Control System............. 324
Immobilizer System......................... 77
Important Safety Precautions .......... 6
Indicator Lights, Instrument
Panel.............................................. 57
Individual Map Lights................... 127
Infant Restraint................................ 30
Inflation, Proper Tire .................... 257
Inside Mirror.................................. 115
Inspection,Tire.............................. 259
Instrument Panel........................ 2, 56
Instrument Panel Brightness......... 67
Interior Cleaning............................ 280
Interior Lights................................ 125
Introduction......................................... i
Jacking up the Vehicle.................. 290
Jack, Tire........................................ 288
Jump Starting................................. 297
Keys...................................................76
Label, Certification........................ 314
Lane Change, Signaling.................. 68
Lap/Shoulder Belts.................. 15, 45
CONTINUEDProCarManuals.comMain Menu s t