seats HONDA ODYSSEY 2000 RA6-RA9 / 2.G Owner's Manual
[x] Cancel search | Manufacturer: HONDA, Model Year: 2000, Model line: ODYSSEY, Model: HONDA ODYSSEY 2000 RA6-RA9 / 2.GPages: 352, PDF Size: 4.43 MB
Page 49 of 352
Additional Informatio n Abou t You r Sea t Belt s
The seat belts in all positions except
the driver's and the center positionof the third seat have an additional
locking mechanism that must be activated to secure a child seat. (See
pages 31 and 36 for instructions on
how to secure child seats with this
type of seat belt.)
If the shoulder part of the belt is
pulled all the way out, the locking
mechanism will activate. The belt
will retract, but it will not allow thepassenger to move freely.
To deactivate the locking
mechanism, unlatch the buckle and
let the seat belt fully retract. To
refasten the belt, pull it out only as
far as needed.
See page 15 for instructions on how
to wear the lap/shoulder belt
properly.
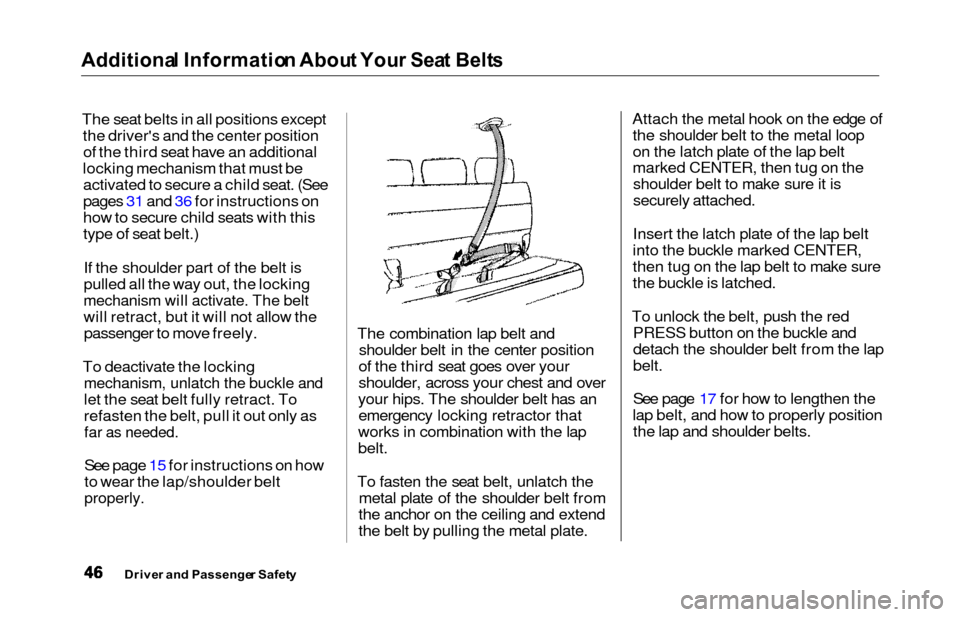
The combination lap belt and shoulder belt in the center position
of the third seat goes over your
shoulder, across your chest and over
your hips. The shoulder belt has an emergency locking retractor that
works in combination with the lap
belt.
To fasten the seat belt, unlatch the metal plate of the shoulder belt from
the anchor on the ceiling and extend
the belt by pulling the metal plate. Attach the metal hook on the edge of
the shoulder belt to the metal loop
on the latch plate of the lap belt
marked CENTER, then tug on theshoulder belt to make sure it is
securely attached.
Insert the latch plate of the lap belt
into the buckle marked CENTER,
then tug on the lap belt to make sure
the buckle is latched.
To unlock the belt, push the red PRESS button on the buckle and
detach the shoulder belt from the lap
belt.
See page 17 for how to lengthen the
lap belt, and how to properly position the lap and shoulder belts.
Drive r an d Passenge r Safet y
Page 58 of 352
Instrument
s an d Control s
This section gives information about
the controls and displays that
contribute to the daily operation of
your Honda. All the essential
controls are within easy reach.
Control Locations............................
56
Indicator Lights...............................
. 57
Gauges.............................................. 62
Controls Near the Steering
Wheel........................................ 65
Headlights.................................... 66
Automatic Lighting Off
Feature......................................
67
Daytime Runnin
g Lights.............
67
Instrument
Pane
l Brightness.....
67
Turn
Signals................................
.
68
Windshield
Wipers.....................
. 68
Windshield Washers................... 70
Rear Window Wiper and Washer...................................... 70
Hazard Warning........................ 70
Rear Windo
w Defogger.............. 71
Steering Wheel Adjustment....... 72
Steering Wheel Controls................ 73
Cruise Control.............................. 73
Remote Audio Controls .............. 76
Keys and Locks................................ 76
Keys............................................... 76
Immobilizer System..................... 77
Ignition Switch............................. 78
Power Door Locks....................... 79
Remote Transmitter.................... 81
Childproof Door Locks............... 85
Tailgate......................................... 85
Glove Box..................................... 87
Manual Sliding Doors...................... 88
Power Sliding Doors........................ 89
HomeLink Universal Transmitter.................................. 95
Seats.................................................. 99
Passenger Seating....................... 99
Seat Adjustments....................... 100
Driver's Seat Power
Adjustments........................... 102
Armrests..................................... 103
Head Restraints......................... 104
Third Seat Access...................... 105 Moving the Second Row Bucket Seat............................ 106
Removing the Bucket Seats in the Second Row................. 108
Folding the Third Seat.............. 109
Power Windows............................. 112
Mirrors............................................ 115
Parking Brake................................ 116
Digital Clock................................... 117 Center Table................................... 117
Beverage Holder............................ 118
Sunglasses Holder......................... 120
Sun Visor......................................... 121
Vanity Mirror................................. 121 Rear Compartment........................ 122
Center Pocket................................ 122Coin Holder.................................... 122
Storage Box.................................... 123
Coat Hook....................................... 123
Accessory Power Sockets............. 124 Interior Lights................................ 125
Instrument s an d Control s
Page 102 of 352
Seats
Passenge r Seatin g
Convertible Second Row Bucket
Seats
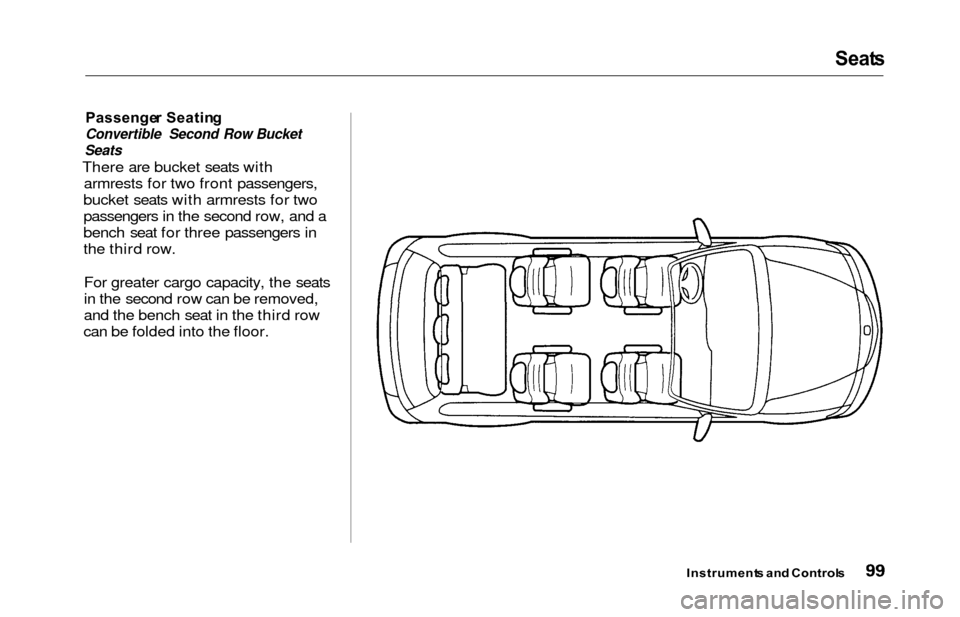
There are bucket seats with
armrests for two front passengers,
bucket seats with armrests for two
passengers in the second row, and a
bench seat for three passengers in
the third row.
For greater cargo capacity, the seats
in the second row can be removed,
and the bench seat in the third row
can be folded into the floor.
Instrument s an d Control s
Page 103 of 352
Seats
Seat Adjustment s
See pages 12 — 13 for important safety
information and warnings about how to
properly position seats and seat-backs.
The EX model has a power adjustable driver's seat. All other
models have manual driver's seat
adjustments.
The front passenger's seat, and the seats in the second and third rows
adjust manually.
Make all seat adjustments before
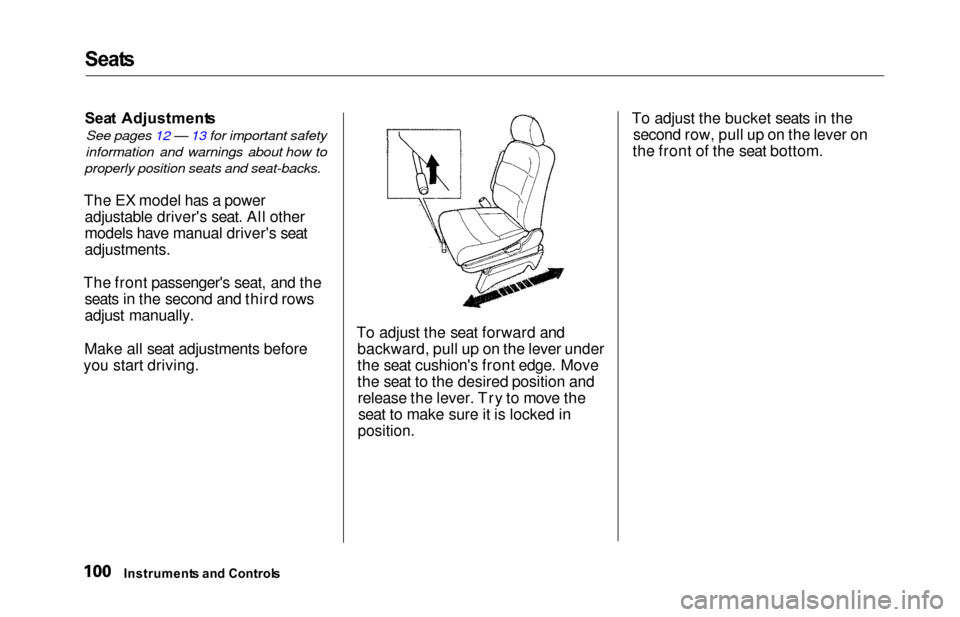
you start driving. To adjust the seat forward and
backward, pull up on the lever under
the seat cushion's front edge. Move
the seat to the desired position andrelease the lever. Try to move theseat to make sure it is locked in
position.
To adjust the bucket seats in the second row, pull up on the lever on
the front of the seat bottom.
Instrument s an d Control s
Page 104 of 352
Seats
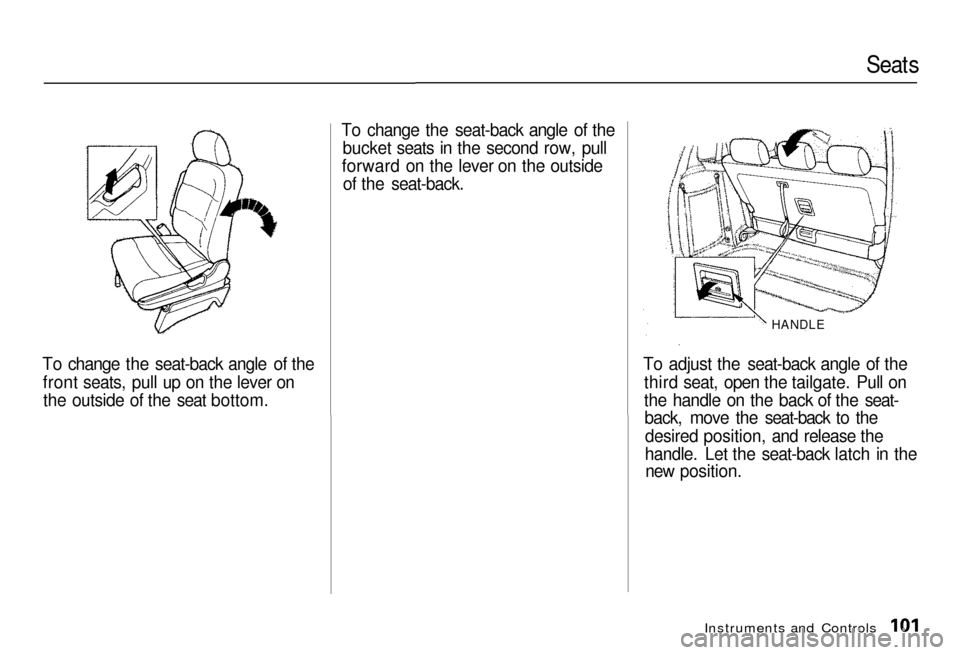
To change the seat-back angle of the front
seats, pull up on the lever on
th
e outside of the seat bottom. To change the seat-back angle of the
bucket seats in the second row, pull
forward
on the lever on the outside
of the seat-back.
HANDLE
T
o adjust the seat-back angle of the
third
seat, open the tailgate. Pull on
the handle on the back of the seat- back,
move the seat-back to the
desired position, and release the
handle. Let the seat-back latch in the new
position.
Instruments and Controls
Page 105 of 352
Seats
Driver' s Sea t Powe r Adjustment s
On EX model
See pages 12 — 13 for important safety
information and warnings about how to
properly position seats and seat-backs.
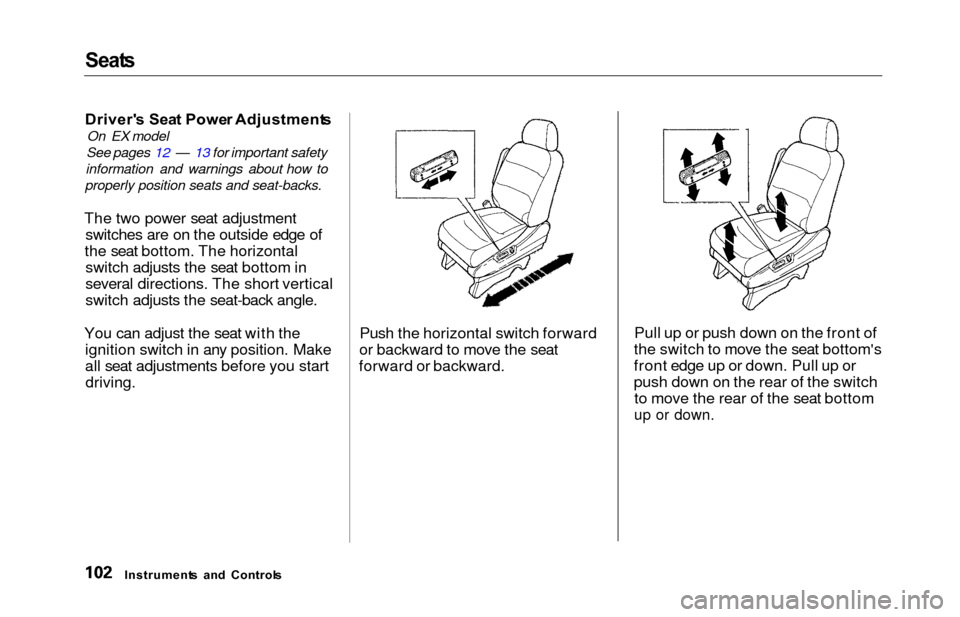
The two power seat adjustment switches are on the outside edge of
the seat bottom. The horizontal switch adjusts the seat bottom in
several directions. The short vertical
switch adjusts the seat-back angle.
You can adjust the seat with the ignition switch in any position. Make
all seat adjustments before you start
driving.
Push the horizontal switch forward
or backward to move the seat
forward or backward. Pull up or push down on the front of
the switch to move the seat bottom's
front edge up or down. Pull up or
push down on the rear of the switch to move the rear of the seat bottom
up or down.
Instrument s an d Control s
Page 106 of 352
Seat
s
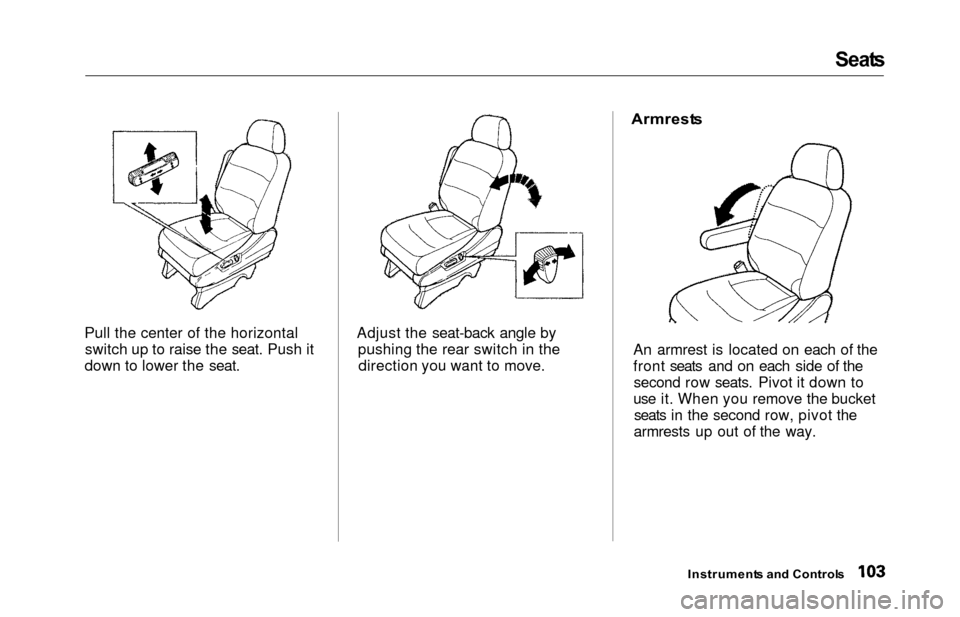
Pull the center of the horizontal switch up to raise the seat. Push it
down to lower the seat. Adjust the seat-back angle by
pushing the rear switch in thedirection you want to move.
Armrest
s
An armrest is located on each of the
front seats and on each side of the second row seats. Pivot it down to
use it. When you remove the bucket seats in the second row, pivot the
armrests up out of the way.
Instrument s an d Control s
Page 107 of 352
Seats
Hea d Restraint s
See page 14 for important safety
information and a warning about how to
properly position the head restraints.
Your vehicle is equipped with head restraints in all seating positions.
The head restraints help protect you and your passengers from whiplashand other injuries. They are most
effective when you adjust them so
the back of the occupant's head rests against the center of the restraint. A
taller person should adjust the
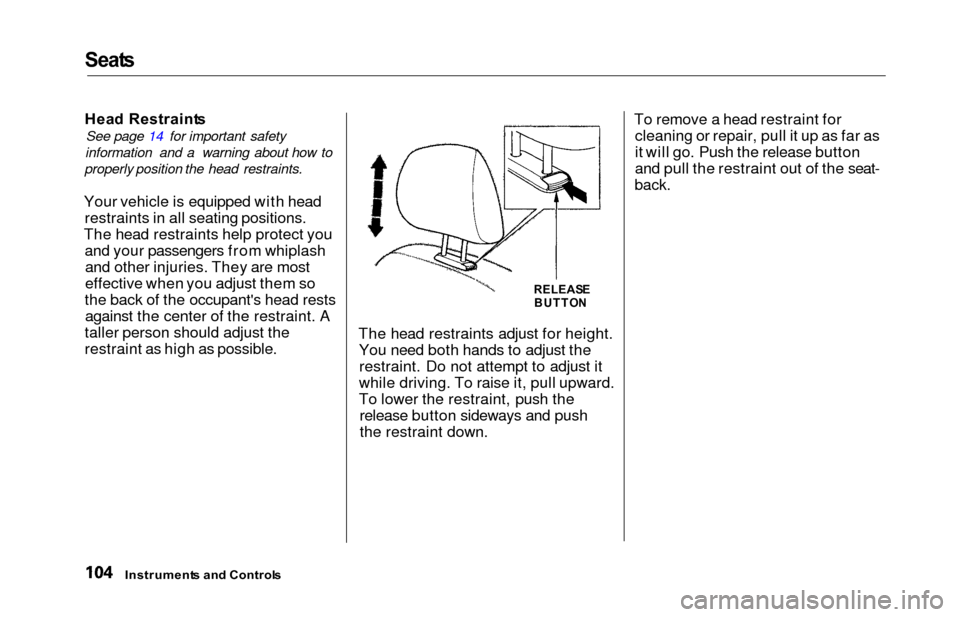
restraint as high as possible. The head restraints adjust for height.
You need both hands to adjust therestraint. Do not attempt to adjust it
while driving. To raise it, pull upward.
To lower the restraint, push the release button sideways and push
the restraint down. To remove a head restraint for
cleaning or repair, pull it up as far as
it will go. Push the release button
and pull the restraint out of the seat-
back.
Instrument s an d Control s
RELEAS E
BUTTO N
Page 108 of 352
Seats
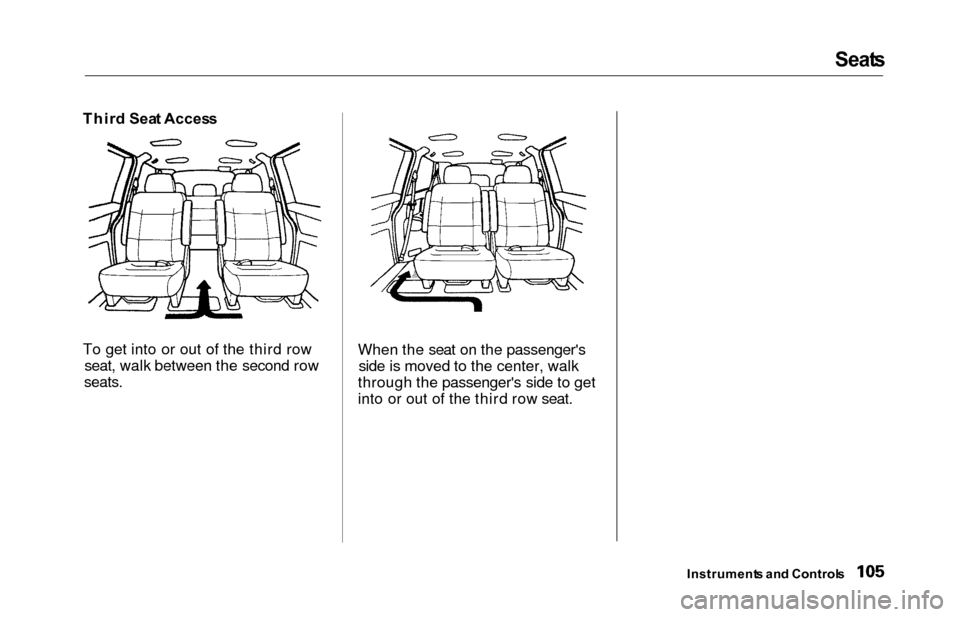
Thir d Sea t Acces s
To get into or out of the third row seat, walk between the second row
seats.
When the seat on the passenger'sside is moved to the center, walk
through the passenger's side to get
into or out of the third row seat.
Instrument s an d Control s
Page 109 of 352
Seats
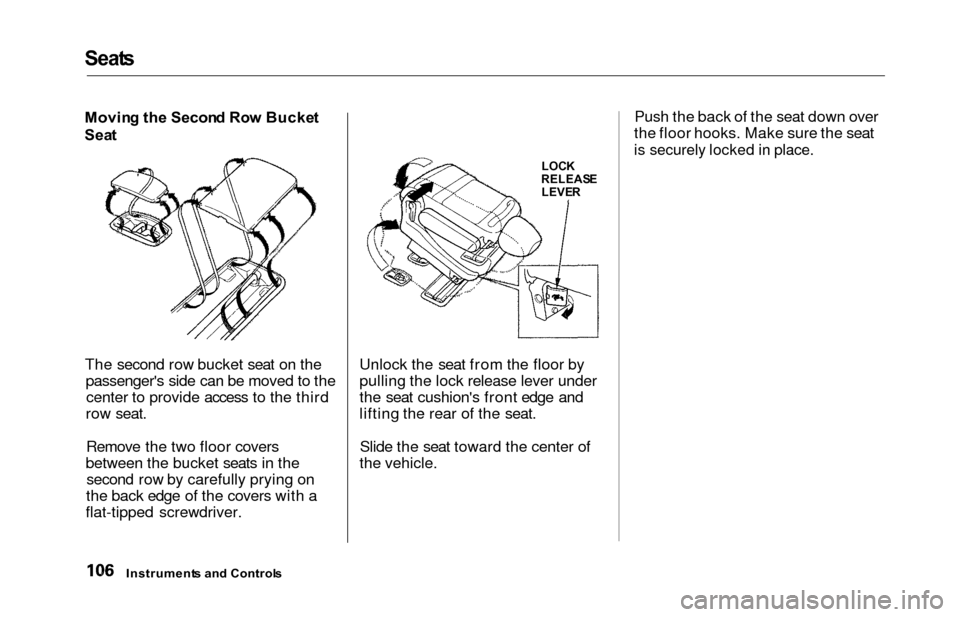
Movin g th e Secon d Ro w Bucke t
Sea t
The second row bucket seat on the passenger's side can be moved to thecenter to provide access to the third
row seat.
Remove the two floor covers
between the bucket seats in the second row by carefully prying on
the back edge of the covers with a
flat-tipped screwdriver. Unlock the seat from the floor by
pulling the lock release lever under
the seat cushion's front edge and
lifting the rear of the seat.
Slide the seat toward the center of
the vehicle. Push the back of the seat down over
the floor hooks. Make sure the seat
is securely locked in place.
Instrument s an d Control s
LOCK
RELEAS E
LEVE R