Installation HONDA ODYSSEY 2000 RA6-RA9 / 2.G Owners Manual
[x] Cancel search | Manufacturer: HONDA, Model Year: 2000, Model line: ODYSSEY, Model: HONDA ODYSSEY 2000 RA6-RA9 / 2.GPages: 352, PDF Size: 4.43 MB
Page 37 of 352
Protecting Childre n
Rear-Facing Child Seat Installation
Tips
For proper protection, an infant must
ride in a reclined, or semi-reclined
position. To determine the proper
reclining angle, check with the baby'sdoctor or follow the seat maker's
recommendations.
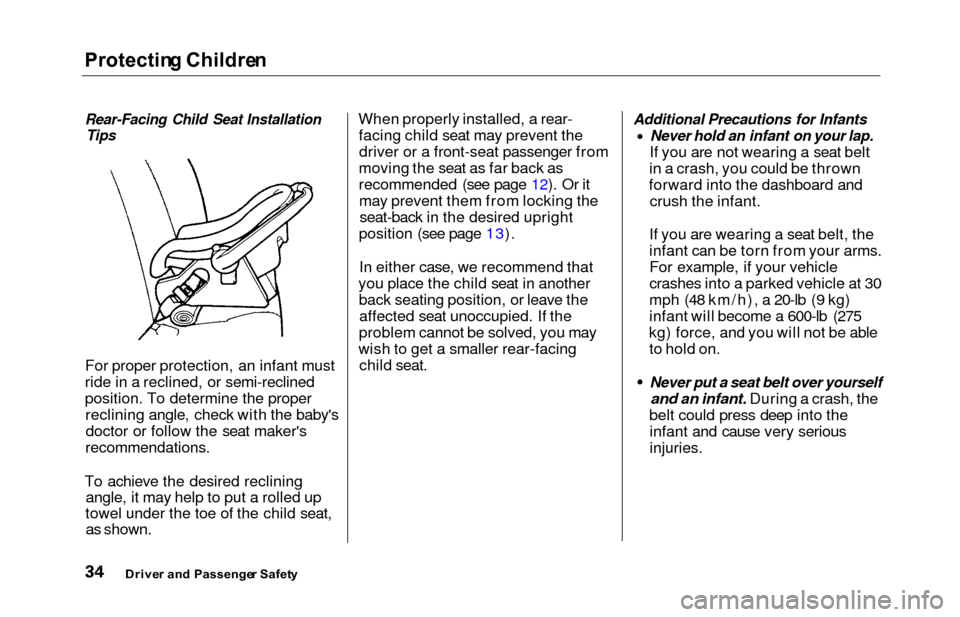
To achieve the desired reclining angle, it may help to put a rolled up
towel under the toe of the child seat, as shown. When properly installed, a rear-
facing child seat may prevent thedriver or a front-seat passenger from
moving the seat as far back as
recommended (see page 12). Or it may prevent them from locking theseat-back in the desired upright
position (see page 13).
In either case, we recommend that
you place the child seat in another back seating position, or leave theaffected seat unoccupied. If the
problem cannot be solved, you may
wish to get a smaller rear-facing child seat.
Additional Precautions for Infants
Never hold an infant on your lap.
If you are not wearing a seat belt
in a crash, you could be thrown
forward into the dashboard and crush the infant.
If you are wearing a seat belt, the
infant can be torn from your arms.
For example, if your vehicle
crashes into a parked vehicle at 30
mph (48 km/h), a 20-lb (9 kg)
infant will become a 600-lb (275
kg) force, and you will not be able to hold on.
Never put a seat belt over yourself
and an infant. During a crash, the
belt could press deep into the infant and cause very serious
injuries.
Drive r an d Passenge r Safet y
Page 46 of 352
Protecting Childre n
Using Chil d Seat s wit h Tether s
Your vehicle has attachment points for a tether-style child seat to beinstalled on the second or third row
as shown.
Since a tether can provide additionalsecurity, we recommend using a
tether whenever one is required or
available.
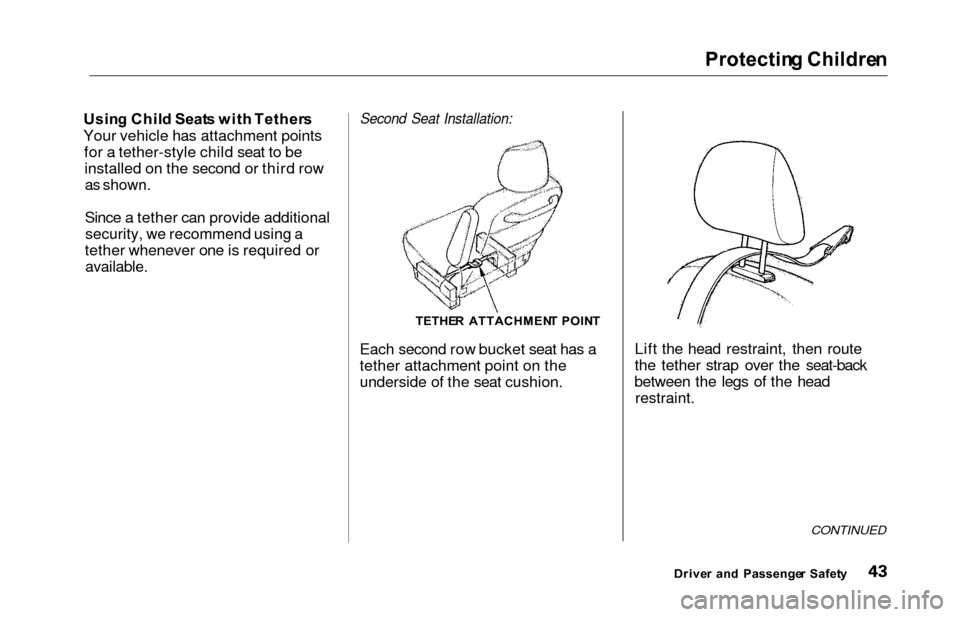
Second Seat Installation:
TETHE R ATTACHMEN T POIN T
Each second row bucket seat has a
tether attachment point on the
underside of the seat cushion. Lift the head restraint, then route
the tether strap over the seat-back
between the legs of the head restraint.
CONTINUED
Drive r an d Passenge r Safet y
Page 47 of 352
Protecting Childre n
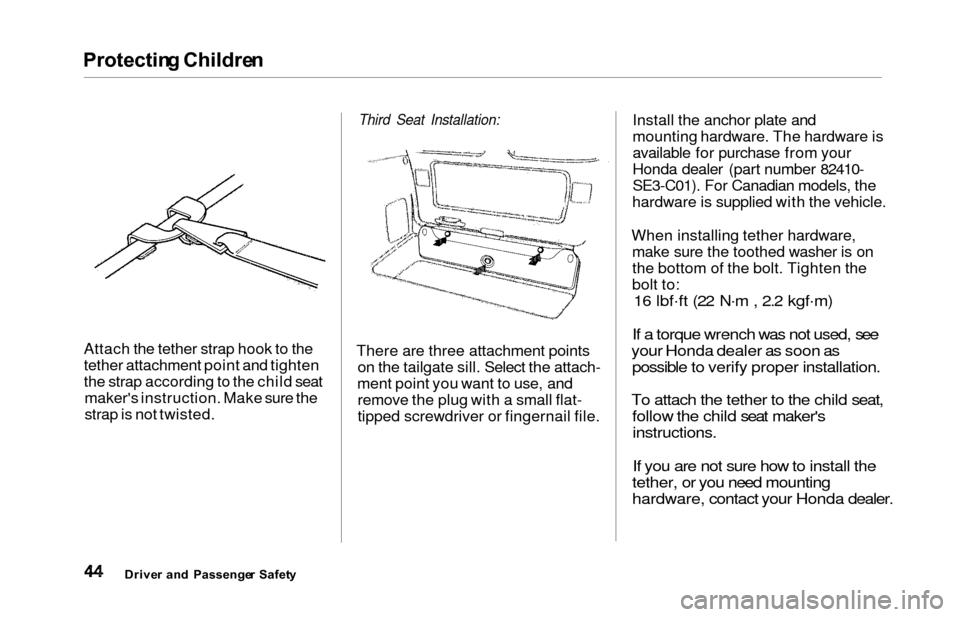
Attach the tether strap hook to the
tether attachment point and tighten
the strap according to the child seat
maker's instruction. Make sure the
strap is not twisted.
Third Seat Installation:
There are three attachment points on the tailgate sill. Select the attach-
ment point you want to use, and remove the plug with a small flat-
tipped screwdriver or fingernail file. Install the anchor plate and
mounting hardware. The hardware is
available for purchase from your
Honda dealer (part number 82410-
SE3-C01). For Canadian models, the
hardware is supplied with the vehicle.
When installing tether hardware, make sure the toothed washer is on
the bottom of the bolt. Tighten the
bolt to:
16 lbf .
ft (22 N .
m , 2.2 kgf .
m)
If a torque wrench was not used, see
your Honda dealer as soon as possible to verify proper installation.
To attach the tether to the child seat, follow the child seat maker's
instructions.
If you are not sure how to install the
tether, or you need mounting
hardware, contact your Honda dealer.
Drive r an d Passenge r Safet y
Page 198 of 352
Accessorie
s an d Modification s
Modifying your vehicle, or installing
some non-Honda accessories, can
make your vehicle unsafe. Before
you make any modifications or add any accessories, be sure to read the
following information.
Accessorie s
Your dealer has Genuine Honda accessories that allow you to
personalize your vehicle. These accessories have been designed and
approved for your vehicle, and are
covered by warranty.
Non-Honda accessories are usually
designed for universal applications.
Although aftermarket accessories may fit on your vehicle, they may not
meet factory specifications, andcould adversely affect your vehicle's
handling and stability. (See "Modifications" on page 196 for
additional information.) When properly installed, cellular
phones, alarms, two-way radios, and
low-powered audio systems should
not interfere with your vehicle's
computer-controlled systems, such
as the SRS and anti-lock brake
system.
However, if electronic accessories
are improperly installed, or exceed
your vehicle's electrical system capacity, they can interfere with the operation of your vehicle, or even
cause the airbags to deploy.
Before installing any accessory:
Make sure the accessory does notobscure any lights, or interfere
with proper vehicle operation or performance.
Be sure electronic accessories do
not overload electrical circuits (see page 311). Have the installer contact your
Honda dealer for assistance before
installing any electronic accessory.
If possible, have your dealer inspect
the final installation.
Before Drivin g
Improper accessories or
modifications can affect your
vehicle's handling, stability and performance, and cause a
crash in which you can be hurt
or killed.
Follow all instructions in this
owner's manual regarding
accessories and modifications.
Page 223 of 352
Towing a Traile r
Towin g Equipmen t an d
Accessorie s
Towing can require a variety of equipment, depending on the size of
your trailer, how it will be used, and how much load you are towing.
Discuss your needs with your trailer
sales or rental agency, and follow the
guidelines in the rest of this section.
Also make sure that all equipment is properly installed and that it meets
federal, state, province, and local
regulations.
Hitches
Any hitch used on your vehicle mustbe properly bolted to the underbody, using the six threaded holes
provided. A hitch designed especially
for your Odyssey can be obtained
from your Honda dealer.
Weight Distributing Hitch
If the total trailer weight is more
than 2,000 Ibs (900 kg), you must
also use a weight distributing hitch.
This device transfers weight from the vehicle's rear wheels to the front
wheels, and to the trailer's wheels. Carefully follow the hitch maker's
instructions for proper installation
and adjustment.
Safety Chain
Always use a safety chain. Make sure that it is secured to both the
trailer and hitch, and that it crosses under the tongue so it can catch the
trailer if it becomes unhitched. Leave enough slack to allow the
trailer to turn corners easily, but do not let the chain drag on the ground.
Sway Control
If the total trailer weight exceeds
2,000 Ibs (900 kg), you should install
a sway control device to minimize swaying that can occur in crosswinds
and in normal and emergency
driving maneuvers. Your trailer
maker can tell you what kind of sway
control you need and how to install it.
Transmission Fluid Cooler
If the total trailer weight is more
than 2,000 Ibs (900 kg), you must also have a transmission fluid cooler
installed. This device will help
prevent transmission overheating,
which could cause serious damage.
A transmission fluid cooler designed for your Odyssey can be obtained
from your Honda dealer.
Drivin g
Page 255 of 352
Air Cleane r Elemen t
The air cleaner element should be
cleaned or replaced according to the
time and distance recommendations
in the maintenance schedule.
Cleanin g (Sever e Conditions )
Clean the air cleaner element by
blowing compressed air through it in
the opposite direction to normal air
flow. If you do not have access to compressed air (such as a servicestation), ask your Honda dealer to do
this service.
Follow the replacement procedure
for removal and reinstallation.
Replacemen t
The air cleaner element is inside the
air cleaner housing on the driver's
side of the engine compartment.
To replace it:
1. Remove the two pins holding the air intake cover by pulling the
head on each pin. Remove the air
intake cover. 2. Loosen the four bolts by using a
Phillips-head screwdriver.
Maintenanc e AI
R
INTAK E
COVER BOLT
S