change HONDA ODYSSEY 2000 RA6-RA9 / 2.G Owners Manual
[x] Cancel search | Manufacturer: HONDA, Model Year: 2000, Model line: ODYSSEY, Model: HONDA ODYSSEY 2000 RA6-RA9 / 2.GPages: 352, PDF Size: 4.43 MB
Page 2 of 352

Owner's Identification
This Owner's Manual should be considereda permanent part of the car, and shouldremain with the car when it is sold.
The information and specifications included
in this publication were in affect at the time
of approval for printing. Honda Motor Co.,
Ltd. reserves the right, however, to
discontinue or change specifications or
design at any time without notice and
with out incurring any obligation whatsoever.
OWNER
ADDRESSSTREET
CITY STATE/PROVINCE ZIP CODE /POSTAL CODE
V. I. N.
DELIVERY DATE(Date sold to original retail purchaser)
DEALER NAME DEALER NO.
ADDRESSSTREET
CITY STATE/PROVINCE ZIP CODE/
POSTAL CODEOWNER'S SIGNATURE
DEALER'S SIGNATURE
Page 23 of 352

Protecting Adult s
Advice fo r Pregnan t Wome n
Because protecting the mother is the
best way to protect her unborn child, a pregnant woman should always
wear a seat belt whenever she drives or rides in a vehicle.
Remember to keep the lap portion of
the belt as low as possible across
your hips. Pregnant women should also sit
upright and as far back as possible
from the steering wheel or dashboard. This will reduce the risk
of injuries to both the mother and
her unborn child that can be caused
by a crash or an inflating airbag.
Each time you have a check-up, ask
your doctor if it's okay for you to drive.Additiona l Safet y Precaution s
Never let passengers ride in the
cargo area or on top of a folded-
down back seat. All passengers
must sit in locked, upright seats
and be properly restrained by seat
belts.
Passengers should not stand up or
change seats while the vehicle is
moving. A passenger who is not
wearing a seat belt during a crash or emergency stop can be thrown
against the inside of the vehicle,
against other occupants, or out of
the vehicle.
Two people should never use the
same seat belt. If they do, they
could be very seriously injured in a
crash.
Drive r an d Passenge r Safet y
Page 56 of 352
Carbon Monoxid e Hazar d
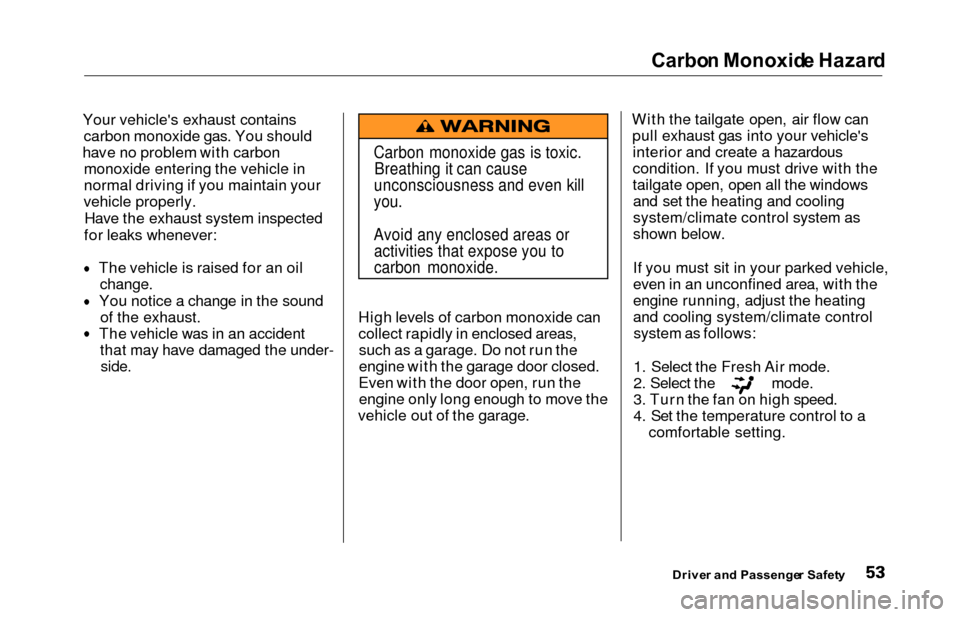
Your vehicle's exhaust contains
carbon monoxide gas. You should
hav e no problem with carbon
monoxide entering the vehicle in
normal driving if you maintain your
vehicle properly.
Have the exhaust system inspected
for leaks whenever:
The vehicle is raised for an oil
change.
You notice a change in the soundof the exhaust.
The vehicle was in an accident that may have damaged the under-
side.
High levels of carbon monoxide can
collect rapidly in enclosed areas,such as a garage. Do not run the
engine with the garage door closed.
Even with the door open, run the engine only long enough to move the
vehicle out of the garage. With the tailgate open, air flow can
pull exhaust gas into your vehicle'sinterior and create a hazardous
condition. If you must drive with the
tailgate open, open all the windowsand set the heating and cooling
system/climate control system as
shown below.
If you must sit in your parked vehicle,
even in an unconfined area, with the
engine running, adjust the heating
and cooling system/climate controlsystem as follows:
1. Select the Fresh Air mode.
2. Select the mode.
3. Turn the fan on high speed.
4. Set the temperature control to a comfortable setting.
Drive r an d Passenge r Safet y
Carbon monoxide gas is toxic.
Breathing it can cause
unconsciousness and even kill
you.
Avoid any enclosed areas or activities that expose you to
carbon monoxide.
Page 63 of 352
Indicator Light s
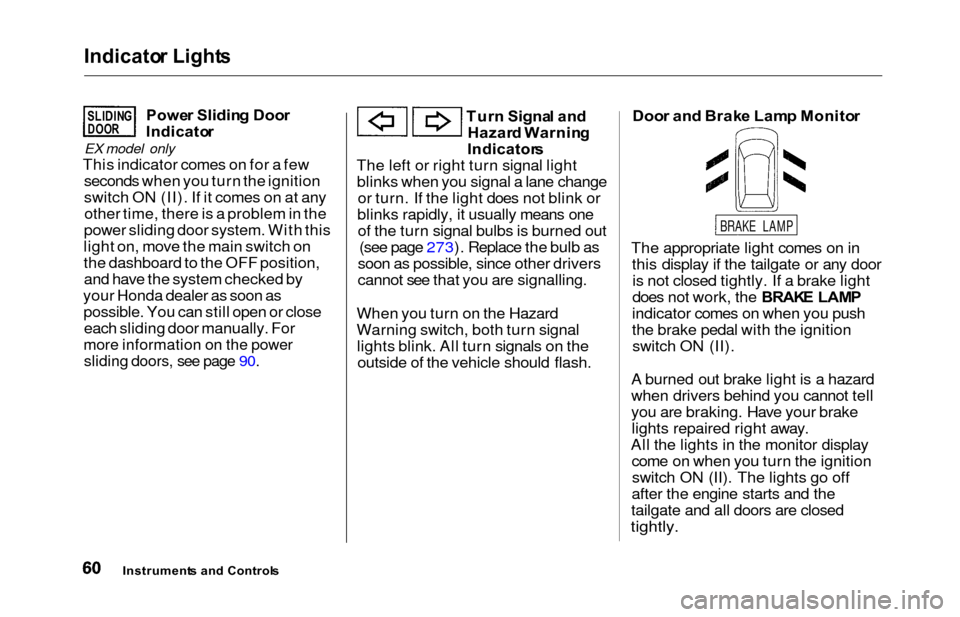
Power Slidin g Doo r
Indicato r
EX model only
This indicator comes on for a few
seconds when you turn the ignition
switch ON (II). If it comes on at anyother time, there is a problem in the
power sliding door system. With this
light on, move the main switch on
the dashboard to the OFF position, and have the system checked by
your Honda dealer as soon as possible. You can still open or closeeach sliding door manually. For
more information on the power
sliding doors, see page 90.
Tur n Signa l an d
Hazar d Warnin g
Indicator s
The left or right turn signal light blinks when you signal a lane change or turn. If the light does not blink or
blinks rapidly, it usually means one of the turn signal bulbs is burned out (see page 273). Replace the bulb as
soon as possible, since other drivers
cannot see that you are signalling.
When you turn on the Hazard
Warning switch, both turn signal lights blink. All turn signals on theoutside of the vehicle should flash. Doo
r an d Brak e Lam p Monito r
The appropriate light comes on in this display if the tailgate or any dooris not closed tightly. If a brake light
does not work, the BRAK E LAM P
indicator comes on when you push
the brake pedal with the ignition switch ON (II).
A burned out brake light is a hazard
when drivers behind you cannot tell
you are braking. Have your brake lights repaired right away.
All the lights in the monitor display come on when you turn the ignitionswitch ON (II). The lights go off
after the engine starts and the
tailgate and all doors are closed
tightly.
Instrument s an d Control s
SLIDINGDOOR
BRAKE LAMP
Page 65 of 352
Gauges
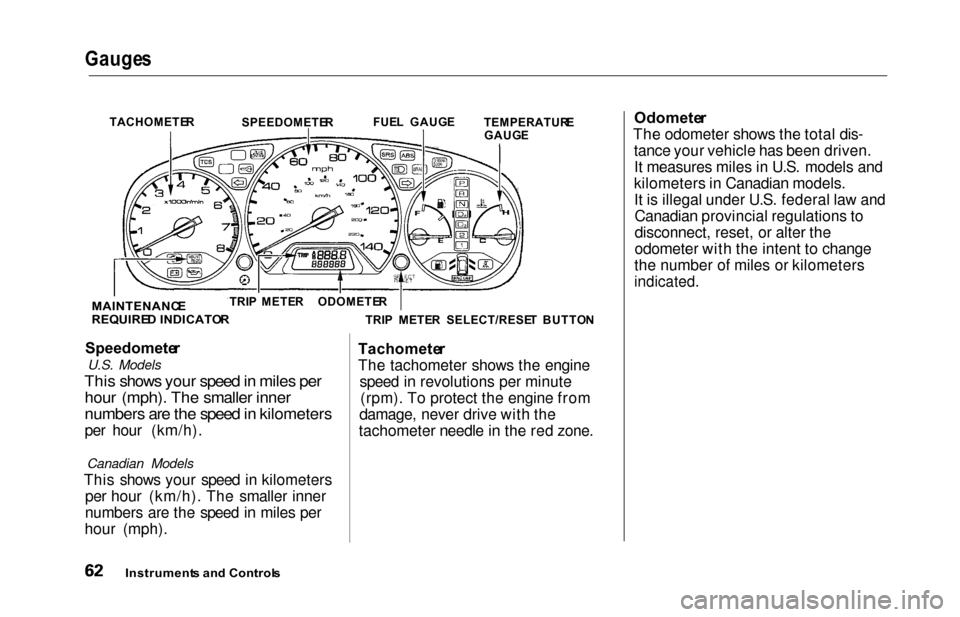
Speedomete r
U.S. Models
This shows your speed in miles per
hour (mph). The smaller inner
numbers are the speed in kilometers
per hour (km/h).
Canadian Models
This shows your speed in kilometers
per hour (km/h). The smaller inner
numbers are the speed in miles per
hour (mph). Tachomete
r
The tachometer shows the engine speed in revolutions per minute(rpm). To protect the engine from
damage, never drive with the
tachometer needle in the red zone. Odomete
r
The odometer shows the total dis- tance your vehicle has been driven.It measures miles in U.S. models and
kilometers in Canadian models. It is illegal under U.S. federal law andCanadian provincial regulations to
disconnect, reset, or alter the
odometer with the intent to change
the number of miles or kilometers
indicated.
Instrument s an d Control s
TACHOMETE R
SPEEDOMETE RFUE
L GAUG E
TEMPERATUR E
GAUG E
TRI P METE R SELECT/RESE T BUTTO N
TRI
P METE RODOMETE R
MAINTENANC E
REQUIRE D INDICATO R
Page 69 of 352
Control
s Nea r th e Steerin g Whee l
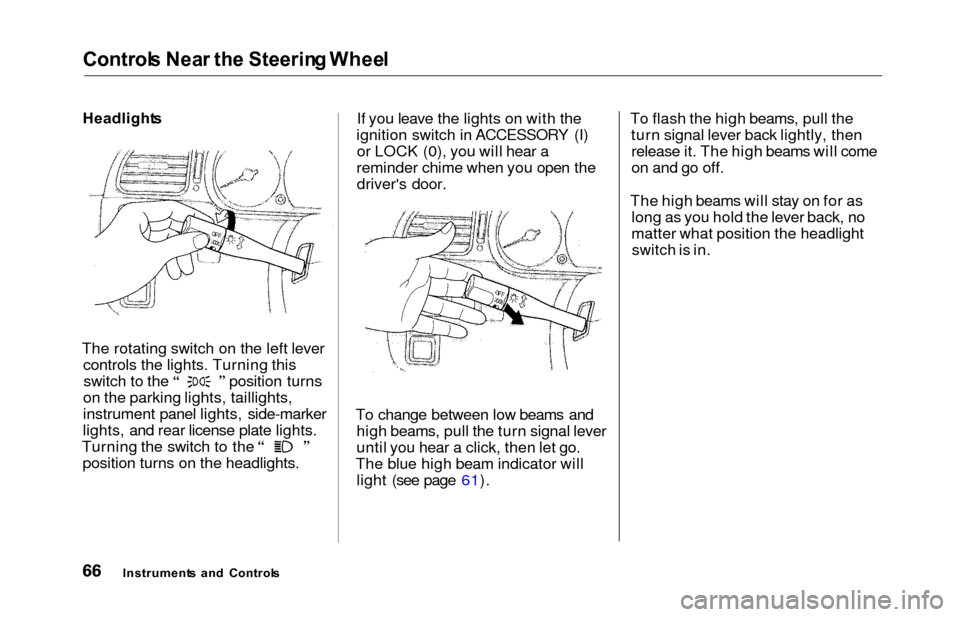
Headlight s
The rotating switch on the left lever controls the lights. Turning this switch to the position turns
on the parking lights, taillights,
instrument panel lights, side-marker
lights, and rear license plate lights. Turning the switch to the
position turns on the headlights. If you leave the lights on with the
ignition switch in ACCESSORY (I) or LOCK (0), you will hear a
reminder chime when you open the driver's door.
To change between low beams and high beams, pull the turn signal lever
until you hear a click, then let go.
The blue high beam indicator will light (see page 61). To flash the high beams, pull the
turn signal lever back lightly, thenrelease it. The high beams will come
on and go off.
The high beams will stay on for as long as you hold the lever back, no
matter what position the headlightswitch is in.
Instrument s an d Control s
Page 71 of 352
Controls Nea r th e Steerin g Whee l
Turn Signal s
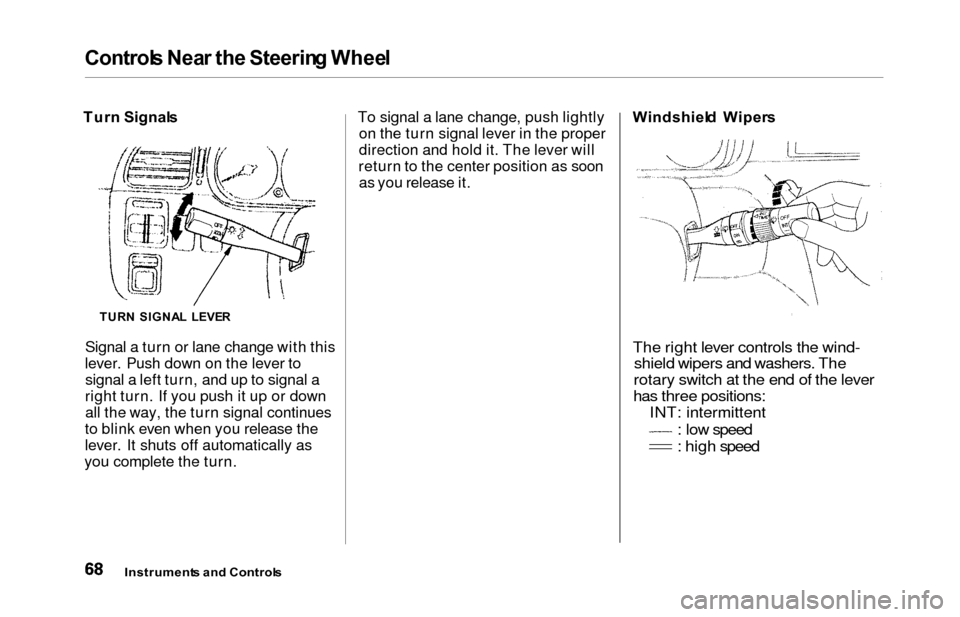
Signal a turn or lane change with this
lever. Push down on the lever to signal a left turn, and up to signal a
right turn. If you push it up or down all the way, the turn signal continues
to blink even when you release the
lever. It shuts off automatically as
you complete the turn. To signal a lane change, push lightly
on the turn signal lever in the proper
direction and hold it. The lever will
return to the center position as soon as you release it. Windshiel
d Wiper s
The right lever controls the wind-
shield wipers and washers. The
rotary switch at the end of the lever
has three positions: INT: intermittent
: low speed
: high speed
Instrument s an d Control s
TURN SIGNA L LEVE R
Page 72 of 352

Controls Nea r th e Steerin g Whee l
In intermittent, the wipers operate
every few seconds. You can vary
how often the wipers sweep the
windshield by turning the INT TIME ring next to the rotary switch. Thesweep interval will change slightly
with speed; getting shorter as you drive faster. In low speed and highspeed, the wipers run continuously. If you turn the INT TIME ring to the
shortest delay, the wipers will
change from intermittent to low speed operation when vehicle speed
exceeds 12 mph (20 km/h).
To operate the wipers in mist mode,push the control lever down. The
wipers run at high speed until you release the lever. This gives you aquick way to clear the windshield.
Instrument s an d Control s
Page 81 of 352
Keys an d Lock s
As required by the FCC:
This device complies with Part 15 of the
FCC rules. Operation is subject to the
following two conditions: (1) This device may not cause harmful interference, and (2) this device must accept any
interference received, including
interference that may cause undesired operation.
Changes or modifications not expressly
approved by the party responsible for compliance could void the user's
authority to operate the equipment.
This device complies with Industry
Canada Standard RSS-210.
Operation is subject to the following two
conditions: (1) this device may not cause
interference, and (2) this device must accept any interference that may cause undesired operation of the device.
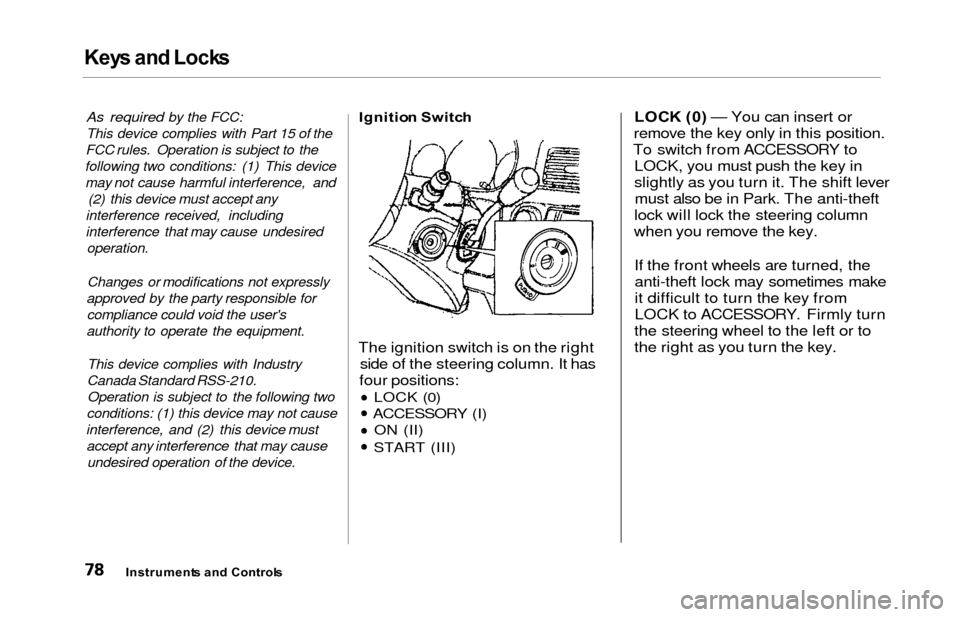
Ignitio n Switc h
The ignition switch is on the right
side of the steering column. It has
four positions:
LOCK (0)
ACCESSORY (I) ON (II)
START (III)
LOC K (0 ) — You can insert or
remove the key only in this position.
To switch from ACCESSORY to LOCK, you must push the key in
slightly as you turn it. The shift levermust also be in Park. The anti-theft
lock will lock the steering column
when you remove the key.
If the front wheels are turned, theanti-theft lock may sometimes make
it difficult to turn the key from
LOCK to ACCESSORY. Firmly turn
the steering wheel to the left or to
the right as you turn the key.
Instrument s an d Control s
Page 87 of 352
Keys an d Lock s
Transmitter Care
Avoid severe shock to the trans-
mitter, such as dropping or throwing
it. Also, protect it from extreme hot or cold temperatures.
Clean the transmitter case with a
soft cloth. Do not use strong
cleaners or solvents that could harm
the case. Immersing the transmitter
in any liquid will harm the trans-
mitter and cause it to not function
properly.
If you lose a transmitter, you will
need to have the replacement
programmed to your vehicle's system by your Honda dealer. Any
other transmitters you have will also
need to be reprogrammed.
As required by the FCC:
This device complies with Part 15 of the
FCC rules. Operation is subject to the
following two conditions: (1) This device may not cause harmful interference, and (2) this device must accept any
interference received, including
interference that may cause undesired
operation.
Changes or modifications not expressly
approved by the party responsible for
compliance could void the user's
authority to operate the equipment.
This device complies with Industry
Canada Standard RSS-210.
Operation is subject to the following two
conditions: (1) this device may not cause
interference, and (2) this device must accept any interference that may cause undesired operation of the device.
Instrument s an d Control s