radiator HONDA ODYSSEY 2000 RA6-RA9 / 2.G Owners Manual
[x] Cancel search | Manufacturer: HONDA, Model Year: 2000, Model line: ODYSSEY, Model: HONDA ODYSSEY 2000 RA6-RA9 / 2.GPages: 352, PDF Size: 4.43 MB
Page 196 of 352
Service Statio n Procedure s
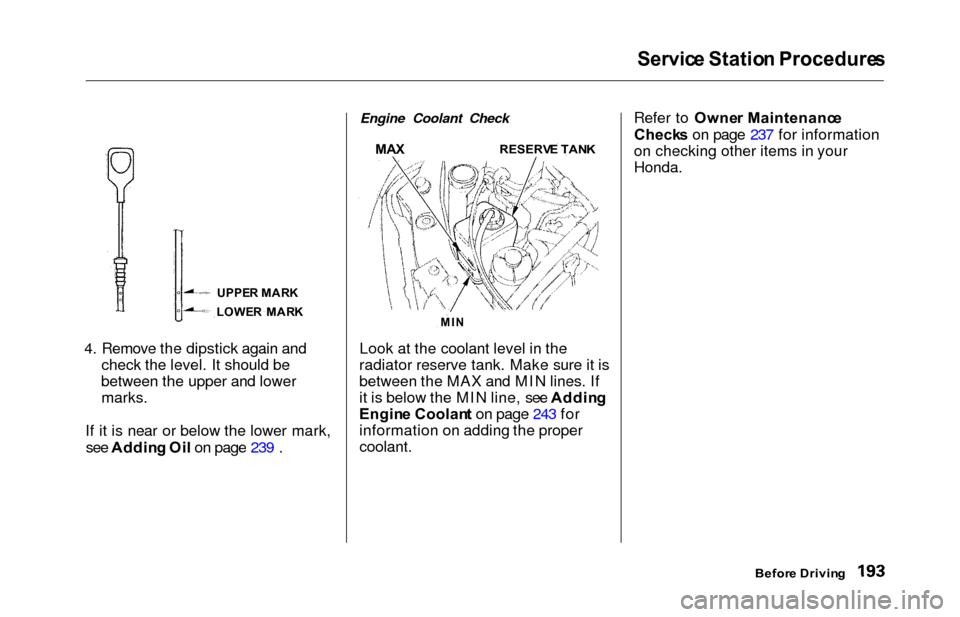
4. Remove the dipstick again and
check the level. It should be
between the upper and lower marks.
If it is near or below the lower mark, see Addin g Oi l on page 239 .
Engine Coolant Check
MA X RESERV E TAN K
Look at the coolant level in the
radiator reserve tank. Make sure it is
between the MAX and MIN lines. If
it is below the MIN line, see Addin g
Engin e Coolan t on page 243 for
information on adding the proper
coolant. Refer to Owne
r Maintenanc e
Check s on page 237 for information
on checking other items in your
Honda.
Befor e Drivin g
MIN
UPPE R MAR K
LOWE R MAR K
Page 240 of 352
Owner Maintenanc e Check s
You should check the following
items at the specified intervals. If
you are unsure of how to perform
any check, turn to the page given.
Engine oil level — Check every
time you fill the fuel tank. See
page 192.
Engine coolant level — Check the
radiator reserve tank every time
you fill the fuel tank. See page 193.
Windshield washer fluid — Check the level in the reservoir monthly.If weather conditions cause you to
use the washers frequently, check
the reservoir each time you stop
for fuel. See page 248.
Automatic transmission — Check the fluid level monthly. See page
249.
Brakes — Check the fluid level
monthly. See page 250. Tires — Check the tire pressure
monthly. Examine the tread for
wear and foreign objects. See page
263.
Lights — Check the operation of
the headlights, parking lights,
taillights, high-mount brake light,
turn signals, brake lights, and
license plate light monthly. See
page 270.
Maintenanc e
Page 246 of 352
Cooling Syste m
Addin g Engin e Coolan t
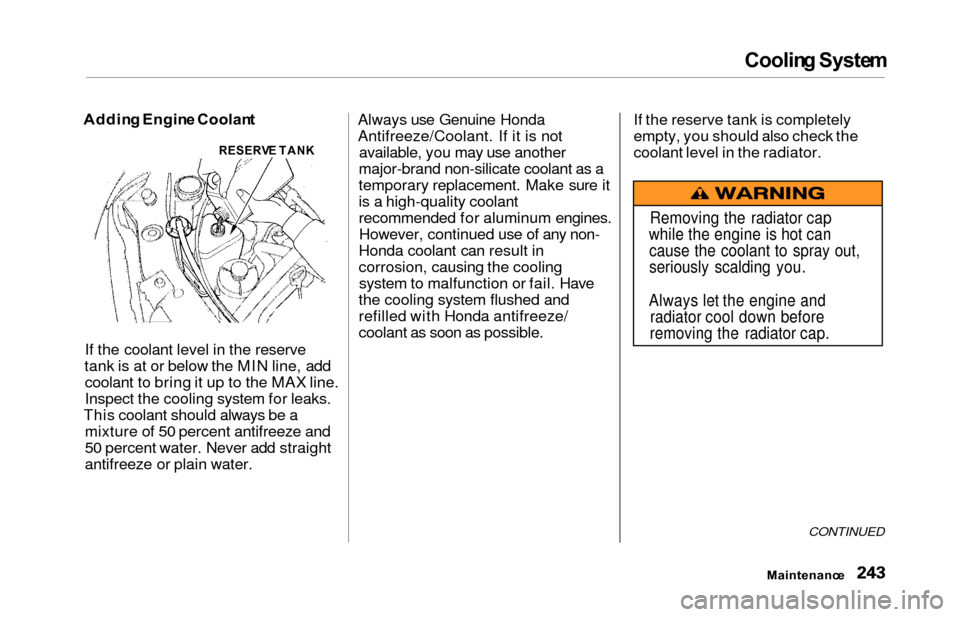
If the coolant level in the reserve
tank is at or below the MIN line, add coolant to bring it up to the MAX line.
Inspect the cooling system for leaks.
This coolant should always be a mixture of 50 percent antifreeze and
50 percent water. Never add straight
antifreeze or plain water. Always use Genuine Honda
Antifreeze/Coolant. If it is not
available, you may use another
major-brand non-silicate coolant as a
temporary replacement. Make sure it
is a high-quality coolant
recommended for aluminum engines. However, continued use of any non-
Honda coolant can result in
corrosion, causing the cooling system to malfunction or fail. Have
the cooling system flushed and
refilled with Honda antifreeze/
coolant as soon as possible. If the reserve tank is completely
empty, you should also check the
coolant level in the radiator.
CONTINUED
Maintenanc
e
RESERVE TAN K
Removing the radiator cap
while the engine is hot can cause the coolant to spray out,
seriously scalding you.
Always let the engine and radiator cool down before
removing the radiator cap.
Page 247 of 352

Cooling Syste m
1. Make sure the engine and radiator
are cool.
2. Turn the radiator cap counter-
clockwise, without pressing down
on it, until it stops. This relieves
any pressure remaining in the
cooling system.
3. Remove the radiator cap by pushing down and turning
counterclockwise.
4. The coolant level should be up tothe base of the filler neck. Add
coolant if it is low.
5. Put the radiator cap back on. Tighten it fully.
6. Pour coolant into the reserve tank. Fill it to halfway between the MAX
and MIN marks. Put the cap back
on the reserve tank.
Do not add any rust inhibitors or
other additives to your vehicle's
cooling system. They may not be
compatible with the coolant or
engine components.
Maintenanc e
RADIATOR CA P
RESERVE TAN K
Page 248 of 352
Cooling Syste m
Replacin g Engin e Coolan t
The cooling system should be completely drained and refilled with
new coolant according to the time
and distance recommendations in
the maintenance schedule. Only use Genuine Honda Antifreeze/Coolant.
Draining the coolant requires access
to the underside of the vehicle. Unless you have the tools and
knowledge, you should have this maintenance done by a skilled
mechanic.
1. Turn the ignition ON (II). Turn the heater temperature controldial fully clockwise. Turn the
ignition off.
Open the hood. Make sure the
engine and radiator are cool to the
touch.
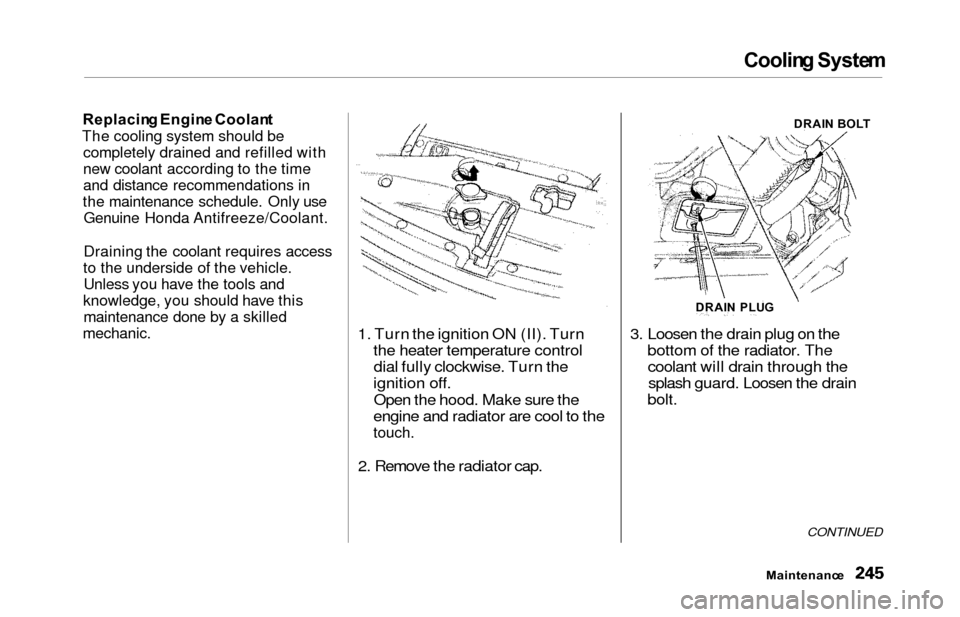
2. Remove the radiator cap. 3. Loosen the drain plug on the
bottom of the radiator. Thecoolant will drain through thesplash guard. Loosen the drain
bolt.
CONTINUED
Maintenanc e
DRAIN PLU G DRAI
N BOL T
Page 249 of 352

Cooling Syste m
4. Install a rubber hose on the drain
bolt in the back of the engine
block. Loosen the drain bolt. 5. Remove the reserve tank from its
holder by pulling it straight up.Drain the coolant, then put the
tank back in its holder.
6. When the coolant stops draining, tighten the drain plug at the
bottom of the radiator.
7. Tighten the drain bolt at the rear of the engine cylinder block
securely.
Tightening torque:
7 lbf .
f t (1 0 N .
m,1. 0 kgf .
m )
8. Mix the recommended antifreeze
with an equal amount of purifiedor distilled water in a clean
container. The cooling system
capacity is:
1.7 4 U S ga l (6. 6 l,1.4 5 Im p gal )
Maintenanc e
RESERVE TAN KRESERV ETANK CA P
HOLDE R
Page 250 of 352

Cooling Syste m
10. Fill the reserve tank to the MAX
mark. Install the reserve tank cap.
11. Install the radiator cap, and tighten it to the first stop.
12. Start the engine and let it run until the radiator cooling fan comes on
at least twice. Then stop the
engine.
13. Remove the radiator cap. Fill theradiator with coolant up to the
base of the filler neck.
14. Install the radiator cap, and tighten it fully.
Maintenanc e
9. Pour coolant into the radiator up
to the base of the filler neck.
FILLER NEC K
Fill u p to her e
Page 264 of 352
Air Conditionin g Syste m
Your vehicle's air conditioning is a
sealed system. Any major mainte-
nance, such as recharging, should be done by a qualified mechanic. You
can do a couple of things to make sure the air conditioning works
efficiently.
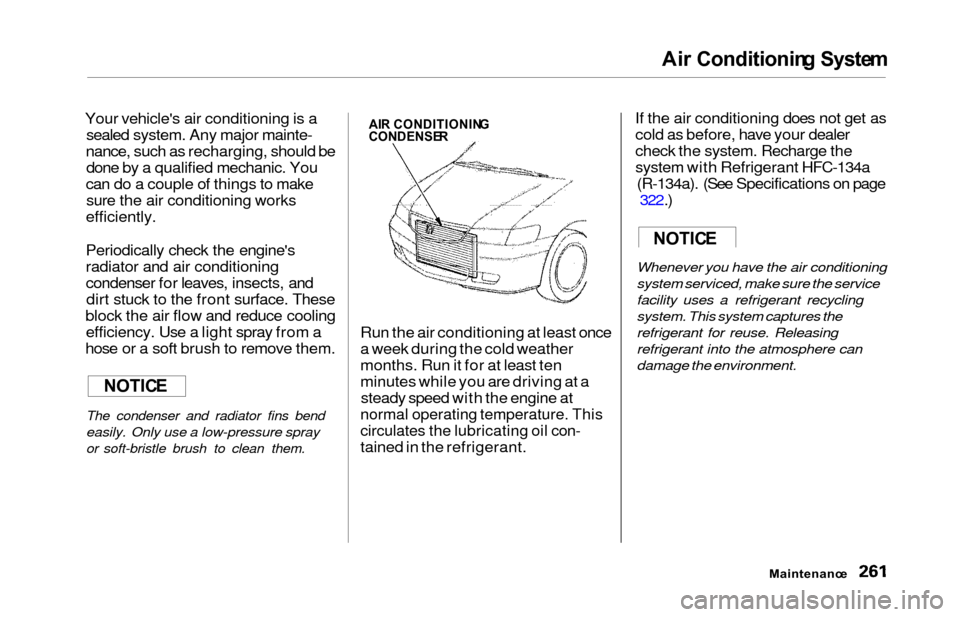
Periodically check the engine's
radiator and air conditioning
condenser for leaves, insects, and dirt stuck to the front surface. These
block the air flow and reduce cooling efficiency. Use a light spray from a
hose or a soft brush to remove them.
The condenser and radiator fins bend
easily. Only use a low-pressure spray
or soft-bristle brush to clean them.
Run the air conditioning at least once
a week during the cold weather
months. Run it for at least ten
minutes while you are driving at a steady speed with the engine at
normal operating temperature. This
circulates the lubricating oil con-
tained in the refrigerant. If the air conditioning does not get as
cold as before, have your dealer
check the system. Recharge the
system with Refrigerant HFC-134a
(R-134a). (See Specifications on page 322.)
Whenever you have the air conditioning
system serviced, make sure the service
facility uses a refrigerant recycling
system. This system captures the
refrigerant for reuse. Releasing
refrigerant into the atmosphere can
damage the environment.
Maintenanc e
NOTICE
AIR CONDITIONIN GCONDENSER
NOTICE
Page 309 of 352
If You r Engin e Overheat s
4. If the temperature gauge stays at
the red mark, turn off the engine.
5. Wait until you see no more signs of steam or spray, then open the
hood.
6. Look for any obvious coolant leaks,
such as a split radiator hose.
Everything is still extremely hot, so use caution. If you find a leak, it
must be repaired before you
continue driving (see Emergenc y
Towin g on page 317).
7. If you don't find an obvious leak, check the coolant level in the
radiator reserve tank (see page 193). If the level is below the
MIN mark, add coolant to halfway
between the MIN and MAX marks.
8. If there was no coolant in the reserve tank, you may also have toadd coolant to the radiator. Let the
engine cool down until the pointer reaches the middle of the tempera-
ture gauge, or lower, before check-
ing the radiator.
9. Using gloves or a large heavy cloth, turn the radiator cap
counterclockwise, without pushing
down, to the first stop. This
releases any remaining pressure in
the cooling system. After the
pressure releases, push down on
the cap and turn it until it comes off. 10. Start the engine and set the
temperature control dial to
maximum (climate control to
FULL AUTO at 90°F/32°C). Add
coolant to the radiator up to the
base of the filler neck. If you do
not have the proper coolant
mixture available, you can add
plain water. Remember to have the cooling system drained and
refilled with the proper mixture assoon as you can.
11. Put the radiator cap back on tightly. Run the engine and watch
the temperature gauge. If it goes
back to the red mark, the engine needs repair. (See Emergenc y
Towin g on page 317.)
12. If the temperature stays normal, check the coolant level in the
radiator reserve tank. If it has
gone down, add coolant to the MAX mark. Put the cap back on
tightly.
Takin g Car e o f th e Unexpecte d
Removing the radiator cap
while the engine is hot can
cause the coolant to spray out,
seriously scalding you.
Always let the engine and
radiator cool down before
removing the radiator cap.
Page 348 of 352

Index
Parking Brake................................ 116
Parking Lights................................. . 66
Parking Over Things that Burn... 209
PGM-FI System.............................. 330
Polishing and Waxing................... 285
Power
Door Locks................................... 79
Mirrors........................................ 115
Seats ........................................... 102
Sliding Doors................................ 90
Steering...................................... . 251
Windows..................................... 112
Power Sliding Doors Indicator................................. . 60, 94
Operation...................................... 90
Switches....................................... . 90
Pre-Drive Safety Checklist............. 11
Pregnancy, Using Seat Belts.......... 20
Protecting Adults............................ . 12
Additional Safety Precautions.... 20
Advice for Pregnant Women...... 20
Protecting Children........................ . 22
Protecting Infants........................ 30
Protecting Larger Children........ 39
Protecting Small Children.......... 35
Using Child Seats with
Tethers...................................... 43
Radiator Overheating.................... 305
Radio/CD Sound System.............. 167
Rear A/C Unit................................ 152
Rear Compartment........................ 122
Rear End Towing........................... 317
Rear Lights, Bulb Replacement....................... 274, 275
Rear View Mirror........................... 115
Rear Window Defogger.................. 71
Rear Windows................................ 114
Rear Window Wiper and Washer.. 70
Reclining the Seat Backs...... 101 , 103
Reclining the Second Seats.......... 101
Reclining the Third Seat .............. 101
Reminder Lights.............................. 57
Remote Audio Controls................. 185
Remote Transmitter........................ 81
Removing the Second Seats............................................ 108
Replacement Information
Air Cleaner Element.................. 252 Coolant........................................ 245
Engine Oil and Filter................. 241
Fuses........................................... 310
Light Bulbs................................. 272
Schedule..................................... 228
Spark Plugs................................. 254
Timing Belt................................. 263
Tires............................................ 267
Wiper Blades.............................. 259
Replacing Seat Belts After a Crash............................................. 47
Reserve Tank, Engine Coolant.... 193
Reverse Gear Position................... 206
Rotation, Tire................................. 266
Safety Belts................................... 8, 45
Safety Defects, Reporting*.......... 338
Safety Features.................................. 7
Air bags........................................... 9
Door Locks................................... 10
Head Restraints........................... 10
Seat Belts........................................ 8
Seats & Seat-Backs...................... 10
CONTINUED