ECU HONDA ODYSSEY 2002 RA6-RA9 / 2.G User Guide
[x] Cancel search | Manufacturer: HONDA, Model Year: 2002, Model line: ODYSSEY, Model: HONDA ODYSSEY 2002 RA6-RA9 / 2.GPages: 399, PDF Size: 4.97 MB
Page 39 of 399
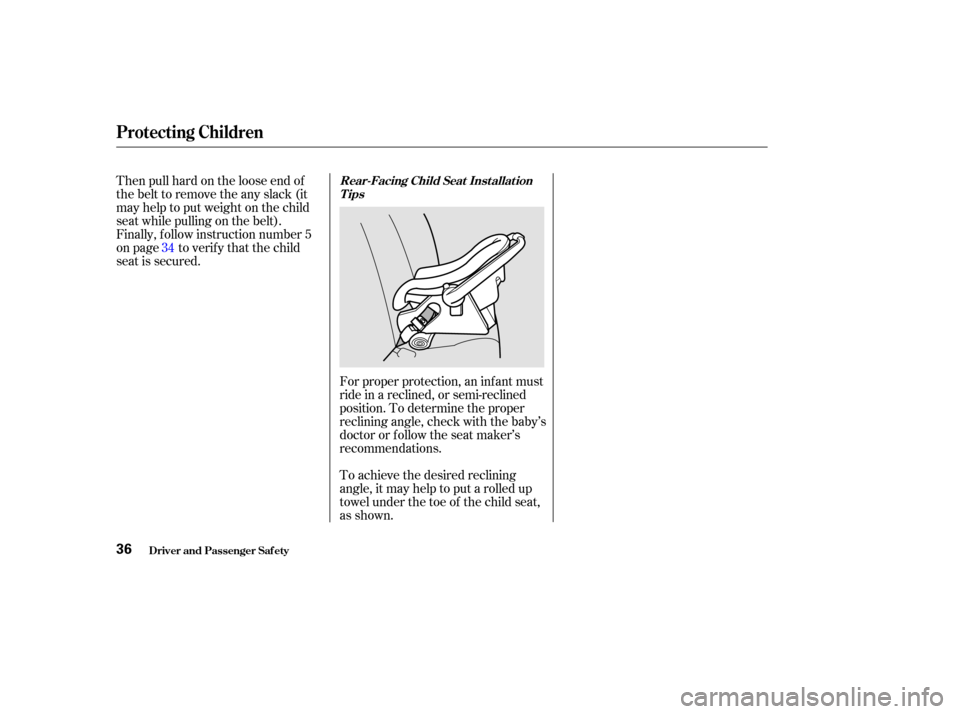
Forproperprotection,aninfantmust
ride in a reclined, or semi-reclined
position. To determine the proper
reclining angle, check with the baby’s
doctor or f ollow the seat maker’s
recommendations.
To achieve the desired reclining
angle, it may help to put a rolled up
towel under the toe of the child seat,
as shown.
Then pull hard on the loose end of
thebelttoremovetheanyslack(it
may help to put weight on the child
seat while pulling on the belt).
Finally, f ollow instruction number 5
on page to verify that the child
seat is secured.
34
Driver and Passenger Saf ety
Protecting Children
Rear-Facing Child Seat Inst allat ion
Tips
36
Page 41 of 399
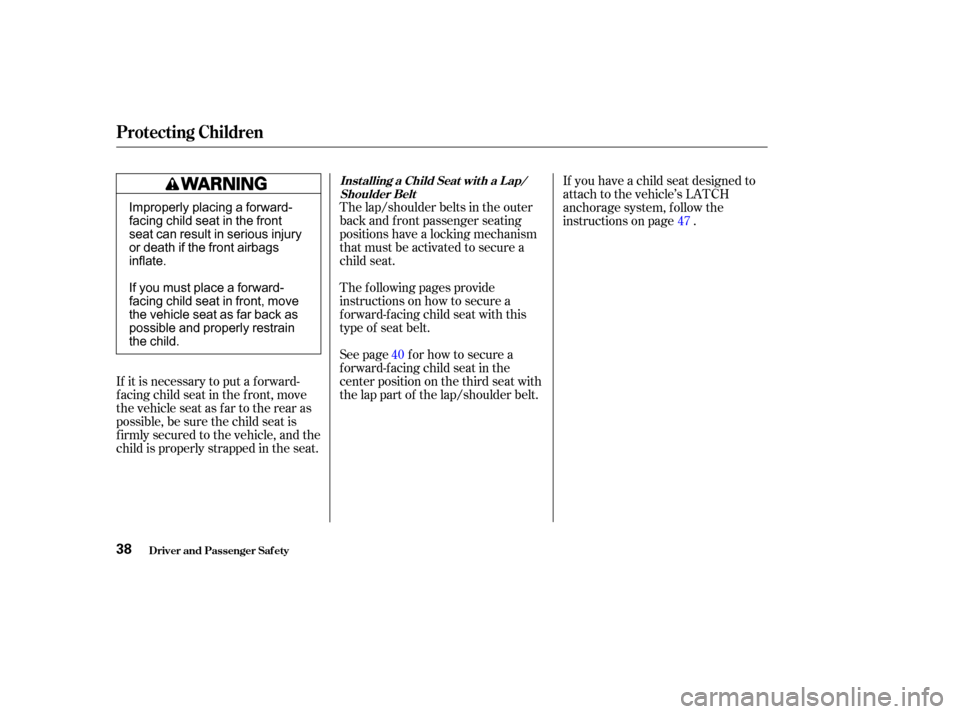
The lap/shoulder belts in the outer
back and f ront passenger seating
positions have a locking mechanism
that must be activated to secure a
child seat.
The f ollowing pages provide
instructions on how to secure a
f orward-f acing child seat with this
type of seat belt.
See page f or how to secure a
f orward-f acing child seat in the
center position on the third seat with
the lap part of the lap/shoulder belt.
If it is necessary to put a f orward-
f acing child seat in the f ront, move
the vehicle seat as far to the rear as
possible, be sure the child seat is
f irmly secured to the vehicle, and the
child is properly strapped in the seat. If you have a child seat designed to
attach to the vehicle’s LATCH
anchorage system, follow the
instructions on page .
40 47
Driver and Passenger Saf ety
Protecting Children
Inst alling a Child Seat wit h a L ap/
Shoulder Belt
38
Improperly placing a forward-
facing child seat in the front
seat can result in serious injury
or death if the front airbags
inflate.
Ifyoumustplaceaforward-
facing child seat in front, move
the vehicle seat as far back as
possible and properly restrain
the child.
Page 42 of 399
CONT INUED
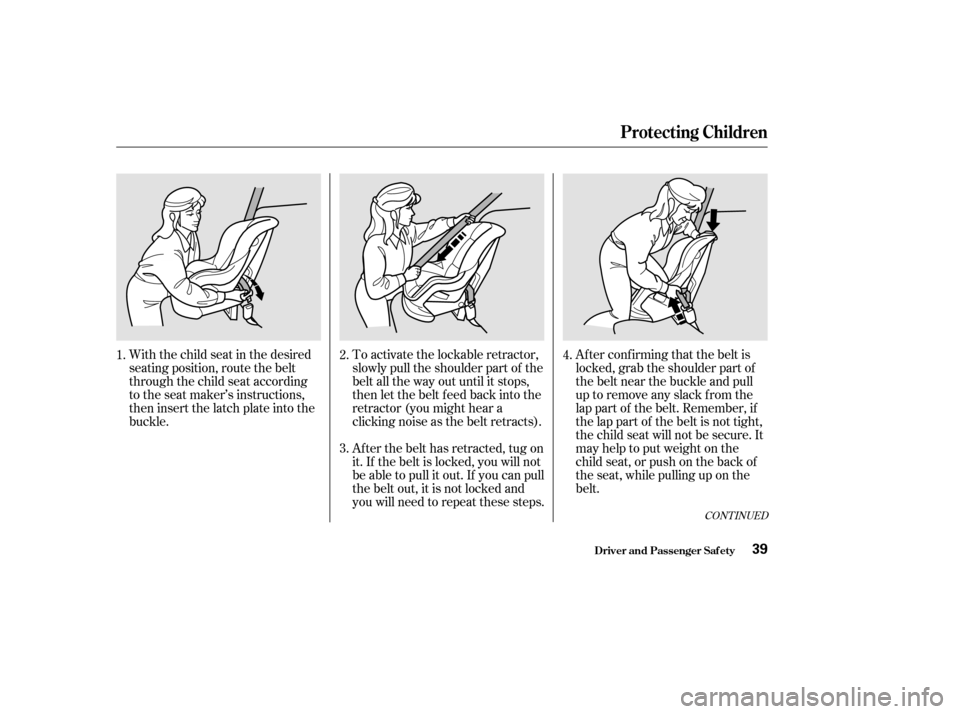
Af ter conf irming that the belt is
locked, grab the shoulder part of
the belt near the buckle and pull
up to remove any slack from the
lap part of the belt. Remember, if
the lap part of the belt is not tight,
the child seat will not be secure. It
mayhelptoputweightonthe
child seat, or push on the back of
the seat, while pulling up on the
belt.
To activate the lockable retractor,
slowly pull the shoulder part of the
belt all the way out until it stops,
then let the belt f eed back into the
retractor (you might hear a
clicking noise as the belt retracts).
Af ter the belt has retracted, tug on
it. If the belt is locked, you will not
be able to pull it out. If you can pull
the belt out, it is not locked and
you will need to repeat these steps.
With the child seat in the desired
seating position, route the belt
through the child seat according
to the seat maker’s instructions,
then insert the latch plate into the
buckle.
4.
2.
3.
1.
Driver and Passenger Saf ety
Protecting Children
39
Page 43 of 399
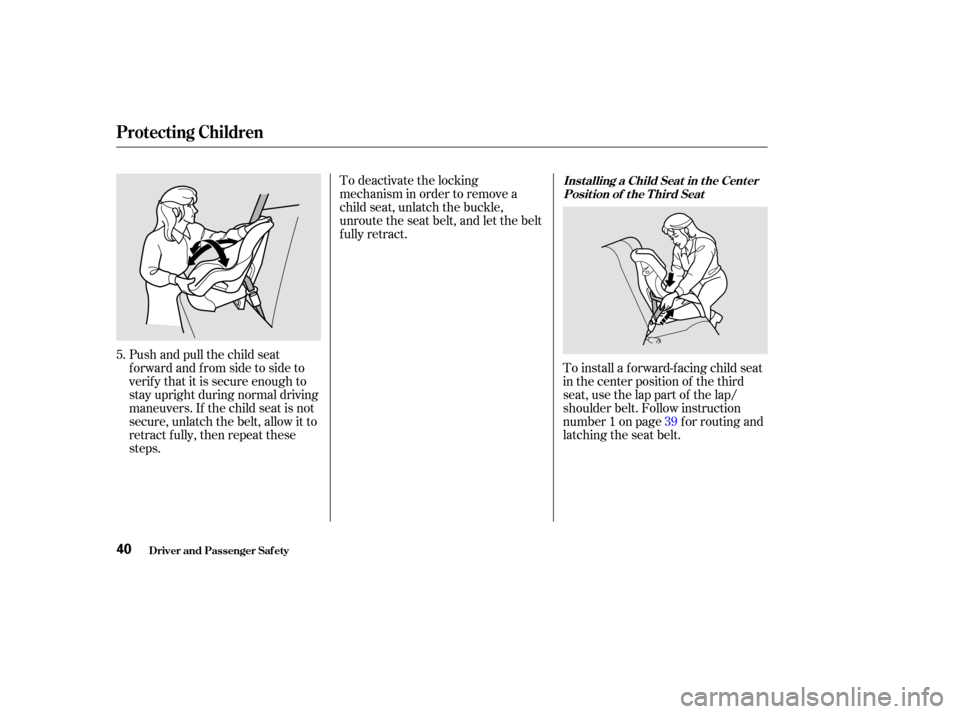
To deactivate the locking
mechanism in order to remove a
child seat, unlatch the buckle,
unroute the seat belt, and let the belt
fully retract.
Push and pull the child seat
f orward and f rom side to side to
verif y that it is secure enough to
stay upright during normal driving
maneuvers. If the child seat is not
secure, unlatch the belt, allow it to
retract f ully, then repeat these
steps. To install a forward-facing child seat
in the center position of the third
seat, use the lap part of the lap/
shoulder belt. Follow instruction
number 1 on page f or routing and
latching the seat belt.
5.
39
Driver and Passenger Saf ety
Protecting Children
Inst alling a Child Seat in t he Cent erPosition of the T hird Seat
40
Page 44 of 399
CONT INUED
When a child reaches the
recommended weight or height limit
for a forward-facing child seat, the
child should sit in the back seat and
wear a lap/shoulder belt.
If a child is too short f or the shoulder
part of the belt to properly f it, we
recommend that the child use a
booster seat until the child is tall
enough to use the seat belt without a
booster.
Then pull hard on the loose end of
thebelttoremovetheanyslack(it
may help to put weight on the child
seat while pulling on the belt).
Finally, f ollow instruction number 5
on page to verify that the child
seat is secured.
The f ollowing pages give
instructions on how to check proper
seat belt f it, what kind of booster
seat to use if one is needed, and
important precautions f or a child
who must sit in the f ront seat.
40
Driver and Passenger Saf ety
Protecting Children
Protecting L arger Children
41
Allowing a larger child to sit
improperly in the front seat can
result in injury or death if the
passenger’s front airbag inflates.
If a larger child must sit in front,
make sure the child moves the
seat as far back as possible
and wears the seat belt properly.
Page 47 of 399
If you decide that a child can saf ely
ride up f ront, be sure to:Caref ully read the owner’s manual
and make sure you understand all
seat belt instructions and all saf ety
inf ormation.
Move the vehicle seat to the rear-
most position.
Have the child sit up straight, back
against the seat, and feet on or
near the f loor.
Check that the child’s seat belt is
properly positioned and secured.
Supervise the child. Even mature
children sometimes need to be
reminded to f asten the seat belts
or sit properly.
Physically, a child must be large
enough f or the lap/shoulder belt to
properly f it over the hips, chest, and
shoulder (see pages and ). If
the seat belt does not f it properly,
the child should not sit in the f ront.
To saf ely ride in f ront, a child must
be able to f ollow the rules, including
sitting properly and wearing the seat
belt properly throughout a ride.
Of course, children vary widely. And
while age may be one indicator of
when a child can saf ely ride in the
f ront, there are other important
f actors you should consider.
41
15
Driver and Passenger Saf ety
Protecting Children
Physical Size
Maturity
44
Page 48 of 399
CONT INUED
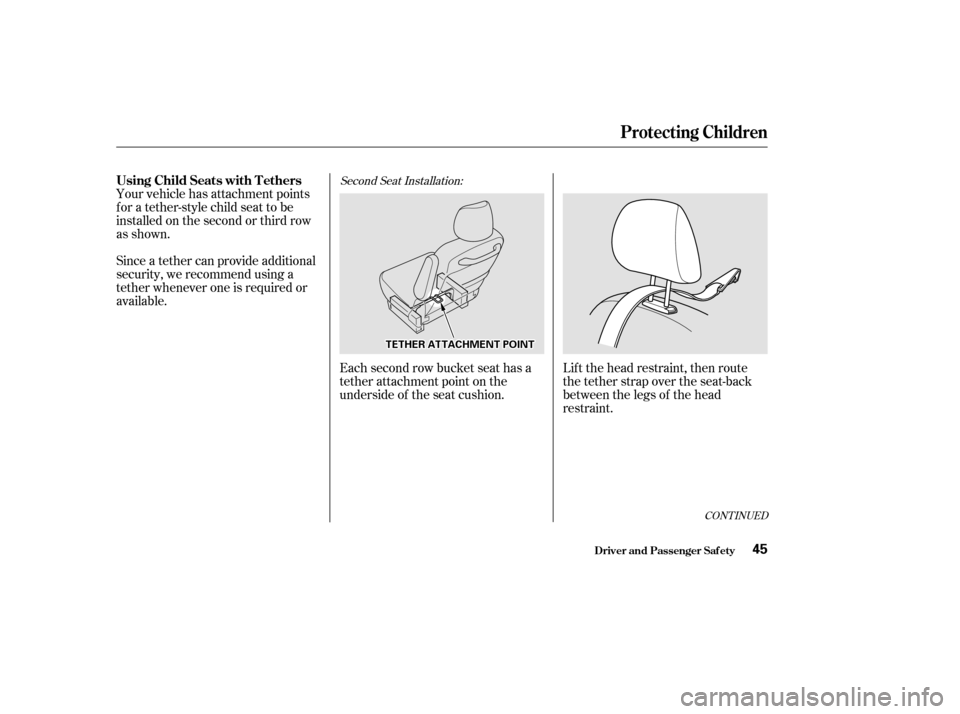
Your vehicle has attachment points
for a tether-style child seat to be
installed on the second or third row
as shown.
Since a tether can provide additional
security, we recommend using a
tether whenever one is required or
available.Each second row bucket seat has a
tether attachment point on the
underside of the seat cushion.Lift the head restraint, then route
the tether strap over the seat-back
between the legs of the head
restraint.
Second Seat Installation:
Driver and Passenger Saf ety
Protecting Children
Using Child Seats with T ethers
45
T T
E
ET
TH
H E
ER
R A
AT
TT
TA
A C
CHH M
M E
EN
NT T P
PO
OI INNT T
Page 50 of 399
CONT INUED
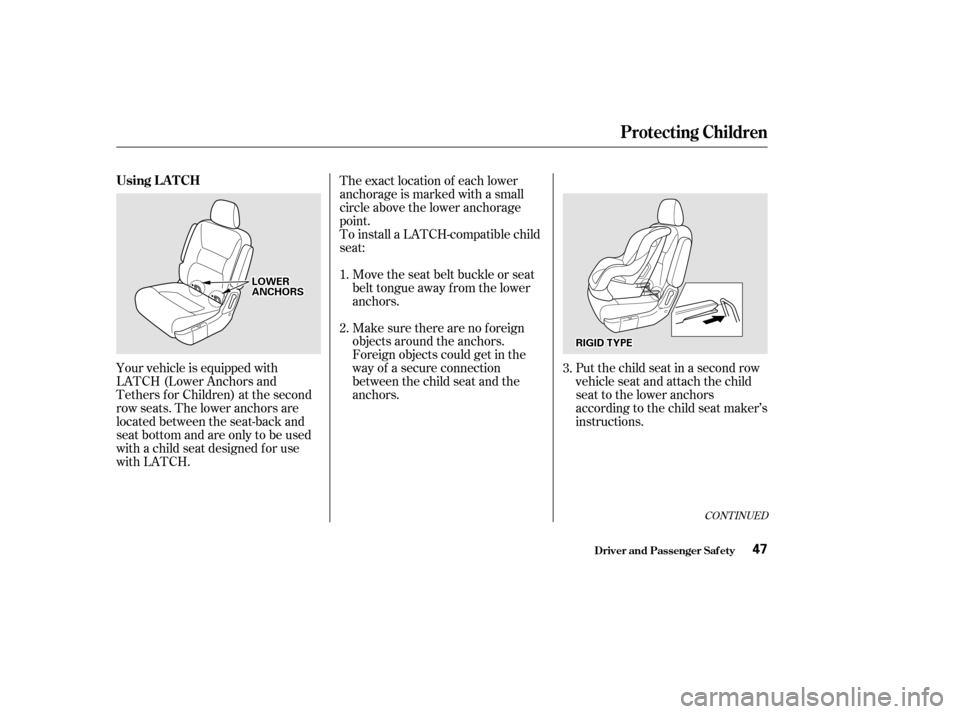
Put the child seat in a second row
vehicle seat and attach the child
seat to the lower anchors
according to the child seat maker’s
instructions.
Your vehicle is equipped with
LATCH (Lower Anchors and
Tethers f or Children) at the second
row seats. The lower anchors are
located between the seat-back and
seat bottom and are only to be used
with a child seat designed f or use
with LATCH. The exact location of each lower
anchorage is marked with a small
circle above the lower anchorage
point.
To install a LATCH-compatible child
seat:
Move the seat belt buckle or seat
belt tongue away f rom the lower
anchors.
Make sure there are no f oreign
objects around the anchors.
Foreign objects could get in the
way of a secure connection
between the child seat and the
anchors.
1.
2.
3.
Protecting Children
Driver and Passenger Saf ety
Using L A T CH
47
R RIIGGI IDD T
TY
YP PE
E
L
LO
OW WE ER
R
A
A N
NC CHH O
OR RSS
Page 51 of 399
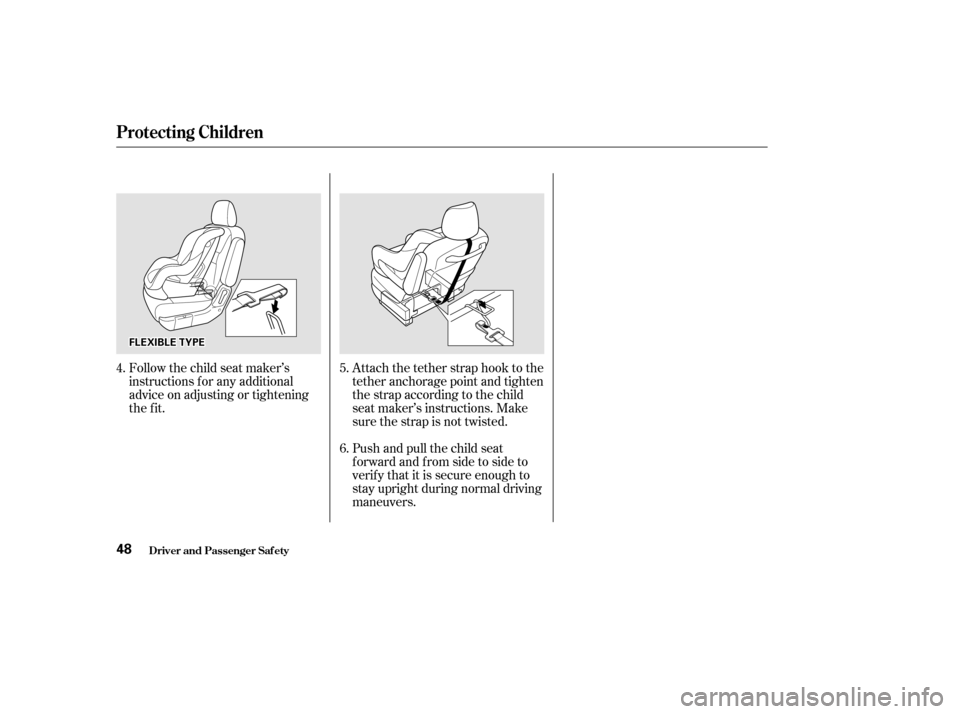
Follow the child seat maker’s
instructions f or any additional
advice on adjusting or tightening
the fit.Attach the tether strap hook to the
tether anchorage point and tighten
the strap according to the child
seat maker’s instructions. Make
sure the strap is not twisted.
Push and pull the child seat
f orward and f rom side to side to
verif y that it is secure enough to
stay upright during normal driving
maneuvers.
4.
5.
6.
Protecting Children
Driver and Passenger Saf ety48
F FLLEE X
X I
IBBL LEE T
TY
YP PE
E
Page 53 of 399
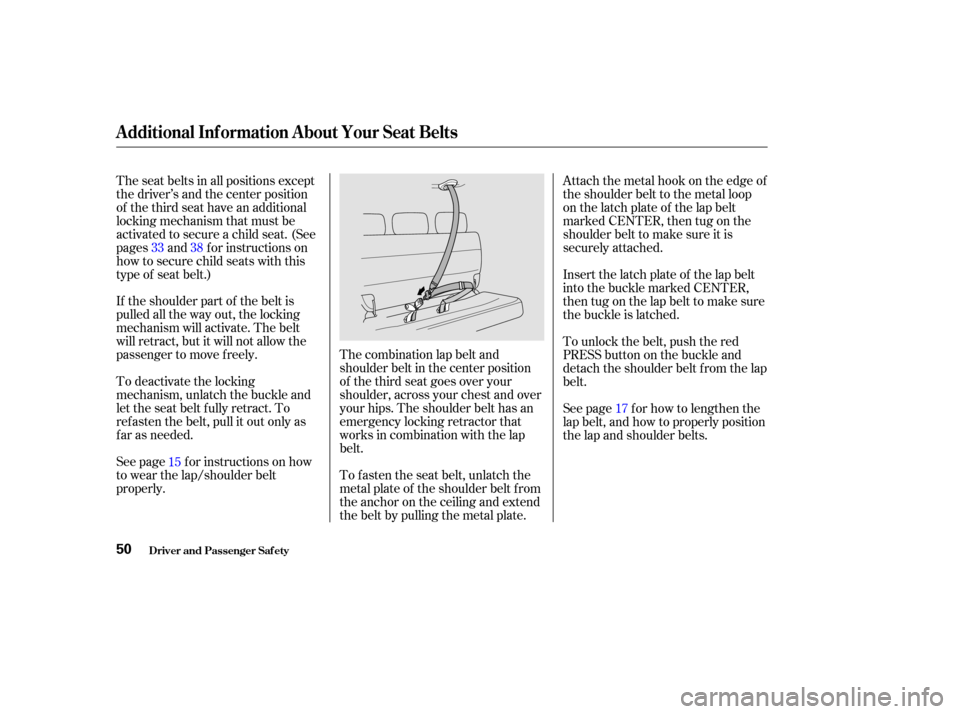
The combination lap belt and
shoulder belt in the center position
of the third seat goes over your
shoulder, across your chest and over
your hips. The shoulder belt has an
emergency locking retractor that
works in combination with the lap
belt.
The seat belts in all positions except
the driver’s and the center position
of the third seat have an additional
locking mechanism that must be
activated to secure a child seat. (See
pages and f or instructions on
how to secure child seats with this
type of seat belt.)
If the shoulder part of the belt is
pulled all the way out, the locking
mechanism will activate. The belt
will retract, but it will not allow the
passenger to move f reely.
To deactivate the locking
mechanism, unlatch the buckle and
let the seat belt f ully retract. To
ref asten the belt, pull it out only as
f ar as needed.
See page f or instructions on how
to wear the lap/shoulder belt
properly.
To f asten the seat belt, unlatch the
metal plate of the shoulder belt from
the anchor on the ceiling and extend
the belt by pulling the metal plate.Attach the metal hook on the edge of
the shoulder belt to the metal loop
on the latch plate of the lap belt
marked CENTER, then tug on the
shoulder belt to make sure it is
securely attached.
Insert the latch plate of the lap belt
into the buckle marked CENTER,
then tug on the lap belt to make sure
the buckle is latched.
To unlock the belt, push the red
PRESS button on the buckle and
detach the shoulder belt f rom the lap
belt.
See page f or how to lengthen the
lap belt, and how to properly position
the lap and shoulder belts.
15 17
33 38
Additional Inf ormation About Your Seat Belts
Driver and Passenger Saf ety50