ect HONDA ODYSSEY 2004 RB1-RB2 / 3.G Service Manual
[x] Cancel search | Manufacturer: HONDA, Model Year: 2004, Model line: ODYSSEY, Model: HONDA ODYSSEY 2004 RB1-RB2 / 3.GPages: 296, PDF Size: 3.84 MB
Page 47 of 296
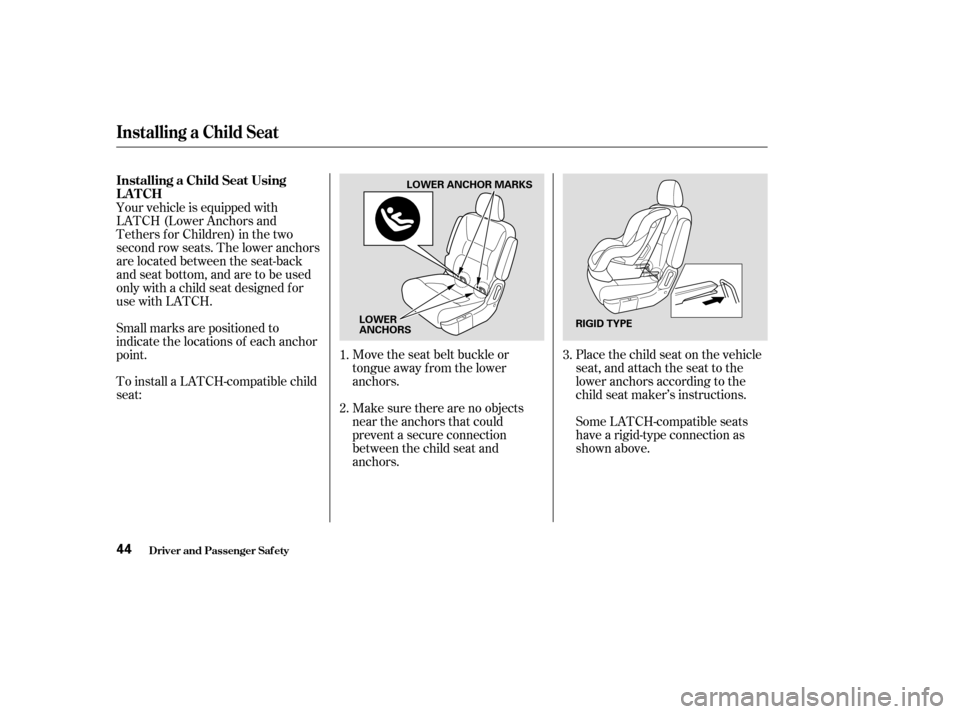
Move the seat belt buckle or
tongue away f rom the lower
anchors.
Make sure there are no objects
near the anchors that could
prevent a secure connection
between the child seat and
anchors.Place the child seat on the vehicle
seat, and attach the seat to the
lower anchors according to the
child seat maker’s instructions.
Some LATCH-compatible seats
have a rigid-type connection as
shown above.
Your vehicle is equipped with
LATCH (Lower Anchors and
Tethers f or Children) in the two
second row seats. The lower anchors
are located between the seat-back
and seat bottom, and are to be used
only with a child seat designed f or
use with LATCH.
To install a LATCH-compatible child
seat: Small marks are positioned to
indicate the locations of each anchor
point.
1.
2. 3.
Driver and Passenger Saf ety
Installing a Child Seat
Installing a Child Seat Using
LATCH
44
RIGID TYPE
LOWER
ANCHORS LOWERANCHORMARKS
Page 48 of 296
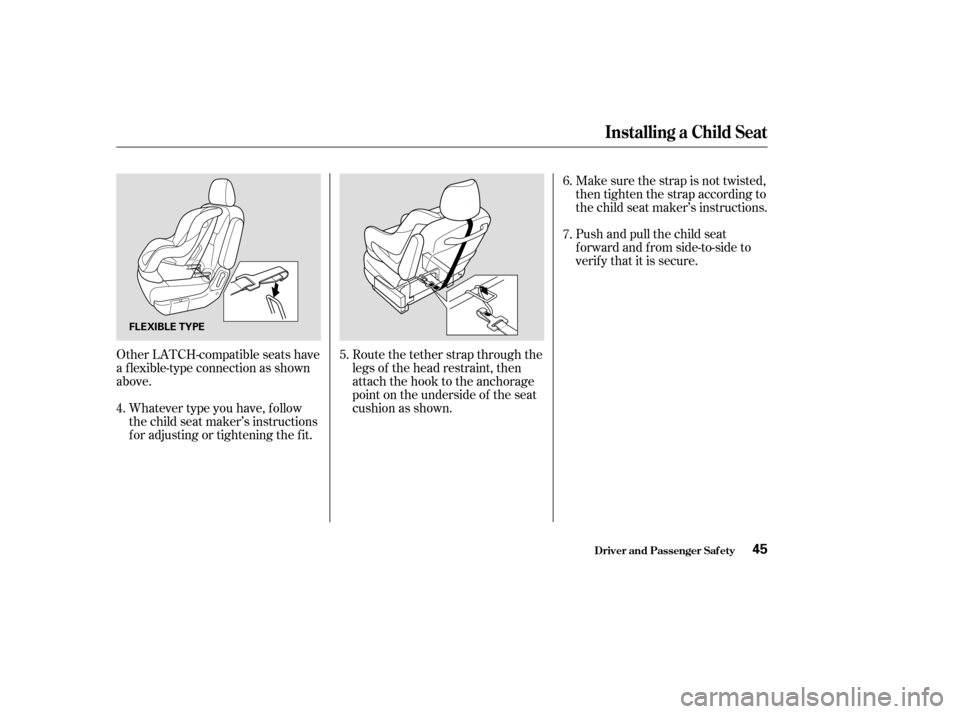
Other LATCH-compatible seats have
a f lexible-type connection as shown
above.Whatever type you have, f ollow
the child seat maker’s instructions
f or adjusting or tightening the f it. Route the tether strap through the
legs of the head restraint, then
attach the hook to the anchorage
point on the underside of the seat
cushion as shown.Push and pull the child seat
f orward and f rom side-to-side to
verif y that it is secure. Make sure the strap is not twisted,
then tighten the strap according to
the child seat maker’s instructions.
4. 5.6.
7.
Driver and Passenger Saf ety
Installing a Child Seat
45
FLEXIBLE TYPE
Page 53 of 296
When a child reaches the
recommended weight or height limit
for a forward-facing child seat, the
child should sit in a back seat on a
booster and wear a lap/shoulder belt.
The f ollowing pages give
instructions on how to check proper
seat belt f it, what kind of booster
seat to use if one is needed, and
important precautions f or a child
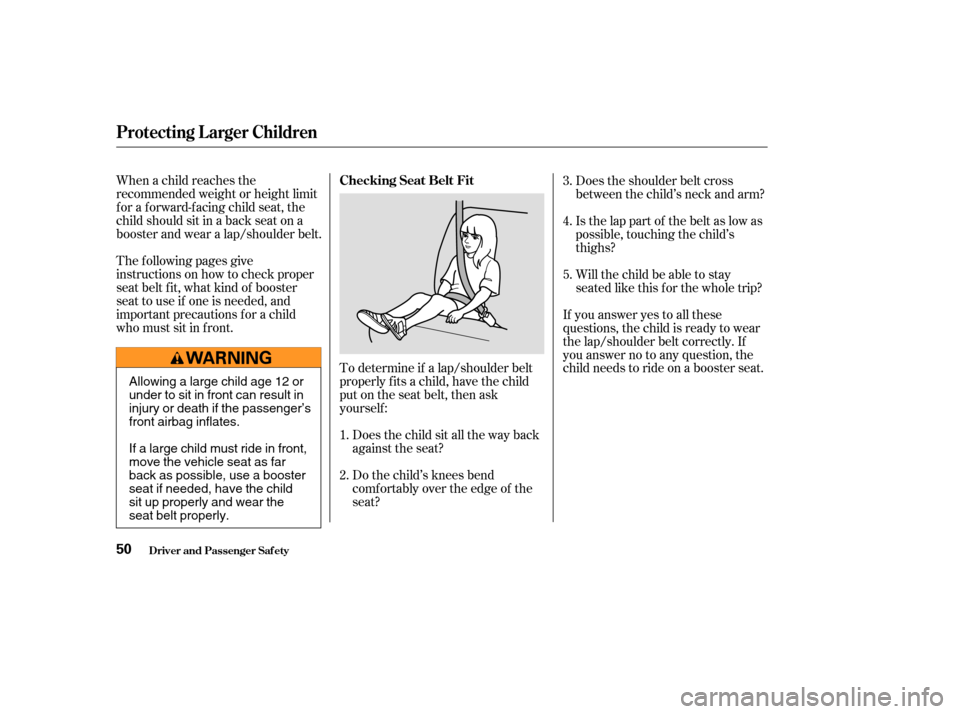
who must sit in f ront.To determine if a lap/shoulder belt
properly f its a child, have the child
put on the seat belt, then ask
yourself :Does the child sit all the way back
against the seat?
Do the child’s knees bend
comf ortably over the edge of the
seat? Does the shoulder belt cross
between the child’s neck and arm?
Is the lap part of the belt as low as
possible, touching the child’s
thighs?
Will the child be able to stay
seated like this f or the whole trip?
If you answer yes to all these
questions, the child is ready to wear
the lap/shoulder belt correctly. If
you answer no to any question, the
child needs to ride on a booster seat.
1.
2. 3.
4.
5.
Protecting L arger Children
Driver and Passenger Saf ety
Checking Seat Belt Fit
50
Allowing a large child age 12 or
under to sit in front can result in
injury or death if the passenger’s
front airbag inflates.
If a large child must ride in front,
move the vehicle seat as far
back as possible, use a booster
seat if needed, have the child
sit up properly and wear the
seat belt properly.
Page 54 of 296
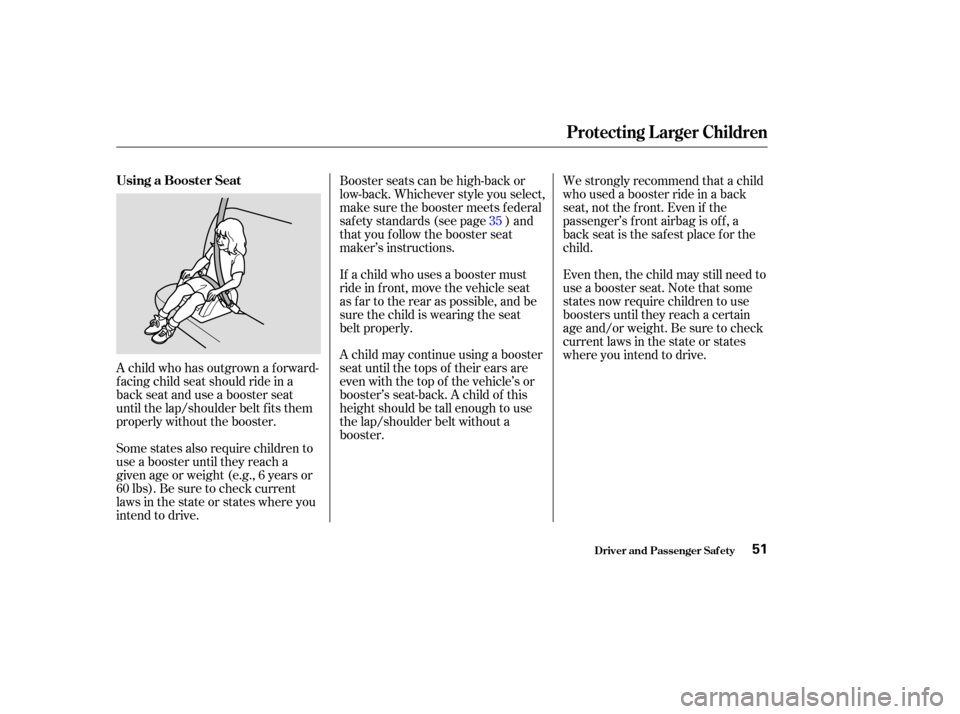
A child who has outgrown a forward-
f acing child seat should ride in a
back seat and use a booster seat
until the lap/shoulder belt f its them
properly without the booster.
Some states also require children to
use a booster until they reach a
given age or weight (e.g., 6 years or
60lbs).Besuretocheckcurrent
laws in the state or states where you
intend to drive.Booster seats can be high-back or
low-back. Whichever style you select,
make sure the booster meets f ederal
saf ety standards (see page ) and
that you f ollow the booster seat
maker’s instructions.
If a child who uses a booster must
ride in f ront, move the vehicle seat
as far to the rear as possible, and be
sure the child is wearing the seat
belt properly.
A child may continue using a booster
seat until the tops of their ears are
even with the top of the vehicle’s or
booster’s seat-back. A child of this
height should be tall enough to use
the lap/shoulder belt without a
booster.
We strongly recommend that a child
whousedaboosterrideinaback
seat,notthefront.Evenif the
passenger’s f ront airbag is of f , a
back seat is the safest place for the
child.
Even then, the child may still need to
use a booster seat. Note that some
states now require children to use
boosters until they reach a certain
ageand/orweight.Besuretocheck
current laws in the state or states
where you intend to drive.
35
Protecting L arger Children
Driver and Passenger Saf ety
Using a Booster Seat
51
Page 55 of 296

The National Highway Traffic Safety
Administration and Transport
Canada recommend that all children
age 12 and under be properly
restrained in a back seat.
Even with advanced front airbag, the
back seat is the safest place for a
child of any age or size.
If the passenger’s f ront airbag is on,
and it inflates in a moderate to
severe f rontal collision, the airbag
can cause serious injuries to a child
who is unrestrained, improperly
restrained, sitting too close to the
airbag, or out of position.
The side airbag also poses risks. If
any part of a larger child’s body is in
the path of a deploying side airbag,
the child could receive possibly
serious injuries.Of course, children vary widely. And
while age may be one indicator of
when a child can saf ely ride in the
f ront. There are other important
f actors you should consider.
To saf ely ride in f ront, a child must
be able to f ollow the rules, including
sitting properly, and wearing the seat
belt properly throughout a ride.
Physically, a child must be large
enough f or the lap/shoulder belt to
properly f it (see pages and ). If
the seat belt does not f it properly,
with or without the child sitting on a
booster, the child should not sit in
the front.
If you decide that a child can saf ely
ride up f ront, be sure to:
Caref ully read the owner’s manual
and make sure you understand all
seat belt instructions and all saf ety
inf ormation.
Move the vehicle seat to the rear-
most position.
Have the child sit up straight, back
against the seat, and feet on or
near the f loor.
Check that the child’s seat belt is
properly and securely positioned.
Supervise the child. Even mature
children sometimes need to be
reminded to f asten the seat belts
or sit properly.
5014
Protecting L arger Children
Driver and Passenger Saf ety
When Can a L arger Child Sit in
Front
Maturity
Physical Size
52
Page 56 of 296

This could result in
serious neck injuries during a crash.
This could cause
very serious injuries during a crash.
It also increases the chance that the
child will slide under the belt in a
crash and be injured.
If they do, they could
be very seriously injured in a crash. Devices intended to improve a
child’s comf ort or reposition the
shoulder part of a seat belt can make
the belt less ef f ective, and increase
the chance of serious injury in a
crash.
Protecting L arger Children
Driver and Passenger Saf ety
Additional Saf ety Precautions
Do not let a child wear a seat belt
across t he neck.
Do not let a child put the shoulderpart of a seat belt behind t he back orunder t he arm.
T wo children should never use t hesame seat belt . Do not put any accessories on a seat
belt.
53
Page 57 of 296
Your vehicle’s exhaust contains
carbon monoxide gas. You should
have no problem with carbon
monoxide entering the vehicle in
normal driving if you maintain your
vehicle properly.
Have the exhaust system inspected
f or leaks whenever:The vehicle is raised f or an oil
change.
You notice a change in the sound
of the exhaust.
The vehicle was in an accident
that may have damaged the under-
side. High levels of carbon monoxide can
collect rapidly in enclosed areas,
such as a garage. Do not run the
engine with the garage door closed.
Even with the door open, run the
engine only long enough to move the
vehicle out of the garage. With the tailgate open, air flow can
pull exhaust gas into your vehicle’s
interior and create a hazardous
condition. If you must drive with the
tailgate open, open all the windows
and set the heating and cooling
system/climate control system as
shown below.
If you must sit in your parked vehicle,
even in an unconf ined area, with the
engine running, adjust the heating
and cooling system/climate control
system as f ollows:
Select the Fresh Air mode.
Select the mode.
Turn the f an on high speed.
Set the temperature control to a
comfortable setting.
1.
2.
3.
4.
Carbon Monoxide Hazard
Driver and Passenger Saf ety54
Carbon monoxide gas is toxic.
Breathing it can cause
unconsciousness and even kill
you.
Avoid any enclosed areas or
activities that expose you to
carbon monoxide.
Page 60 of 296
This section gives inf ormation about
the controls and displays that
contribute to the daily operation of
your Honda. All the essential
controls are within easy reach............................
Control Locations .58
............................
Instrument Panel .59
..........
Instrument Panel Indicators . 60
..
Maintenance Required Indicator . 65
.............................................
Gauges .66
Controls Near the Steering ...........................................
Wheel .68
.
Windshield Wipers and Washers . 69
......................................
Turn Signal .71
........................................
Headlights .71
........
Instrument Panel Brightness . 72
..............................
Hazard Warning .73
.................
Rear Window Def ogger . 73
..........
Steering Wheel Adjustment . 74
...............................
Keys and Locks .75
........................
Immobilizer System .76
................................
Ignition Switch .77
......................................
Door Locks .78
......................
Power Door Locks .78
..............
Childproof Door Locks . 79
........................................
Tailgate .79
.......................
Remote Transmitter .81
...................................
Sliding Doors .84
.................................................
Seats .88
....................................
Seat Heaters .98
..............................
Power Windows .99 ...........................................
Mirrors .102
...............................
Parking Brake .103
.........
Interior Convenience Items . 104
..........................................
Clock .105
.............................
Center Table .105
.....................
Beverage Holders .106
....................
Sunglasses Holder .107
...................................
Sun Visor .108
............................
Vanity Mirror .108
...................
Rear Compartment . 108
..................................
Glove Box .109
........
Accessory Power Sockets . 109
...........................
Center Pocket .110
...............................
Coin Holder .110
...............................
Storage Box .111
..................................
Coat Hook .111
...............................
Interior Lights .112
Instruments and Controls
Inst rument s and Cont rols57
Page 68 of 296
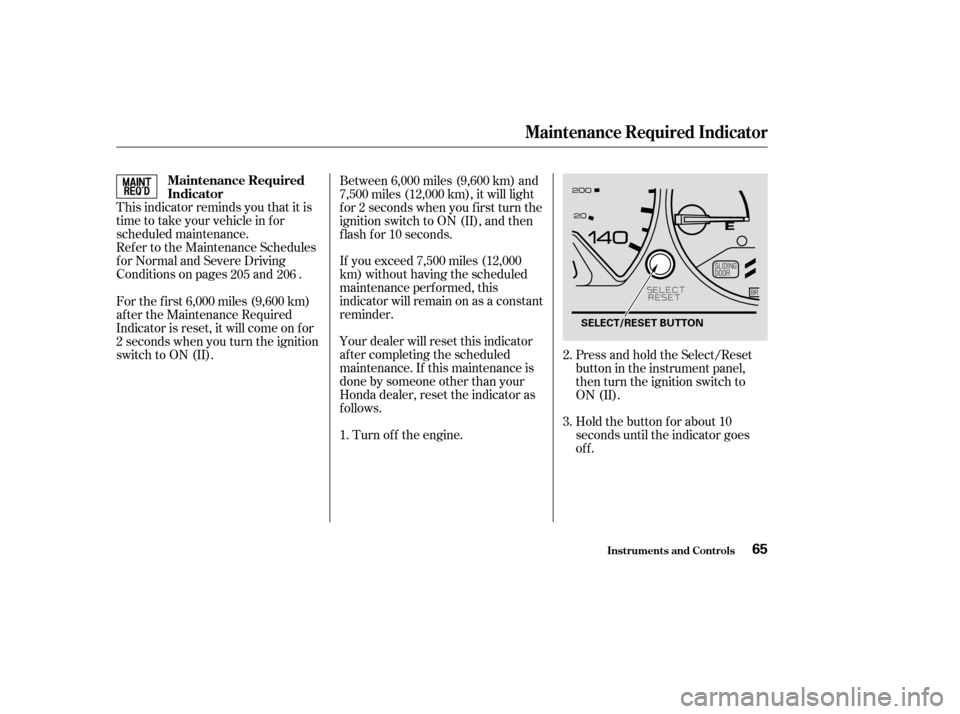
This indicator reminds you that it is
time to take your vehicle in for
scheduled maintenance.
Ref er to the Maintenance Schedules
f or Normal and Severe Driving
Conditions on pages and .Between 6,000 miles (9,600 km) and
7,500 miles (12,000 km), it will light
f or 2 seconds when you f irst turn the
ignition switch to ON (II), and then
f lash f or 10 seconds.
If you exceed 7,500 miles (12,000
km) without having the scheduled
maintenance perf ormed, this
indicator will remain on as a constant
reminder.
Your dealer will reset this indicator
af ter completing the scheduled
maintenance. If this maintenance is
done by someone other than your
Honda dealer, reset the indicator as
f ollows.
Turn of f the engine. Hold the button for about 10
seconds until the indicator goes
of f .
For the f irst 6,000 miles (9,600 km)
af ter the Maintenance Required
Indicator is reset, it will come on f or
2 seconds when you turn the ignition
switch to ON (II).
Press and hold the Select/Reset
buttonintheinstrumentpanel,
then turn the ignition switch to
ON (II).
1. 2.
3.
205 206
Maintenance Required Indicator
Inst rument s and Cont rols
Maintenance Required
Indicator
65
SELECT/RESET BUTTON
Page 69 of 296
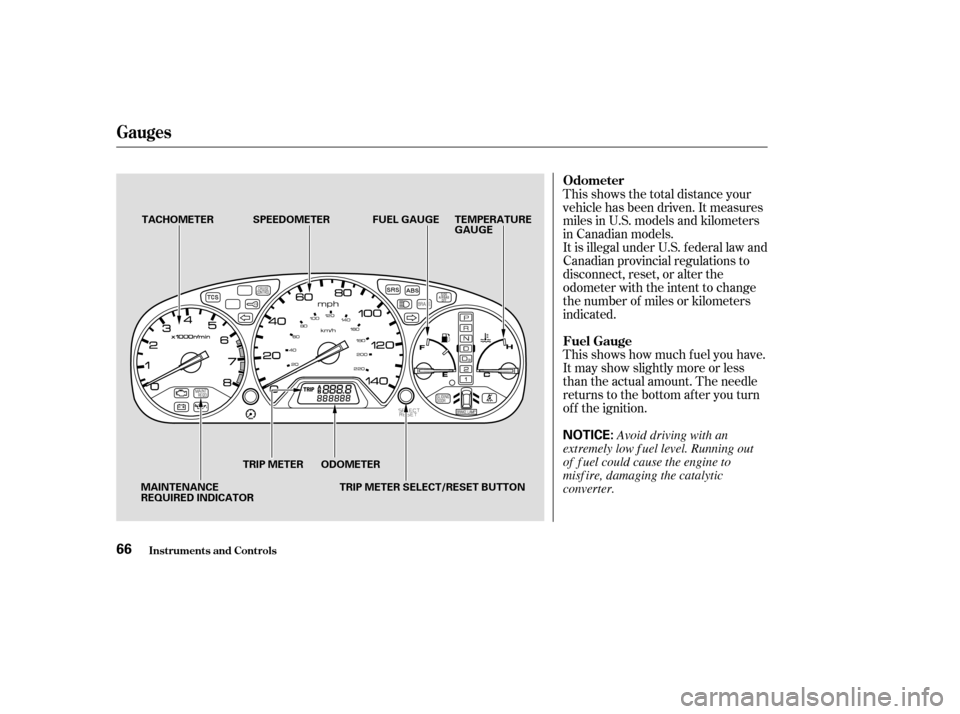
This shows how much f uel you have.
It may show slightly more or less
than the actual amount. The needle
returns to the bottom after you turn
of f the ignition. This shows the total distance your
vehicle has been driven. It measures
miles in U.S. models and kilometers
in Canadian models.
It is illegal under U.S. f ederal law and
Canadian provincial regulations to
disconnect, reset, or alter the
odometer with the intent to change
the number of miles or kilometers
indicated.
Gauges
Inst rument s and Cont rols
Odometer
Fuel Gauge
66
NOTICE:
TACHOMETER SPEEDOMETERTEMPERATURE
GAUGE
TRIP METER FUEL GAUGE
TRIP METER SELECT/RESET BUTTON
MAINTENANCE
REQUIRED INDICATOR ODOMETER
Avoid driving with an
extremely low f uel level. Running out
of f uel could cause the engine to
misf ire, damaging the catalytic
converter.