Button HONDA ODYSSEY 2006 RB1-RB2 / 3.G Owner's Manual
[x] Cancel search | Manufacturer: HONDA, Model Year: 2006, Model line: ODYSSEY, Model: HONDA ODYSSEY 2006 RB1-RB2 / 3.GPages: 420, PDF Size: 6.01 MB
Page 97 of 420
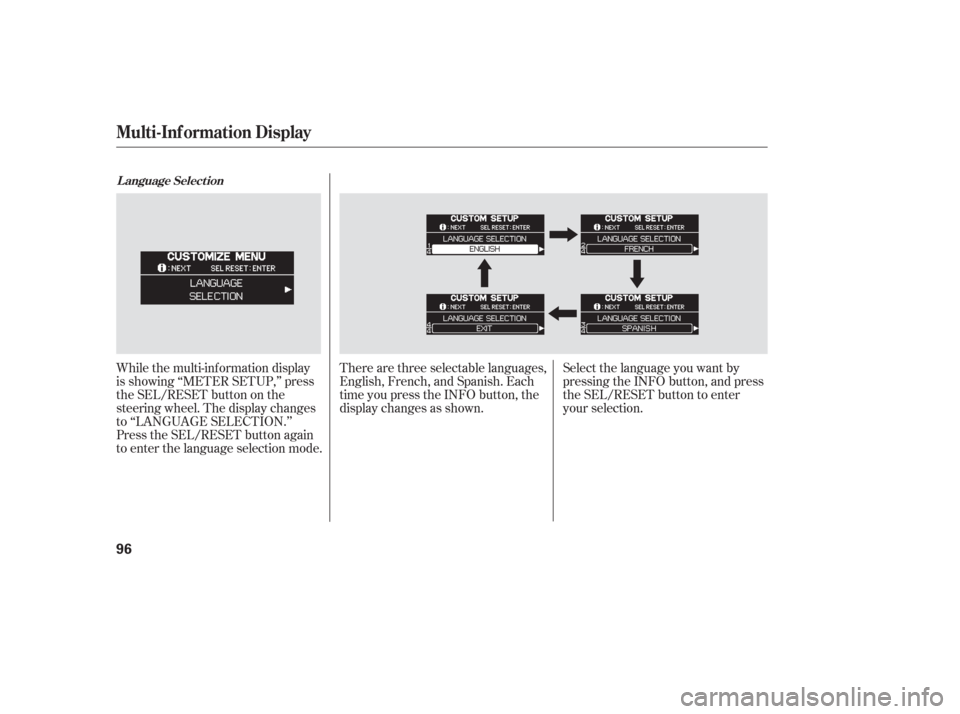
While the multi-information display
is showing ‘‘METER SETUP,’’ press
the SEL/RESET button on the
steering wheel. The display changes
to ‘‘LANGUAGE SELECTION.’’
Press the SEL/RESET button again
to enter the language selection mode.There are three selectable languages,
English, French, and Spanish. Each
time you press the INFO button, the
display changes as shown.
Select the language you want by
pressing the INFO button, and press
the SEL/RESET button to enter
your selection.
L anguage Select ion
Multi-Inf ormation Display
96
Page 98 of 420
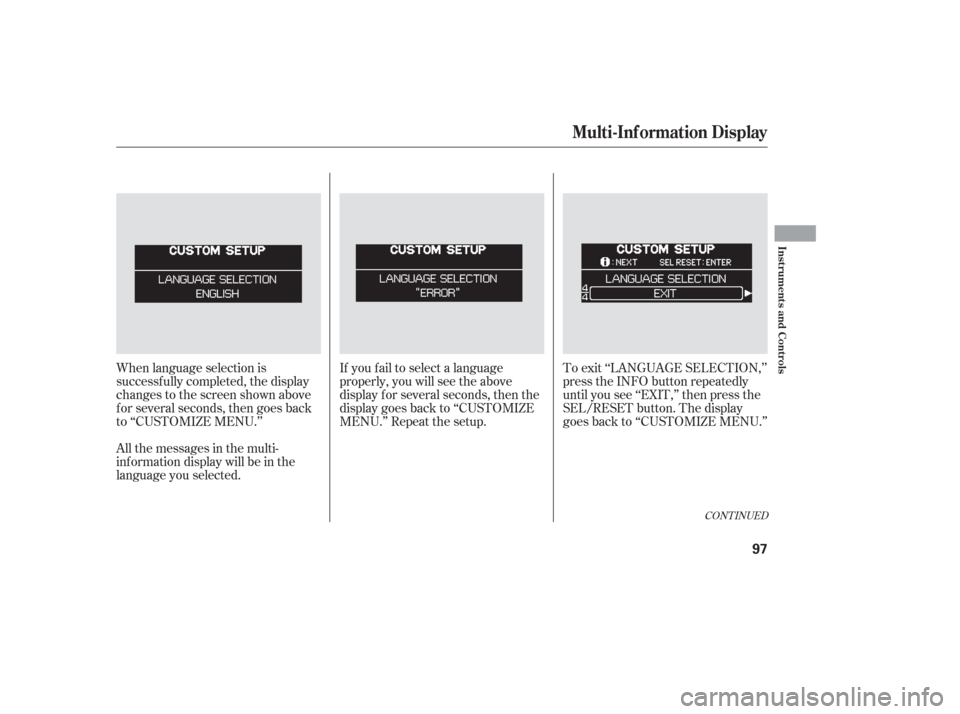
When language selection is
successf ully completed, the display
changes to the screen shown above
f or several seconds, then goes back
to ‘‘CUSTOMIZE MENU.’’If you f ail to select a language
properly, you will see the above
display f or several seconds, then the
display goes back to ‘‘CUSTOMIZE
MENU.’’ Repeat the setup.To exit ‘‘LANGUAGE SELECTION,’’
press the INFO button repeatedly
until you see ‘‘EXIT,’’ then press the
SEL/RESET button. The display
goes back to ‘‘CUSTOMIZE MENU.’’
All the messages in the multi-
inf ormation display will be in the
language you selected.
CONT INUED
Multi-Inf ormation Display
Inst rument s and Cont rols
97
Page 99 of 420
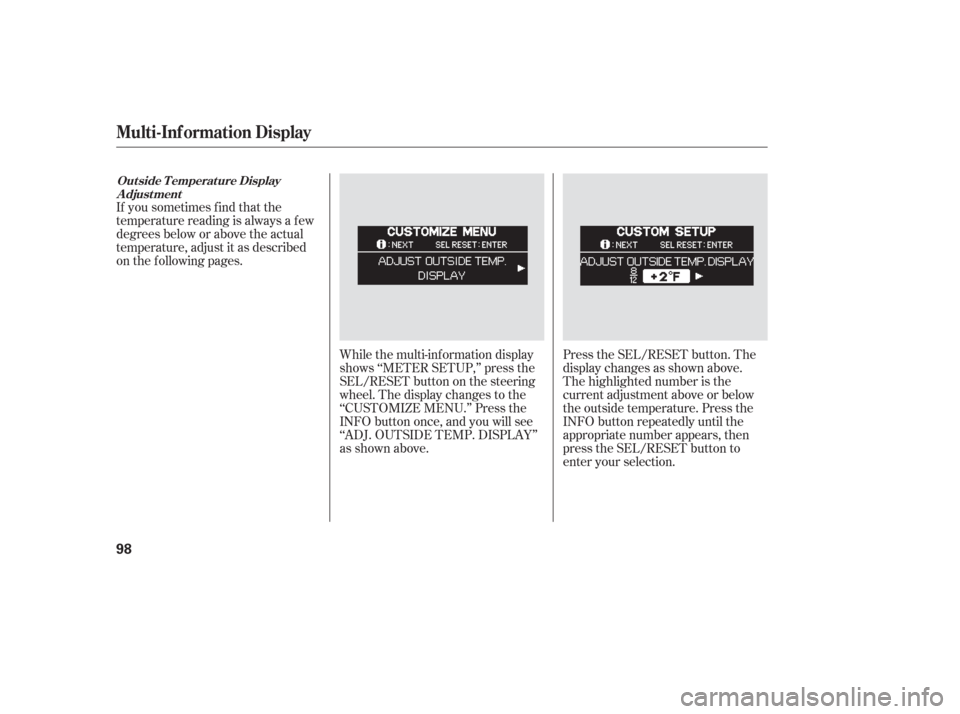
Press the SEL/RESET button. The
display changes as shown above.
The highlighted number is the
current adjustment above or below
the outside temperature. Press the
INFO button repeatedly until the
appropriate number appears, then
press the SEL/RESET button to
enter your selection.
If you sometimes f ind that the
temperature reading is always a f ew
degrees below or above the actual
temperature, adjust it as described
on the f ollowing pages.
While the multi-information display
shows ‘‘METER SETUP,’’ press the
SEL/RESET button on the steering
wheel. The display changes to the
‘‘CUSTOMIZE MENU.’’ Press the
INFO button once, and you will see
‘‘ADJ. OUTSIDE TEMP. DISPLAY’’
as shown above.
Out side T emperat ure DisplayA djust ment
Multi-Inf ormation Display
98
Page 100 of 420
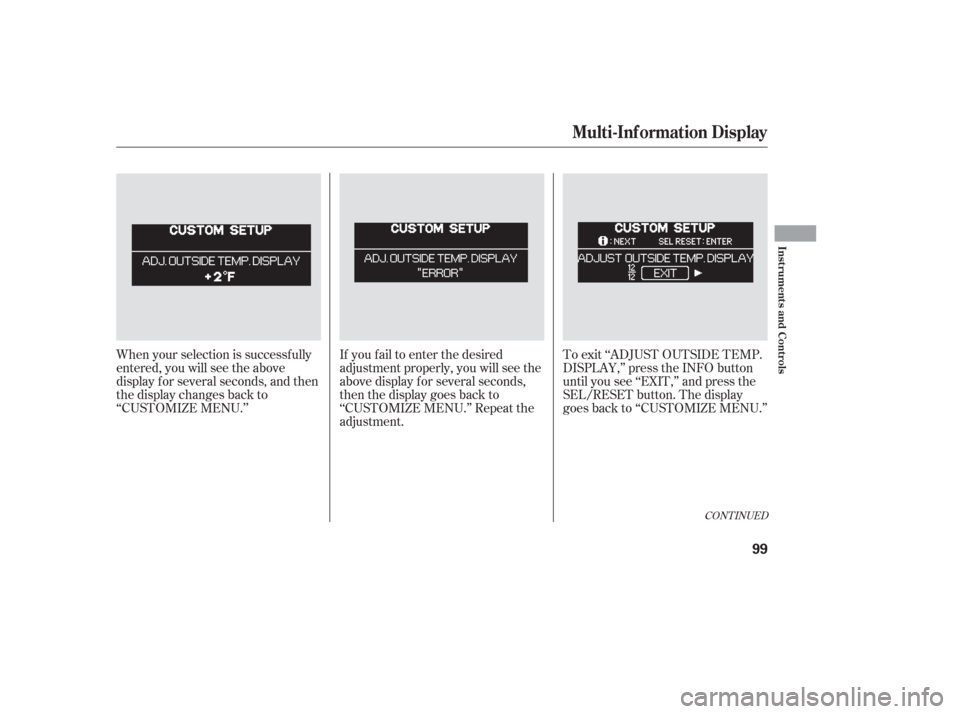
If you f ail to enter the desired
adjustment properly, you will see the
above display for several seconds,
then the display goes back to
‘‘CUSTOMIZE MENU.’’ Repeat the
adjustment.To exit ‘‘ADJUST OUTSIDE TEMP.
DISPLAY,’’ press the INFO button
until you see ‘‘EXIT,’’ and press the
SEL/RESET button. The display
goes back to ‘‘CUSTOMIZE MENU.’’
When your selection is successf ully
entered, you will see the above
display f or several seconds, and then
the display changes back to
‘‘CUSTOMIZE MENU.’’
CONT INUED
Multi-Inf ormation Display
Inst rument s and Cont rols
99
Page 101 of 420
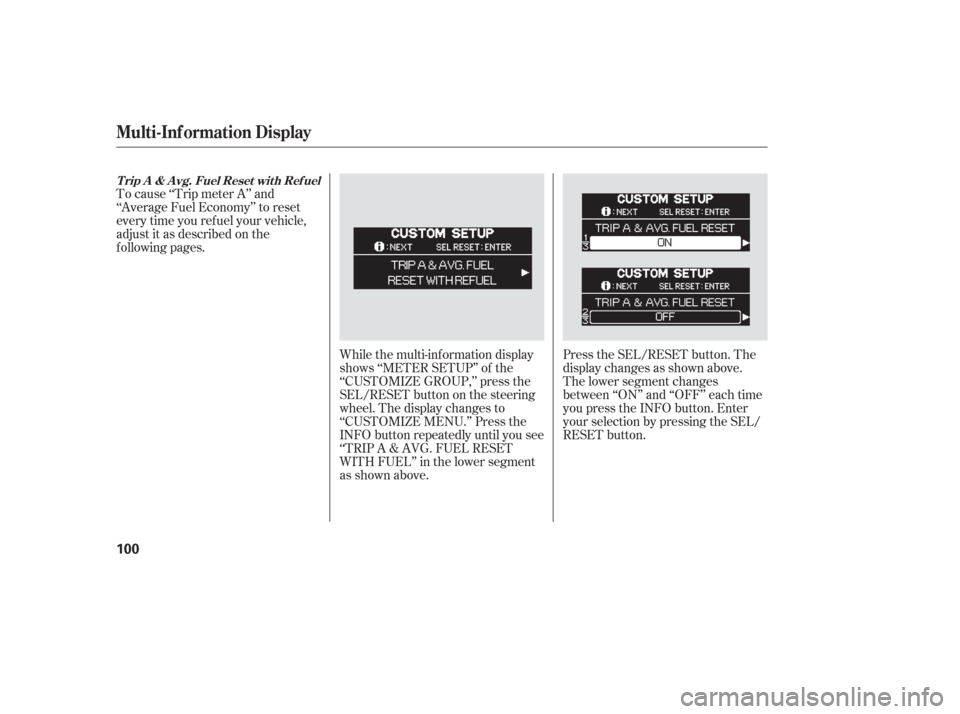
To cause ‘‘Trip meter A’’ and
‘‘Average Fuel Economy’’ to reset
every time you ref uel your vehicle,
adjust it as described on the
f ollowing pages.While the multi-information display
shows ‘‘METER SETUP’’ of the
‘‘CUSTOMIZE GROUP,’’ press the
SEL/RESET button on the steering
wheel. The display changes to
‘‘CUSTOMIZE MENU.’’ Press the
INFO button repeatedly until you see
‘‘TRIP A & AVG. FUEL RESET
WITH FUEL’’ in the lower segment
as shown above.Press the SEL/RESET button. The
display changes as shown above.
The lower segment changes
between ‘‘ON’’ and ‘‘OFF’’ each time
you press the INFO button. Enter
your selection by pressing the SEL/
RESET button.
T rip A & A vg. Fuel Reset wit h Ref uel
Multi-Inf ormation Display
100
Page 102 of 420
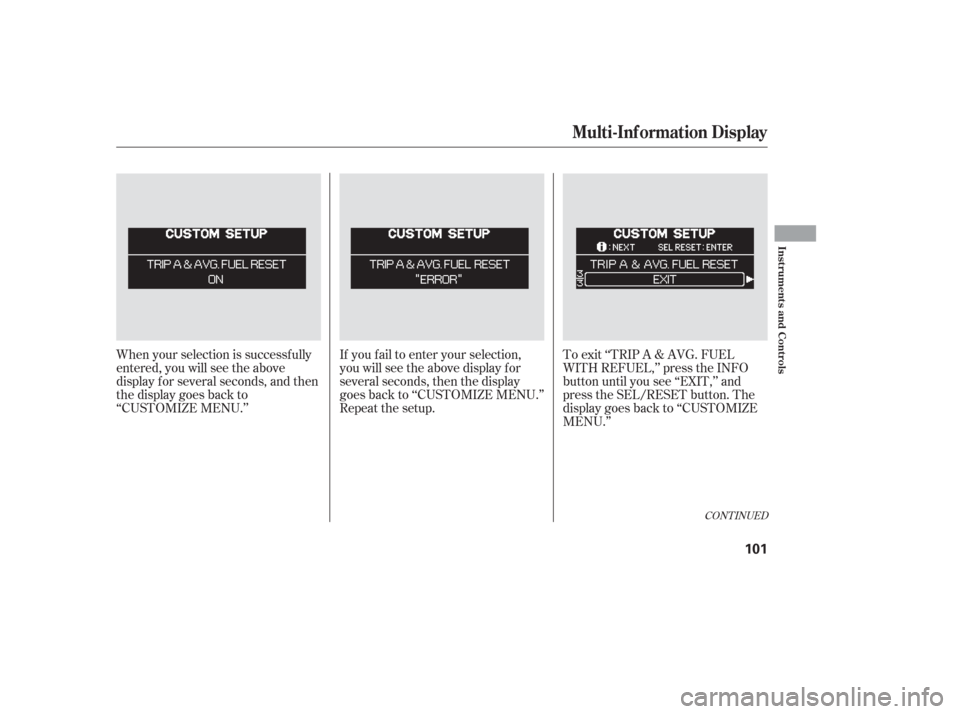
When your selection is successf ully
entered, you will see the above
display f or several seconds, and then
the display goes back to
‘‘CUSTOMIZE MENU.’’If you f ail to enter your selection,
you will see the above display f or
several seconds, then the display
goes back to ‘‘CUSTOMIZE MENU.’’
Repeat the setup.To exit ‘‘TRIP A & AVG. FUEL
WITH REFUEL,’’ press the INFO
button until you see ‘‘EXIT,’’ and
press the SEL/RESET button. The
display goes back to ‘‘CUSTOMIZE
MENU.’’
CONT INUED
Multi-Inf ormation Display
Inst rument s and Cont rols
101
Page 103 of 420
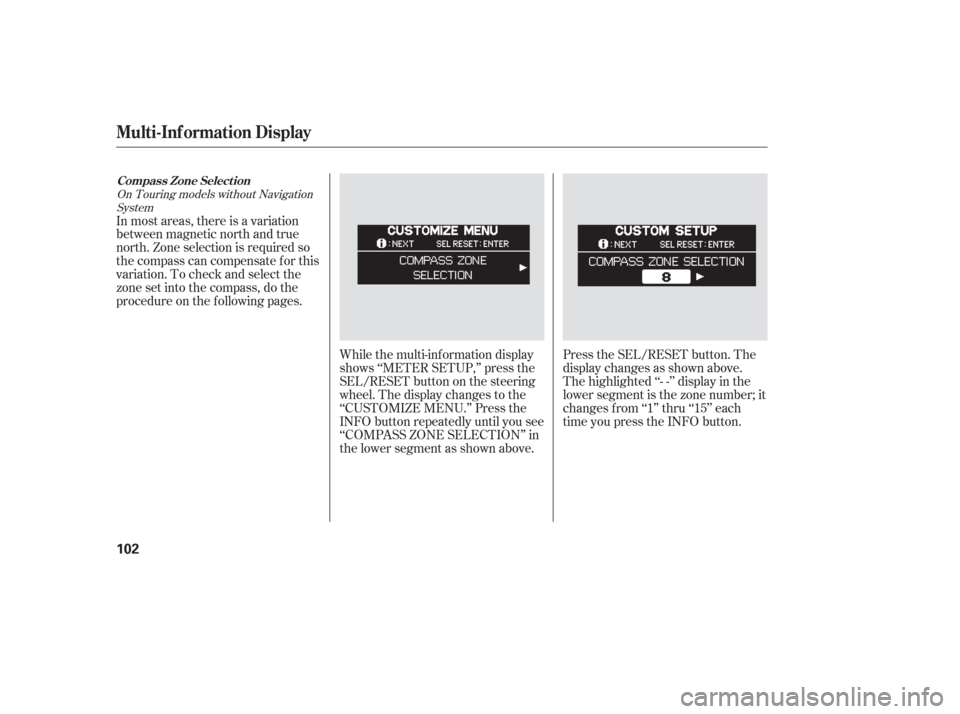
While the multi-information display
shows ‘‘METER SETUP,’’ press the
SEL/RESET button on the steering
wheel. The display changes to the
‘‘CUSTOMIZE MENU.’’ Press the
INFO button repeatedly until you see
‘‘COMPASS ZONE SELECTION’’ in
the lower segment as shown above.Press the SEL/RESET button. The
display changes as shown above.
The highlighted ‘‘- -’’ display in the
lower segment is the zone number; it
changes f rom ‘‘1’’ thru ‘‘15’’ each
time you press the INFO button.
In most areas, there is a variation
between magnetic north and true
north. Zone selection is required so
the compass can compensate f or this
variation. To check and select the
zone set into the compass, do the
procedure on the f ollowing pages.
On Touring models without Navigation
System
Compass Zone Select ion
Multi-Inf ormation Display
102
Page 104 of 420
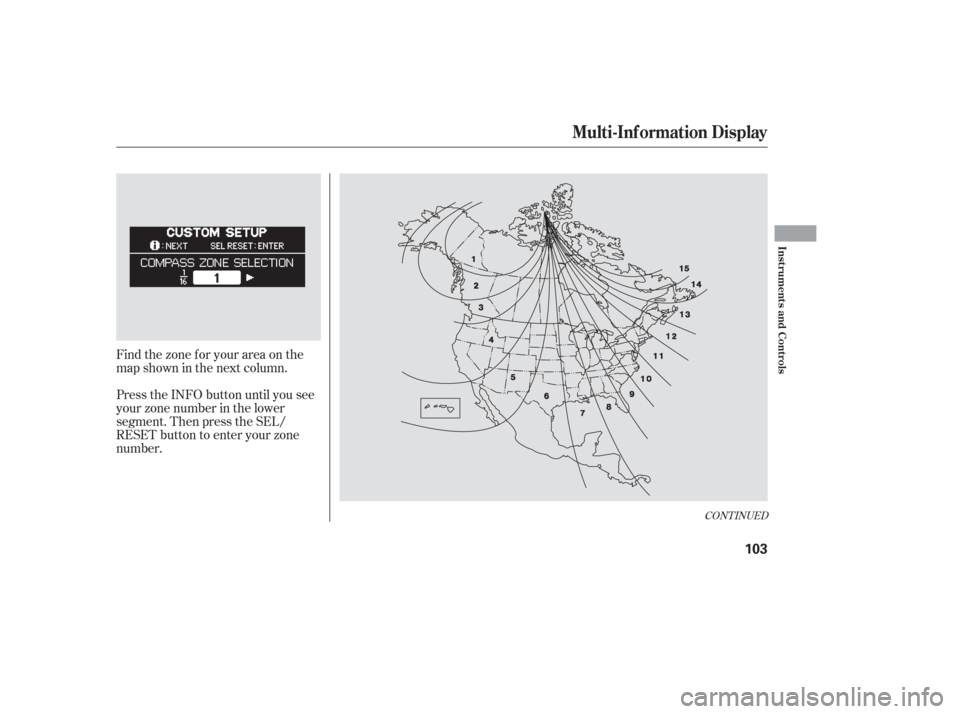
Find the zone f or your area on the
map shown in the next column.
Press the INFO button until you see
your zone number in the lower
segment. Then press the SEL/
RESET button to enter your zone
number.
CONT INUED
Multi-Inf ormation Display
Inst rument s and Cont rols
103
Page 105 of 420
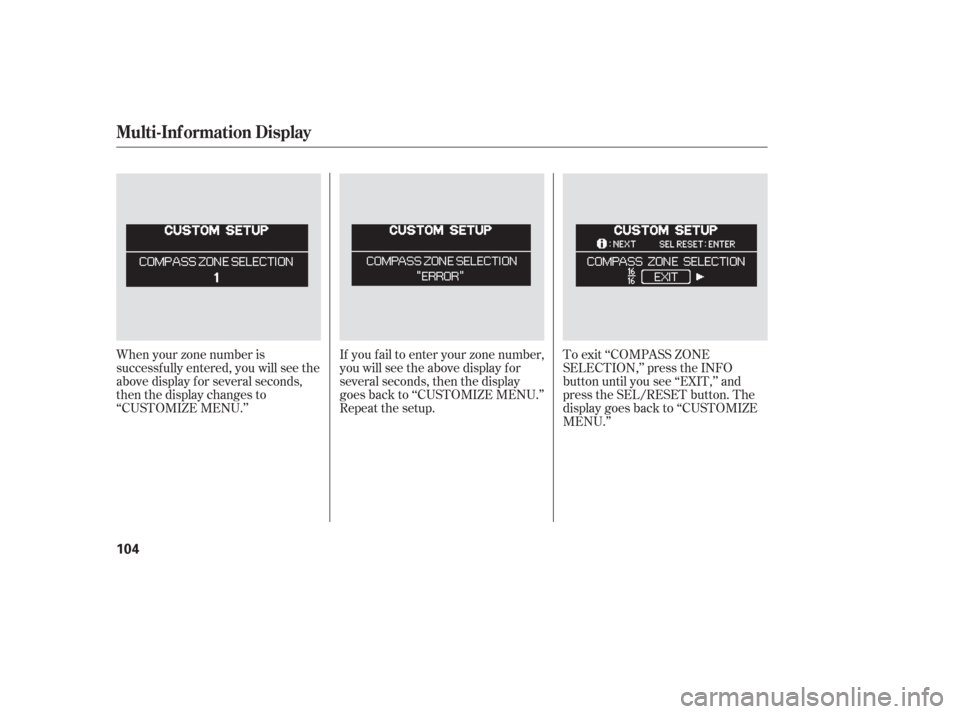
If you f ail to enter your zone number,
you will see the above display f or
several seconds, then the display
goes back to ‘‘CUSTOMIZE MENU.’’
Repeat the setup.To exit ‘‘COMPASS ZONE
SELECTION,’’ press the INFO
button until you see ‘‘EXIT,’’ and
press the SEL/RESET button. The
display goes back to ‘‘CUSTOMIZE
MENU.’’
When your zone number is
successf ully entered, you will see the
above display for several seconds,
then the display changes to
‘‘CUSTOMIZE MENU.’’
Multi-Inf ormation Display
104
Page 106 of 420
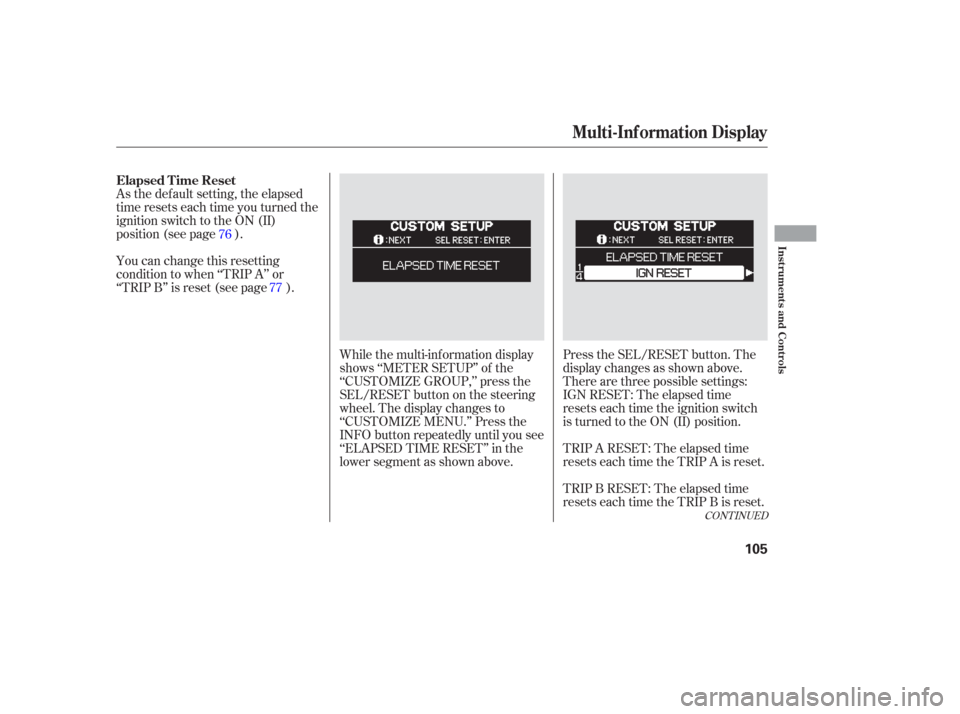
As the default setting, the elapsed
time resets each time you turned the
ignition switch to the ON (II)
position (see page ).
You can change this resetting
condition to when ‘‘TRIP A’’ or
‘‘TRIP B’’ is reset (see page ).While the multi-information display
shows ‘‘METER SETUP’’ of the
‘‘CUSTOMIZE GROUP,’’ press the
SEL/RESET button on the steering
wheel. The display changes to
‘‘CUSTOMIZE MENU.’’ Press the
INFO button repeatedly until you see
‘‘ELAPSED TIME RESET’’ in the
lower segment as shown above.Press the SEL/RESET button. The
display changes as shown above.
Therearethreepossiblesettings:
IGN RESET: The elapsed time
resets each time the ignition switch
is turned to the ON (II) position.
TRIP A RESET: The elapsed time
resets each time the TRIP A is reset.
TRIP B RESET: The elapsed time
resets each time the TRIP B is reset.
76
77
CONT INUED
Elapsed T ime Reset
Multi-Inf ormation Display
Inst rument s and Cont rols
105