key HONDA ODYSSEY 2009 RB3-RB4 / 4.G Navigation Manual
[x] Cancel search | Manufacturer: HONDA, Model Year: 2009, Model line: ODYSSEY, Model: HONDA ODYSSEY 2009 RB3-RB4 / 4.GPages: 153, PDF Size: 4.75 MB
Page 72 of 153
72Navigation System
Information Features
Edit Title
Say or select Edit Title, then enter the
name of your title using the on-screen
keyboard. Once you have entered the
title, say or select Done.
Edit Message
Say or select Edit Message , and the
system will show the Edit Message
screen. You can enter a message on two
lines. Use to change the line.
Once you have entered the message, say
or select Done .
Message Icon
Say or select Message Icon , and the
system displays a list of icons you can
select to help identify the type of
message you entered. The message icon
you choose will be displayed alongside
the specified date on the Calendar
screen.
Delete
From the Calendar screen, select the
date of the schedule you wish to
remove. To remove the schedule, say or
select Delete .
Done
Once you have finished entering the
schedule, say or select Done. The
Calendar screen is redisplayed and a
message icon appears.
NOTE:
You can only enter one message per day.
A maximum of 50 entries can be stored in the schedule. After you
reach 50 entries, a warning message
will appear telling you that the limit
has been reached. You can clear any
older entries as needed.
To reactivate a previous message, turn the Reminder setting from Off to
On . If it is not turned on, the
reminder will not be displayed when
you start the vehicle.
The system displays active calendar entries only after you answer OK on
the Disclaimer screen.
For more information, refer to System Start-up on page17.Calculator
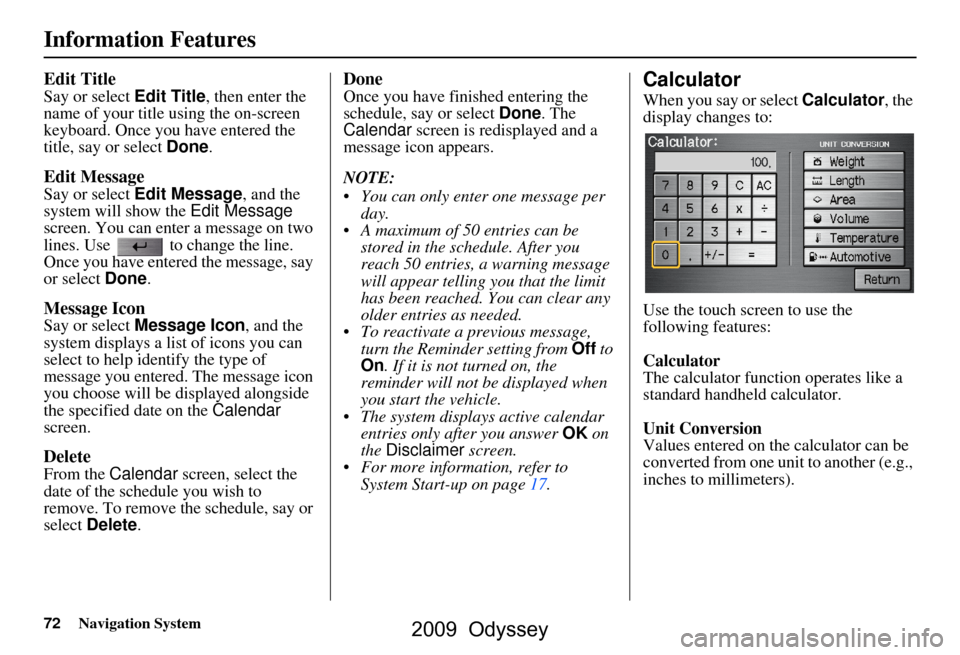
When you say or select Calculator, the
display changes to:
Use the touch screen to use the
following features:
Calculator
The calculator function operates like a
standard handheld calculator.
Unit Conversion
Values entered on the calculator can be
converted from one unit to another (e.g.,
inches to millimeters).
2009 Odyssey
Page 75 of 153
Navigation System75
Information Features
Key to Zagat Ratings
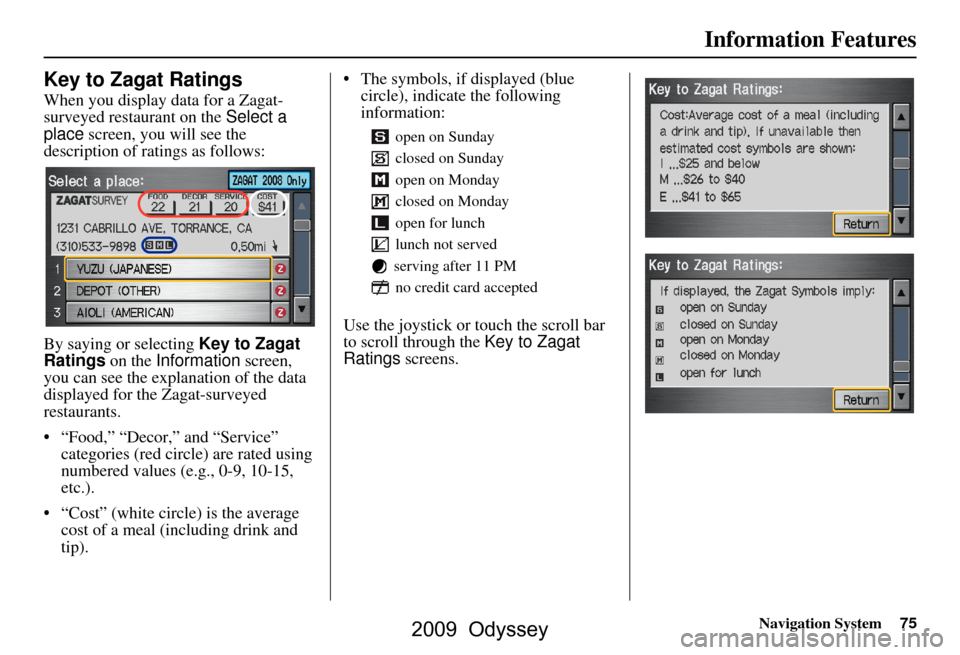
When you display data for a Zagat-
surveyed restaurant on the Select a
place screen, you will see the
description of ratings as follows:
By saying or selecting Key to Zagat
Ratings on the Information screen,
you can see the explanation of the data
displayed for the Zagat-surveyed
restaurants.
“Food,” “Decor,” and “Service” categories (red circle) are rated using
numbered values (e.g., 0-9, 10-15,
etc.).
“Cost” (white circ le) is the average
cost of a meal (including drink and
tip). The symbols, if displayed (blue
circle), indicate the following
information:
Use the joystick or touch the scroll bar
to scroll through the Key to Zagat
Ratings screens.
open on Sunday
closed on Sunday
open on Monday
closed on Monday
open for lunch
lunch not served
serving after 11 PM no credit card accepted
2009 Odyssey
Page 80 of 153
80Navigation System
System Setup
Accessing the Address Book List
After selecting Address Book , the
system prompts you to select User 1 or
User 2 .
If an Address Book PIN has been set,
the system prompts you to enter your
PIN. Verify that the correct user is
displayed, then enter your PIN. After
entering your PIN, say or select Done,
and the system displays your Address
Book.
If no Address Book PIN has been set,
the system displays your Address Book
after selecting User 1 or User 2 .
NOTE:
Personal information cannot be backed
up or moved to another navigation
system.
Entering an Address
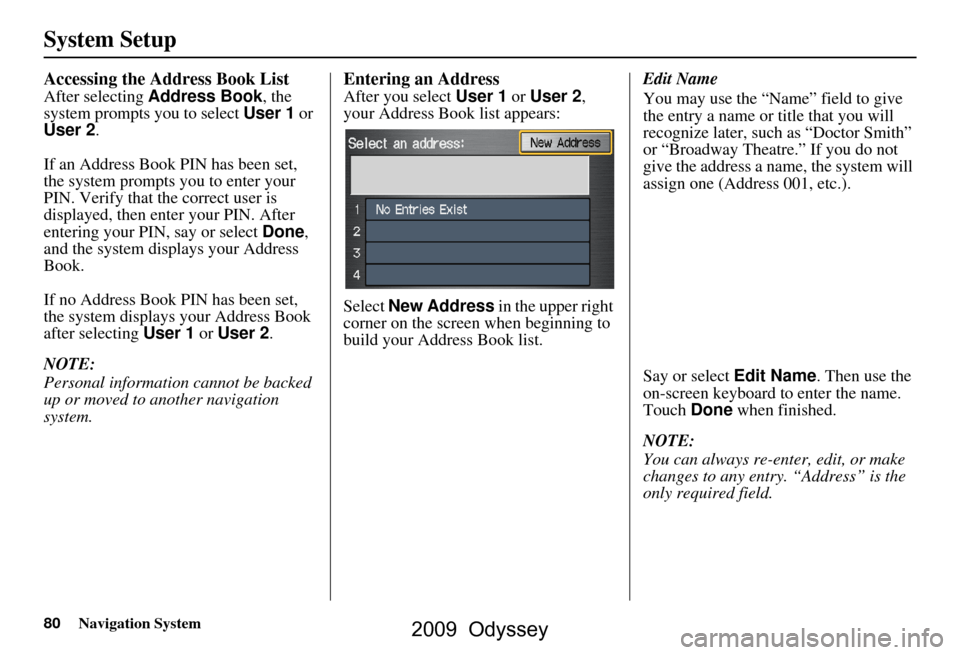
After you select User 1 or User 2 ,
your Address Book list appears:
Select New Address in the upper right
corner on the screen when beginning to
build your Address Book list. Edit Name
You may use the “Name” field to give
the entry a name or title that you will
recognize later, such as “Doctor Smith”
or “Broadway Theatre.” If you do not
give the address a name, the system will
assign one (Address 001, etc.).
Say or select Edit Name
. Then use the
on-screen keyboard to enter the name.
Touch Done when finished.
NOTE:
You can always re-enter, edit, or make
changes to any entry. “Address” is the
only required field.
2009 Odyssey
Page 81 of 153
Navigation System81
System Setup
Edit Address
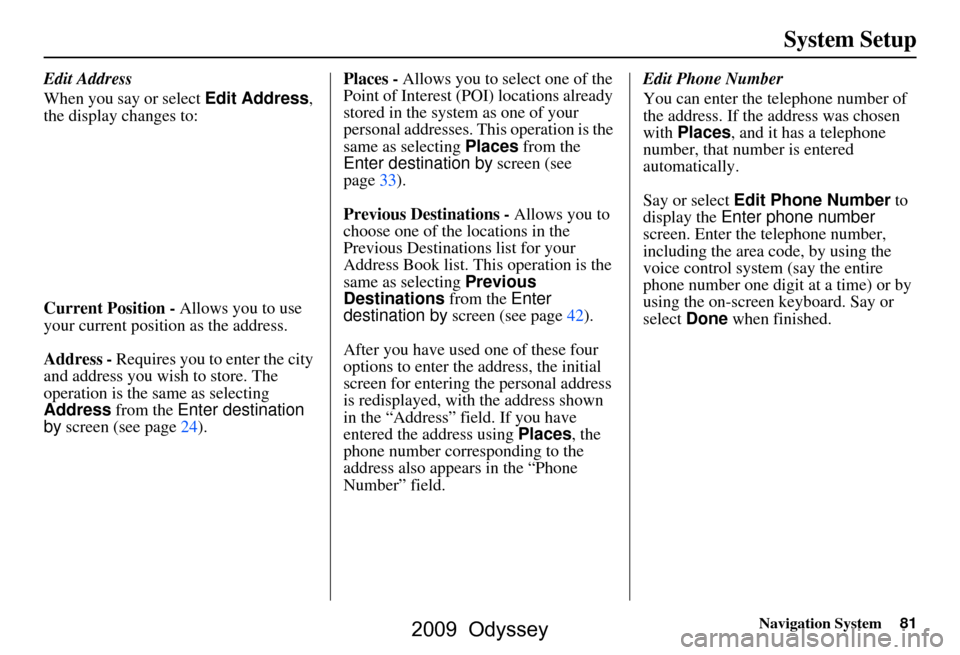
When you say or select Edit Address,
the display changes to:
Current Position - Allows you to use
your current position as the address.
Address - Requires you to enter the city
and address you wish to store. The
operation is the same as selecting
Address from the Enter destination
by screen (see page24). Places -
Allows you to select one of the
Point of Interest (POI) locations already
stored in the system as one of your
personal addresses. This operation is the
same as selecting Places from the
Enter destination by screen (see
page33).
Previous Destinations - Allows you to
choose one of the locations in the
Previous Destinations list for your
Address Book list. Th is operation is the
same as selecting Previous
Destinations from the Enter
destination by screen (see page42).
After you have used one of these four
options to enter the address, the initial
screen for entering the personal address
is redisplayed, with the address shown
in the “Address” field. If you have
entered the address using Places, the
phone number corresponding to the
address also appears in the “Phone
Number” field. Edit Phone Number
You can enter the telephone number of
the address. If the
address was chosen
with Places , and it has a telephone
number, that number is entered
automatically.
Say or select Edit Phone Number to
display the Enter phone number
screen. Enter the telephone number,
including the area code, by using the
voice control system (say the entire
phone number one digit at a time) or by
using the on-screen keyboard. Say or
select Done when finished.
2009 Odyssey
Page 90 of 153
90Navigation System
System Setup
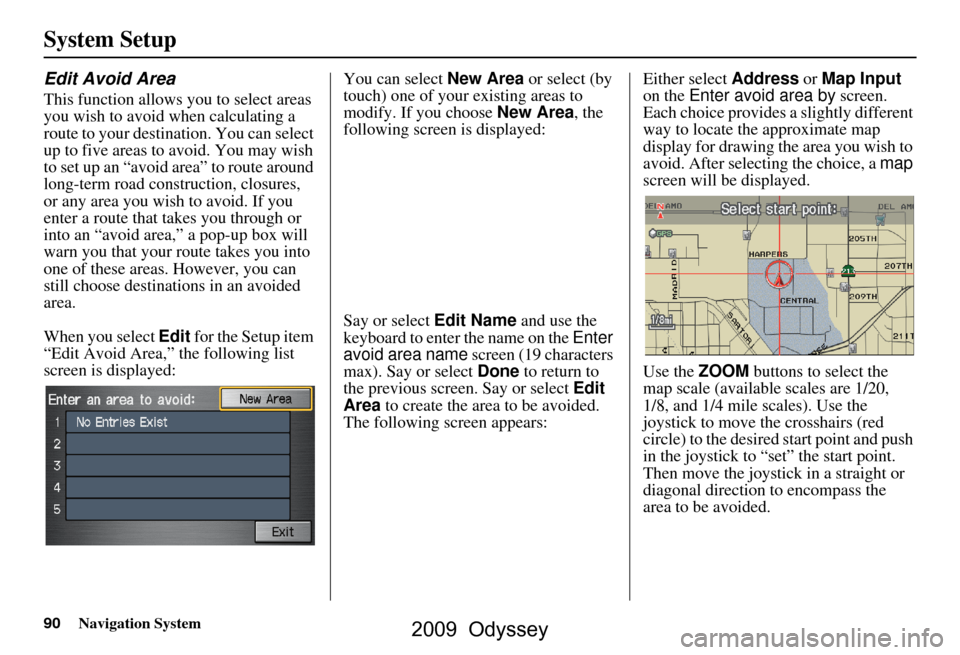
Edit Avoid Area
This function allows you to select areas
you wish to avoid when calculating a
route to your destination. You can select
up to five areas to avoid. You may wish
to set up an “avoid area” to route around
long-term road construction, closures,
or any area you wish to avoid. If you
enter a route that takes you through or
into an “avoid area,” a pop-up box will
warn you that your route takes you into
one of these areas. However, you can
still choose destinations in an avoided
area.
When you select Edit for the Setup item
“Edit Avoid Area,” the following list
screen is displayed: You can select
New Area or select (by
touch) one of your existing areas to
modify. If you choose New Area, the
following screen is displayed:
Say or select Edit Name and use the
keyboard to enter the name on the Enter
avoid area name screen (19 characters
max). Say or select Done to return to
the previous screen. Say or select Edit
Area to create the area to be avoided.
The following screen appears: Either select
Address or Map Input
on the Enter avoid area by screen.
Each choice provides a slightly different
way to locate the approximate map
display for drawing the area you wish to
avoid. After selecting the choice, a map
screen will be displayed.
Use the ZOOM buttons to select the
map scale (available scales are 1/20,
1/8, and 1/4 mile scales). Use the
joystick to move the crosshairs (red
circle) to the desired start point and push
in the joystick to “set” the start point.
Then move the joystick in a straight or
diagonal direction to encompass the
area to be avoided.
2009 Odyssey
Page 95 of 153
Navigation System95
System Setup
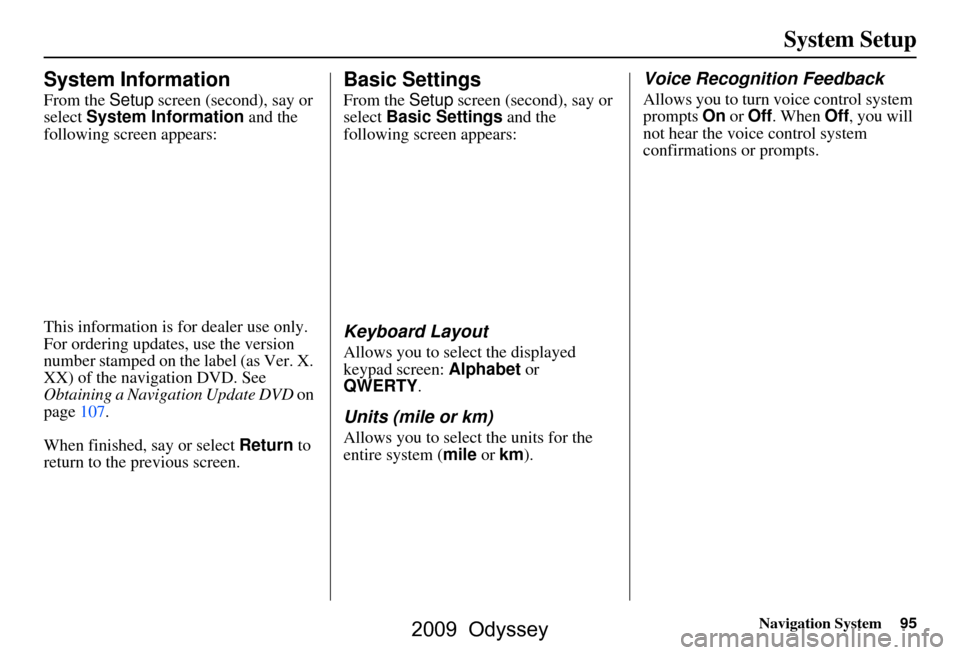
System Information
From the Setup screen (second), say or
select System Information and the
following screen appears:
This information is for dealer use only.
For ordering updates, use the version
number stamped on the label (as Ver. X.
XX) of the navigation DVD. See
Obtaining a Navigation Update DVD on
page107.
When finished, say or select Return to
return to the previous screen.
Basic Settings
From the Setup screen (second), say or
select Basic Settings and the
following screen appears:
Keyboard Layout
Allows you to select the displayed
keypad screen: Alphabet or
QWERTY .
Units (mile or km)
Allows you to select the units for the
entire system ( mile or km).
Voice Recognition Feedback
Allows you to turn voice control system
prompts On or Off . When Off, you will
not hear the voice control system
confirmations or prompts.
2009 Odyssey
Page 110 of 153
110Navigation System
Coverage Areas
FloridaCape Canaveral/Cocoa Beach/Titusville
Florida Keys
Fort Myers Metro area – including
Naples
Fort Pierce
Gainesville
Jacksonville Metro – including St.
Johns County
Miami/Fort Lauderdale/West Palm Beach Metro
Orlando/Daytona Beach/Melbourne area – including Osceola County
Panama City
Pensacola
Tallahassee
Tampa Bay/St. Petersburg Metro – including Pasco and Manatee
Counties
Vero Beach
Georgia Athens
Atlanta Metro
Augusta/Aiken Metro
Columbus
Macon Hawaii (all cities for the following
islands)
Hawaii
Kauai
Lanai
Maui
Molokai
Oahu
Idaho Boise
Sun Valley Ski Resorts
Illinois Bloomington-Normal
Carbondale
Champaign
Charleston
Chicago Metro (to Wisconsin border) – including Lake County, IN, and
Dekalb County, IL
East St. Louis Metro
Galesburg
Moline
Peoria
Quincy
Rock Island
Rockford
Springfield
Urbana-Danville Indiana
Bloomington
Evansville
Fort Wayne
Gary/Hammond Metro
Indianapolis Metro
Kokomo Metro
Muncie
Northwest Indiana
South Bend/Elkhart/Goshen
Iowa Cedar Rapids
Davenport
Des Moines
Iowa City
Waterloo-Cedar Falls
Kansas Kansas City/Leavenworth Metro
Topeka
Wichita
Kentucky Lexington
Louisville
2009 Odyssey
Page 111 of 153
Navigation System111
Coverage Areas
Louisiana
Baton Rouge
New Orleans Metro
Shreveport
Maine Bangor
Bar Harbor/Acadia National Park
Portland/Lewiston/Auburn
Maryland State of (partial) - Baltimore/Washington D.C. Metro – including
Charles and Carroll Counties
Cumberland
Ocean City
Massachusetts Boston/Cape Cod Metro
Cape Cod
Springfield Metro area
Complete coverage of all cities in Barnstable, Berkshire, Bristol,
Essex, Hampshire, Hampden,
Middlesex, Norfolk, Plymouth,
Suffolk, and Worcester Counties Michigan
Detroit Metro area – including Ann
Arbor, Pontiac, Flint, Clinton,
Eaton, and Monroe Counties
Kalamazoo
Northern Michigan Resort Area – including Traverse City, Elk
Rapids, Petoskey, Charlevoix,
Boyne City, and Harbor Springs
Saginaw-Midland
Southeast Michigan – including
Detroit - Grand Rapids - Lansing
Southern Michigan
Minnesota Minneapolis/St. Paul Metro – including cities in Anoka Scott and
Carver Counties
Moorhead
Rochester
Mississippi Biloxi/Gulfport
Jackson
Memphis
Tupelo Missouri
Branson
Columbia
Kansas City (KS-MO) Metro – including Platte County
Springfield
St. Louis Metro (IL-MO) – including
additional cities in Jefferson
County
Montana Billings
Missoula
Nebraska Lincoln (Lancaster County)
Omaha
Nevada Las Vegas Metro
Reno/Lake Tahoe
New Hampshire Lebanon
Manchester
Nashua
2009 Odyssey
Page 134 of 153
134Navigation System
Glossary
LCD - Liquid Crystal Display. The
navigation screen.
Map Matching - The received GPS information allows the navigation
system to position the vehicle on the
map. Map matching has occurred if
the map screen is displaying the
current street name in the bottom-
shaded area.
Mic - Abbreviation for the microphone
used for receiving voice commands.
It is located near the map light in the
ceiling.
MW - Maneuver Window. While en
route to a destination, this window
displays informatio n about the next
maneuver.
Navi - Abbreviation for the navigation
system.
North Pointer - The map symbol showing the map orientation. See
page57. Off Route -
This occurs when the user
leaves mapped roads. Off-road
tracking dots (“breadcrumbs”) are
displayed if the option is enabled in
the Setup screen. The user can use
them to return to a mapped road. The
bottom of the navigation screen will
say, “Not on a digitized road.”
Outlying Areas - These are rural areas
that typically have only their main
roads mapped. All other roads are
shown in light brown for reference
only, since they have not been
verified.
PIN - Personal Identification Number.
A 4-digit number created by the
customer to protect personal
information.
POI - Point of Interest. These are the
businesses, schools, etc. found under
the Places option on the Enter
destination by screen. See page33. Polygon - Colored areas on the
map
screen denoting parks, schools, etc.
See Map Screen Legend “Map
Features” for a list of the assigned
colors. See page52.
QWERTY - Keyboard layout
resembling the typewriter keys. The
keyboard layout can be changed to an
alphabetical layout in the Setup,
Basic Settings screen.
Reminder - Automatic “pop-up”
Calendar message. See Calendar on
page71.
RES - Rear Entertainment System.
(Factory installed)
Security Code - Code needed to
activate the navigation system or
audio unit. See Entering the Security
Code on page100.
Touch Sensor - The touch sensor on the
front of the LCD consists of a touch
sensitive resistive membrane with an
infinite number of possible touch
locations. The sensing locations are
confined to a grid of 20 vertical and
10 horizontal touch locations.
2009 Odyssey
Page 145 of 153
Navigation System145
Voice Command Index
Information Screen Voice
Commands
These are additional commands not
found on the Voice Command Help
screen available when viewing the
Information screen. Follow the voice
prompts.
Cellular phonebook
Calendar
Calculator
Voice command help (the system reads and lists all of the
commands, starting with
Navigation General Commands)
Map legend
Key to Zagat ratings
Setup Screen (first)
Commands
The system accepts these commands on
Setup screen (first). (For Setup screen
(second), simply say what is written on
the screen, and follow the voice
prompts.)
Brightness up
Brightness down
Brightness minimum/min.
Brightness maximum/max.
Volume up (tone indicates volume)
Volume down (tone indicates volume)
Volume minimum/min. (tone indicates
volume)
Volume maximum/max. (tone indicates volume)
Volume Off
Display off (screen goes dark, route
guidance stops)
Display Day
Display Night
Display Auto
Contrast adjust
Guidance Prompts normal
Guidance Prompts maximum/max.
Guidance Prompts minimum/min.
2009 Odyssey