reset HONDA ODYSSEY 2011 RB3-RB4 / 4.G Navigation Manual
[x] Cancel search | Manufacturer: HONDA, Model Year: 2011, Model line: ODYSSEY, Model: HONDA ODYSSEY 2011 RB3-RB4 / 4.GPages: 178, PDF Size: 3.97 MB
Page 3 of 178
Navigation System3
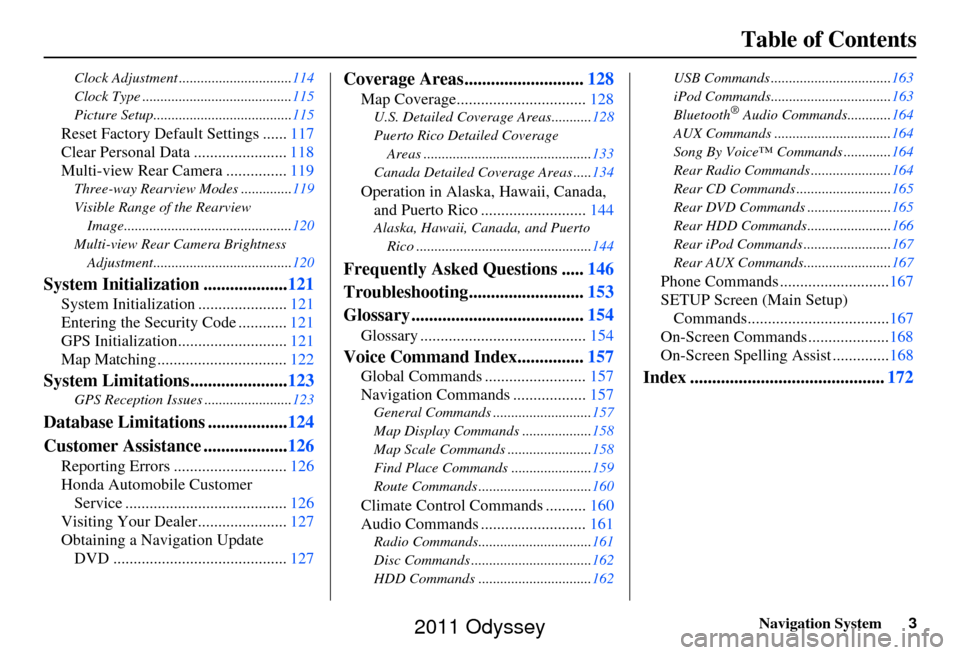
Table of Contents
Clock Adjustment ............................... 114
Clock Type ......................................... 115
Picture Setup...................................... 115
Reset Factory Default Settings ......117
Clear Personal Data ....................... 118
Multi-view Rear Camera ............... 119
Three-way Rearview Modes .............. 119
Visible Range of the Rearview Image.............................................. 120
Multi-view Rear Camera Brightness Adjustment...................................... 120
System Initialization ...................121
System Initialization ......................121
Entering the Security Code ............ 121
GPS Initialization.................. .........121
Map Matching ................................ 122
System Limitations......................123
GPS Reception Issues ........................ 123
Database Limitations ..................124
Customer Assistance ................... 126
Reporting Errors ............................ 126
Honda Automobile Customer Service ........................................ 126
Visiting Your Dealer...................... 127
Obtaining a Navigation Update DVD ........................................... 127
Coverage Areas........................... 128
Map Coverage................................ 128
U.S. Detailed Coverage Areas........... 128
Puerto Rico Detailed Coverage Areas .............................................. 133
Canada Detailed Coverage Areas ..... 134
Operation in Alaska, Hawaii, Canada,
and Puerto Rico .......................... 144
Alaska, Hawaii, Canada, and Puerto
Rico ................................................ 144
Frequently Asked Questions .....146
Troubleshooting.......................... 153
Glossary ....................................... 154
Glossary ......................................... 154
Voice Command Index...............157
Global Commands ......................... 157
Navigation Commands .................. 157
General Commands ........................... 157
Map Display Commands ................... 158
Map Scale Commands .... ...................158
Find Place Commands ...................... 159
Route Commands ............ ...................160
Climate Control Commands .......... 160
Audio Commands .......................... 161
Radio Commands...............................161
Disc Commands .... .............................162
HDD Commands ............................... 162USB Commands .................................
163
iPod Commands................................. 163
Bluetooth
® Audio Commands............ 164
AUX Commands ................................ 164
Song By Voice™ Co mmands .............164
Rear Radio Commands .. ....................164
Rear CD Commands .......................... 165
Rear DVD Commands ....................... 165
Rear HDD Commands....................... 166
Rear iPod Commands ........................ 167
Rear AUX Commands........................ 167
Phone Commands ...........................167
SETUP Screen (Main Setup) Commands................................... 167
On-Screen Commands .................... 168
On-Screen Spelling Assist ..............168
Index ............................................ 172
2011 Odyssey
Page 27 of 178
Navigation System27
Getting Started
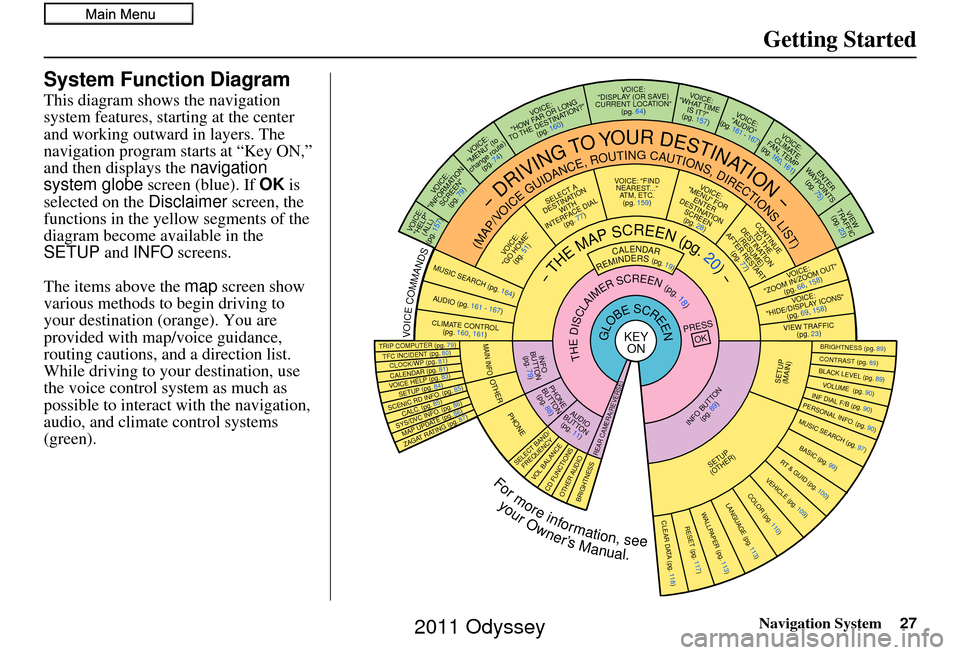
System Function Diagram
This diagram shows the navigation
system features, starting at the center
and working outward in layers. The
navigation program starts at “Key ON,”
and then displays the navigation
system globe screen (blue). If OK is
selected on the Disclaimer screen, the
functions in the yellow segments of the
diagram become available in the
SETUP and INFO screens.
The items above the map screen show
various methods to begin driving to
your destination (orange). You are
provided with map/voice guidance,
routing cautions, and a direction list.
While driving to your destination, use
the voice control system as much as
possible to interact with the navigation,
audio, and climat e control systems
(green).
REMINDERS(pg.19)CALENDAR
-THEMAPSCREEN(pg.20)-
(MAP/VOICEGUIDANCE,ROUTINGCAUTIONS,DIRECTIONSLIST)
-DRIVINGTOYOURDESTINATION-
VOICE: "HELP" (ALL)
(pg. 157)
VOICE:
"INFORMATION SCREEN"(pg. 79)
VOICE:
"MENU" (to
change route) (pg. 74)
VOICE:
"HOW FAR OR LONG
TO THE DESTINATION?" (pg. 160)
VOICE:
"DISPLAY (OR S AV E)
CURRENT LOCA TION"
(pg. 64)VOICE:
"WHAT TIME IS IT?"
(pg. 157)
VOI CE:
"AUDIO"
(pg. 161 - 167)
VOI CE:
CLIMATE
FAN, TEMP
(pg. 160, 161)
ENTER
WAY POINTS
(pg. 75)
VIEW
TRAFFIC(pg. 23)
VOICE:
"ZOOM IN/ZOOM OUT" (pg. 66, 158)
VOICE:
"HIDE/DISPLAY ICONS" (pg. 69, 158)
VIEW TRAFFIC(pg. 23)
BRIGHTN ESS (pg. 89)CONTRAST (pg. 89)BLACK LEVEL (pg. 89)VOLUME (pg. 90)INF DIAL F/B (pg. 90)PERSONAL INFO. (pg. 90)MUSIC SEARCH (pg. 97)
BASIC (pg. 99)RT & GUID (pg. 100)
VEHICLE (pg. 109)COLOR (pg. 110)LANGUAGE (pg. 113)CLEAR DATA (pg. 118)RESET (pg. 117)WALLPAPER (pg. 113)
ZAGAT RATING (pg. 87)
TFC INCIDENT (pg. 80)TRIP COMPUTER (pg. 79)
CALENDAR (pg. 81)VOICE HELP (pg. 83)SETUP (pg. 84)
SYS/DVC INFO. (pg. 86)MAP UPDATE (pg. 86)
SCENIC RD INFO . (pg. 85)
PRESS
OK
SELECT BAND/FREQUENCYVOL BALANCECD FUNCTIONSOTH ER AUDIOBRIGHTNESS
REAR CAMERA(R EVERSE)
INFO BUTTON
(pg. 89)AUD IO
BUTTON (pg. 11)
INFO
BUTTON (pg. 79)
PHONE
BUTTON (pg. 88)
PHONE
THEDISCLAIMERSCREEN(pg.18)
VOI CE: "FIND
NEARES T..."
AT M , ETC.
(pg. 159)
SELECT A
DESTINATION WITH
INTERFACE DIAL (pg. 77)
VOICE:
"GO HOME" (pg. 51)
VOICE:
"MENU" FOR ENTER
DESTINATION SCREEN(pg. 28)
CONTINUE TO THE
DESTINATION (RESUME)
AFTER RESTART (pg. 77)
GLOBESCREENKEYONVOICECOMMANDSMUSIC SEARCH
(pg. 164)AUD IO (pg. 161 - 167)
CLIMATE CONTR OL
(pg. 160, 161 )
Formoreinformation,see
yourOwner’sManual.
SETUP
(OTHER)
CLOCK/W P (pg. 81)
CALC. (pg. 85)
MAIN INFO
OTHERSETUP
(MAIN)
2011 Odyssey
Page 51 of 178
Navigation System51
Entering a Destination
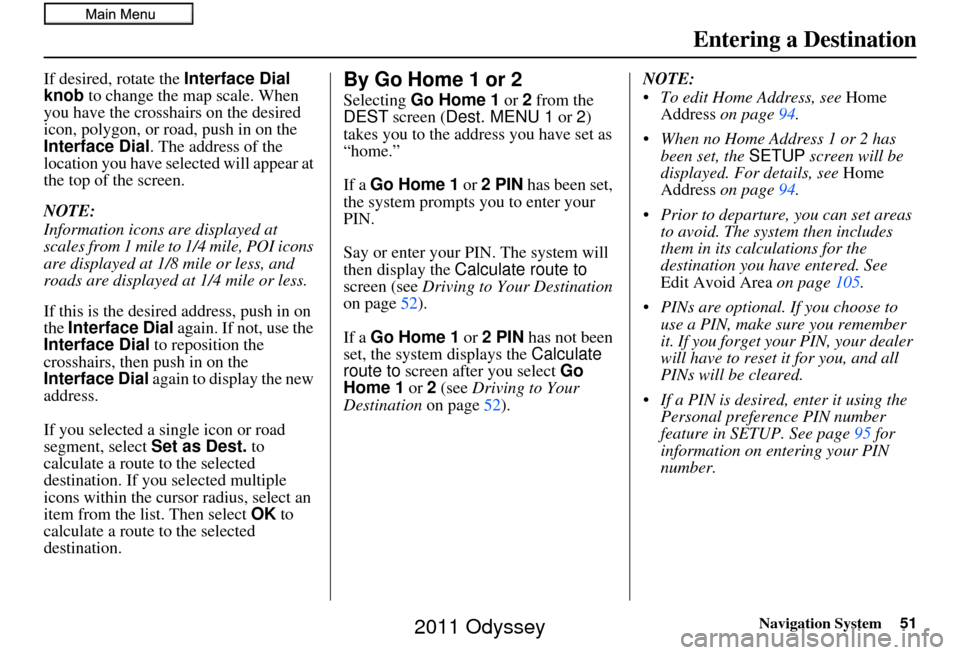
If desired, rotate the Interface Dial
knob to change the map scale. When
you have the crosshairs on the desired
icon, polygon, or road, push in on the
Interface Dial . The address of the
location you have selected will appear at
the top of the screen.
NOTE:
Information icons are displayed at
scales from 1 mile to 1/4 mile, POI icons
are displayed at 1/8 mile or less, and
roads are displayed at 1/4 mile or less.
If this is the desired address, push in on
the Interface Dial again. If not, use the
Interface Dial to reposition the
crosshairs, then push in on the
Interface Dial again to display the new
address.
If you selected a single icon or road
segment, select Set as Dest. to
calculate a route to the selected
destination. If you selected multiple
icons within the cursor radius, select an
item from the list. Then select OK to
calculate a route to the selected
destination.By Go Home 1 or 2
Selecting Go Home 1 or 2 from the
DEST screen ( Dest. MENU 1 or 2)
takes you to the address you have set as
“home.”
If a Go Home 1 or 2 PIN has been set,
the system prompts you to enter your
PIN.
Say or enter your PIN. The system will
then display the Calculate route to
screen (see Driving to Your Destination
on page 52).
If a Go Home 1 or 2 PIN has not been
set, the system displays the Calculate
route to screen after you select Go
Home 1 or 2 (see Driving to Your
Destination on page52). NOTE:
To edit Home Address, see
Home
Address on page 94.
When no Home Address 1 or 2 has been set, the SETUP screen will be
displayed. For details, see Home
Address on page 94.
Prior to departure, you can set areas to avoid. The system then includes
them in its calculations for the
destination you have entered. See
Edit Avoid Area on page105.
PINs are optional. If you choose to use a PIN, make sure you remember
it. If you forget your PIN, your dealer
will have to reset it for you, and all
PINs will be cleared.
If a PIN is desired, enter it using the Personal preference PIN number
feature in SETUP. See page 95 for
information on entering your PIN
number.
2011 Odyssey
Page 91 of 178
Navigation System91
System Setup
You may choose to use a Personal
Identification Number (PIN) to protect
your privacy. However, PINs are
optional, and if you decide to use one,
record it in case you forget the number
(see page 95).
NOTE:
If you forget your PIN, your dealer will
have to reset it for you, and all of your
stored information will be cleared.
You can do the following functions in
the address book:
• Enter an address (see this page)
• Edit an existing address (see page 92)
• Delete an existing address (see page 94) If an Address Book PIN has been set,
the system prompts you to enter your
PIN. Verify that the correct user is
displayed, then enter your PIN. After
entering your PIN correctly by voice or
by using the
Interface Dial , the system
displays your Address Book.
If no Address Book PIN has been set,
the system displays your Address Book.
NOTE:
Personal information cannot be backed
up or moved to another navigation
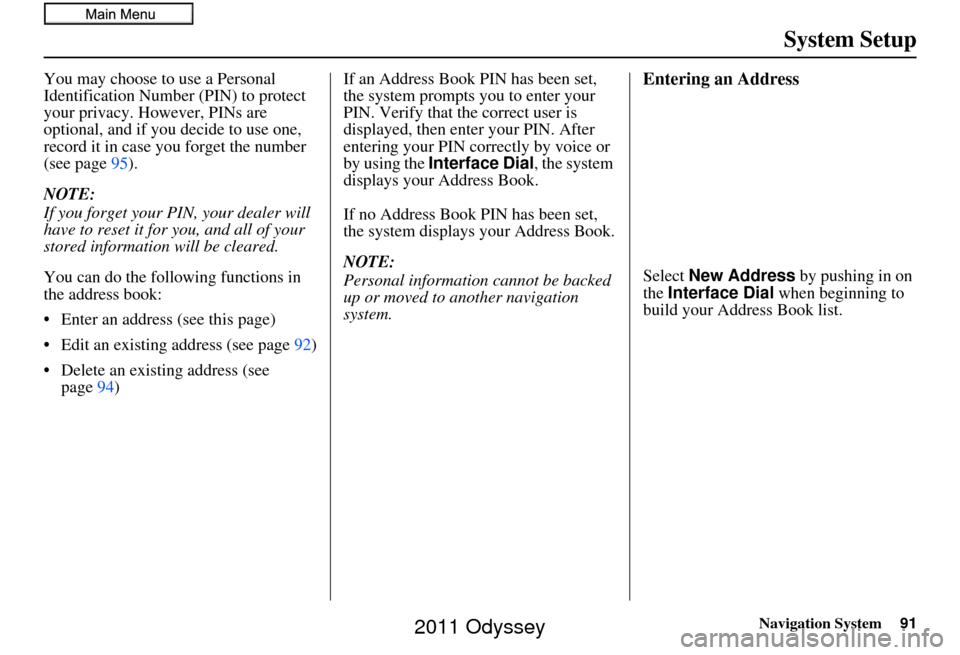
system.Entering an Address
Select New Address by pushing in on
the Interface Dial when beginning to
build your Address Book list.
2011 Odyssey
Page 95 of 178
Navigation System95
System Setup
PIN Number
You can set a four-digit PIN (Personal
Identification Number) for accessing
and changing personal addresses and
your home address if desired. Once you
set the PIN on this screen, the system
asks you to enter the PIN when you
access a personal address or your home
address.
NOTE:
PINs are optional. If you choose to use a
PIN, make sure you remember it. If you
forget your PIN, the dealer will have to
reset it for you, and all of your stored
information will be cleared.
When you select PIN Number , the
display changes to:
Address Book PIN
If you choose to enter a PIN for the
personal Address Book, you will have to
enter it when you edit your Address
Book (see page 90) or select Address
Book on the DEST screen ( Dest.
MENU 1 ) (see page 34).
1. Select Address Book PIN .
2. The display changes to:
3. Enter your new four-digit PIN. If you do not wish to use a PIN, select DO
NOT USE PIN .
NOTE:
The factory default is no PIN. 4. When you have entered your PIN, the
display changes to the Re-enter new
PIN screen. Enter the same number to
validate the number you have
selected.
5. If you have entered the same number both times, the disp lay returns to the
Select one of the following screen.
If not, “INCORRECT PIN” appears.
Enter your PIN again.
NOTE:
Once you enter your PIN to access your Address Book or select
Address Book on the DEST
screen ( Dest. MENU 1 ), you will not
need to enter your PIN until the
ignition key is cycled again.
If you wish to remove your PIN, return to the same screen and, after
entering your PIN correctly, select
DO NOT USE PIN .
PINs are optional. If you choose to use a PIN, make sure you remember
it. If you forget your PIN, your dealer
will have to reset it for you.
2011 Odyssey
Page 96 of 178
96Navigation System
System Setup
Go home 1 or 2 PIN
1. Select Go home 1 PIN or Go
home 2 PIN , and the system
displays the Enter your new PIN
screen.
2. Enter your PIN in the same way as entering the Address Book PIN.
NOTE:
The factory default is no PIN. If you choose to use a PIN, you will have to
enter it whenever you say “Go home
1” or “Go home 2” at the map
screen or select Go home 1 or Go
home 2 on the DEST screen ( Dest.
MENU 1 or 2 ).
PINs are optional. If you choose to use a PIN, make sure you remember
it. If you forget your PIN, your dealer
will have to reset it for you, and all
stored information will be cleared.
Previous Destinations
Allows you to delete some or all of your
previous destinations.
1. Select this option, and the display changes to:
2. Scroll through the list and find the address you want to delete.
3. Select the address to delete by saying the line number, or by using the
Interface Dial . NOTE:To cancel the deletion of Previous
Destinations, select the address that was
to have been deleted and push in on the
Interface Dial before performing step 4.
4. Say or select
OK to perform the
deletion, and the di splay returns to
the previous screen.
2011 Odyssey
Page 114 of 178
114Navigation System
System Setup
Clock Adjustment
Say or select Clock Adjustment and
the following screen appears:
This screen allows you to set or adjust
the following:
• Auto Daylight (Default = ON)
• Auto Time Zone (Default = ON)
• Adjust Time (adjust your clock)
• Clock Format (Default = 12H)
• Reset (resets this screen’s settings to factory defaults)
Auto Daylight
Sets automatic daylight saving time ON
or OFF . If set to ON , the clock will
automatically “spring ahead” or “fall
back” by one hour when a daylight
saving time change occurs.
NOTE:
Even if you have set Auto Daylight to
ON , this function is not activated in
areas that do not adopt daylight saving
time.
Auto Time Zone
Sets automatic time zone selection by
GPS to ON or OFF . If you are driving
across the country and passing through
time zones, then this feature will
automatically set the time to the time
zone you are traveling through.
However, if you live and work in two
different time zones, you may want to
turn this feature off.
NOTE:
When driving near a time zone
boundary, the displa yed time zone may
fluctuate between the two zone times.
2011 Odyssey
Page 115 of 178
Navigation System115
System Setup
Time Adjustment
Adjusts the current time in hours and
minutes. Select ADJUST TIME by
moving the Interface Dial up, and then
switch HOUR and MINUTE by moving
the Interface Dial to the left and right
and changing the value by rotating the
Interface Dial knob . Selecting OK
returns you to the previous screen.
Clock Format
Sets clock format selection 12H or 24H .
Resetting the Clock Settings
Selecting Reset clears any changes you
made to “Auto Daylight,” “Auto Time
Zone” settings, time adjustment, or
“Clock Format”. Depending on your
location, you may need to adjust these
settings.
Clock Type
You can set the clock type and
background image.
When you select Type, you can choose
Small Digital, Digital , or Analog
type. When you select
Background by
moving the Interface Dial to the right,
you can choose Galaxy, Metallic , or
Time Zone background image.
Tip:
You can preview the se lected clock type
on the right window.
Picture Setup
Say or select Picture Setup and the
following screen will be displayed.
Two default images are provided.
2011 Odyssey
Page 117 of 178
Navigation System117
System Setup
Importing Pictures from USB
To use a wallpaper image other than the
factory defaults, you can import pictures
from a USB thumb drive or similar
device.
If you say or select Import Pictures
from USB and a USB thumb drive is
properly connected, the following
screen will display.
Tip:
You can preview the selected image on
the right window.
Rotate the Interface Dial knob and
select the images to be uploaded to the
HDD. Move the Interface Dial down
and select OK. NOTE:
You can only import images from the
root directory. Images in the folders
cannot be imported.
The display size is 800 x 480 pixels. Smaller images are displayed with
the extra area appearing in black.
Larger images are reduced to a
displayable size without changing the
aspect ratio.
20 uploaded images (in BMP or JPEG format) can be saved to the
HDD.
Incompatible data formats or images greater than 6 MB cannot be saved.
Images with file names longer than 211 characters cannot be uploaded.
If you attempt to upload an image with the same name as an existing
image, a pop-up screen will appear,
asking if you want to overwrite the
existing image file.
You cannot import images while driving.Reset Factory Default
Settings
The Setup settings and multi-view rear
camera brightness value settings can be
returned to the factory default settings.
If you say or select Reset Factory
Default from the SETUP screen
(Other ), the following screen will
display.
If you select Yes, the following Setup
settings return to the factory default
settings. If you select No, these settings
will remain as they are currently set.
• Brightness, Contrast, Black Level, Volume, Interface Dial Feedback,
Brightness (multi-view rear camera)
2011 Odyssey
Page 147 of 178
Navigation System147
Frequently Asked Questions
Traffic
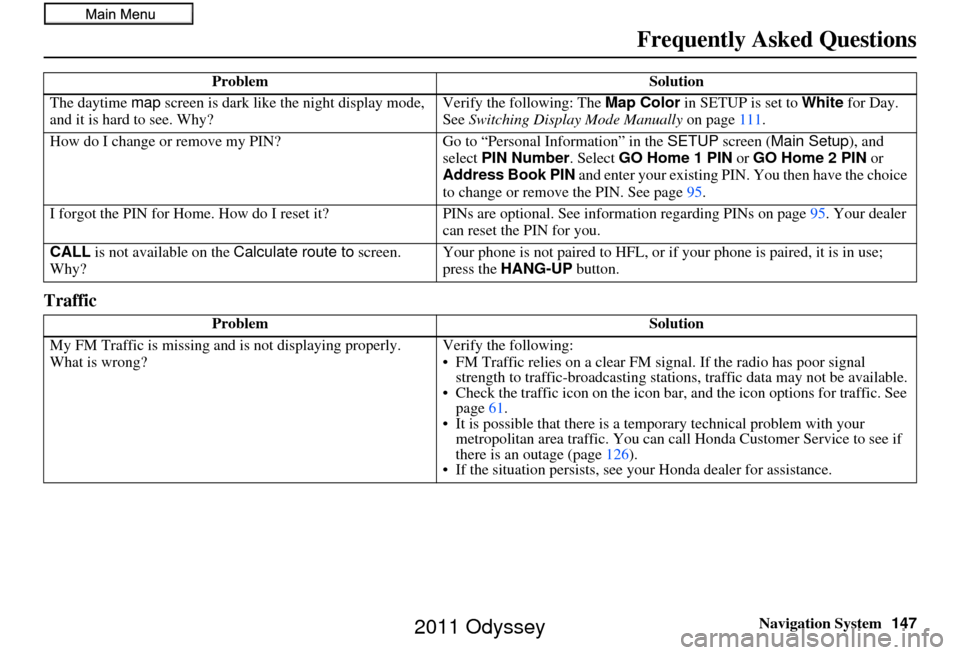
The daytime map screen is dark like the night display mode,
and it is hard to see. Why? Verify the following: The
Map Color in SETUP is set to White for Day.
See Switching Display Mode Manually on page111.
How do I change or remove my PIN? Go to “Personal Information” in the SETUP screen ( Main Setup ), and
select PIN Number . Select GO Home 1 PIN or GO Home 2 PIN or
Address Book PIN and enter your existing PIN. You then have the choice
to change or remove the PIN. See page 95.
I forgot the PIN for Home. How do I rese t it?PINs are optional. See information regarding PINs on page 95. Your dealer
can reset the PIN for you.
CALL is not available on the Calculate route to screen.
Why? Your phone is not paired to HFL, or if
your phone is paired, it is in use;
press the HANG-UP button.
Problem Solution
My FM Traffic is missing an d is not displaying properly.
What is wrong? Verify the following:
• FM Traffic relies on a clear FM
signal. If the radio has poor signal
strength to traffic-broadc asting stations, traffic data may not be available.
• Check the traffic icon on the icon bar, and the icon options for traffic. See
page 61.
• It is possible that there is a te mporary technical problem with your
metropolitan area traffic. You can call Honda Cust omer Service to see if
there is an outage (page 126).
• If the situation persists, see your Honda dealer for assistance.
Problem
Solution
2011 Odyssey