front HONDA ODYSSEY 2012 RB3-RB4 / 4.G Repair Manual
[x] Cancel search | Manufacturer: HONDA, Model Year: 2012, Model line: ODYSSEY, Model: HONDA ODYSSEY 2012 RB3-RB4 / 4.GPages: 441, PDF Size: 14.07 MB
Page 170 of 441
169
Continued
Controls
Interior Lights/Interior Convenience ItemsInterior Lights
■
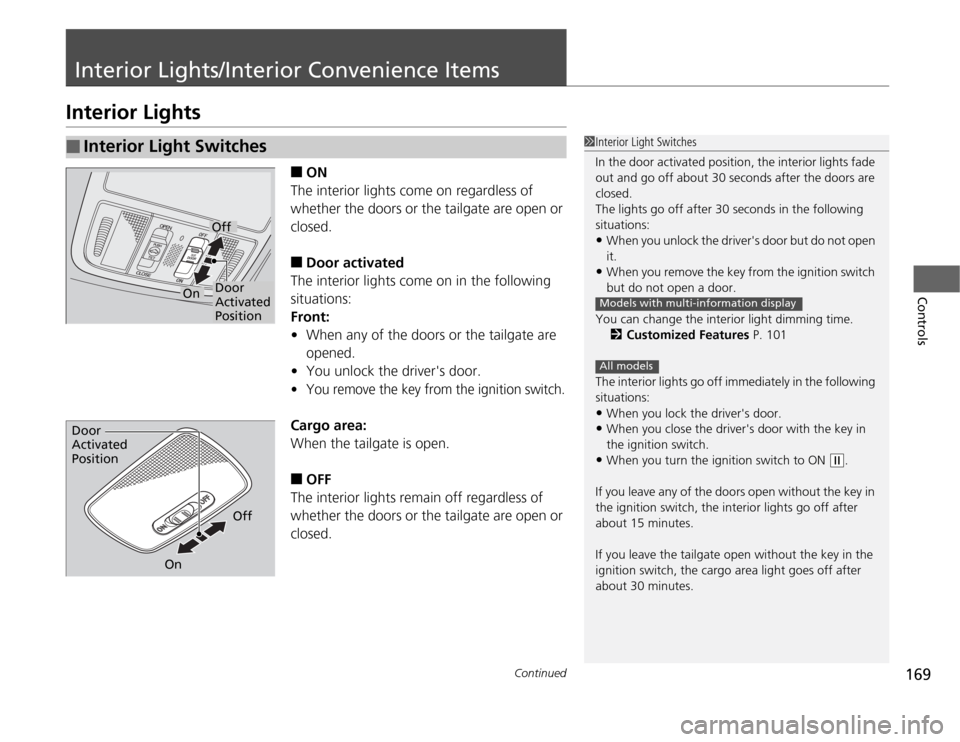
ON
The interior lights come on regardless of
whether the doors or the tailgate are open or
closed.
■
Door activated
The interior lights come on in the following
situations:
Front:
•When any of the doors or the tailgate are
opened.
•You unlock the driver's door.
•
You remove the key from the ignition switch.
Cargo area:
When the tailgate is open.■
OFF
The interior lights remain off regardless of
whether the doors or the tailgate are open or
closed.
■
Interior Light Switches
1Interior Light Switches
In the door activated position, the interior lights fade
out and go off about 30 seconds after the doors are
closed.
The lights go off after 30 seconds in the following
situations:•When you unlock the driver's door but do not open
it.•When you remove the key from the ignition switch
but do not open a door.
You can change the interior light dimming time.
2Customized Features P. 101
The interior lights go off immediately in the following
situations:•When you lock the driver's door.•When you close the driver's door with the key in
the ignition switch.•When you turn the ignition switch to ON
(w
.
If you leave any of the doors open without the key in
the ignition switch, the interior lights go off after
about 15 minutes.
If you leave the tailgate open without the key in the
ignition switch, the cargo area light goes off after
about 30 minutes.
Models with multi-information displayAll models
Door
Activated
PositionOff
On
Door
Activated
Position
Off
On
Page 171 of 441
uuInterior Lights/Interior Convenience ItemsuInterior Lights
170Controls
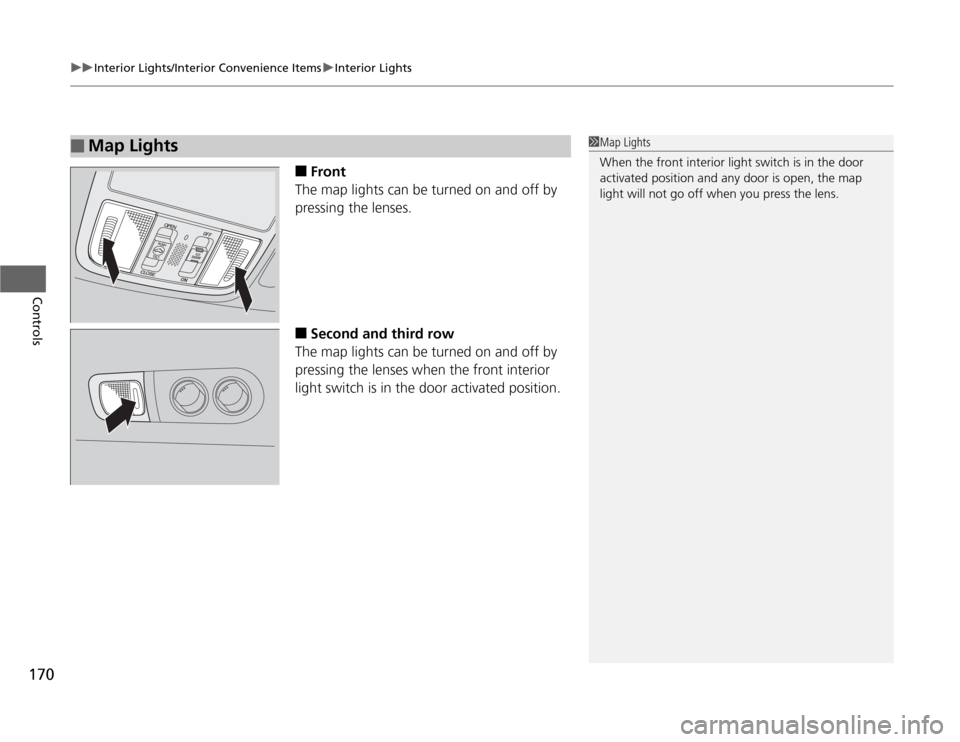
■
Front
The map lights can be turned on and off by
pressing the lenses.
■
Second and third row
The map lights can be turned on and off by
pressing the lenses when the front interior
light switch is in the door activated position.
■
Map Lights
1Map Lights
When the front interior light switch is in the door
activated position and any door is open, the map
light will not go off when you press the lens.
Page 172 of 441
171
uuInterior Lights/Interior Convenience ItemsuInterior Convenience Items
Continued
Controls
Interior Convenience Items
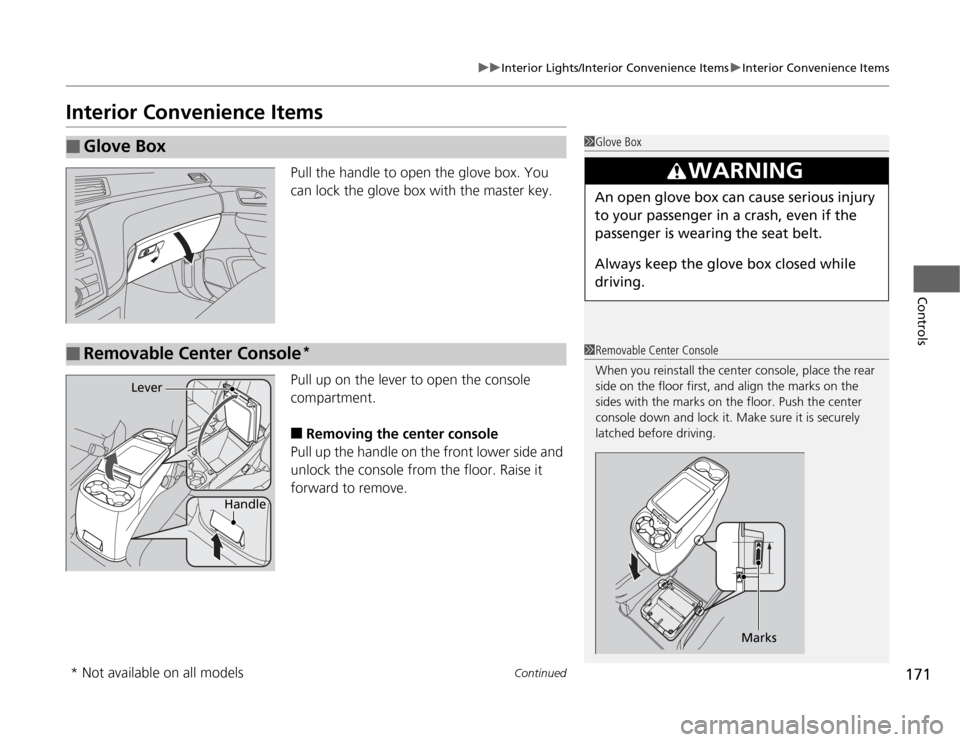
Pull the handle to open the glove box. You
can lock the glove box with the master key.
Pull up on the lever to open the console
compartment.■
Removing the center console
Pull up the handle on the front lower side and
unlock the console from the floor. Raise it
forward to remove.
■
Glove Box
1Glove Box
3
WARNING
An open glove box can cause serious injury
to your passenger in a crash, even if the
passenger is wearing the seat belt.
Always keep the glove box closed while
driving.
■
Removable Center Console
*
1Removable Center Console
When you reinstall the center console, place the rear
side on the floor first, and align the marks on the
sides with the marks on the floor. Push the center
console down and lock it. Make sure it is securely
latched before driving.
Marks
Handle
Lever
* Not available on all models
Page 175 of 441
uuInterior Lights/Interior Convenience ItemsuInterior Convenience Items
174Controls
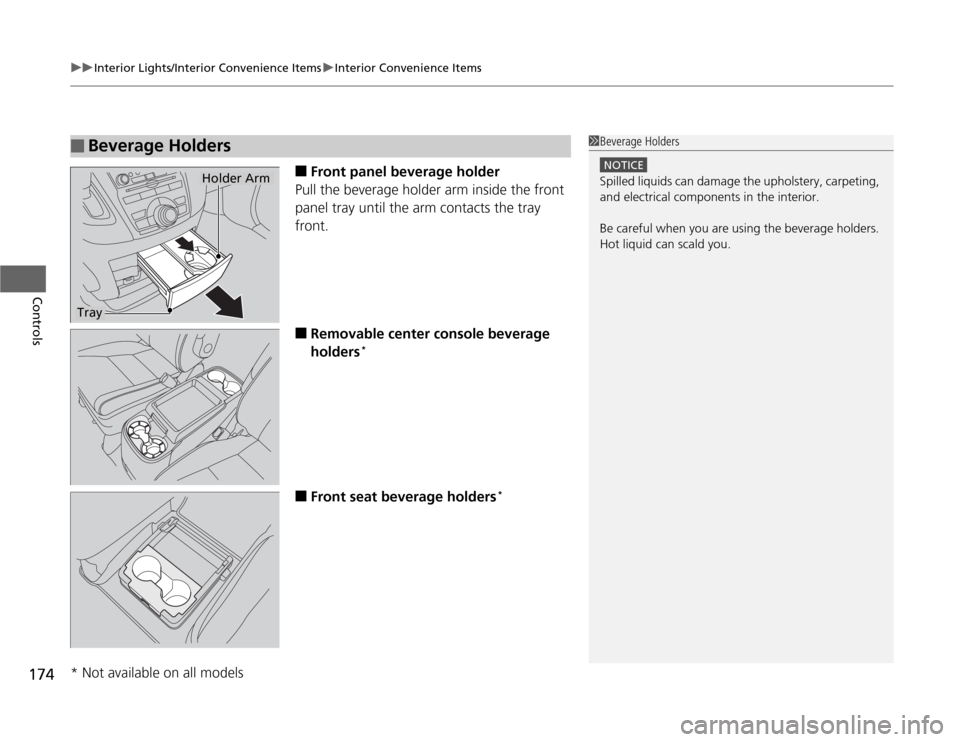
■
Front panel beverage holder
Pull the beverage holder arm inside the front
panel tray until the arm contacts the tray
front.
■
Removable center console beverage
holders
*
■
Front seat beverage holders
*
■
Beverage Holders
1Beverage Holders
NOTICESpilled liquids can damage the upholstery, carpeting,
and electrical components in the interior.
Be careful when you are using the beverage holders.
Hot liquid can scald you.
Tray
Holder Arm
* Not available on all models
Page 180 of 441
Continued
179
uuInterior Lights/Interior Convenience ItemsuInterior Convenience Items
Controls
■
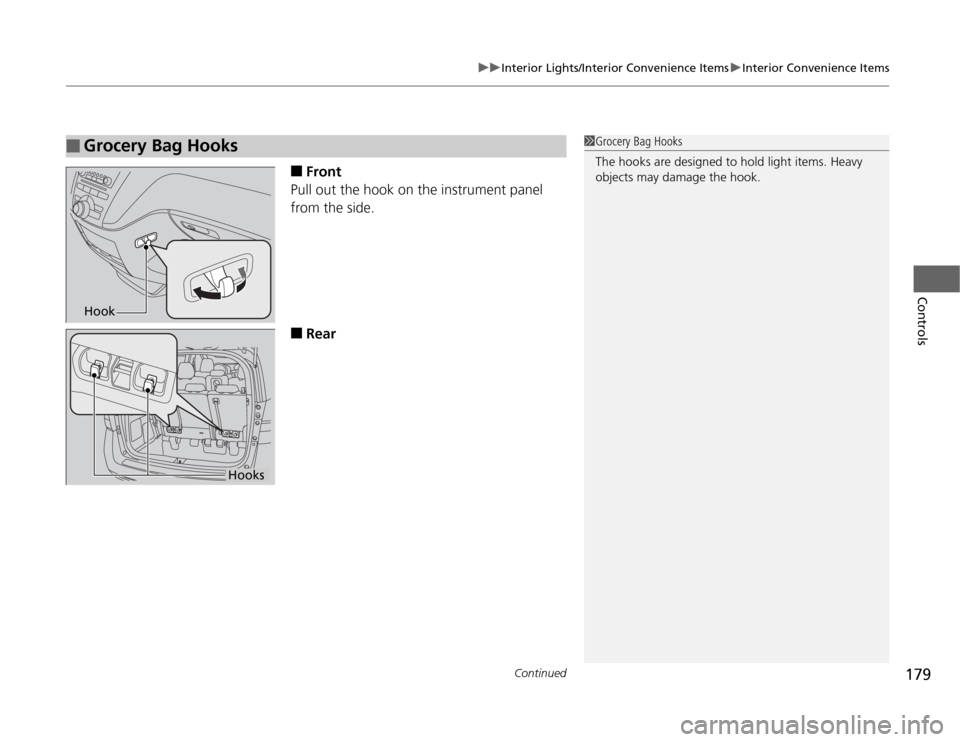
Front
Pull out the hook on the instrument panel
from the side.
■
Rear
■
Grocery Bag Hooks
1Grocery Bag Hooks
The hooks are designed to hold light items. Heavy
objects may damage the hook.
Hook
Hooks
Page 191 of 441
190
uuClimate Control System
*uRear Climate Control System
Controls
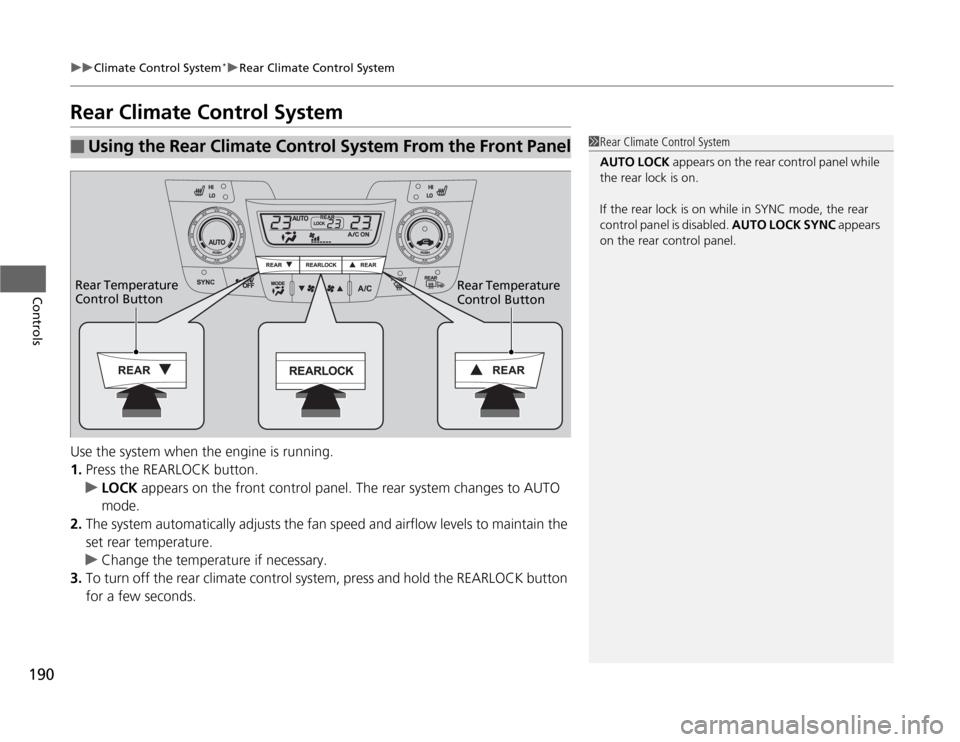
Rear Climate Control SystemUse the system when the engine is running.
1.Press the REARLOCK button.
uLOCK appears on the front control panel. The rear system changes to AUTO
mode.
2.The system automatically adjusts the fan speed and airflow levels to maintain the
set rear temperature.
uChange the temperature if necessary.
3.To turn off the rear climate control system, press and hold the REARLOCK button
for a few seconds.■
Using the Rear Climate Control System From the Front Panel
1Rear Climate Control System
AUTO LOCK appears on the rear control panel while
the rear lock is on.
If the rear lock is on while in SYNC mode, the rear
control panel is disabled. AUTO LOCK SYNC appears
on the rear control panel.
Rear Temperature
Control Button Rear Temperature
Control Button
Page 192 of 441
191
uuClimate Control System
*uRear Climate Control System
Controls
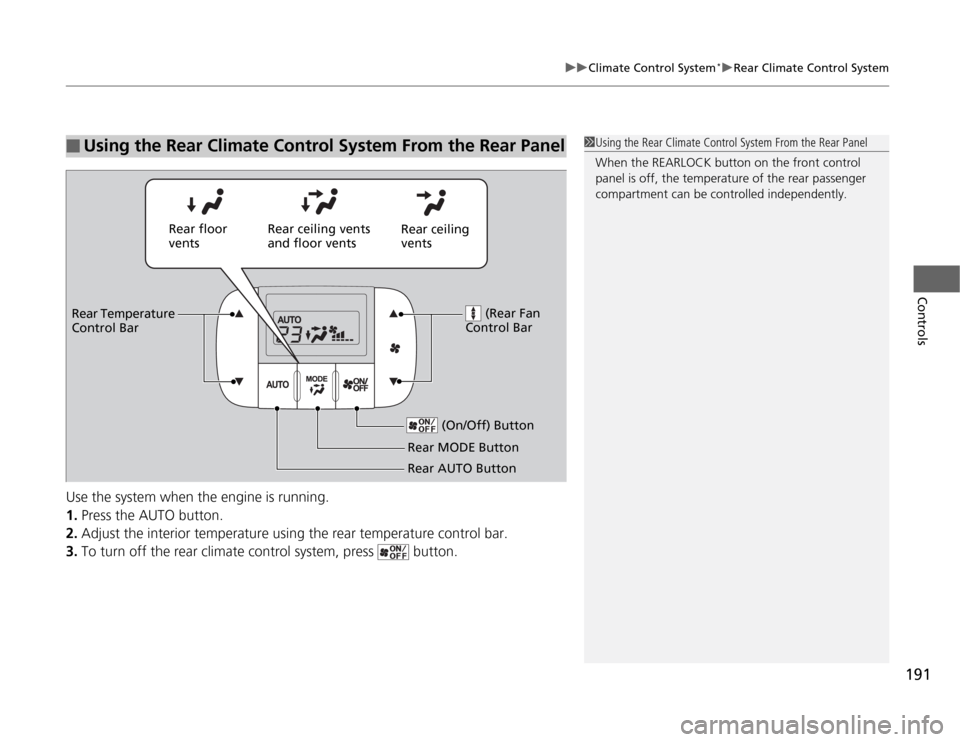
Use the system when the engine is running.
1.Press the AUTO button.
2.Adjust the interior temperature using the rear temperature control bar.
3.To turn off the rear climate control system, press button.■
Using the Rear Climate Control System From the Rear Panel
1Using the Rear Climate Control System From the Rear Panel
When the REARLOCK button on the front control
panel is off, the temperature of the rear passenger
compartment can be controlled independently.
Rear ceiling
vents Rear floor
ventsRear ceiling vents
and floor vents
(Rear Fan
Control Bar
Rear Temperature
Control Bar
(On/Off) Button
Rear MODE Button
Rear AUTO Button
Page 242 of 441
241
Continued
Features
Rear Entertainment System
*
For models with the navigation system, see the Navigation System Manual for how
to operate the rear entertainment system.
Allows the rear passengers to enjoy a different entertainment source, such as DVD,
CD, CD Library, and radio, than the front passengers.
The rear seat passengers can listen to audio from the rear entertainment system by
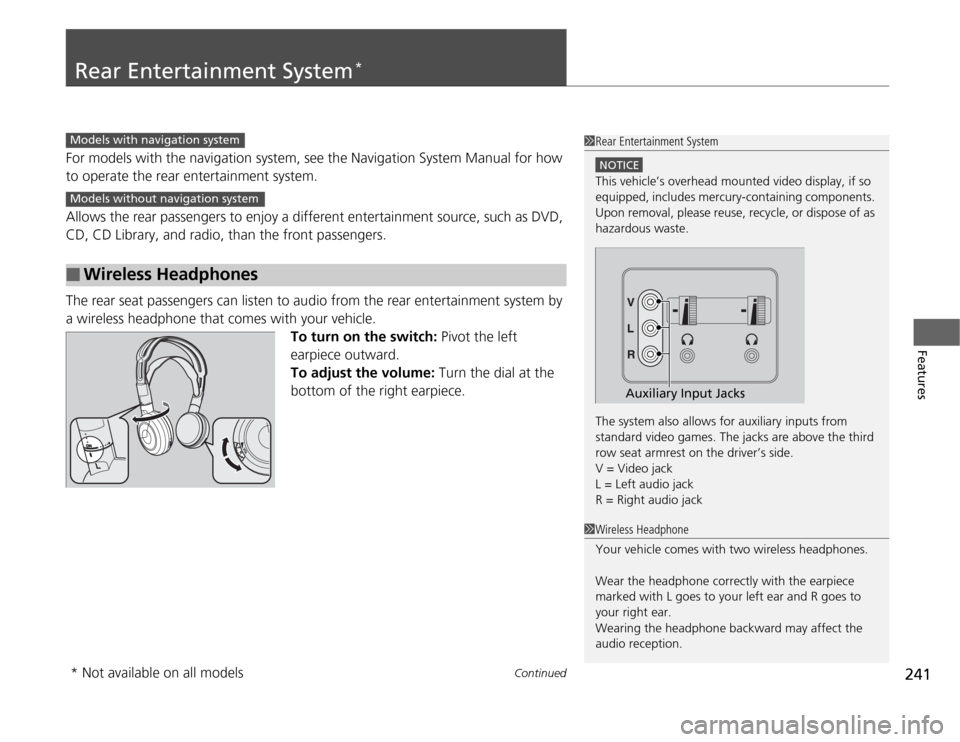
a wireless headphone that comes with your vehicle.
To turn on the switch: Pivot the left
earpiece outward.
To adjust the volume: Turn the dial at the
bottom of the right earpiece.■
Wireless Headphones
1Rear Entertainment System
NOTICEThis vehicle’s overhead mounted video display, if so
equipped, includes mercury-containing components.
Upon removal, please reuse, recycle, or dispose of as
hazardous waste.
The system also allows for auxiliary inputs from
standard video games. The jacks are above the third
row seat armrest on the driver’s side.
V = Video jack
L = Left audio jack
R = Right audio jack
Auxiliary Input Jacks
Models with navigation systemModels without navigation system
1Wireless Headphone
Your vehicle comes with two wireless headphones.
Wear the headphone correctly with the earpiece
marked with L goes to your left ear and R goes to
your right ear.
Wearing the headphone backward may affect the
audio reception.
* Not available on all models
Page 243 of 441
uuRear Entertainment System
*uOperating the System
242Features
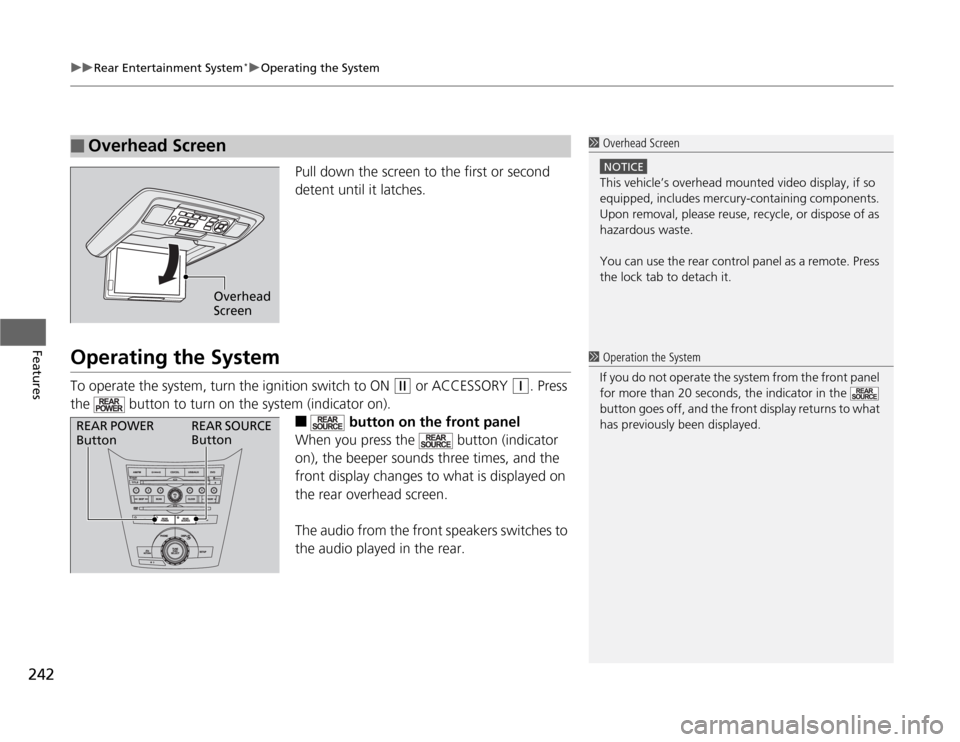
Pull down the screen to the first or second
detent until it latches.
Operating the SystemTo operate the system, turn the ignition switch to ON
(w
or ACCESSORY
(q
. Press
the button to turn on the system (indicator on).
■
button on the front panel
When you press the button (indicator
on), the beeper sounds three times, and the
front display changes to what is displayed on
the rear overhead screen.
The audio from the front speakers switches to
the audio played in the rear.
■
Overhead Screen
1 Overhead Screen
NOTICEThis vehicle’s overhead mounted video display, if so
equipped, includes mercury-containing components.
Upon removal, please reuse, recycle, or dispose of as
hazardous waste.
You can use the rear control panel as a remote. Press
the lock tab to detach it.
Overhead
Screen
1 Operation the System
If you do not operate the system from the front panel
for more than 20 seconds, the indicator in the
button goes off, and the front display returns to what
has previously been displayed.
REAR POWER
ButtonREAR SOURCE
Button
Page 245 of 441
uuRear Entertainment System
*uOperating the System
244Features
■
Playing a DVD
•Insert a DVD into the lower slot of the front audio unit.
uThe system automatically starts the DVD.
•To fast forward, press and hold the (SEEK/SKIP) bar, and to reverse, press and
hold the bar on the front panel or the remote.
•To go to the next chapter, press the bar, and to go to the beginning of the
current chapter, press the bar on the front panel or the remote. Quickly press
the bar twice to go to the previous chapter.
■
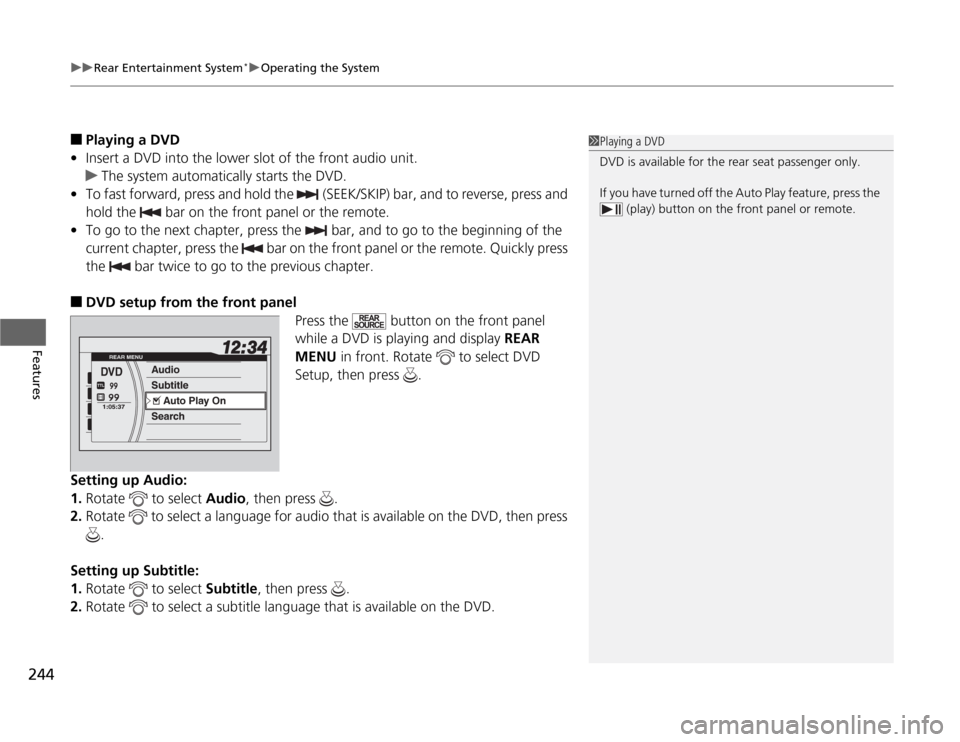
DVD setup from the front panel
Press the button on the front panel
while a DVD is playing and display REAR
MENU in front. Rotate to select DVD
Setup, then press .
Setting up Audio:
1.Rotate to select Audio, then press .
2.Rotate to select a language for audio that is available on the DVD, then press
.
Setting up Subtitle:
1.Rotate to select Subtitle, then press .
2.Rotate to select a subtitle language that is available on the DVD.
1Playing a DVD
DVD is available for the rear seat passenger only.
If you have turned off the Auto Play feature, press the
(play) button on the front panel or remote.