third HONDA ODYSSEY 2012 RB3-RB4 / 4.G Owners Manual
[x] Cancel search | Manufacturer: HONDA, Model Year: 2012, Model line: ODYSSEY, Model: HONDA ODYSSEY 2012 RB3-RB4 / 4.GPages: 441, PDF Size: 14.07 MB
Page 6 of 441
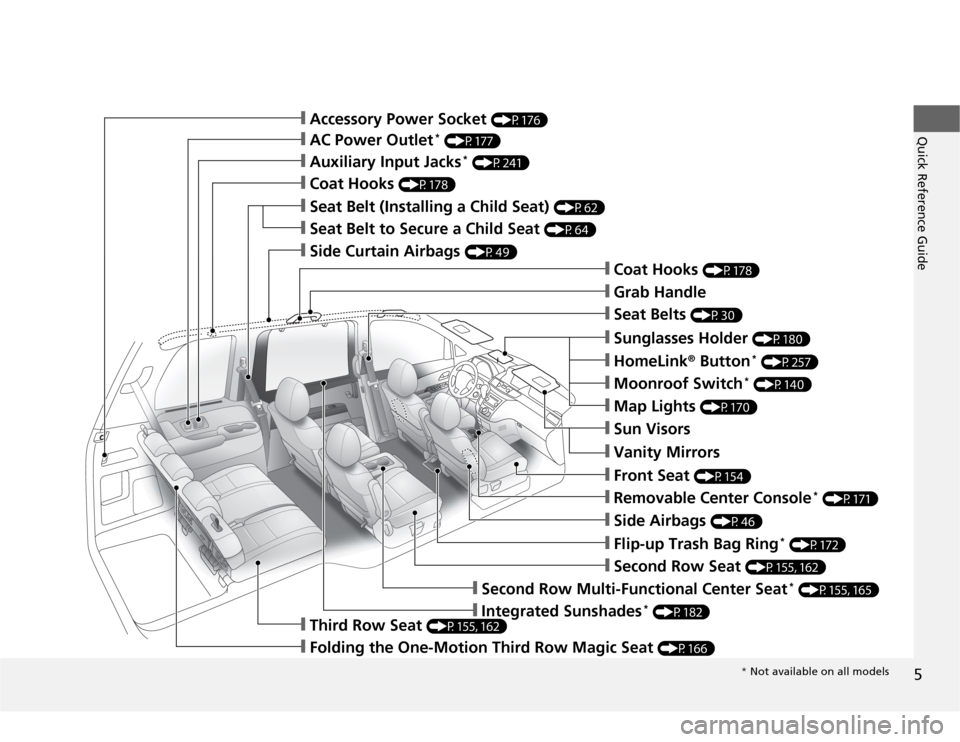
5Quick Reference Guide
❙Sun Visors❙Vanity Mirrors❙Moonroof Switch
* (P140)
❙Map Lights
(P170)
❙HomeLink
® Button
* (P257)
❙Sunglasses Holder
(P180)
❙Seat Belts
(P30)
❙Grab Handle❙Coat Hooks
(P178)
❙Seat Belt to Secure a Child Seat
(P64)
❙Seat Belt (Installing a Child Seat)
(P62)
❙Accessory Power Socket
(P176)
❙Side Curtain Airbags
(P49)
❙Coat Hooks
(P178)
❙AC Power Outlet
* (P177)
❙Auxiliary Input Jacks
* (P241)
❙Side Airbags
(P46)
❙Second Row Seat
(P155, 162)
❙Front Seat
(P154)
❙Removable Center Console
* (P171)
❙Flip-up Trash Bag Ring
* (P172)
❙Third Row Seat
(P155, 162)
❙Folding the One-Motion Third Row Magic Seat
(P166)
❙Second Row Multi-Functional Center Seat
* (P155, 165)
❙Integrated Sunshades
* (P182)
* Not available on all models
Page 31 of 441

30Safe Driving
Seat BeltsAbout Your Seat BeltsSeat belts are the single most effective safety device because they keep you
connected to the vehicle so that you can take advantage of many built-in safety
features. They also help keep you from being thrown against the inside of the
vehicle, against other passengers, or out of the vehicle. When worn properly, seat
belts also keep your body properly positioned in a crash so that you can take full
advantage of the additional protection provided by the airbags.
In addition, seat belts help protect you in almost every type of crash, including:
-frontal impacts
-side impacts
-rear impacts
-rollovers■
Lap/shoulder seat belts
All seven or eight seating positions are equipped with lap/shoulder seat belts with
emergency locking retractors. In normal driving the retractor lets you move freely
while keeping some tension on the belt. During a collision or sudden stop the
retractor locks to restrain your body. The second and third row passenger’s seat
belts also have a lockable retractor for use with child seats.2Installing a Child Seat with a Lap/Shoulder Seat Belt P. 62
1About Your Seat Belts
Seat belts cannot completely protect you in every
crash. But in most cases, seat belts can reduce your
risk of serious injury.
Most states and all Canadian provinces and territories
require you to wear seat belts.
3
WARNING
Not wearing a seat belt properly increases
the chance of serious injury or death in a
crash, even though your vehicle has
airbags.
Be sure you and your passengers always
wear seat belts and wear them properly.
Page 60 of 441

59
uuChild SafetyuSafety of Infants and Small Children
Continued
Safe Driving
A LATCH-compatible child seat can be installed in each of the second and third row
seats. A child seat is attached to the lower anchors with either the rigid or flexible
type of connectors.
1.Locate the lower anchors under the marks.■
Installing a LATCH-Compatible Child SeatMarks
Marks
Third row seatSecond row seat
Page 65 of 441

uuChild SafetyuSafety of Infants and Small Children
64Safe Driving
A tether anchorage point is provided behind
each second and third row seating position. A
child seat that is installed with a seat belt and
comes with a tether can use the tether for
additional security.
1.Locate the appropriate tether anchorage
point.
2.Raise the head restraint to its highest
position, then route the tether strap
through the head restraint legs. Make sure
the strap is not twisted.
■
Adding Security with a Tether
1Adding Security with a Tether
Since a tether can provide additional security to the
lap/shoulder seat belt installation, we recommend
using a tether whenever one is available.
Second row seatThird row seatSecond row outer position
Page 66 of 441

65
uuChild SafetyuSafety of Infants and Small Children
Safe Driving
3.Secure the tether strap hook onto the
anchor.
4.Tighten the tether strap as instructed by the
child seat manufacturer.
Second row center seatThird row seat
Page 112 of 441
111
uuLocking and Unlocking the DoorsuKey Types and Functions
Controls
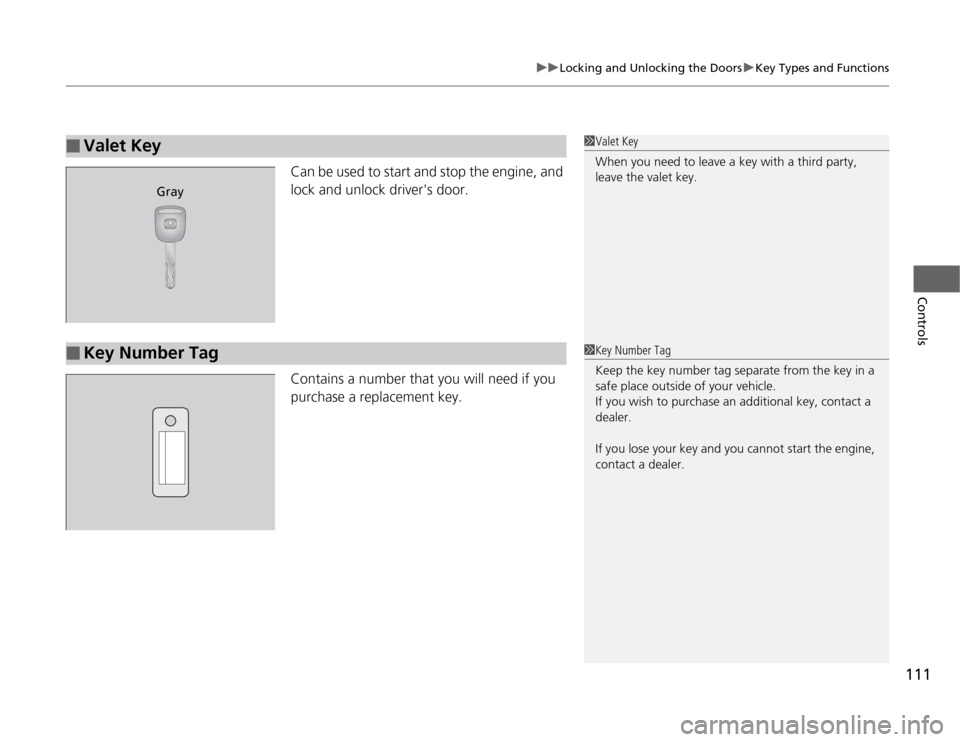
Can be used to start and stop the engine, and
lock and unlock driver's door.
Contains a number that you will need if you
purchase a replacement key.
■
Valet Key
1Valet Key
When you need to leave a key with a third party,
leave the valet key.
Gray
■
Key Number Tag
1Key Number Tag
Keep the key number tag separate from the key in a
safe place outside of your vehicle.
If you wish to purchase an additional key, contact a
dealer.
If you lose your key and you cannot start the engine,
contact a dealer.
Page 156 of 441

155
uuAdjusting the SeatsuAdjusting the Seat Positions
Continued
Controls
■
Adjusting the passenger’s manual seats
Seat-back Angle
AdjustmentPull up the lever to
change the angle.
Seat-back Angle
AdjustmentPull the strap to change
the angle.
Seat-back Angle
AdjustmentPull up strap on the
right to change the
angle of the right
halves of the seat-
back, and left for the
left halves.
The front
* and second row outer
The second row center seat
Horizontal Position
AdjustmentPull up the bar to move
the seat, then release
the bar.
The third row
* Not available on all models
Page 159 of 441

158
uuAdjusting the SeatsuAdjusting the Seat Positions
Controls
■
Adjusting the front and second row outer and third row outer head
restraint positions
To raise the head restraint: Pull it upward.
To lower the head restraint: Push it down
while pressing the release button.
Page 160 of 441

Continued
159
uuAdjusting the SeatsuAdjusting the Seat Positions
Controls
A passenger sitting in the second row/third
row center seating position should adjust the
height of their head restraint to an
appropriate position before the vehicle begins
moving.
To raise the head restraint:
Pull it upward.
To lower the head restraint:
Push it down while pressing the release
button.
Head restraints can be removed for cleaning or repair.
To remove a head restraint:
Pull the restraint up as far as it will go. Then push the release button, and pull the
restraint up and out.
To reinstall a head restraint:
Insert the legs back in place, then adjust the head restraint to an appropriate height
while pressing the release button. Pull up on the restraint to make sure it is locked
in position.
■
Changing the Second Row
*/Third Row Center Seat Head
Restraint Positions
■
Removing and Reinstalling the Head Restraints
1Removing and Reinstalling the Head Restraints
To remove the third row seat outer head restraints,
fold down the seat-back first.
2Adjusting the passenger’s manual seats
P. 155
3
WARNING
Failure to reinstall, or correctly reinstall, the
head restraints can result in severe injury
during a crash.
Always replace the head restraints before
driving.
* Not available on all models
Page 163 of 441

162
uuAdjusting the SeatsuRear Seats
Controls
Rear Seats
Pulling up on the seat-back angle adjustment
lever, or pulling the release strap tilts the
second row outer seat’s seat-back forward.
Slide the whole seat forward.
■
Third Row Seat Access
1Third Row Seat Access
When you enter the third row seat, be careful not to
trip over the second row seat belt. If necessary, move
the seat forward after tilting the seat-back forward.
Lever Strap