HONDA ODYSSEY 2013 RC1-RC2 / 5.G Owners Manual
ODYSSEY 2013 RC1-RC2 / 5.G
HONDA
HONDA
https://www.carmanualsonline.info/img/13/5982/w960_5982-0.png
HONDA ODYSSEY 2013 RC1-RC2 / 5.G Owners Manual
Trending: jacking, check engine, display, headlight bulb, change key battery, transmission oil, phone
Page 351 of 433
350
uuReplacing Light BulbsuHeadlight Bulbs
Maintenance
High voltage can remain in the circuit for a long period of time after the light is
switched off. Do not attempt to inspect or replace the high voltage discharge type
bulbs yourself. Ask a dealer to inspect and replace low beam headlights.
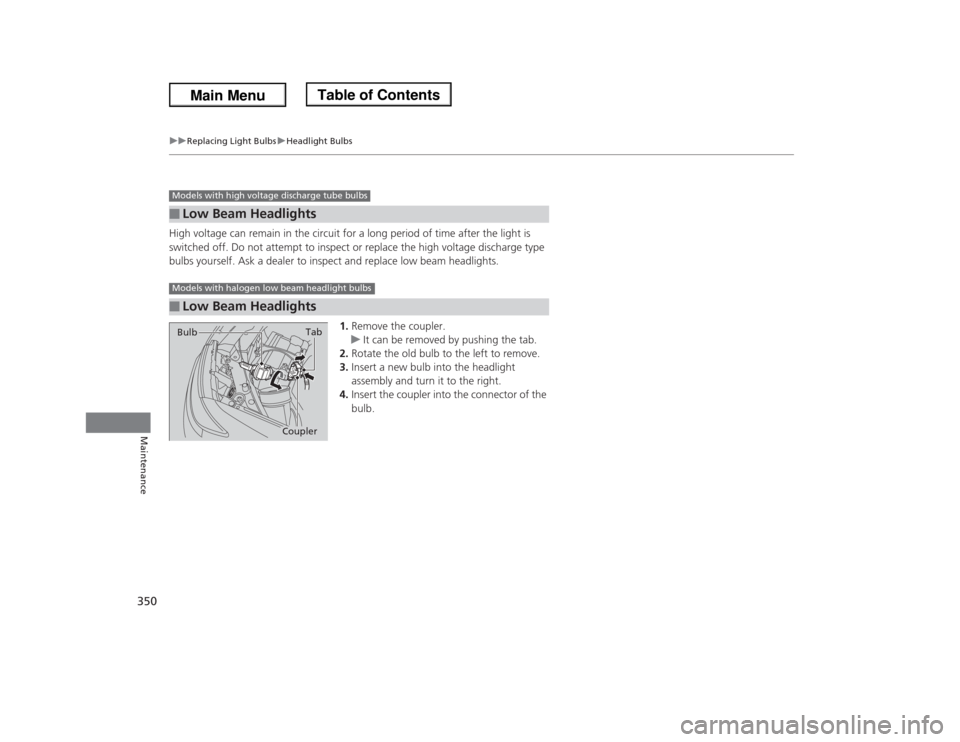
1.Remove the coupler.
uIt can be removed by pushing the tab.
2.Rotate the old bulb to the left to remove.
3.Insert a new bulb into the headlight
assembly and turn it to the right.
4.Insert the coupler into the connector of the
bulb.■
Low Beam Headlights
■
Low Beam HeadlightsModels with high voltage discharge tube bulbsModels with halogen low beam headlight bulbs
Tab
Coupler Bulb
Page 352 of 433
351
uuReplacing Light BulbsuFog Light Bulbs
*
Maintenance
Fog Light Bulbs
*
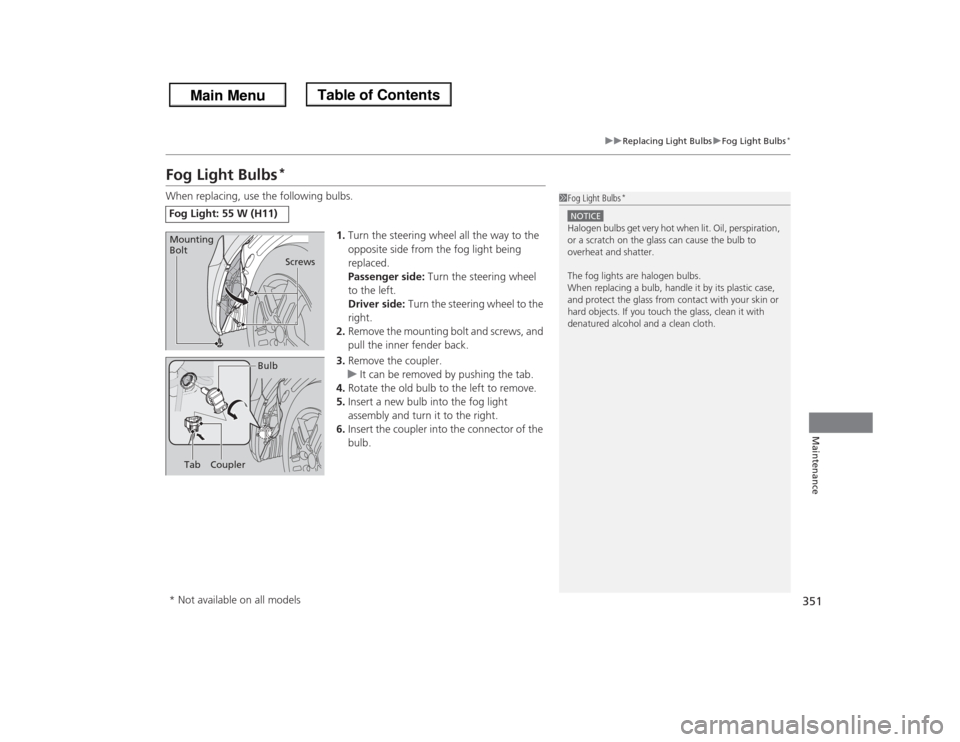
When replacing, use the following bulbs.
1.Turn the steering wheel all the way to the
opposite side from the fog light being
replaced.
Passenger side: Turn the steering wheel
to the left.
Driver side: Turn the steering wheel to the
right.
2.Remove the mounting bolt and screws, and
pull the inner fender back.
3.Remove the coupler.
uIt can be removed by pushing the tab.
4.Rotate the old bulb to the left to remove.
5.Insert a new bulb into the fog light
assembly and turn it to the right.
6.Insert the coupler into the connector of the
bulb.Fog Light: 55 W (H11)
1Fog Light Bulbs
*
NOTICEHalogen bulbs get very hot when lit. Oil, perspiration,
or a scratch on the glass can cause the bulb to
overheat and shatter.
The fog lights are halogen bulbs.
When replacing a bulb, handle it by its plastic case,
and protect the glass from contact with your skin or
hard objects. If you touch the glass, clean it with
denatured alcohol and a clean cloth.
Screws Mounting
Bolt
Bulb
Coupler
Tab
* Not available on all models
Page 353 of 433
352
uuReplacing Light BulbsuFront Turn Signal/Parking/Side Marker Light Bulbs
Maintenance
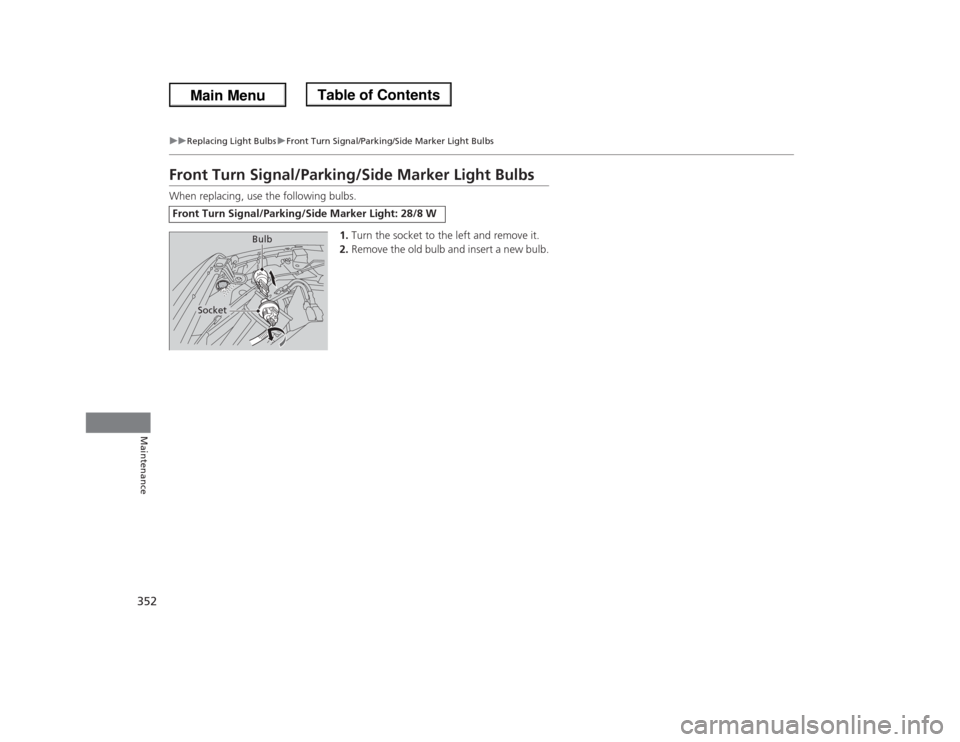
Front Turn Signal/Parking/Side Marker Light BulbsWhen replacing, use the following bulbs.
1.Turn the socket to the left and remove it.
2.Remove the old bulb and insert a new bulb.Front Turn Signal/Parking/Side Marker Light: 28/8 W
Bulb
Socket
Page 354 of 433
353
uuReplacing Light BulbsuBrake/Rear Side Marker/Taillight and Rear Turn Signal Light Bulbs
Continued
Maintenance
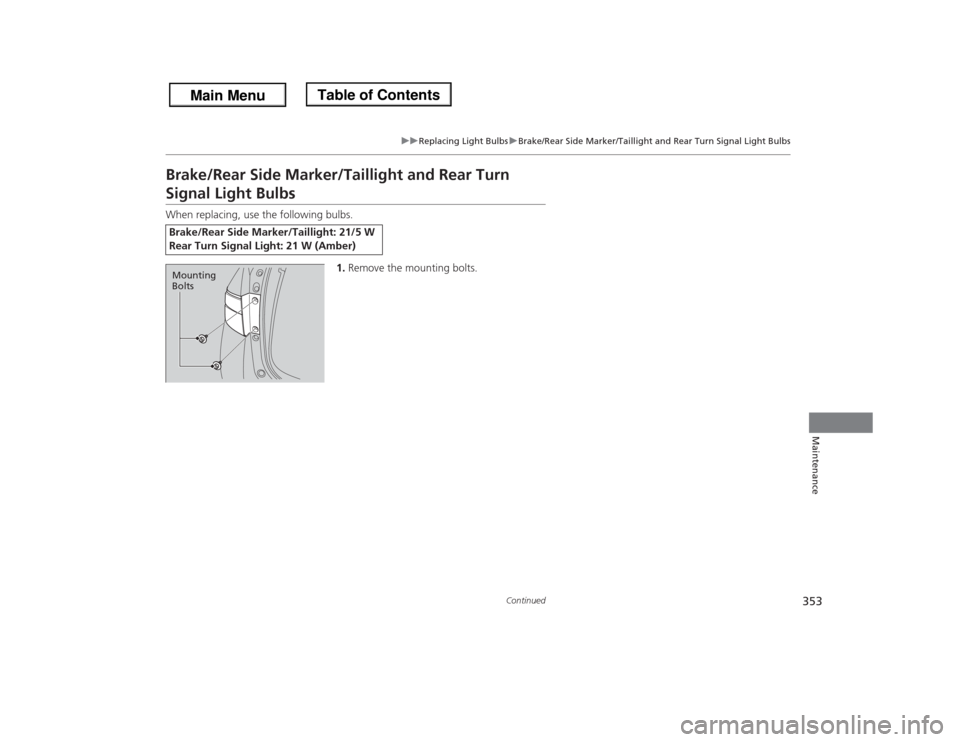
Brake/Rear Side Marker/Taillight and Rear Turn Signal Light BulbsWhen replacing, use the following bulbs.
1.Remove the mounting bolts.Brake/Rear Side Marker/Taillight: 21/5 W
Rear Turn Signal Light: 21 W (Amber)Mounting
Bolts
Page 355 of 433
uuReplacing Light BulbsuBrake/Rear Side Marker/Taillight and Rear Turn Signal Light Bulbs
354Maintenance
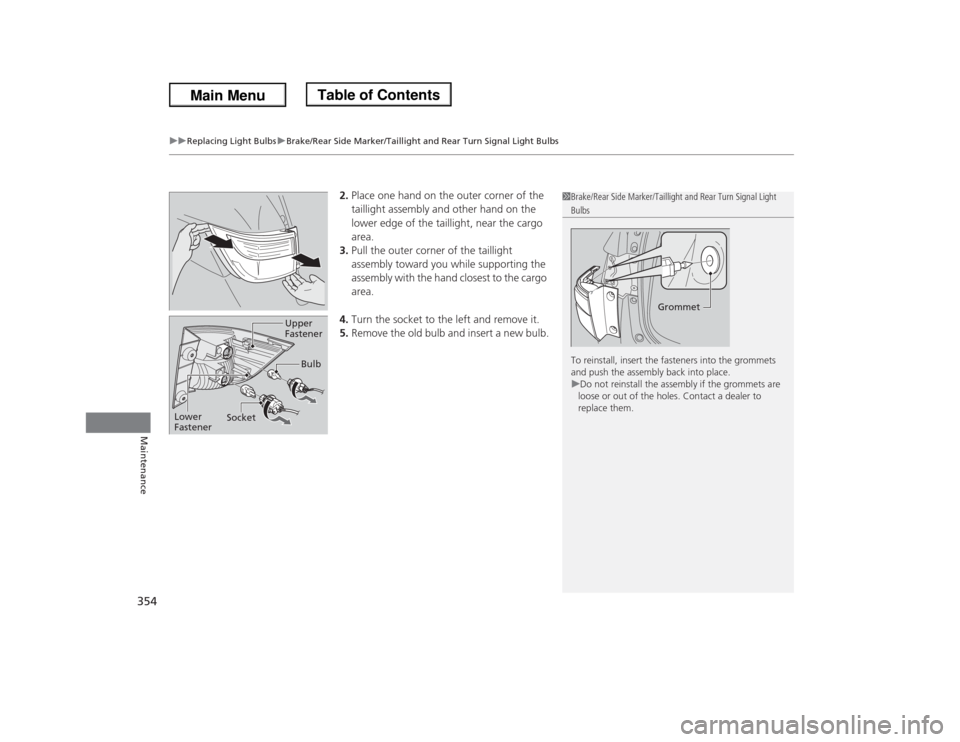
2.Place one hand on the outer corner of the
taillight assembly and other hand on the
lower edge of the taillight, near the cargo
area.
3.Pull the outer corner of the taillight
assembly toward you while supporting the
assembly with the hand closest to the cargo
area.
4.Turn the socket to the left and remove it.
5.Remove the old bulb and insert a new bulb.
1Brake/Rear Side Marker/Taillight and Rear Turn Signal Light Bulbs
To reinstall, insert the fasteners into the grommets
and push the assembly back into place.
uDo not reinstall the assembly if the grommets are
loose or out of the holes. Contact a dealer to
replace them.
Grommet
Bulb
SocketUpper
Fastener
Lower
Fastener
Page 356 of 433
355
uuReplacing Light BulbsuBack-Up/Taillight Bulbs
Maintenance
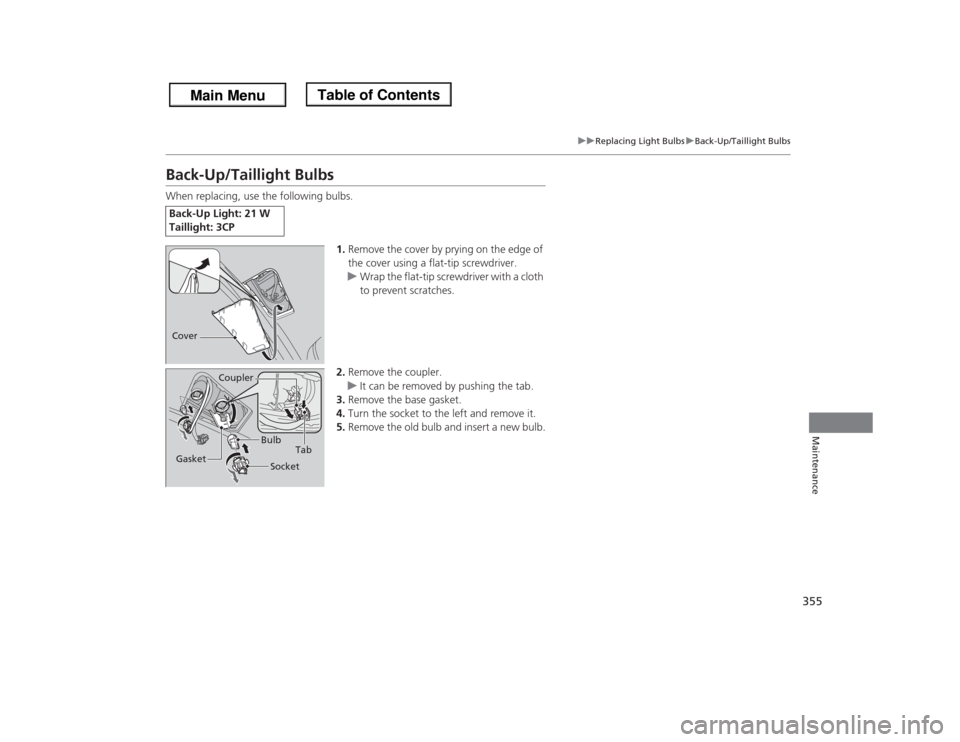
Back-Up/Taillight BulbsWhen replacing, use the following bulbs.
1.Remove the cover by prying on the edge of
the cover using a flat-tip screwdriver.
uWrap the flat-tip screwdriver with a cloth
to prevent scratches.
2.Remove the coupler.
uIt can be removed by pushing the tab.
3.Remove the base gasket.
4.Turn the socket to the left and remove it.
5.Remove the old bulb and insert a new bulb.Back-Up Light: 21 W
Taillight: 3CPCover
Bulb Coupler
TabSocket
Gasket
Page 357 of 433
356
uuReplacing Light BulbsuRear License Plate Light Bulbs
Maintenance
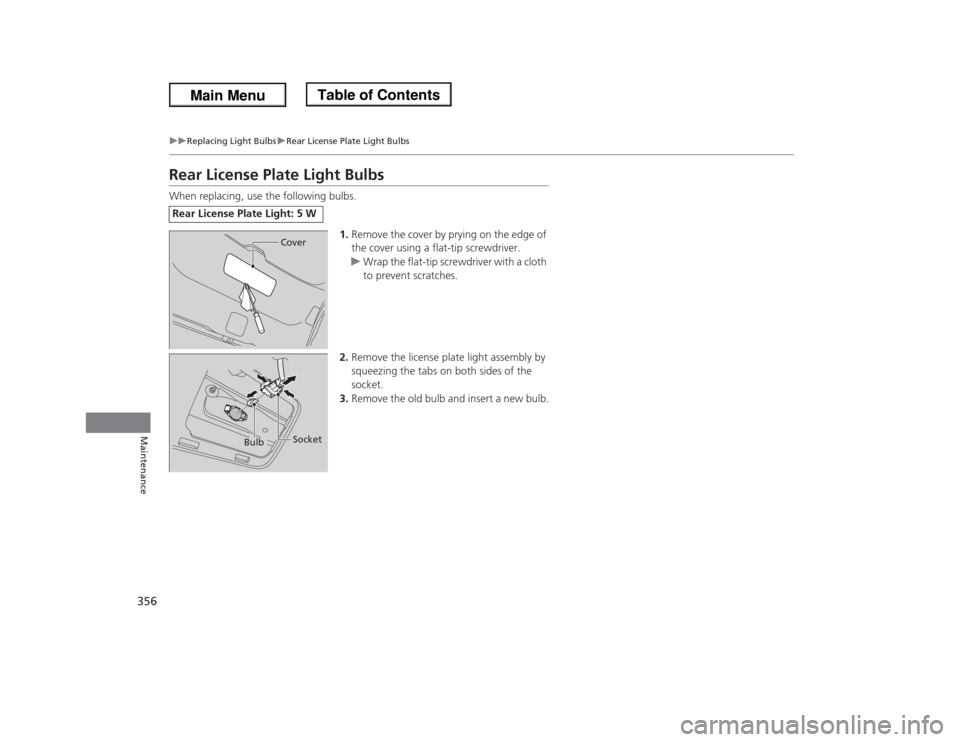
Rear License Plate Light BulbsWhen replacing, use the following bulbs.
1.Remove the cover by prying on the edge of
the cover using a flat-tip screwdriver.
uWrap the flat-tip screwdriver with a cloth
to prevent scratches.
2.Remove the license plate light assembly by
squeezing the tabs on both sides of the
socket.
3.Remove the old bulb and insert a new bulb.Rear License Plate Light: 5 W
Cover
Bulb
Socket
Page 358 of 433
357
uuReplacing Light BulbsuHigh-Mount Brake Light Bulb
Maintenance
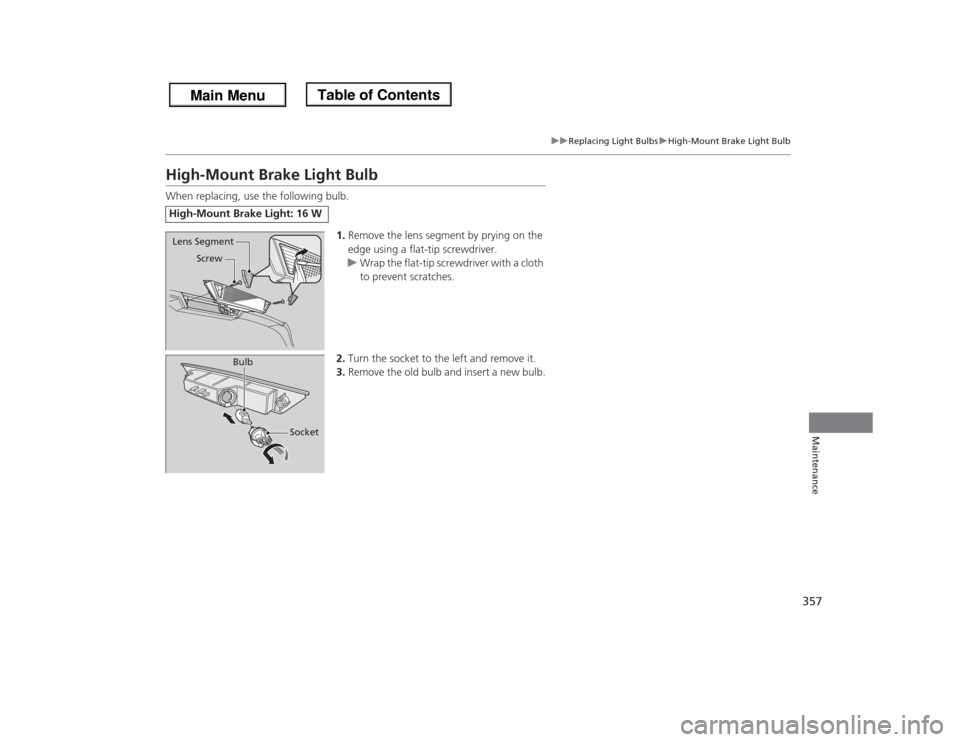
High-Mount Brake Light BulbWhen replacing, use the following bulb.
1.Remove the lens segment by prying on the
edge using a flat-tip screwdriver.
uWrap the flat-tip screwdriver with a cloth
to prevent scratches.
2.Turn the socket to the left and remove it.
3.Remove the old bulb and insert a new bulb.High-Mount Brake Light: 16 W
Screw
Lens Segment
Bulb
Socket
Page 359 of 433
358Maintenance
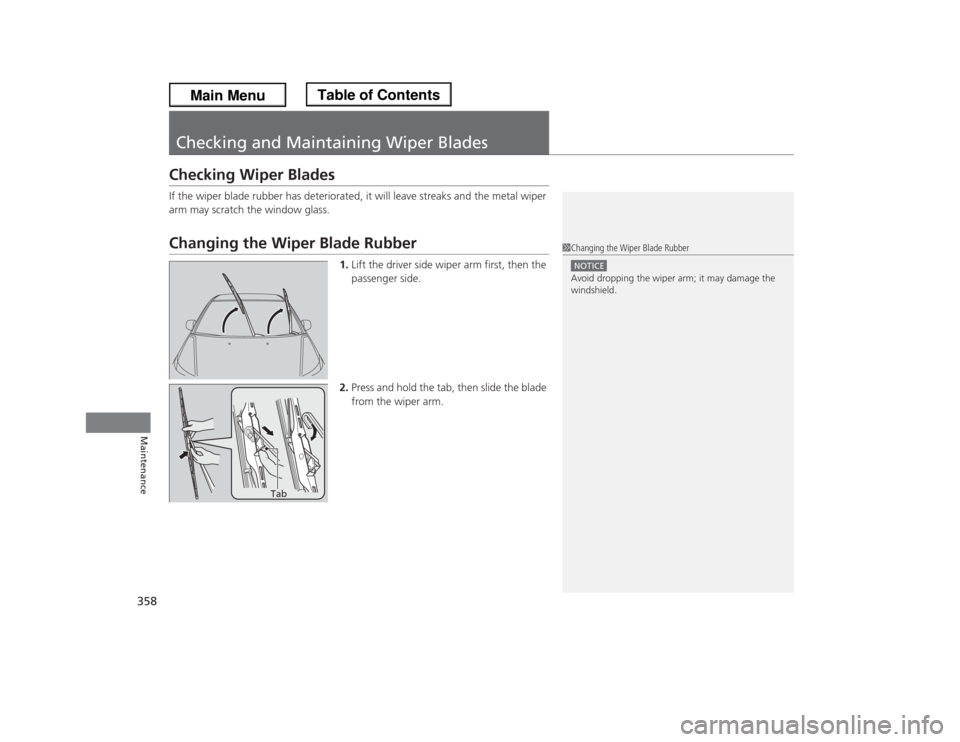
Checking and Maintaining Wiper BladesChecking Wiper BladesIf the wiper blade rubber has deteriorated, it will leave streaks and the metal wiper
arm may scratch the window glass.Changing the Wiper Blade Rubber
1.Lift the driver side wiper arm first, then the
passenger side.
2.Press and hold the tab, then slide the blade
from the wiper arm.
1Changing the Wiper Blade RubberNOTICEAvoid dropping the wiper arm; it may damage the
windshield.
Tab
Page 360 of 433
359
uuChecking and Maintaining Wiper BladesuChanging the Wiper Blade Rubber
Maintenance
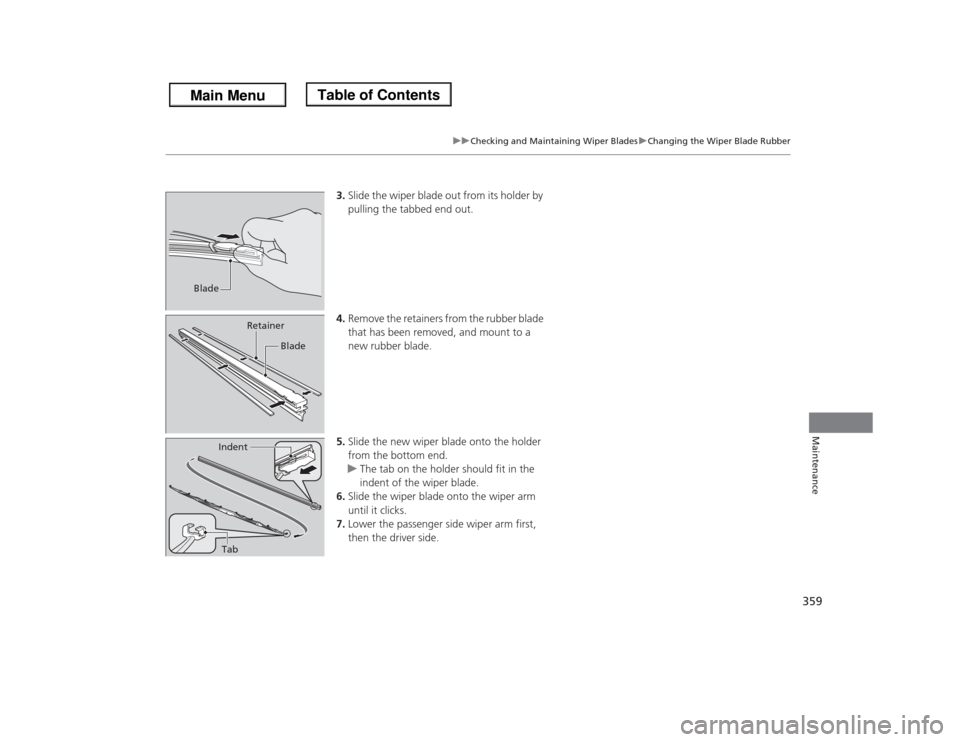
3.Slide the wiper blade out from its holder by
pulling the tabbed end out.
4.Remove the retainers from the rubber blade
that has been removed, and mount to a
new rubber blade.
5.Slide the new wiper blade onto the holder
from the bottom end.
uThe tab on the holder should fit in the
indent of the wiper blade.
6.Slide the wiper blade onto the wiper arm
until it clicks.
7.Lower the passenger side wiper arm first,
then the driver side.
Blade
Retainer
Blade
Indent
Tab
Trending: engine coolant, open hood, wiring, octane, drain bolt, display, driver seat adjustment
