interior lights HONDA ODYSSEY 2013 RC1-RC2 / 5.G Owners Manual
[x] Cancel search | Manufacturer: HONDA, Model Year: 2013, Model line: ODYSSEY, Model: HONDA ODYSSEY 2013 RC1-RC2 / 5.GPages: 433, PDF Size: 12.35 MB
Page 2 of 433
Contents
Child Safety P. 54 Exhaust Gas Hazard P. 68 Safety Labels P. 69Opening and Closing the Tailgate P. 119 Opening and Closing the Sliding Doors P. 125
Opening and Closing the Moonroof
* P. 139 Operating the Switches Around the Steering Wheel P. 140
Adjusting the Seats P. 153 Interior Lights/Interior Convenience Items P. 168
Climate Control System
* P. 186
Audio Error Messages P. 230 General Information on the Audio System P. 232
Bluetooth® HandsFreeLink® P. 254 Compass
* P. 277
When Driving P. 291 Braking P. 308 Parking Your Vehicle P. 312
Fuel Economy P. 321 Accessories and Modifications P. 322Maintenance Under the Hood P. 335 Replacing Light Bulbs P. 347
Checking and Maintaining Tires P. 362 Battery P. 371 Remote Transmitter Care P. 372
Heating and Cooling System
*/Climate Control System
* Maintenance P. 376 Cleaning P. 377
Engine Does Not Start P. 392 Jump Starting P. 393 Shift Lever Does Not Move P. 395
Fuses P. 403 Emergency Towing P. 409Devices that Emit Radio Waves P. 415 Reporting Safety Defects P. 416 Emissions Testing P. 417
Customer Service Information P. 422 Gracenote® End User License Agreement P. 423
Quick Reference Guide
P. 2
Safe Driving
P. 25
Instrument Panel
P. 71
Controls
P. 107
Features
P. 193
Driving
P. 279
Maintenance
P. 323
Handling the Unexpected
P. 381
Information
P. 411
Index
P. 425
Page 104 of 433
103
uuGauges and DisplaysuMulti-Information Display
*
Continued
Instrument Panel
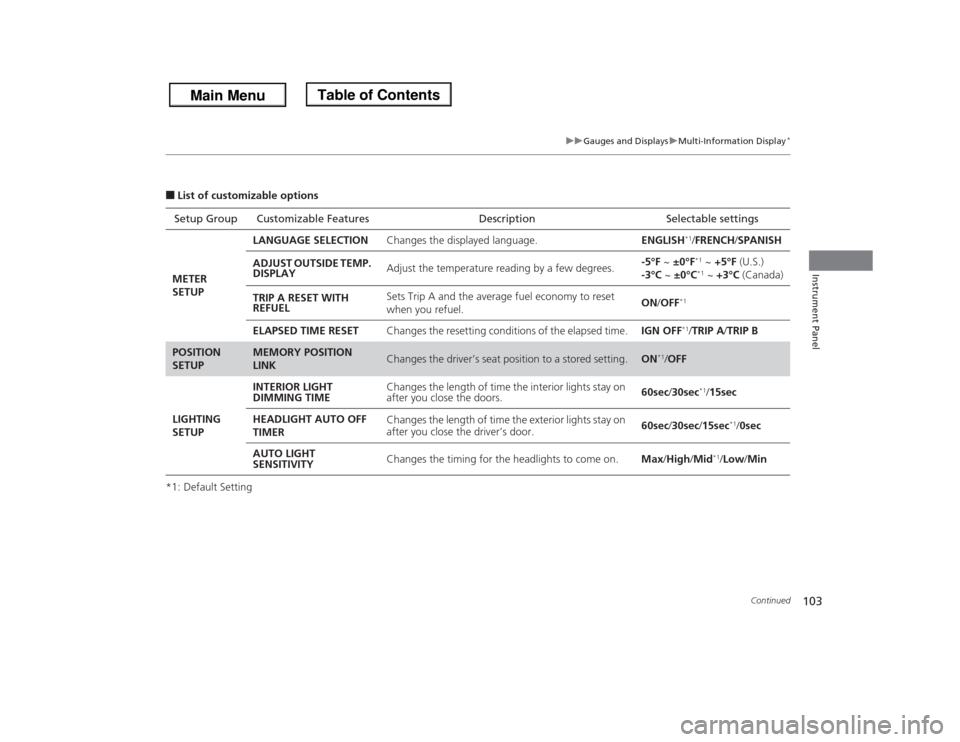
■List of customizable options
*1: Default SettingSetup Group Customizable Features Description Selectable settings
METER
SETUPLANGUAGE SELECTIONChanges the displayed language.ENGLISH
*1/FRENCH/SPANISH
ADJUST OUTSIDE TEMP.
DISPLAYAdjust the temperature reading by a few degrees.-5°F ~ ±0°F*1 ~ +5°F (U.S.)
-3°C ~ ±0°C*1 ~ +3°C (Canada)
TRIP A RESET WITH
REFUELSets Trip A and the average fuel economy to reset
when you refuel.ON/OFF
*1
ELAPSED TIME RESETChanges the resetting conditions of the elapsed time.IGN OFF
*1/TRIP A/TRIP B
POSITION
SETUP
MEMORY POSITION
LINK
Changes the driver’s seat position to a stored setting.
ON
*1/OFF
LIGHTING
SETUPINTERIOR LIGHT
DIMMING TIMEChanges the length of time the interior lights stay on
after you close the doors.60sec/30sec
*1/15sec
HEADLIGHT AUTO OFF
TIMERChanges the length of time the exterior lights stay on
after you close the driver’s door.60sec/30sec/15sec
*1/0sec
AUTO LIGHT
SENSITIVITYChanges the timing for the headlights to come on.Max/High/Mid
*1/Low/Min
Page 108 of 433
107
Controls
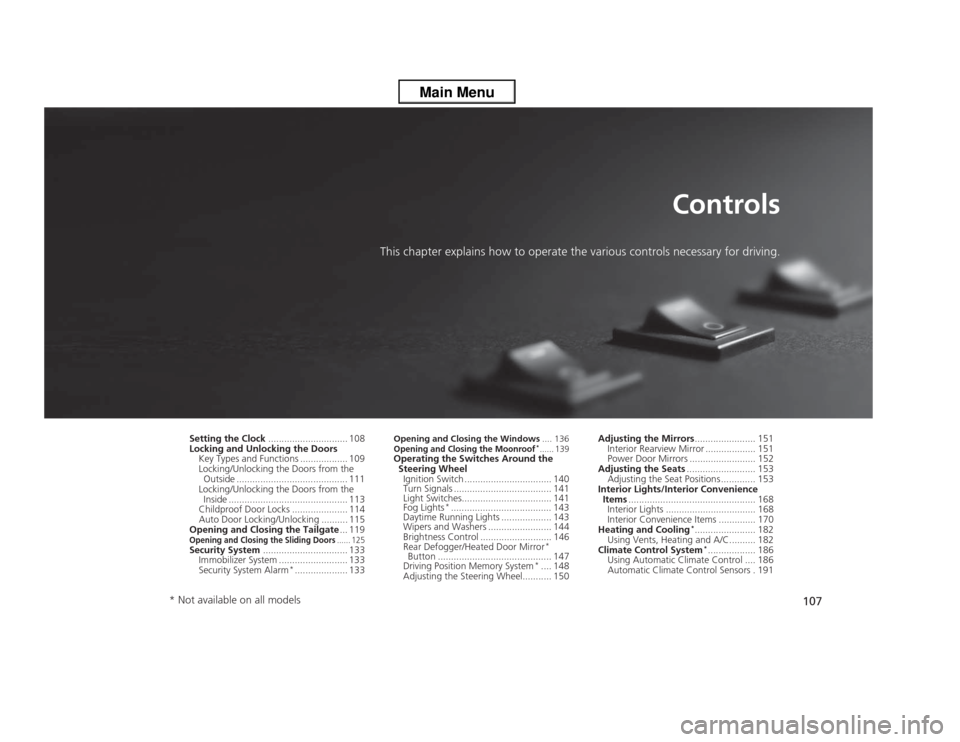
This chapter explains how to operate the various controls necessary for driving.
Setting the Clock.............................. 108
Locking and Unlocking the Doors
Key Types and Functions .................. 109
Locking/Unlocking the Doors from the
Outside .......................................... 111
Locking/Unlocking the Doors from the
Inside ............................................. 113
Childproof Door Locks ..................... 114
Auto Door Locking/Unlocking .......... 115
Opening and Closing the Tailgate... 119Opening and Closing the Sliding Doors
...... 125
Security System................................ 133
Immobilizer System .......................... 133
Security System Alarm
*.................... 133
Opening and Closing the Windows.... 136Opening and Closing the Moonroof
*...... 139
Operating the Switches Around the
Steering Wheel
Ignition Switch ................................. 140
Turn Signals ..................................... 141
Light Switches.................................. 141
Fog Lights
*...................................... 143
Daytime Running Lights ................... 143
Wipers and Washers ........................ 144
Brightness Control ........................... 146
Rear Defogger/Heated Door Mirror
*
Button ........................................... 147
Driving Position Memory System
*.... 148
Adjusting the Steering Wheel........... 150Adjusting the Mirrors....................... 151
Interior Rearview Mirror ................... 151
Power Door Mirrors ......................... 152
Adjusting the Seats.......................... 153
Adjusting the Seat Positions ............. 153
Interior Lights/Interior Convenience
Items................................................ 168
Interior Lights .................................. 168
Interior Convenience Items .............. 170
Heating and Cooling
*....................... 182
Using Vents, Heating and A/C.......... 182
Climate Control System*.................. 186
Using Automatic Climate Control .... 186
Automatic Climate Control Sensors . 191
* Not available on all models
Page 112 of 433
111
uuLocking and Unlocking the DoorsuLocking/Unlocking the Doors from the Outside
Continued
Controls
Locking/Unlocking the Doors from the Outside
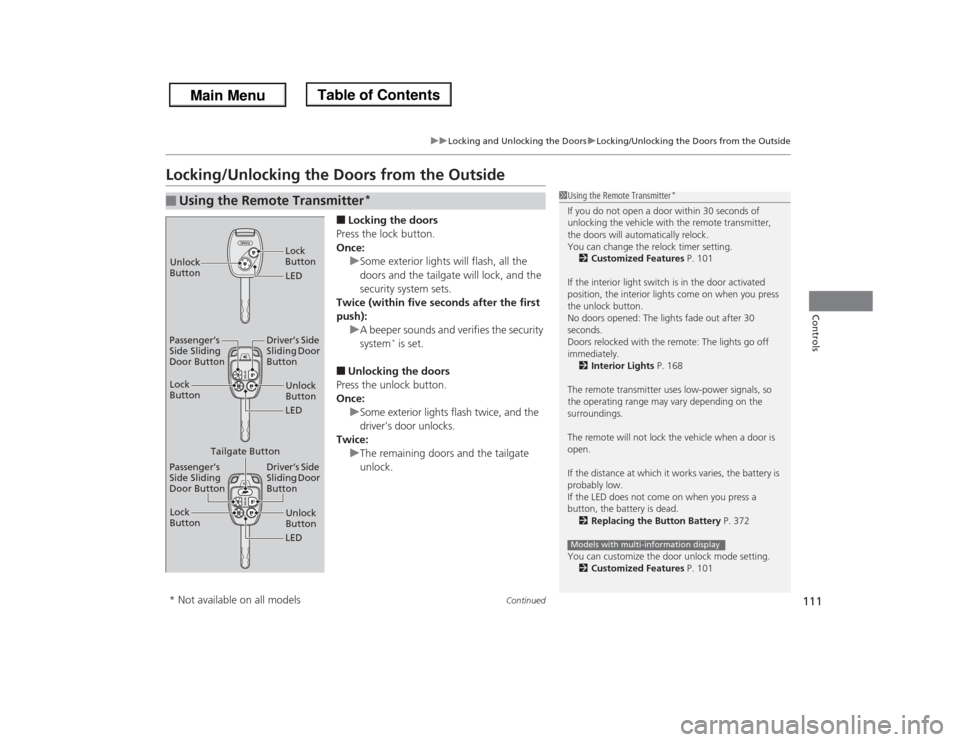
■Locking the doors
Press the lock button.
Once:
uSome exterior lights will flash, all the
doors and the tailgate will lock, and the
security system sets.
Twice (within five seconds after the first
push):
uA beeper sounds and verifies the security
system
* is set.
■Unlocking the doors
Press the unlock button.
Once:
uSome exterior lights flash twice, and the
driver's door unlocks.
Twice:
uThe remaining doors and the tailgate
unlock.
■
Using the Remote Transmitter
*
1Using the Remote Transmitter
*
If you do not open a door within 30 seconds of
unlocking the vehicle with the remote transmitter,
the doors will automatically relock.
You can change the relock timer setting.
2Customized Features P. 101
If the interior light switch is in the door activated
position, the interior lights come on when you press
the unlock button.
No doors opened: The lights fade out after 30
seconds.
Doors relocked with the remote: The lights go off
immediately.
2Interior Lights P. 168
The remote transmitter uses low-power signals, so
the operating range may vary depending on the
surroundings.
The remote will not lock the vehicle when a door is
open.
If the distance at which it works varies, the battery is
probably low.
If the LED does not come on when you press a
button, the battery is dead.
2Replacing the Button Battery P. 372
You can customize the door unlock mode setting.
2Customized Features P. 101Models with multi-information display
LED Unlock
ButtonLock
ButtonUnlock
Button
LED Lock
Button
Passenger’s
Side Sliding
Door ButtonDriver’s Side
Sliding Door
Button
Unlock
Button
LED Lock
Button
Passenger’s
Side Sliding
Door ButtonDriver’s Side
Sliding Door
Button
Tailgate Button
* Not available on all models
Page 152 of 433
151Controls
Adjusting the MirrorsInterior Rearview MirrorAdjust the angle of the rearview mirror when you are sitting in the correct driving
position.
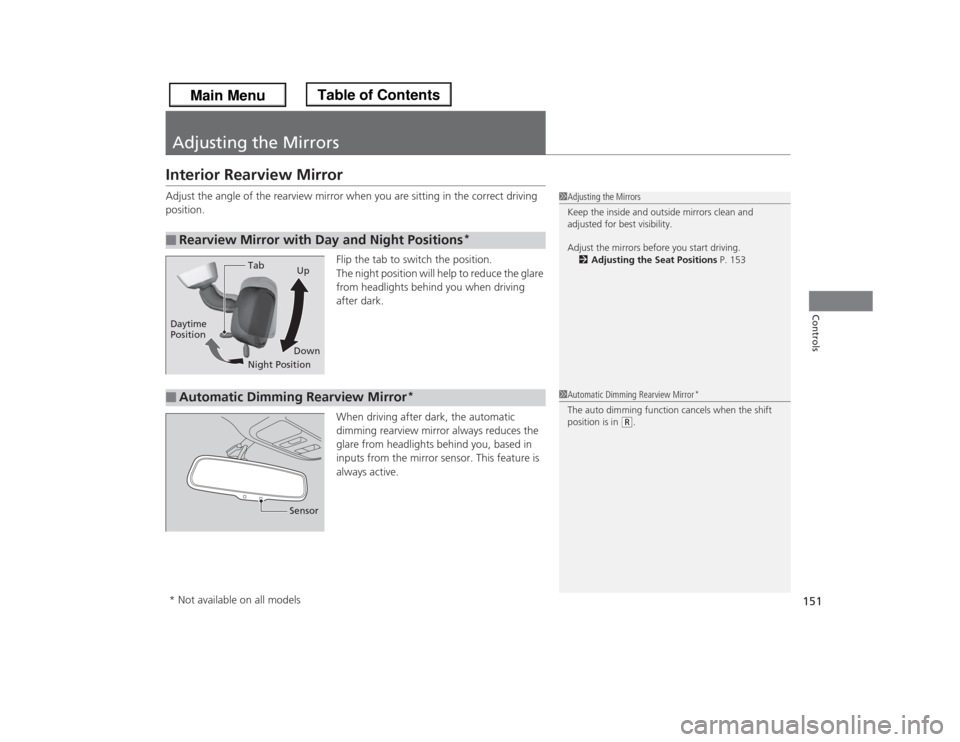
Flip the tab to switch the position.
The night position will help to reduce the glare
from headlights behind you when driving
after dark.
When driving after dark, the automatic
dimming rearview mirror always reduces the
glare from headlights behind you, based in
inputs from the mirror sensor. This feature is
always active.■
Rearview Mirror with Day and Night Positions
*
1Adjusting the Mirrors
Keep the inside and outside mirrors clean and
adjusted for best visibility.
Adjust the mirrors before you start driving.
2Adjusting the Seat Positions P. 153
Tab
Daytime
Position
Night PositionUp
Down■
Automatic Dimming Rearview Mirror
*
1Automatic Dimming Rearview Mirror
*
The auto dimming function cancels when the shift
position is in
(R.
Sensor
* Not available on all models
Page 169 of 433
168Controls
Interior Lights/Interior Convenience ItemsInterior Lights
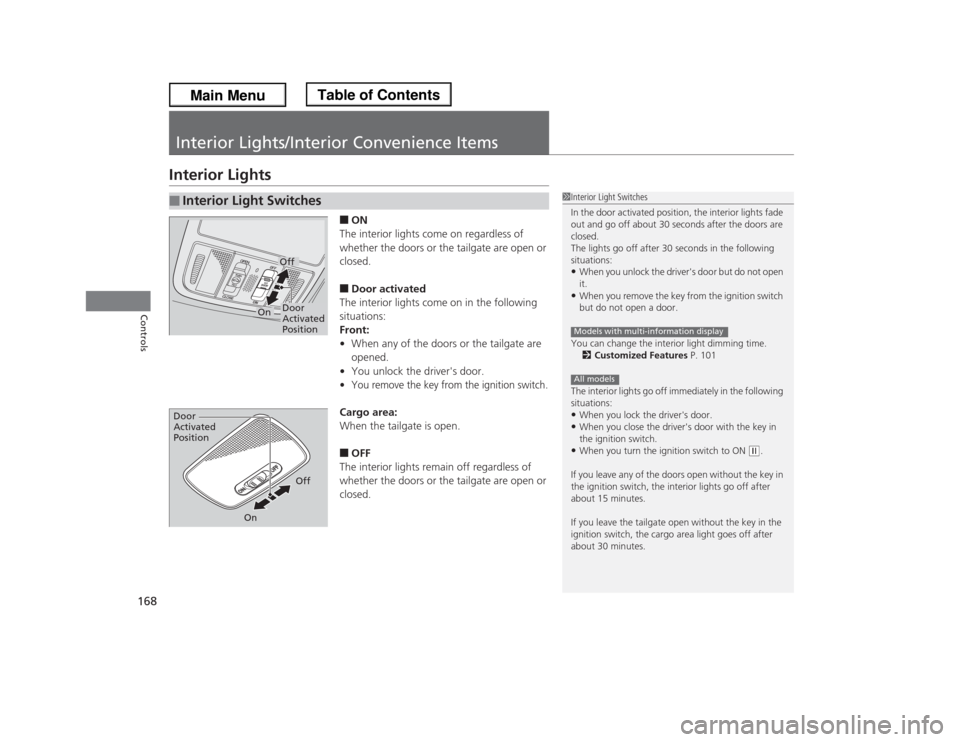
■ON
The interior lights come on regardless of
whether the doors or the tailgate are open or
closed.■Door activated
The interior lights come on in the following
situations:
Front:
•When any of the doors or the tailgate are
opened.
•You unlock the driver's door.•You remove the key from the ignition switch.Cargo area:
When the tailgate is open.■OFF
The interior lights remain off regardless of
whether the doors or the tailgate are open or
closed.
■
Interior Light Switches
1Interior Light Switches
In the door activated position, the interior lights fade
out and go off about 30 seconds after the doors are
closed.
The lights go off after 30 seconds in the following
situations:•When you unlock the driver's door but do not open
it.•When you remove the key from the ignition switch
but do not open a door.
You can change the interior light dimming time.
2Customized Features P. 101
The interior lights go off immediately in the following
situations:•When you lock the driver's door.•When you close the driver's door with the key in
the ignition switch.•When you turn the ignition switch to ON
(w.
If you leave any of the doors open without the key in
the ignition switch, the interior lights go off after
about 15 minutes.
If you leave the tailgate open without the key in the
ignition switch, the cargo area light goes off after
about 30 minutes.
Models with multi-information displayAll models
Door
Activated
PositionOff
On
Door
Activated
Position
Off
On
Page 170 of 433
169
uuInterior Lights/Interior Convenience ItemsuInterior Lights
Controls
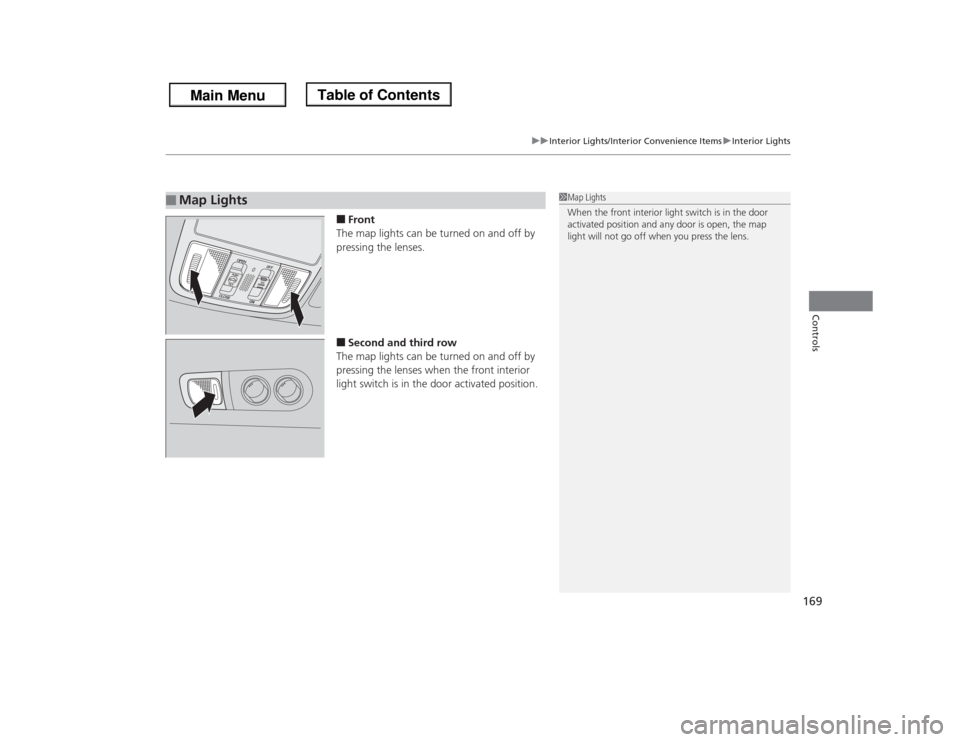
■Front
The map lights can be turned on and off by
pressing the lenses.■Second and third row
The map lights can be turned on and off by
pressing the lenses when the front interior
light switch is in the door activated position.
■
Map Lights
1Map Lights
When the front interior light switch is in the door
activated position and any door is open, the map
light will not go off when you press the lens.
Page 171 of 433
170
uuInterior Lights/Interior Convenience ItemsuInterior Convenience Items
Controls
Interior Convenience Items
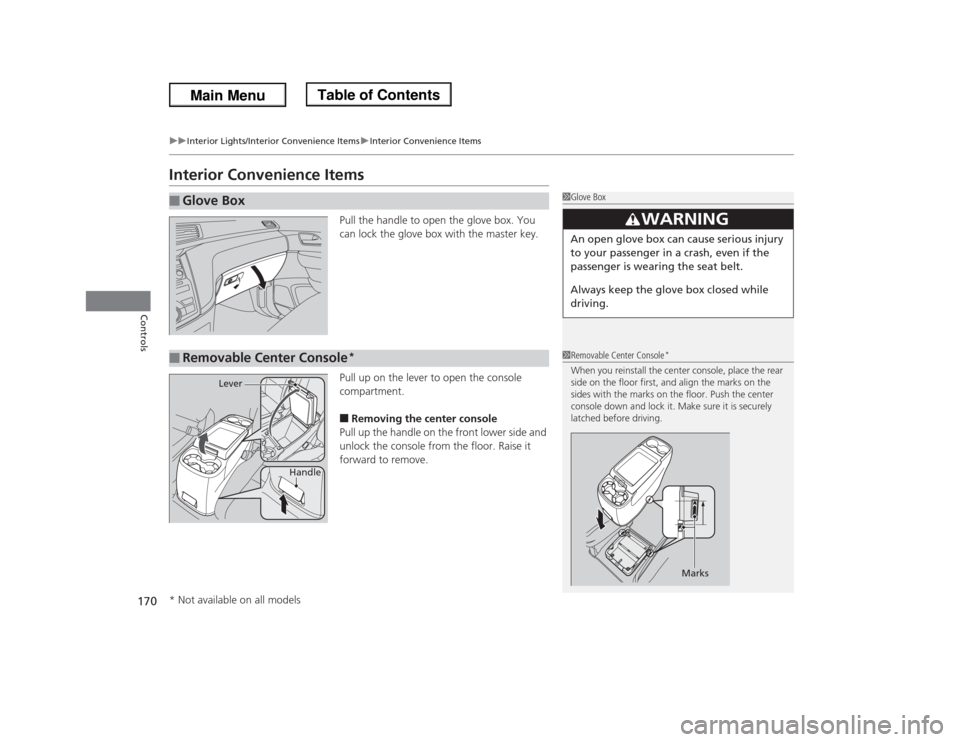
Pull the handle to open the glove box. You
can lock the glove box with the master key.
Pull up on the lever to open the console
compartment.■Removing the center console
Pull up the handle on the front lower side and
unlock the console from the floor. Raise it
forward to remove.
■
Glove Box
1Glove Box
3
WARNING
An open glove box can cause serious injury
to your passenger in a crash, even if the
passenger is wearing the seat belt.
Always keep the glove box closed while
driving.
■
Removable Center Console
*
1Removable Center Console
*
When you reinstall the center console, place the rear
side on the floor first, and align the marks on the
sides with the marks on the floor. Push the center
console down and lock it. Make sure it is securely
latched before driving.
Marks
Handle
Lever
* Not available on all models
Page 172 of 433
Continued
171
uuInterior Lights/Interior Convenience ItemsuInterior Convenience Items
Controls
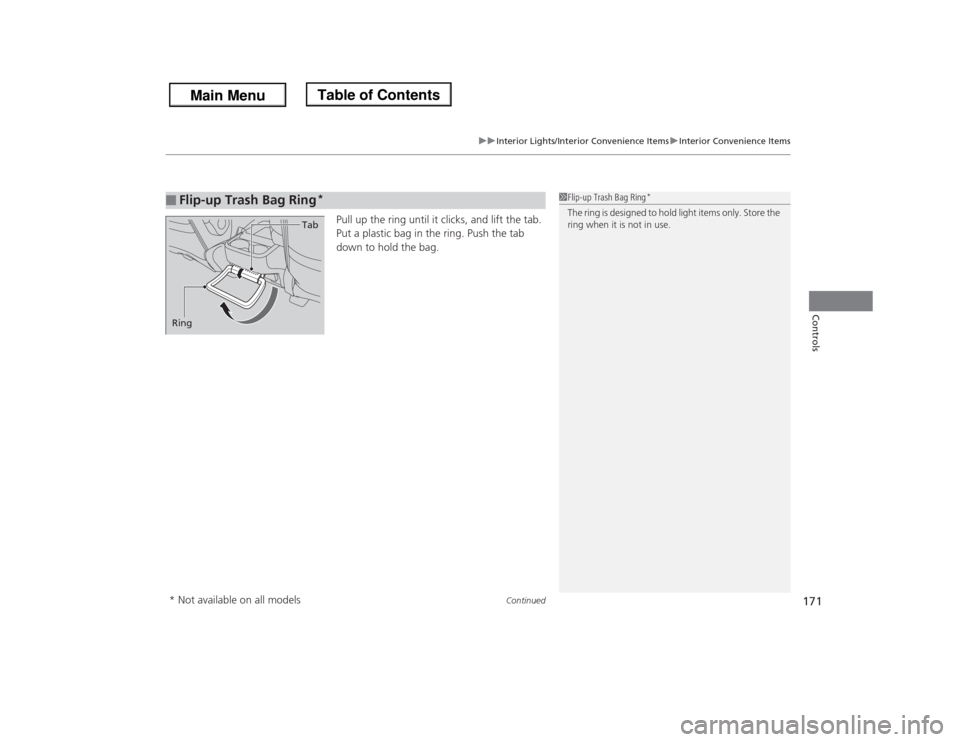
Pull up the ring until it clicks, and lift the tab.
Put a plastic bag in the ring. Push the tab
down to hold the bag.
■
Flip-up Trash Bag Ring
*
1Flip-up Trash Bag Ring
*
The ring is designed to hold light items only. Store the
ring when it is not in use.
RingTab* Not available on all models
Page 173 of 433
uuInterior Lights/Interior Convenience ItemsuInterior Convenience Items
172Controls
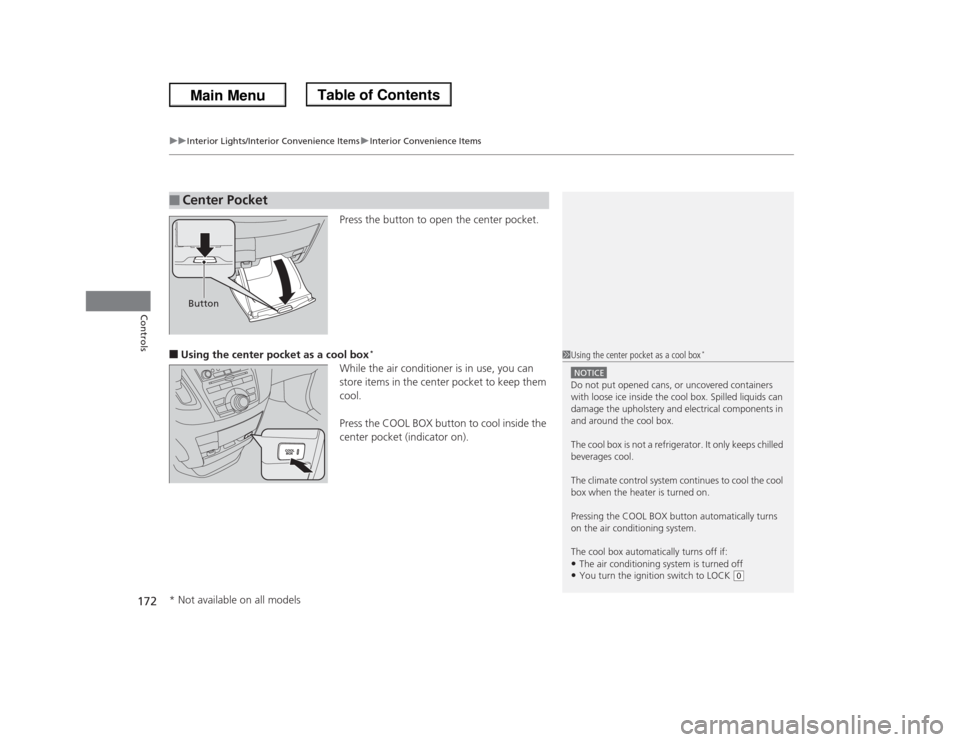
Press the button to open the center pocket.
■Using the center pocket as a cool box
*
While the air conditioner is in use, you can
store items in the center pocket to keep them
cool.
Press the COOL BOX button to cool inside the
center pocket (indicator on).
■
Center PocketButton
1Using the center pocket as a cool box
*
NOTICEDo not put opened cans, or uncovered containers
with loose ice inside the cool box. Spilled liquids can
damage the upholstery and electrical components in
and around the cool box.
The cool box is not a refrigerator. It only keeps chilled
beverages cool.
The climate control system continues to cool the cool
box when the heater is turned on.
Pressing the COOL BOX button automatically turns
on the air conditioning system.
The cool box automatically turns off if:•The air conditioning system is turned off•You turn the ignition switch to LOCK
(0
* Not available on all models