ECO mode HONDA ODYSSEY 2014 RC1-RC2 / 5.G Navigation Manual
[x] Cancel search | Manufacturer: HONDA, Model Year: 2014, Model line: ODYSSEY, Model: HONDA ODYSSEY 2014 RC1-RC2 / 5.GPages: 327, PDF Size: 19.96 MB
Page 6 of 327
5Quick Reference Guide
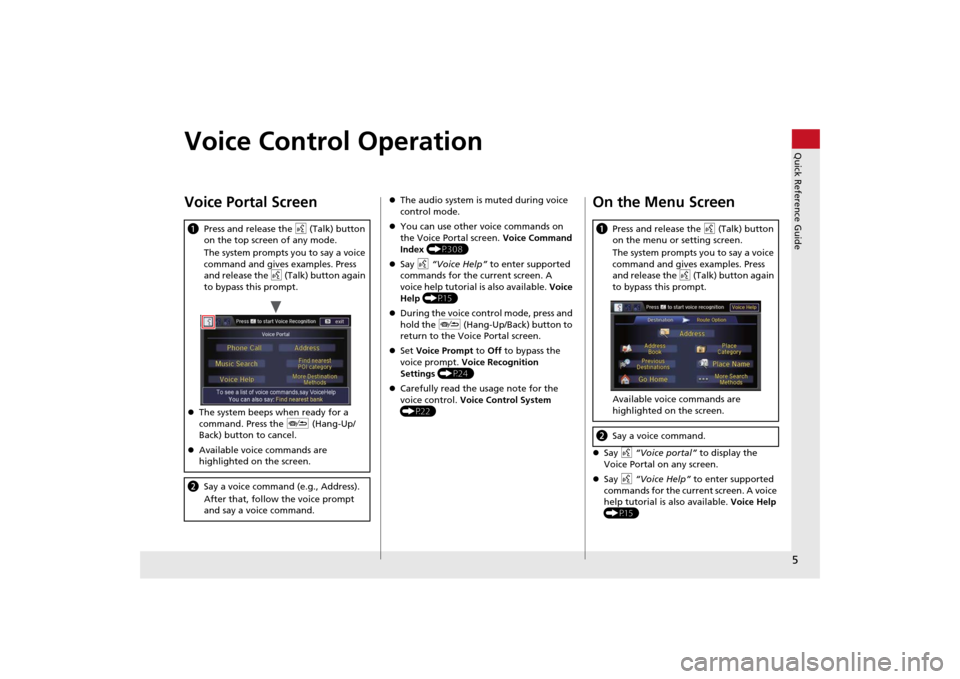
Voice Control OperationVoice Portal ScreenaPress and release the d (Talk) button
on the top screen of any mode.
The system prompts you to say a voice
command and gives examples. Press
and release the d (Talk) button again
to bypass this prompt.
The system beeps when ready for a
command. Press the J (Hang-Up/
Back) button to cancel.
Available voice commands are
highlighted on the screen.bSay a voice command (e.g., Address).
After that, follow the voice prompt
and say a voice command.
The audio system is muted during voice
control mode.
You can use other voice commands on
the Voice Portal screen. Voice Command
Index (P308)
Say d “Voice Help” to enter supported
commands for the current screen. A
voice help tutorial is also available. Voice
Help (P15)
During the voice control mode, press and
hold the J (Hang-Up/Back) button to
return to the Voice Portal screen.
Set Voice Prompt to Off to bypass the
voice prompt. Voice Recognition
Settings (P24)
Carefully read the usage note for the
voice control. Voice Control System
(P22)
On the Menu ScreenSay d “Voice portal” to display the
Voice Portal on any screen.
Say d “Voice Help” to enter supported
commands for the current screen. A voice
help tutorial is also available. Voice Help
(P15)aPress and release the d (Talk) button
on the menu or setting screen.
The system prompts you to say a voice
command and gives examples. Press
and release the d (Talk) button again
to bypass this prompt.
Available voice commands are
highlighted on the screen.bSay a voice command.
Page 20 of 327
19
System Setup
This section describes the start-up procedure and the navigation and
setup functions.
Start-up.............................................................. 20
Voice Control System........................................ 22
Command Input .............................................. 22
Voice Recognition ............................................ 23
Interface Settings.............................................. 25
Personal Information........................................ 36
Address Book ................................................... 37
Home Address ................................................. 42
PIN Numbers .................................................... 43
Previous Destination ......................................... 44
Category History .............................................. 45
Download POI .................................................. 46
Routing.............................................................. 49
Route Preference.............................................. 50
Unverified Routing ........................................... 51
Traffic Rerouting .............................................. 53
Edit POI Search Radius Along Route ................. 54
Avoided Area ................................................... 55Guidance............................................................ 57
Guidance Mode ............................................... 58
Street Name Guidance ..................................... 60
Non-map screens ............................................. 61
Guidance Point................................................. 63
Estimated Time................................................. 64
Map..................................................................... 65
Showing Icons on Map ..................................... 67
Color................................................................ 69
View (Map Orientation) .................................... 72
3D Angle Adjustment ....................................... 73
Straight Line Guide........................................... 73
Current Location .............................................. 74
Map Legend ..................................................... 75
Display Tracking ............................................... 79
Correct Vehicle Position.................................... 80
Data Reset.......................................................... 81
Defaulting All the Settings ................................ 81Touchscreen....................................................... 82
Changing the Screen Settings .......................... 82
Page 21 of 327
20System Setup
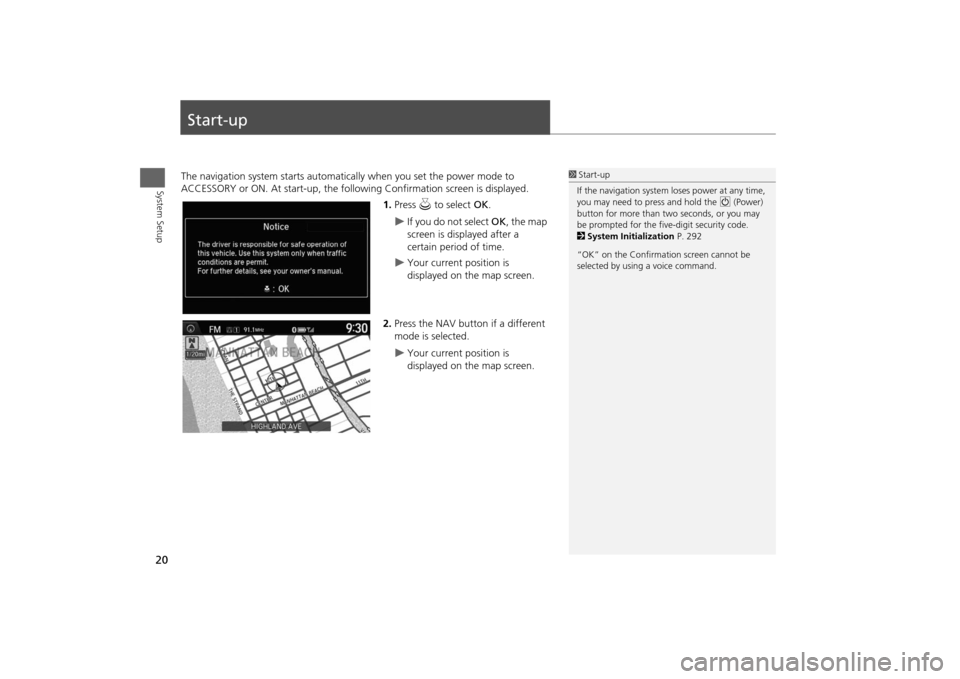
Start-upThe navigation system starts automatically when you set the power mode to
ACCESSORY or ON. At start-up, the following Confirmation screen is displayed.
1.Press u to select OK.
If you do not select OK, the map
screen is displayed after a
certain period of time.
Your current position is
displayed on the map screen.
2.Press the NAV button if a different
mode is selected.
Your current position is
displayed on the map screen.
1Start-up
If the navigation system loses power at any time,
you may need to press and hold the 9 (Power)
button for more than two seconds, or you may
be prompted for the five-digit security code.
2System Initialization P. 292
“OK” on the Confirmation screen cannot be
selected by using a voice command.
Page 71 of 327
70
Map
Color
System Setup
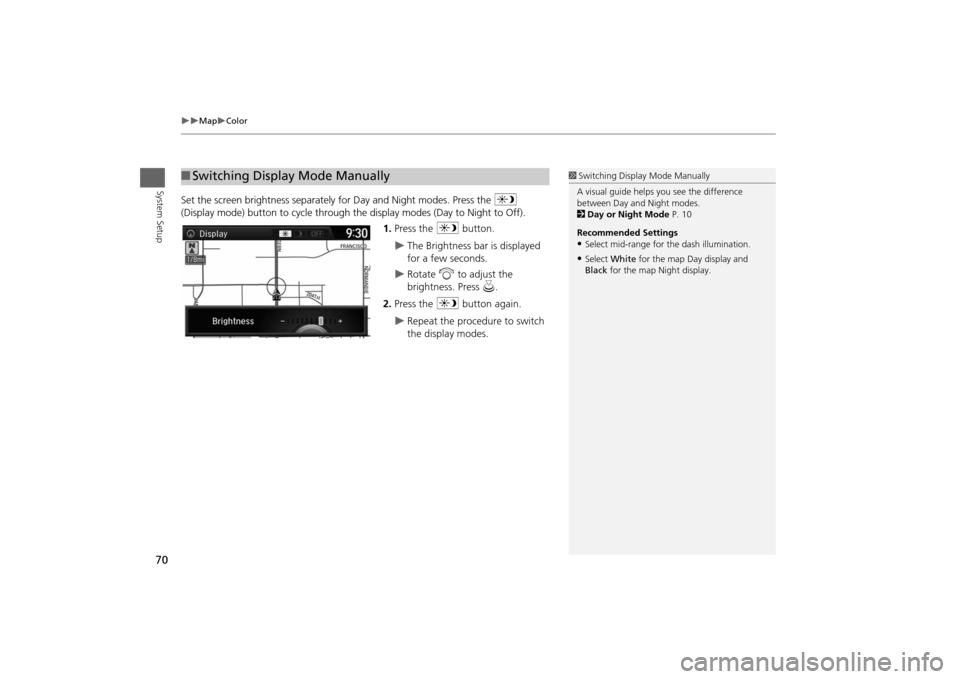
Set the screen brightness separately for Day and Night modes. Press the
a
(Display mode) button to cycle through the display modes (Day to Night to Off).
1.Press the a button.
The Brightness bar is displayed
for a few seconds.
Rotate i to adjust the
brightness. Press u.
2.Press the a button again.
Repeat the procedure to switch
the display modes.
■Switching Display Mode Manually
1Switching Display Mode Manually
A visual guide helps you see the difference
between Day and Night modes.
2Day or Night Mode P. 10
Recommended Settings•Select mid-range for the dash illumination.•Select White for the map Day display and
Black for the map Night display.
Page 136 of 327
135
Audio
This section describes how to operate the audio system. You can play
music from a wide array of media sources, and control the audio system
using the audio buttons, the Interface Dial, or voice control.
Audio System.................................................. 136
About Your Audio System .............................. 136
USB Port ........................................................ 137
Auxiliary Input Jack ........................................ 138
Audio System Theft Protection ....................... 139
Setting Audio Shortcuts ................................. 140
Audio Remote Controls.................................. 142
Steering Wheel Controls ................................ 142
Audio Settings................................................. 143
Adjusting the Sound ...................................... 145
Playing FM/AM Radio..................................... 147
Selecting FM/AM Mode.................................. 147
Audio Screen Control ..................................... 147
Audio Menu .................................................. 149
Playing XM® Radio......................................... 153
Selecting XM® Mode..................................... 153
Audio Screen Control ..................................... 153
Audio Menu .................................................. 155XM® Radio Service......................................... 157
Playing a Disc................................................... 158
Selecting Disc Mode ....................................... 158
Audio Screen Control ..................................... 159
Audio Menu ................................................... 160
Recommended CDs ........................................ 163
Playing Hard Disc Drive (HDD) Audio............ 165
Selecting HDD Mode ...................................... 165
Recording a Music CD to HDD........................ 166
Audio Screen Control ..................................... 167
Audio Menu ................................................... 168
Playing an iPod®............................................. 177
Selecting iPod® Mode .................................... 178
Audio Screen Control ..................................... 179
Audio Menu ................................................... 181
Song By Voice
TM (SBV) .................................... 184
Playing Internet Radio..................................... 189
Selecting Internet Radio Mode........................ 189Pandora® Menu ............................................ 190
Aha
TM Radio Menu ......................................... 191
Playing a USB Flash Drive............................... 193
Selecting USB Mode....................................... 194
Audio Screen Control..................................... 195
Audio Menu .................................................. 196
Playing Bluetooth® Audio............................. 199
Selecting Bluetooth® Audio Mode ................ 199
Audio Screen Control..................................... 200
Page 138 of 327
137
Audio System
USB Port
Audio
USB Port
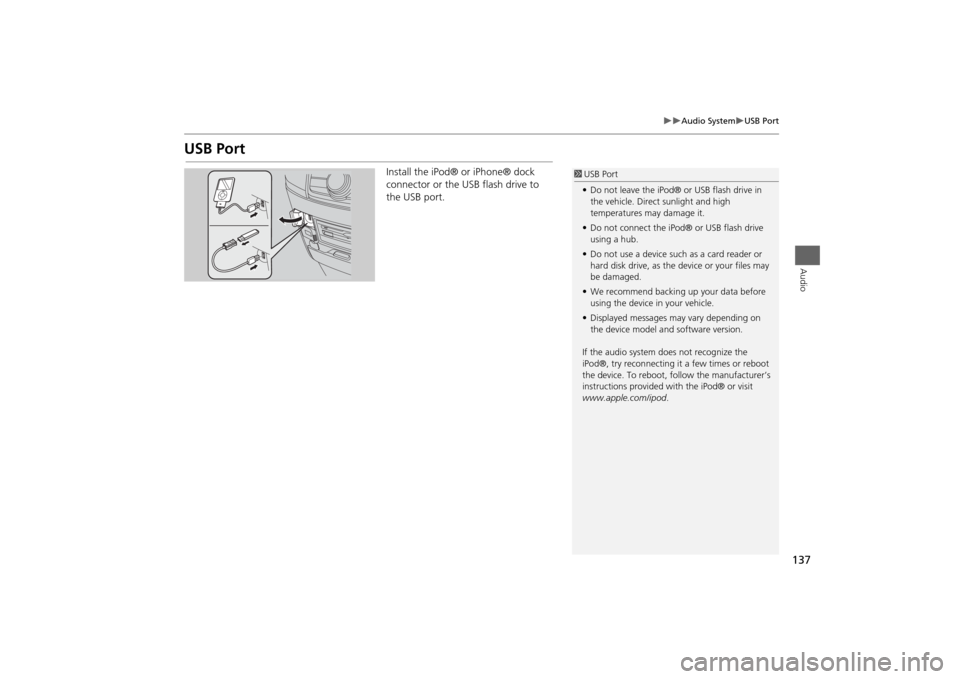
Install the iPod® or iPhone® dock
connector or the USB flash drive to
the USB port.
1USB Port
•Do not leave the iPod® or USB flash drive in
the vehicle. Direct sunlight and high
temperatures may damage it.
•Do not connect the iPod® or USB flash drive
using a hub.
•Do not use a device such as a card reader or
hard disk drive, as the device or your files may
be damaged.
•We recommend backing up your data before
using the device in your vehicle.
•Displayed messages may vary depending on
the device model and software version.
If the audio system does not recognize the
iPod®, try reconnecting it a few times or reboot
the device. To reboot, follow the manufacturer’s
instructions provided with the iPod® or visit
www.apple.com/ipod.
Page 140 of 327
139
Audio System
Audio System Theft Protection
Audio
Audio System Theft ProtectionThe audio system is disabled when it is disconnected from the power source, such as
when the battery is disconnected or goes dead. In certain conditions, the system may
display Enter code . If this occurs, reactivate the audio system.
1. Set the power mode to ON.
2. Turn on the audio system.
3. Press and hold the audio system power button for more than two seconds.
The audio system is reac tivated when the audio c ontrol unit establishes a
connection with the vehicle control unit. If the control unit fails to recognize
the audio unit, you must go to a deal er and have the audio unit checked.
■Reactivate the audio system
Page 144 of 327
143Audio
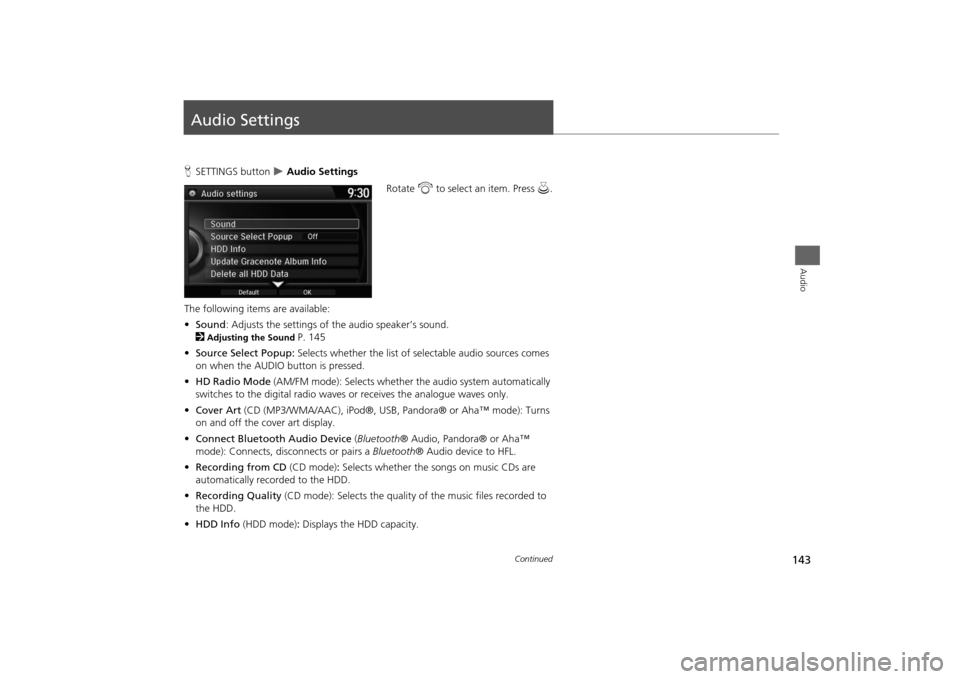
Audio SettingsHSETTINGS button
Audio Settings
Rotate i to select an item. Press u.
The following items are available:
•Sound: Adjusts the settings of the audio speaker’s sound.
2
Adjusting the Sound
P. 145
•Source Select Popup: Selects whether the list of selectable audio sources comes
on when the AUDIO button is pressed.
•HD Radio Mode (AM/FM mode): Selects whether the audio system automatically
switches to the digital radio waves or receives the analogue waves only.
•Cover Art (CD (MP3/WMA/AAC), iPod®, USB, Pandora® or Aha™ mode): Turns
on and off the cover art display.
•Connect Bluetooth Audio Device (Bluetooth® Audio, Pandora® or Aha™
mode): Connects, disconnects or pairs a Bluetooth® Audio device to HFL.
•Recording from CD (CD mode): Selects whether the songs on music CDs are
automatically recorded to the HDD.
•Recording Quality (CD mode): Selects the quality of the music files recorded to
the HDD.
•HDD Info (HDD mode): Displays the HDD capacity.
Continued
Page 148 of 327
147Audio
Playing FM/AM RadioSelecting FM/AM Mode1.Press the MENU button.(in AUDIO mode)
2.Rotate i to select Change Source. Press u.
3.Rotate i to select the frequency band (FM, AM). Press u.
The band and frequency are displayed on the navigation screen.
1.Select Audio Source.
2.Select the frequency band (AM, FM) icon.
The band and frequency are displayed on the touchscreen.
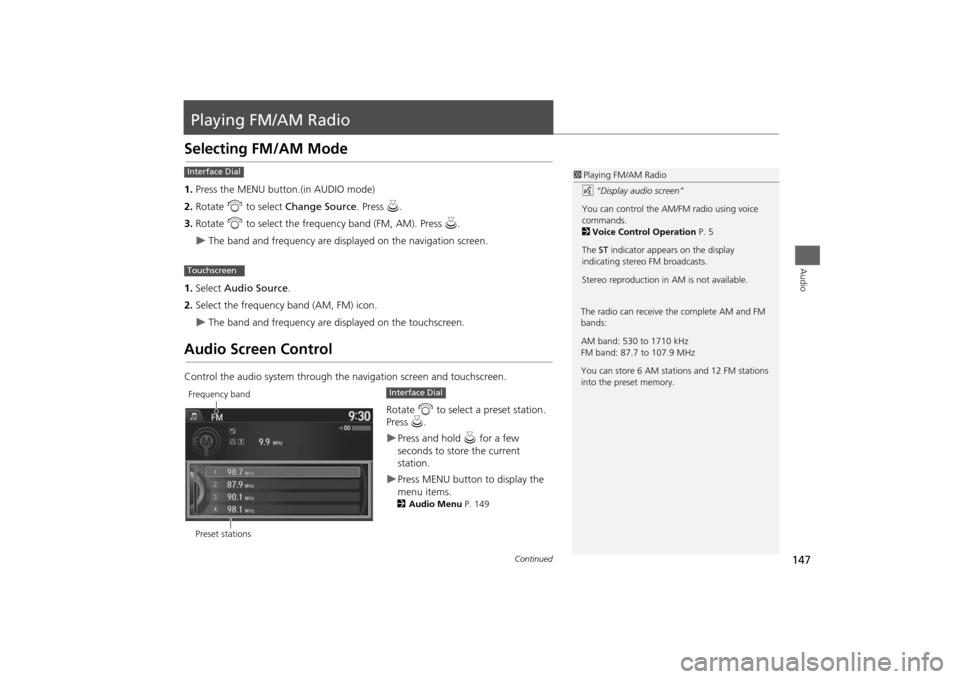
Audio Screen ControlControl the audio system through the navigation screen and touchscreen.
Rotate i to select a preset station.
Press u.
Press and hold u for a few
seconds to store the current
station.Press MENU button to display the
menu items.2Audio Menu P. 149
1Playing FM/AM Radio
d “Display audio screen”
You can control the AM/FM radio using voice
commands.
2Voice Control Operation P. 5
The ST indicator appears on the display
indicating stereo FM broadcasts.
Stereo reproduction in AM is not available.
Interface DialTouchscreen
The radio can receive the complete AM and FM
bands:
AM band: 530 to 1710 kHz
FM band: 87.7 to 107.9 MHz
You can store 6 AM stations and 12 FM stations
into the preset memory.
Preset stationsFrequency band
Interface Dial
Continued
Page 150 of 327
149
Playing FM/AM Radio
Audio Menu
Audio
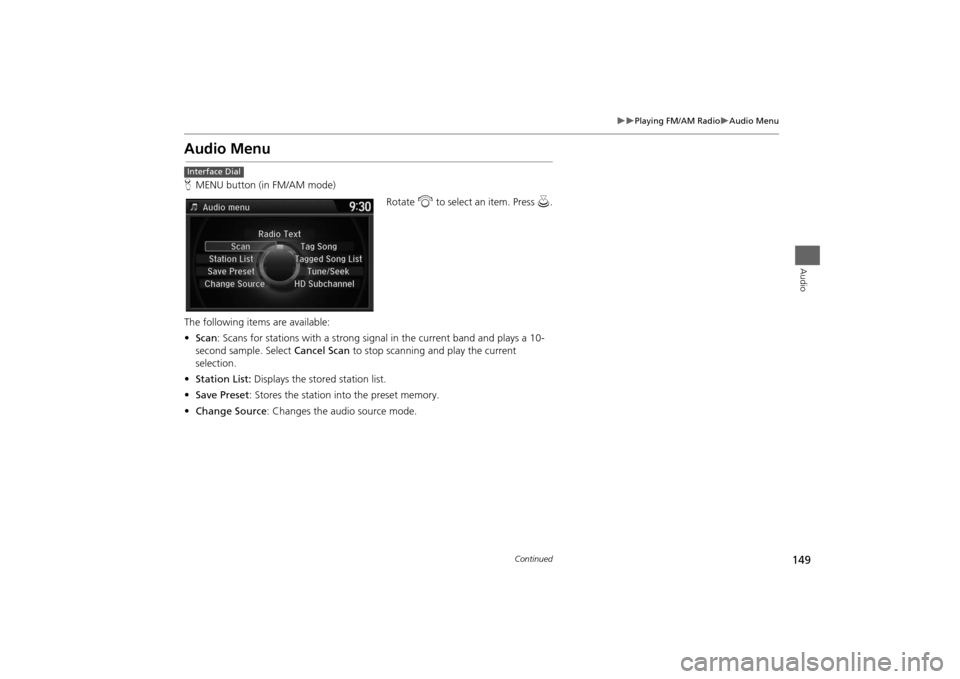
Audio MenuHMENU button (in FM/AM mode)
Rotate i to select an item. Press u.
The following items are available:
•Scan: Scans for stations with a strong signal in the current band and plays a 10-
second sample. Select Cancel Scan to stop scanning and play the current
selection.
•Station List: Displays the stored station list.
•Save Preset: Stores the station into the preset memory.
•Change Source: Changes the audio source mode.Interface Dial
Continued