lights HONDA ODYSSEY 2014 RC1-RC2 / 5.G Navigation Manual
[x] Cancel search | Manufacturer: HONDA, Model Year: 2014, Model line: ODYSSEY, Model: HONDA ODYSSEY 2014 RC1-RC2 / 5.GPages: 327, PDF Size: 19.96 MB
Page 8 of 327

7Quick Reference Guide
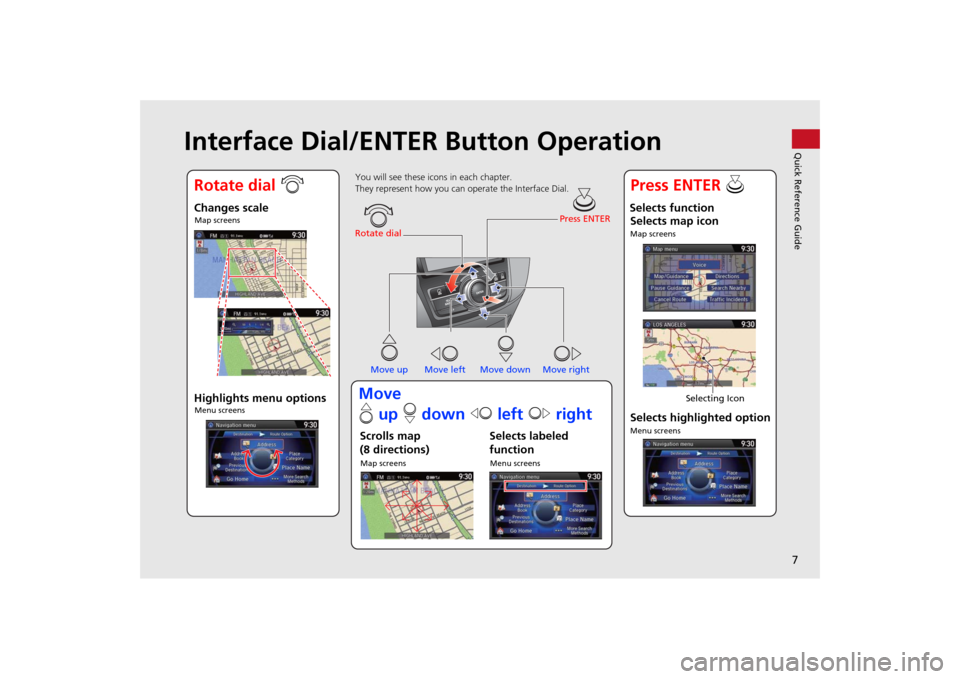
Interface Dial/ENTER Button Operation
You will see these icons in each chapter.
They represent how you can operate the Interface Dial.
Changes scaleMap screensHighlights menu optionsMenu screens
Rotate dialPress ENTER
Move up Move left Move down Move rightScrolls map
(8 directions)Map screens
Selects labeled
functionMenu screens
Selects function
Selects map iconMap screens
Selecting Icon
Selects highlighted optionMenu screens
Rotate dial iPress ENTER u
Move
e up r down w left y right
Page 23 of 327

22System Setup
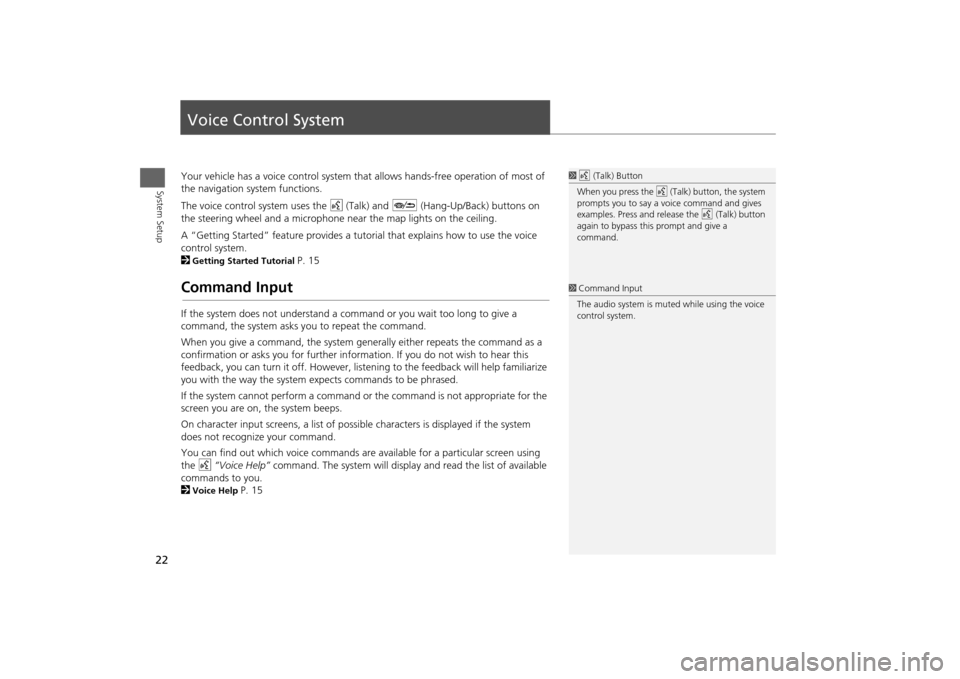
Voice Control SystemYour vehicle has a voice control system that allows hands-free operation of most of
the navigation system functions.
The voice control system uses the d (Talk) and J (Hang-Up/Back) buttons on
the steering wheel and a microphone near the map lights on the ceiling.
A “Getting Started” feature provides a tutorial that explains how to use the voice
control system.
2Getting Started Tutorial
P. 15
Command InputIf the system does not understand a command or you wait too long to give a
command, the system asks you to repeat the command.
When you give a command, the system generally either repeats the command as a
confirmation or asks you for further information. If you do not wish to hear this
feedback, you can turn it off. However, listening to the feedback will help familiarize
you with the way the system expects commands to be phrased.
If the system cannot perform a command or the command is not appropriate for the
screen you are on, the system beeps.
On character input screens, a list of possible characters is displayed if the system
does not recognize your command.
You can find out which voice commands are available for a particular screen using
the d “Voice Help” command. The system will display and read the list of available
commands to you.
2Voice Help
P. 15
1d (Talk) Button
When you press the d (Talk) button, the system
prompts you to say a voice command and gives
examples. Press and release the d (Talk) button
again to bypass this prompt and give a
command.1Command Input
The audio system is muted while using the voice
control system.
Page 52 of 327

51
Routing
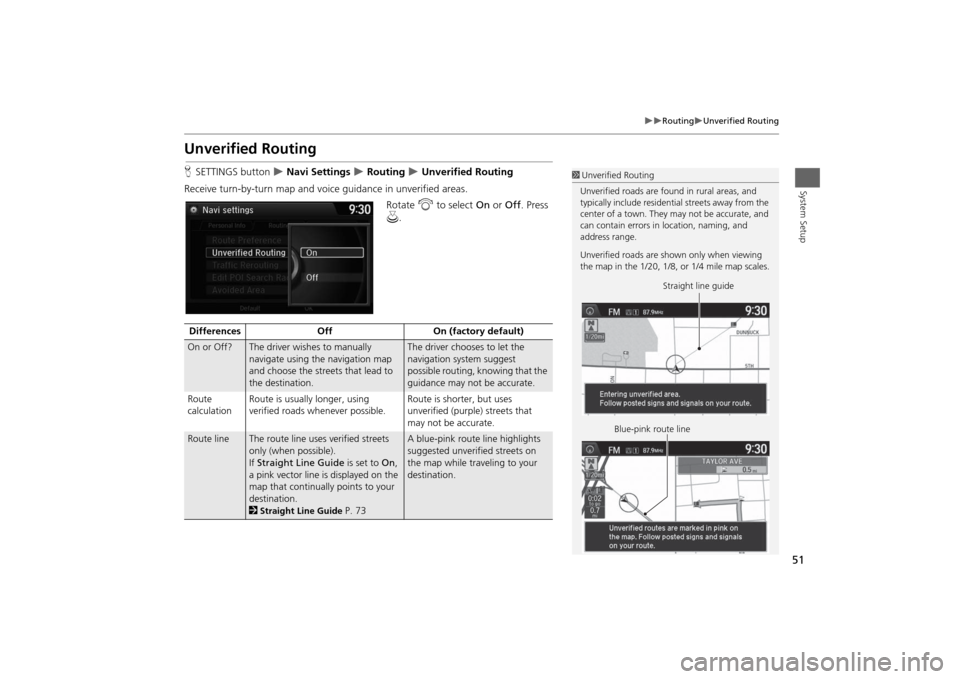
Unverified Routing
System Setup
Unverified RoutingHSETTINGS button
Navi Settings
Routing
Unverified Routing
Receive turn-by-turn map and voice guidance in unverified areas.
Rotate i to select On or Off. Press
u.
1Unverified Routing
Unverified roads are found in rural areas, and
typically include residential streets away from the
center of a town. They may not be accurate, and
can contain errors in location, naming, and
address range.
Unverified roads are shown only when viewing
the map in the 1/20, 1/8, or 1/4 mile map scales.
Straight line guide
Blue-pink route line
Differences Off On (factory default)On or Off?
The driver wishes to manually
navigate using the navigation map
and choose the streets that lead to
the destination.
The driver chooses to let the
navigation system suggest
possible routing, knowing that the
guidance may not be accurate.
Route
calculationRoute is usually longer, using
verified roads whenever possible.Route is shorter, but uses
unverified (purple) streets that
may not be accurate.
Route line
The route line uses verified streets
only (when possible).
If Straight Line Guide is set to On,
a pink vector line is displayed on the
map that continually points to your
destination.
2Straight Line Guide
P. 73
A blue-pink route line highlights
suggested unverified streets on
the map while traveling to your
destination.
Page 72 of 327

71
Map
Color
System Setup
Illumination
controlPriority Operationa button
1
Selects Day, Night, or Off display mode. This button has
the highest priority and overrides all other display control
adjustments listed below.
Remember: Once you press this button, you assume full
manual control of the display mode until the power mode
is set to VEHICLE OFF (LOCK).
Sunlight sensor
(see your
Owner’s Manual
for location)2 If the sunlight sensor detects daylight and the headlights
are turned on, the system automatically overrides the
Night display and displays the Day display mode.
Remember: If desired, use the a button to override
this automatic choice.
Dash illumination
adjustment
buttons (see your
Owner’s Manual
for location)
3
When headlights are turned on, and you wish to have the
Day display mode, adjust the illumination to the full
brightness setting (beeps).
Remember: Adjust the dash brightness back to mid-range
to allow auto switching by sensing the headlights are on or
off.
Headlights
(Auto/On/Off)4 When turned on, the display changes to Night display
mode. The previous three controls listed above can
“cancel” this function.
Remember: Use the a button, or adjust the dash
illumination to full brightness, to set the display to your
desired choice.
Screen color
choice
N/A
The user can select the color of the screen that will be
displayed for the Day and Night display modes described
above.
Remember: For best contrast, ensure that the map color is
white for Day and black for Night.