AUX HONDA ODYSSEY 2016 RC1-RC2 / 5.G Navigation Manual
[x] Cancel search | Manufacturer: HONDA, Model Year: 2016, Model line: ODYSSEY, Model: HONDA ODYSSEY 2016 RC1-RC2 / 5.GPages: 325, PDF Size: 8.63 MB
Page 134 of 325
133
Audio
This section describes how to operate the audio system. You can play
music from a wide array of media s ources, and control the audio system
using the audio buttons, the Interface Dial, or voice control.
Audio System .................................................. 134
About Your Audio System .............................. 134
USB Port ........................................................ 135
Auxiliary Input Jack ......... .......................... ..... 136
Audio System Theft Protection ....................... 137
Setting Audio Shortcuts ................................. 138
Audio Remote Controls .................................. 140
Steering Wheel Controls ................................ 140
Audio Settings ................................................. 141
Adjusting the Sound ...................................... 143
Playing FM/AM Radio ..................................... 145
Selecting FM/AM Mode.................................. 145
Audio Screen Control ..................................... 145
Audio Menu .................................................. 147
Playing SiriusXM® Radio ................................ 151
Selecting SiriusXM® Mode............................. 151
Audio Screen Control ..................................... 151
Audio Menu .................................................. 153 SiriusXM® Radio Service................................. 155
Playing a Disc ................................................... 156
Selecting Disc Mode ....................................... 156
Audio Screen Control ..................................... 157
Audio Menu ................................................... 158
Recommended CDs ........................................ 161
Playing Hard Disc Drive (HDD) Audio ............ 163
Selecting HDD Mode ...................................... 163
Recording a Music CD to HDD........................ 164
Audio Screen Control ..................................... 165
Audio Menu ................................................... 166
Playing an iPod® ............................................. 175
Selecting iPod® Mode .................................... 176
Audio Screen Control ..................................... 177
Audio Menu ................................................... 179
Song By Voice
TM (SBV) .................................... 182
Playing Internet Radio ..................................... 187
Selecting Internet Radio Mode........................ 187 Pandora® Menu ............................................ 188
Aha
TM Radio Menu ......................................... 189
Playing a USB Flash Drive ............................... 191
Selecting USB Mode....................................... 192
Audio Screen Control..................................... 193
Audio Menu .................................................. 194
Playing Bluetooth ® Audio............................. 197
Selecting Bluetooth ® Audio Mode ................ 197
Audio Screen Control..................................... 198
Page 137 of 325
136
Audio SystemAuxiliary Input Jack
Audio
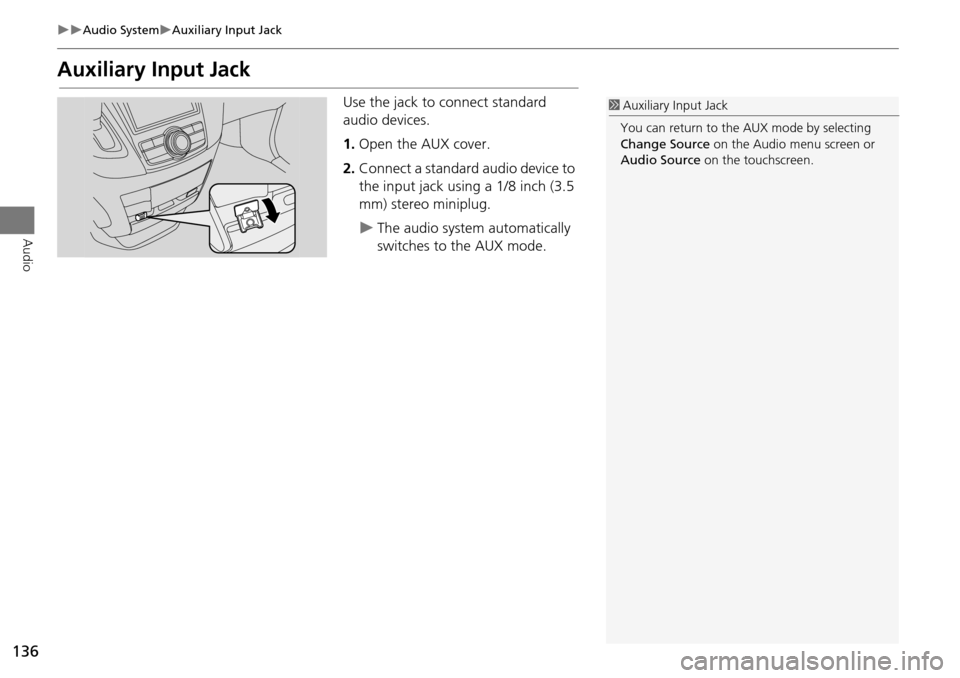
Auxiliary Input Jack
Use the jack to connect standard
audio devices.
1.Open the AUX cover.
2. Connect a standard audio device to
the input jack using a 1/8 inch (3.5
mm) stereo miniplug.
The audio system automatically
switches to the AUX mode.
1Auxiliary Input Jack
You can return to the AUX mode by selecting
Change Source on the Audio menu screen or
Audio Source on the touchscreen.
Page 141 of 325
140
Audio
Audio Remote Controls
Steering Wheel Controls
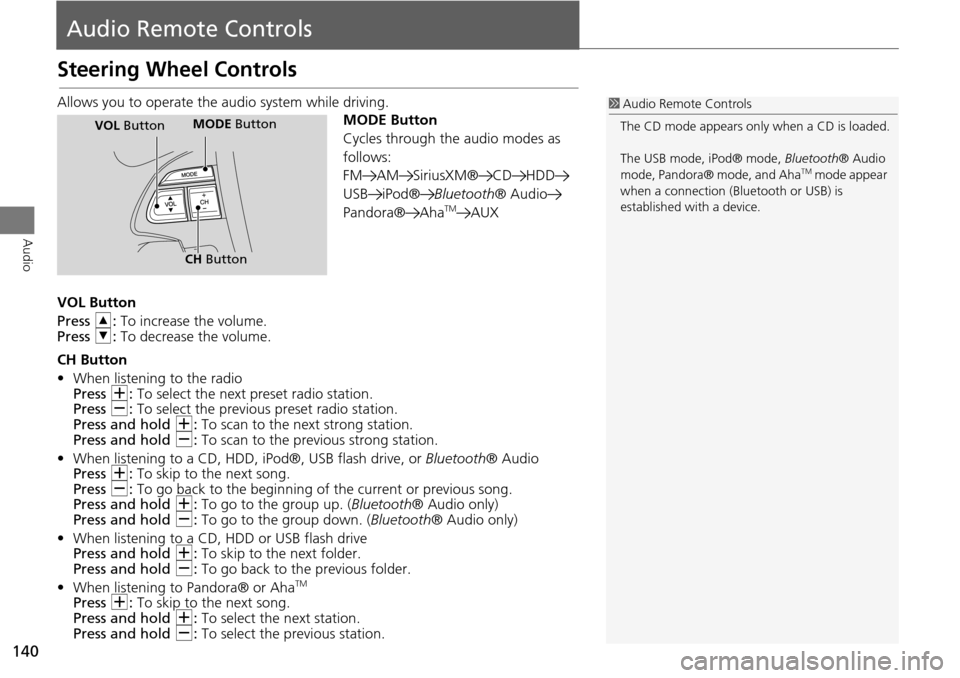
Allows you to operate the audio system while driving.
MODE Button
Cycles through the audio modes as
follows:
FM AM SiriusXM® CD HDD
USB iPod®Bluetooth® Audio
Pandora® Aha
TMAUX
VOL Button
Press R: To increase the volume.
Press U: To decrease the volume.
CH Button
• When listening to the radio
Press N: To select the next preset radio station.
Press B: To select the previous preset radio station.
Press and hold N: To scan to the next strong station.
Press and hold B: To scan to the previous strong station.
• When listening to a CD, HDD, iPod®, USB flash drive, or Bluetooth® Audio
Press N: To skip to the next song.
Press B: To go back to the beginning of the current or previous song.
Press and hold N: To go to the group up. ( Bluetooth® Audio only)
Press and hold B: To go to the group down. ( Bluetooth® Audio only)
• When listening to a CD, HDD or USB flash drive
Press and hold N: To skip to the next folder.
Press and hold B: To go back to the previous folder.
• When listening to Pandora® or Aha
TM
Press N: To skip to the next song.
Press and hold N: To select the next station.
Press and hold B: To select the pr evious station.
1Audio Remote Controls
The CD mode appears only when a CD is loaded.
The USB mode, iPod® mode, Bluetooth® Audio
mode, Pandora® mode, and Aha
TM mode appear
when a connection (Bluetooth or USB) is
established with a device.
MODE Button
CH Button
MODE ButtonVOL Button
Page 244 of 325
243
Rear Entertainment System
Rear seat passengers can enjoy a completely separate entertainment
source than front passengers, including movies, games, and other audio choices.
Rear Entertainment System..................244
Auxiliary Console Panel .........................244
HDMI Input Jack (Ultrawide RES only) ....245
Rear Control Panel Operation ...............248
Selecting the Audio Source ...................248
Rear DVD Menu ....................................249
Screen and Surround Settings ...............252
DVD Initial Settings (RES only) ...............255
Dual Screen Mode (U ltrawide RES only) .256
Replacing the Batteries ..........................258
Front Control Panel Operation .............259
Selecting the Audio Source using front control panel .......................................259
Rear System Setup ................................260 Setting the DVD Menu ......................... 261
Wireless Headphones ........................... 263
Using the Wireless Headphones ........... 263
Changing the Sound Sour ce (Ultrawide RES
only)................................................... 264
Replacing the Batteries ......................... 265
Page 245 of 325
244
Rear Entertainment System
Rear Entertainment System
The Rear Entertainment System (RES) is operable from both the front control panel
and the rear control panel.
2Front Control Panel Operation P. 259
2Rear Control Panel Operation P. 248
Auxiliary Console Panel
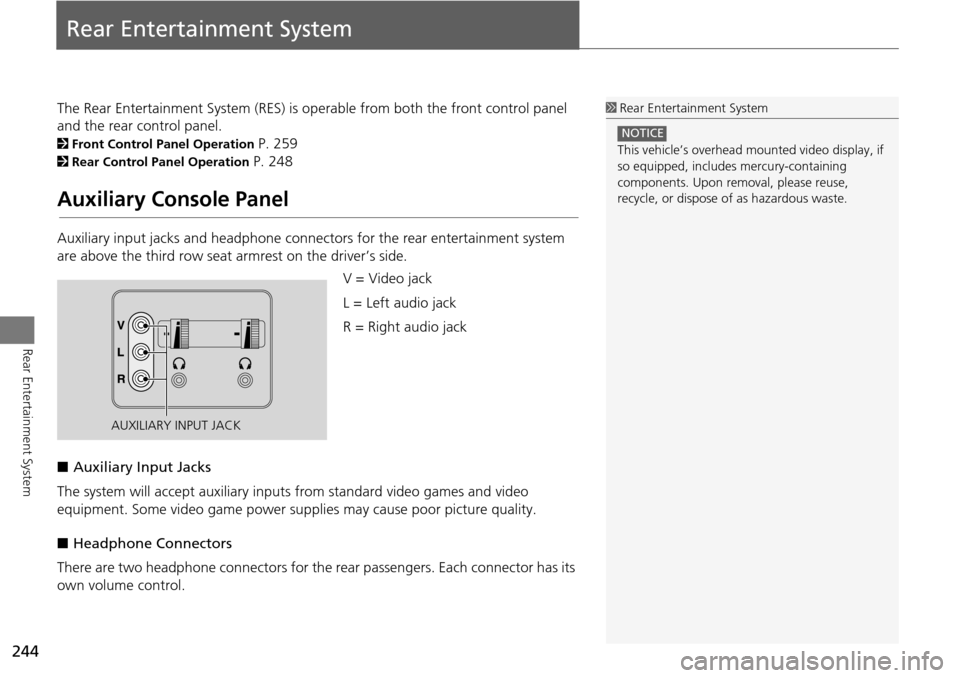
Auxiliary input jacks and headphone connectors for the rear entertainment system
are above the third row seat a rmrest on the driver’s side.
V = Video jack
L = Left audio jack
R = Right audio jack
■ Auxiliary Input Jacks
The system will accept auxiliary input s from standard video games and video
equipment. Some video game power su pplies may cause poor picture quality.
■ Headphone Connectors
There are two headphone connectors for th e rear passengers. Each connector has its
own volume control.
1 Rear Entertainment System
This vehicle’s overhead m ounted video display, if
so equipped, include s mercury-containing
components. Upon removal, please reuse,
recycle, or dispose of as hazardous waste.
NOTICE
AUXILIARY INPUT JACK
Page 257 of 325
256
Rear Control Panel OperationDual Screen Mode (Ultrawide RES only)
Rear Entertainment System
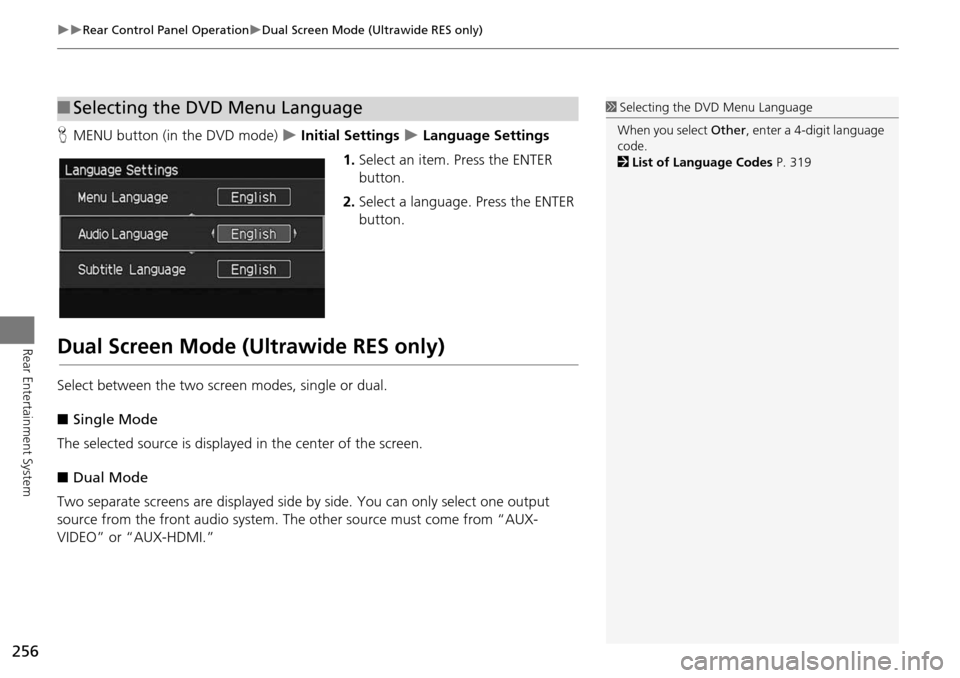
HMENU button (in the DVD mode) Initial Settings Language Settings
1. Select an item. Press the ENTER
button.
2. Select a language. Press the ENTER
button.
Dual Screen Mode (Ultrawide RES only)
Select between the two screen modes, single or dual.
■ Single Mode
The selected source is displayed in the center of the screen.
■ Dual Mode
Two separate screens are displayed side by side. You can only select one output
source from the front audio system. The other source must come from “AUX-
VIDEO” or “AUX-HDMI.”
■ Selecting the DVD Menu Language1 Selecting the DVD Menu Language
When you select Other, enter a 4-digit language
code.
2 List of Language Codes P. 319
Page 258 of 325
257
Rear Control Panel OperationDual Screen Mode (Ultrawide RES only)
Rear Entertainment System
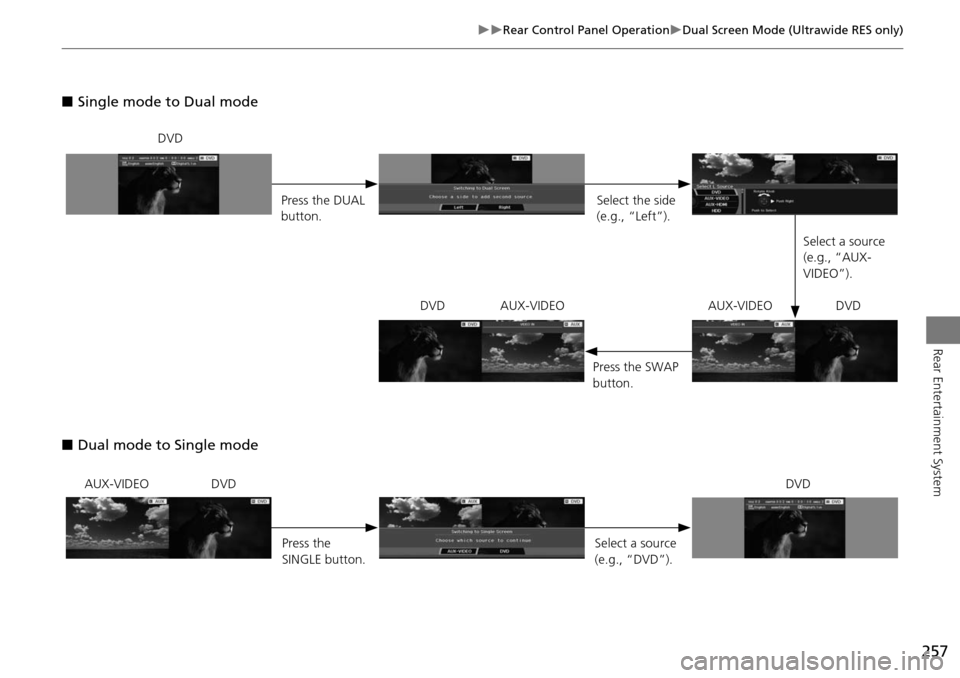
■Single mode to Dual mode
■ Dual mode to Single mode
DVD
Press the DUAL
button. Select the side
(e.g., “Left”).
Select a source
(e.g., “AUX-
VIDEO”).
Press the SWAP
button.
DVD AUX-VIDEO AUX-VIDEO DVD
AUX-VIDEO DVD
Press the
SINGLE button. Select a source
(e.g., “DVD”).DVD
Page 264 of 325
263
Rear Entertainment System
Wireless Headphones
Using the Wireless Headphones
Audio for the Rear Entertainment System is sent to the wireless headphones that
come with the system.
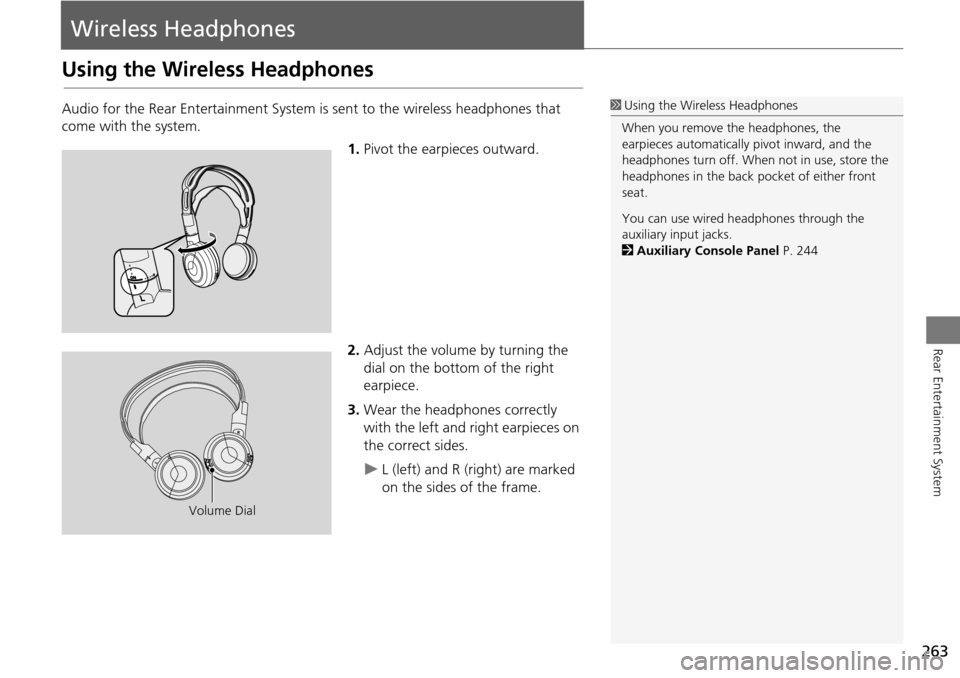
1.Pivot the earpieces outward.
2. Adjust the volume by turning the
dial on the bottom of the right
earpiece.
3. Wear the headphones correctly
with the left and right earpieces on
the correct sides.
L (left) and R (right) are marked
on the sides of the frame.
1Using the Wireless Headphones
When you remove the headphones, the
earpieces automatically pivot inward, and the
headphones turn off. When not in use, store the
headphones in the back pocket of either front
seat.
You can use wired headphones through the
auxiliary input jacks.
2 Auxiliary Console Panel P. 244
Volume Dial
Page 313 of 325
312
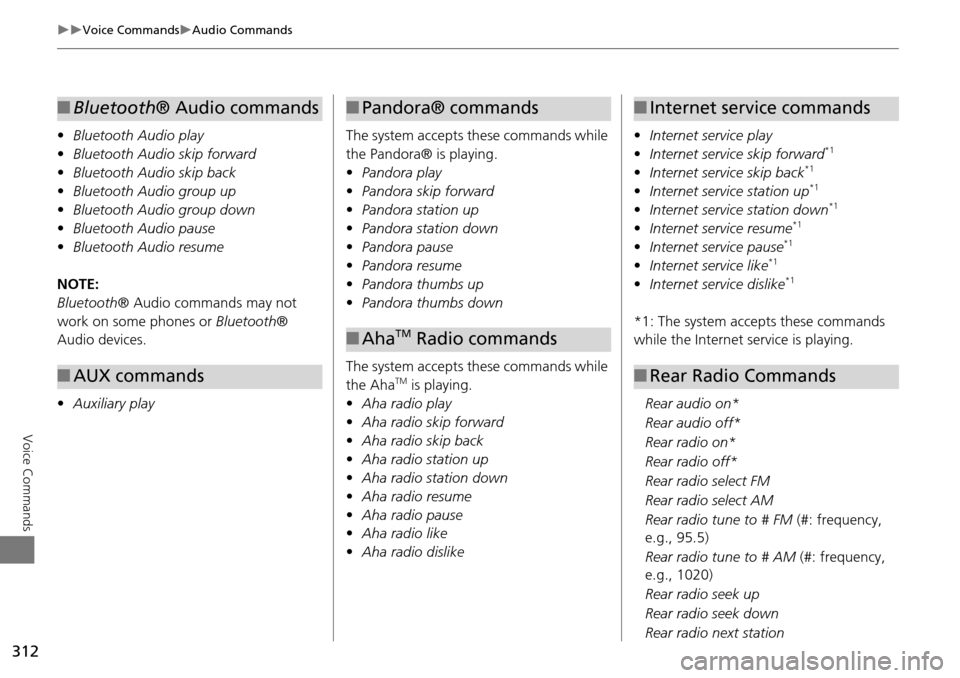
Voice CommandsAudio Commands
Voice Commands
•Bluetooth Audio play
• Bluetooth Audio skip forward
• Bluetooth Audio skip back
• Bluetooth Audio group up
• Bluetooth Audio group down
• Bluetooth Audio pause
• Bluetooth Audio resume
NOTE:
Bluetooth ® Audio commands may not
work on some phones or Bluetooth®
Audio devices.
• Auxiliary play
■Bluetooth® Audio commands
■AUX commands
The system accepts these commands while
the Pandora® is playing.
• Pandora play
• Pandora skip forward
• Pandora station up
• Pandora station down
• Pandora pause
• Pandora resume
• Pandora thumbs up
• Pandora thumbs down
The system accepts these commands while
the Aha
TM is playing.
• Aha radio play
• Aha radio skip forward
• Aha radio skip back
• Aha radio station up
• Aha radio station down
• Aha radio resume
• Aha radio pause
• Aha radio like
• Aha radio dislike
■Pandora® commands
■AhaTM Radio commands
• Internet service play
• Internet service skip forward*1
•Internet service skip back*1
•Internet service station up*1
•Internet service station down*1
•Internet service resume*1
•Internet service pause*1
•Internet service like*1
•Internet service dislike*1
*1: The system accepts these commands
while the Internet service is playing.
Rear audio on*
Rear audio off*
Rear radio on*
Rear radio off*
Rear radio select FM
Rear radio select AM
Rear radio tune to # FM (#: frequency,
e.g., 95.5)
Rear radio tune to # AM (#: frequency,
e.g., 1020)
Rear radio seek up
Rear radio seek down
Rear radio next station
■ Internet service commands
■Rear Radio Commands
Page 315 of 325
314
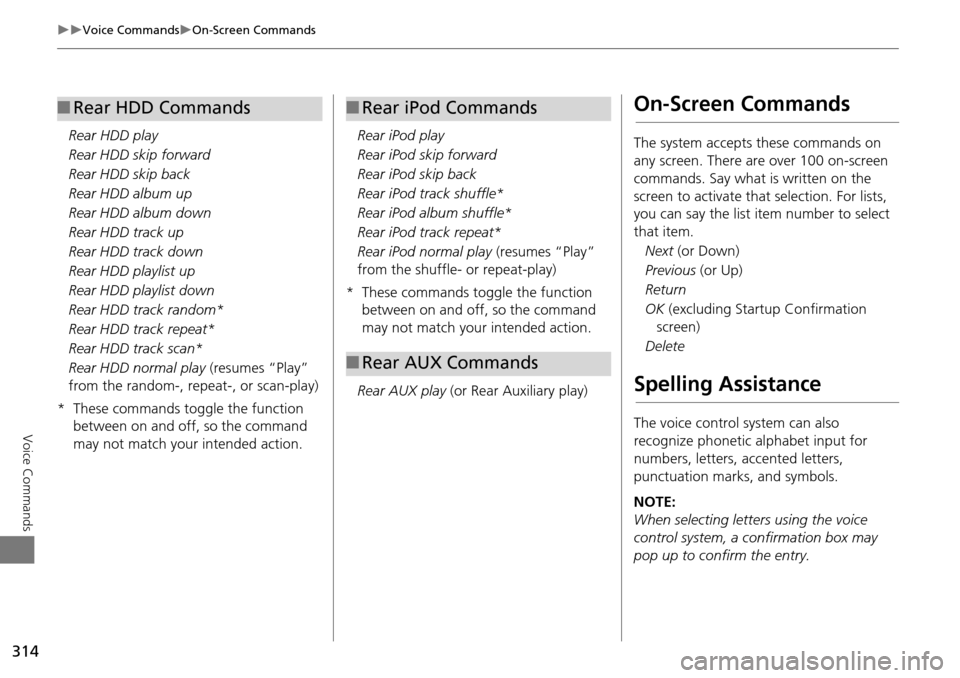
Voice CommandsOn-Screen Commands
Voice Commands
Rear HDD play
Rear HDD skip forward
Rear HDD skip back
Rear HDD album up
Rear HDD album down
Rear HDD track up
Rear HDD track down
Rear HDD playlist up
Rear HDD playlist down
Rear HDD track random*
Rear HDD track repeat*
Rear HDD track scan*
Rear HDD normal play (resumes “Play”
from the random-, repeat-, or scan-play)
* These commands toggle the function between on and off, so the command
may not match your intended action.
■Rear HDD Commands
Rear iPod play
Rear iPod skip forward
Rear iPod skip back
Rear iPod track shuffle*
Rear iPod album shuffle*
Rear iPod track repeat*
Rear iPod normal play (resumes “Play”
from the shuffle- or repeat-play)
* These commands toggle the function between on and off, so the command
may not match your intended action.
Rear AUX play (or Rear Auxiliary play)
■Rear iPod Commands
■Rear AUX Commands
On-Screen Commands
The system accepts these commands on
any screen. There are over 100 on-screen
commands. Say what is written on the
screen to activate that selection. For lists,
you can say the list item number to select
that item.
Next (or Down)
Previous (or Up)
Return
OK (excluding Startup Confirmation
screen)
Delete
Spelling Assistance
The voice control system can also
recognize phonetic alphabet input for
numbers, letters, accented letters,
punctuation marks, and symbols.
NOTE:
When selecting letters using the voice
control system, a confirmation box may
pop up to confirm the entry.