wallpaper HONDA ODYSSEY 2018 Owner's Manual (in English)
[x] Cancel search | Manufacturer: HONDA, Model Year: 2018, Model line: ODYSSEY, Model: HONDA ODYSSEY 2018Pages: 763, PDF Size: 47.02 MB
Page 269 of 763
267
Features
Audio System Basic Operation
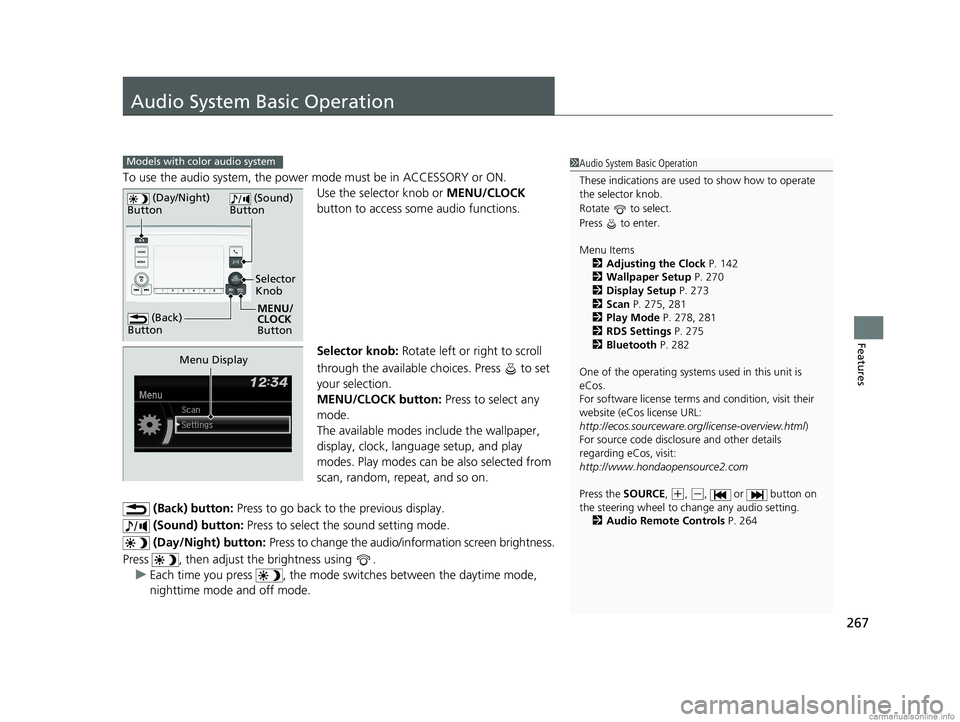
To use the audio system, the power mode must be in ACCESSORY or ON.Use the selector knob or MENU/CLOCK
button to access some audio functions.
Selector knob: Rotate left or right to scroll
through the available ch oices. Press to set
your selection.
MENU/CLOCK button: Press to select any
mode.
The available modes in clude the wallpaper,
display, clock, language setup, and play
modes. Play modes can be also selected from
scan, random, repeat, and so on.
(Back) button: Press to go back to the previous display.
(Sound) button: Press to select the sound setting mode.
(Day/Night) button: Press to change the audio/information screen brightness.
Press , then adjust the brightness using . u Each time you press , the mode sw itches between the daytime mode,
nighttime mode and off mode.
Models with color audio system1 Audio System Basic Operation
These indications are used to show how to operate
the selector knob.
Rotate to select.
Press to enter.
Menu Items
2 Adjusting the Clock P. 142
2 Wallpaper Setup P. 270
2 Display Setup P. 273
2 Scan P. 275, 281
2 Play Mode P. 278, 281
2 RDS Settings P. 275
2 Bluetooth P. 282
One of the operating system s used in this unit is
eCos.
For software license terms and condition, visit their
website (eCos license URL:
http://ecos.sourceware.org/license-overview.html )
For source code disclo sure and other details
regarding eCos, visit:
http://www.hondaopensource2.com
Press the SOURCE ,
(+, (-, or button on
the steering wheel to change any audio setting.
2 Audio Remote Controls P. 264
(Back)
Button
Selector
Knob
MENU/
CLOCK
Button
(Day/Night)
Button
(Sound)
Button
Menu Display
18 US ODYSSEY-31THR6010.book 267 ページ 2018年12月6日 木曜日 午後4時18分
Page 270 of 763
268
uuAudio System Basic Operation uAudio/Information Screen
Features
Audio/Information Screen
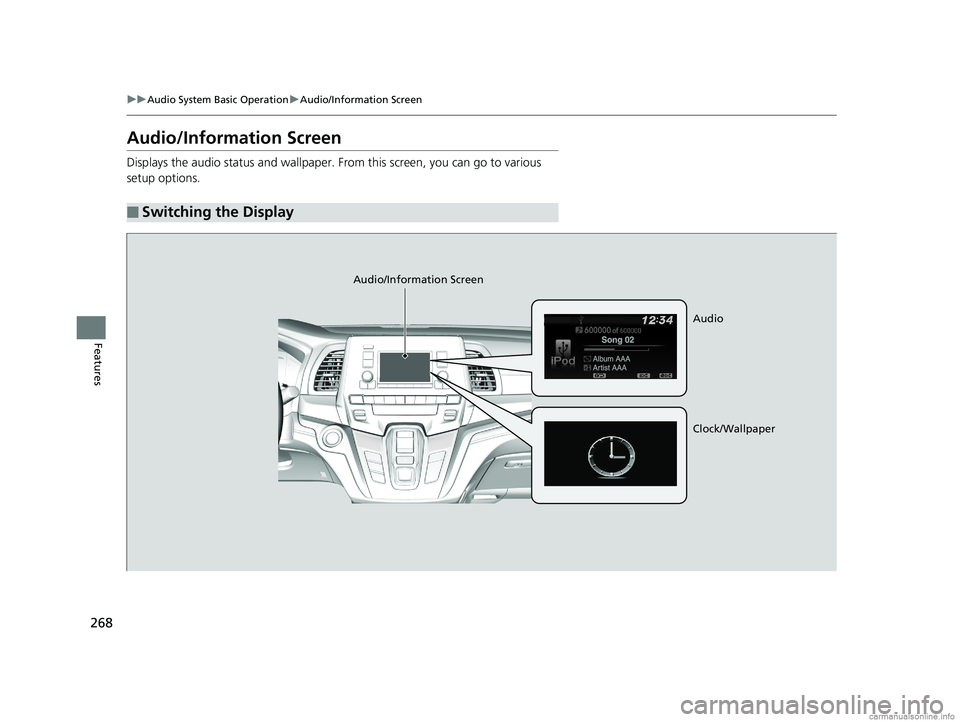
Displays the audio status and wallpaper. From this screen, you can go to various
setup options.
■Switching the Display
Audio/Information Screen
Audio
Clock/Wallpaper
18 US ODYSSEY-31THR6010.book 268 ページ 2018年12月6日 木曜日 午後4時18分
Page 271 of 763
269
uuAudio System Basic Operation uAudio/Information Screen
Continued
Features
■Audio
Shows the current audio information.
■Clock/Wallpaper
Shows a clock screen or an image you import.
■Change display
1. Press the MENU/CLOCK button.
2. Rotate to select Settings, then press .
3. Rotate to select Display Change, then press .
4. Rotate to select Wallpaper, then press .
u If you want to return to the audio/information screen, select Audio.
18 US ODYSSEY-31THR6010.book 269 ページ 2018年12月6日 木曜日 午後4時18分
Page 272 of 763
uuAudio System Basic Operation uAudio/Information Screen
270
Features
You can change, store, and delete the wa llpaper on the audio/information screen.
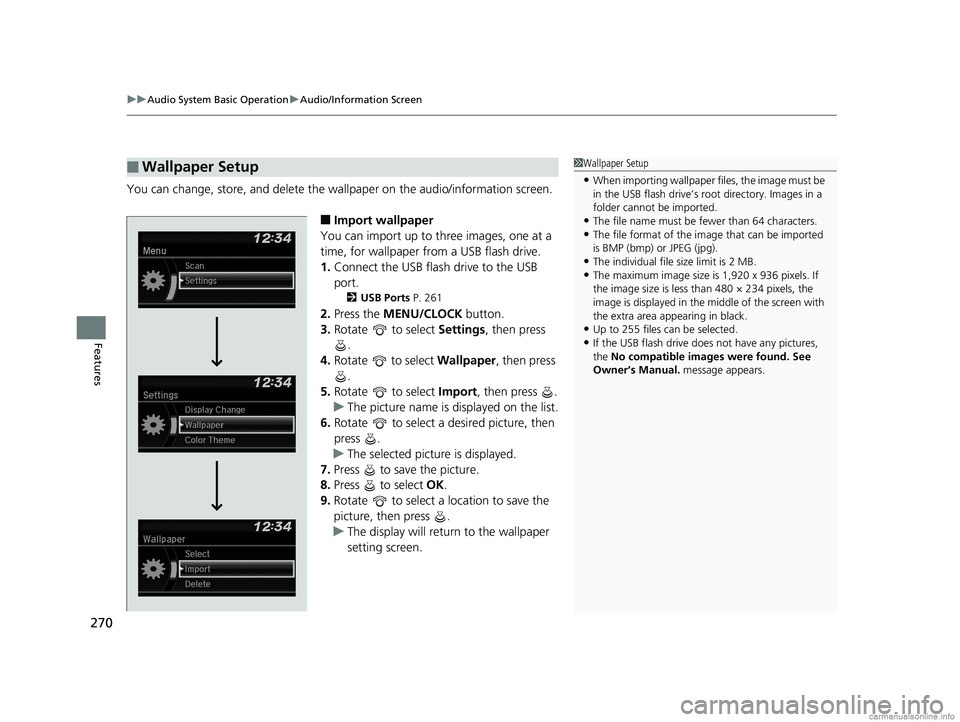
■Import wallpaper
You can import up to three images, one at a
time, for wallpaper from a USB flash drive.
1. Connect the USB flash drive to the USB
port.
2 USB Ports P. 261
2.Press the MENU/CLOCK button.
3. Rotate to select Settings, then press
.
4. Rotate to select Wallpaper , then press
.
5. Rotate to select Import, then press .
u The picture name is displayed on the list.
6. Rotate to select a desired picture, then
press .
u The selected picture is displayed.
7. Press to save the picture.
8. Press to select OK.
9. Rotate to select a location to save the
picture, then press .
u The display will return to the wallpaper
setting screen.
■Wallpaper Setup1Wallpaper Setup
•When importing wallpaper files, the image must be
in the USB flash drive’s root directory. Images in a
folder cannot be imported.
•The file name must be fewer than 64 characters.•The file format of the im age that can be imported
is BMP (bmp) or JPEG (jpg).
•The individual file size limit is 2 MB.•The maximum image size is 1,920 x 936 pixels. If
the image size is less than 480 × 234 pixels, the
image is displayed in the middle of the screen with
the extra area appearing in black.
•Up to 255 files can be selected.
•If the USB flash drive doe s not have any pictures,
the No compatible images were found. See
Owner’s Manual. message appears.
18 US ODYSSEY-31THR6010.book 270 ページ 2018年12月6日 木曜日 午後4時18分
Page 273 of 763
271
uuAudio System Basic Operation uAudio/Information Screen
Features
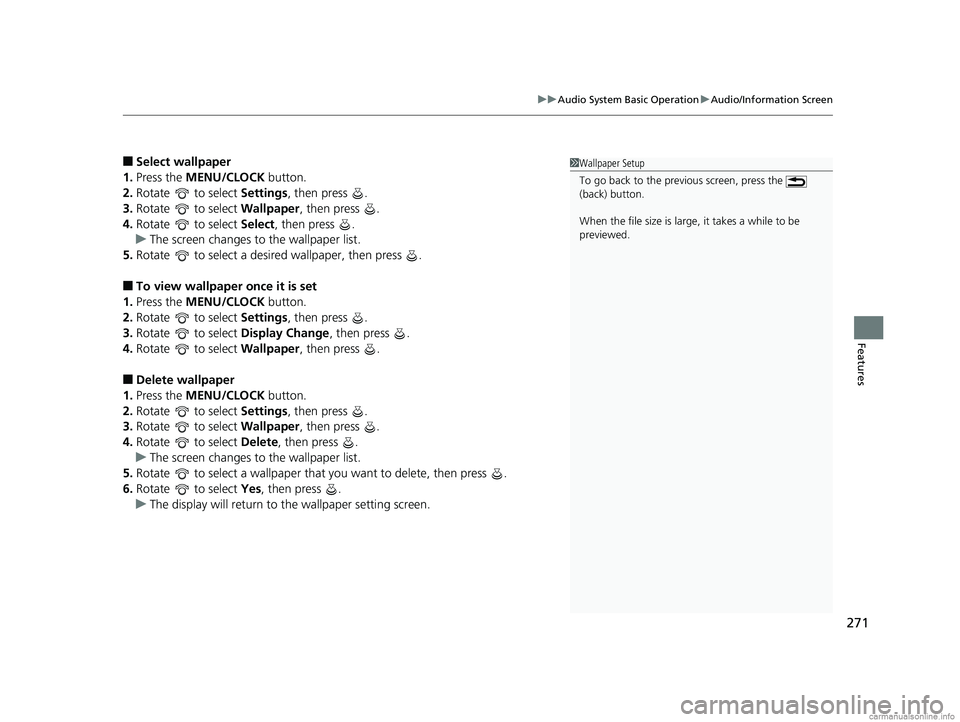
■Select wallpaper
1. Press the MENU/CLOCK button.
2. Rotate to select Settings, then press .
3. Rotate to select Wallpaper, then press .
4. Rotate to select Select, then press .
u The screen changes to the wallpaper list.
5. Rotate to select a desired wallpaper, then press .
■To view wallpaper once it is set
1. Press the MENU/CLOCK button.
2. Rotate to select Settings, then press .
3. Rotate to select Display Change, then press .
4. Rotate to select Wallpaper, then press .
■Delete wallpaper
1. Press the MENU/CLOCK button.
2. Rotate to select Settings, then press .
3. Rotate to select Wallpaper, then press .
4. Rotate to select Delete, then press .
u The screen changes to the wallpaper list.
5. Rotate to select a wallpaper that you want to delete, then press .
6. Rotate to select Yes, then press .
u The display will return to the wallpaper setting screen.
1Wallpaper Setup
To go back to the previous screen, press the
(back) button.
When the file size is large, it takes a while to be
previewed.
18 US ODYSSEY-31THR6010.book 271 ページ 2018年12月6日 木曜日 午後4時18分
Page 288 of 763
286
uuAudio System Basic Operation uAudio/Information Screen
Features
Audio/Information Screen
Displays the audio status and wallpaper. From this display, you can go to various
setup options.
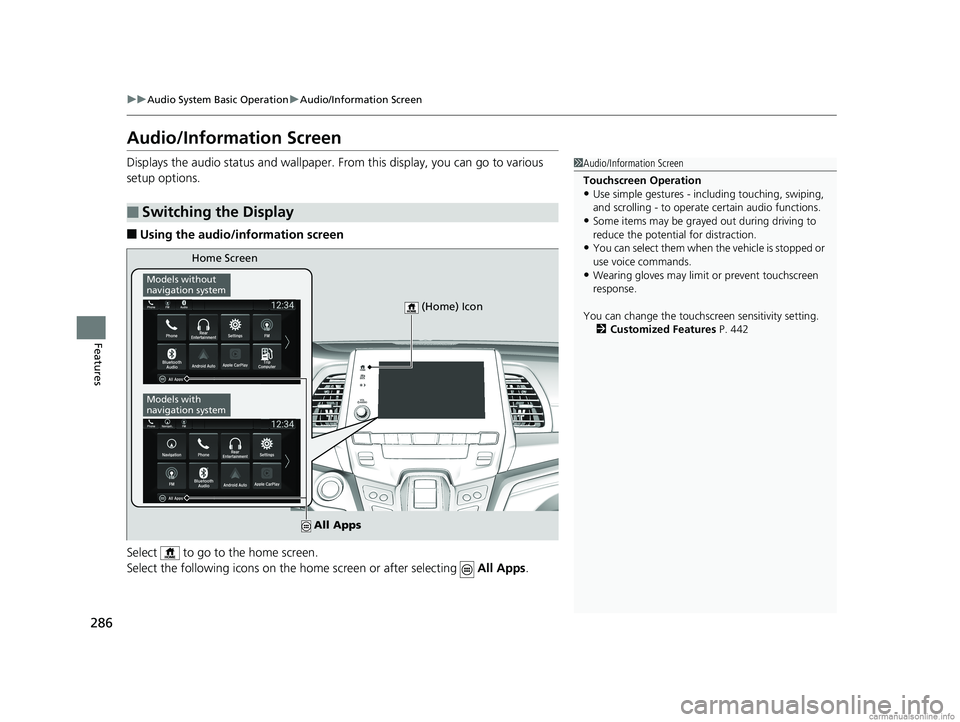
■Using the audio/information screen
Select to go to the home screen.
Select the following icons on the hom e screen or after selecting All Apps.
■Switching the Display
1Audio/Information Screen
Touchscreen Operation
•Use simple gestures - in cluding touching, swiping,
and scrolling - to operate certain audio functions.
•Some items may be grayed out during driving to
reduce the potential for distraction.
•You can select them when the vehicle is stopped or
use voice commands.
•Wearing gloves may limit or prevent touchscreen
response.
You can change the touchs creen sensitivity setting.
2 Customized Features P. 442
Home Screen
Models without
navigation system
Models with
navigation system
(Home) Icon
All Apps
18 US ODYSSEY-31THR6010.book 286 ページ 2018年12月6日 木曜日 午後4時18分
Page 292 of 763
uuAudio System Basic Operation uAudio/Information Screen
290
Features
You can change, store, and delete the wa llpaper on the audio/information screen.
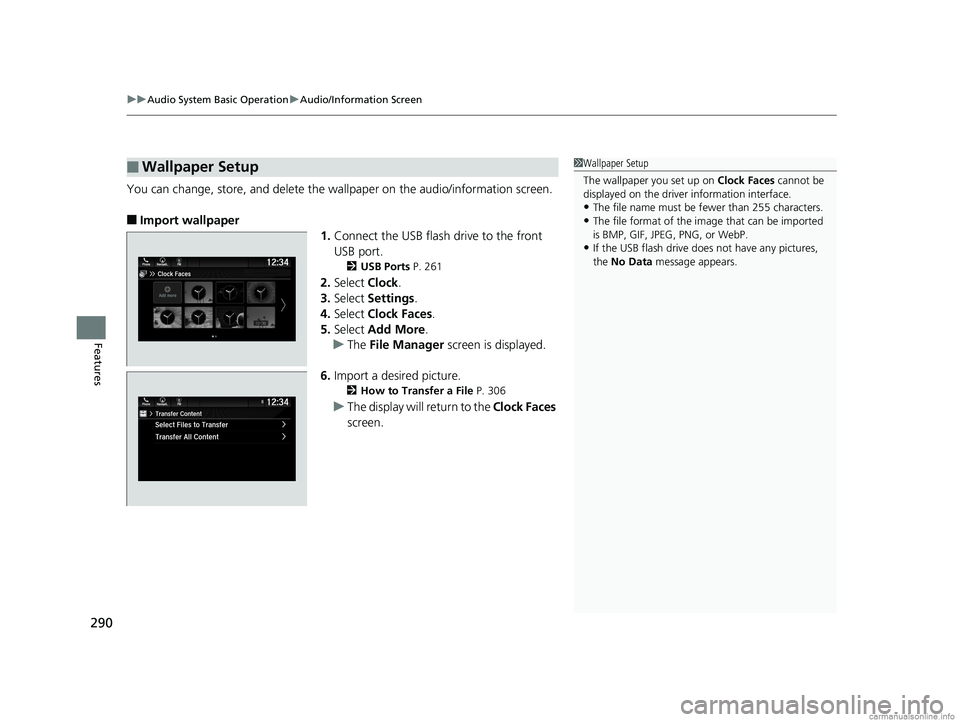
■Import wallpaper
1.Connect the USB flash drive to the front
USB port.
2 USB Ports P. 261
2.Select Clock.
3. Select Settings .
4. Select Clock Faces .
5. Select Add More .
u The File Manager screen is displayed.
6. Import a desired picture.
2 How to Transfer a File P. 306
uThe display will return to the Clock Faces
screen.
■Wallpaper Setup1 Wallpaper Setup
The wallpaper you set up on Clock Faces cannot be
displayed on the driver information interface.
•The file name must be fewer than 255 characters.
•The file format of the im age that can be imported
is BMP, GIF, JPEG, PNG, or WebP.
•If the USB flash drive doe s not have any pictures,
the No Data message appears.
18 US ODYSSEY-31THR6010.book 290 ページ 2018年12月6日 木曜日 午後4時18分
Page 293 of 763
291
uuAudio System Basic Operation uAudio/Information Screen
Continued
Features
■Select wallpaper
1. Select Clock.
2. Select Settings .
3. Select Clock Faces.
4. Select a desired wallpaper.
u The preview is displayed on the screen.
5. Select Save.
u The display will return to the clock screen.
■To view wallpaper once it is set
1. Select .
2. Select Clock.
■Delete wallpaper
1. Select Clock.
2. Select Settings .
3. Select Clock Faces.
4. Select Delete Photos .
u The File Manager screen is displayed.
5. Delete a picture.
2 How to Delete a File P. 309
uThe display will return to the Clock Faces screen.
18 US ODYSSEY-31THR6010.book 291 ページ 2018年12月6日 木曜日 午後4時18分
Page 358 of 763
356
uuAudio System Basic Operation uNear Field Communication (NFC)*
Features
Near Field Comm unication (NFC)*
Near Field Communication (NFC) allows you to connect your phone to the audio
system easily via Bluetooth®.
NFC enables two devices to communicate in close proximity, within about 2 inch (40
mm).
The following features are available:
• Bluetooth ® setup
• Image transfer for wallpaper
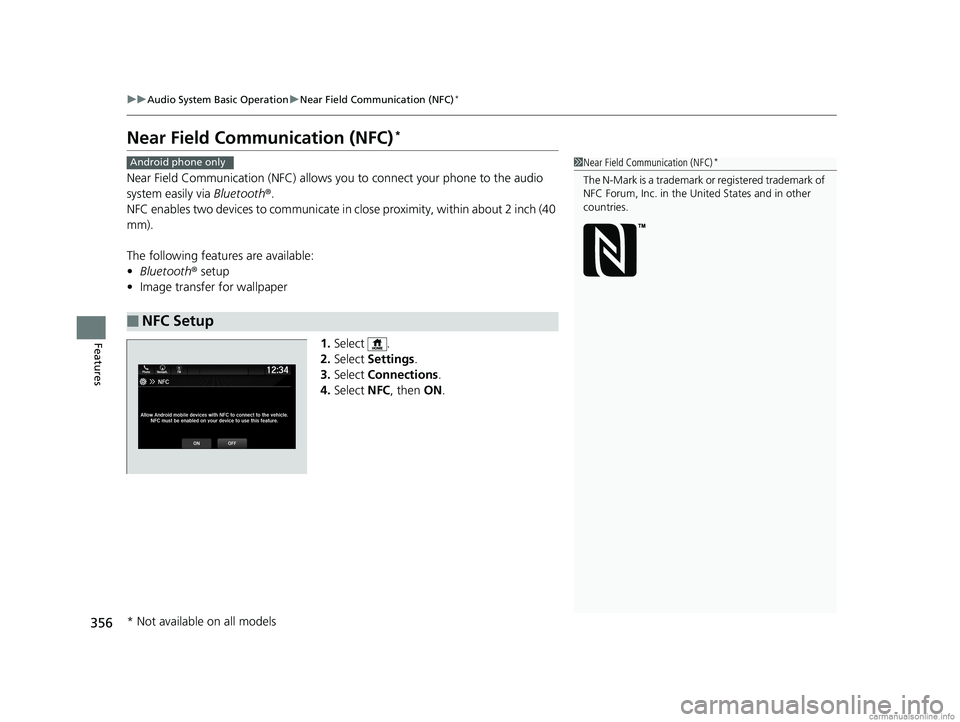
1.Select .
2. Select Settings .
3. Select Connections .
4. Select NFC, then ON.
■NFC Setup
1Near Field Communication (NFC)*
The N-Mark is a trademark or registered trademark of
NFC Forum, Inc. in the United States and in other
countries.
Android phone only
* Not available on all models
18 US ODYSSEY-31THR6010.book 356 ページ 2018年12月6日 木曜日 午後4時18分
Page 360 of 763
358
uuAudio System Basic Operation uNear Field Communication (NFC)*
Features
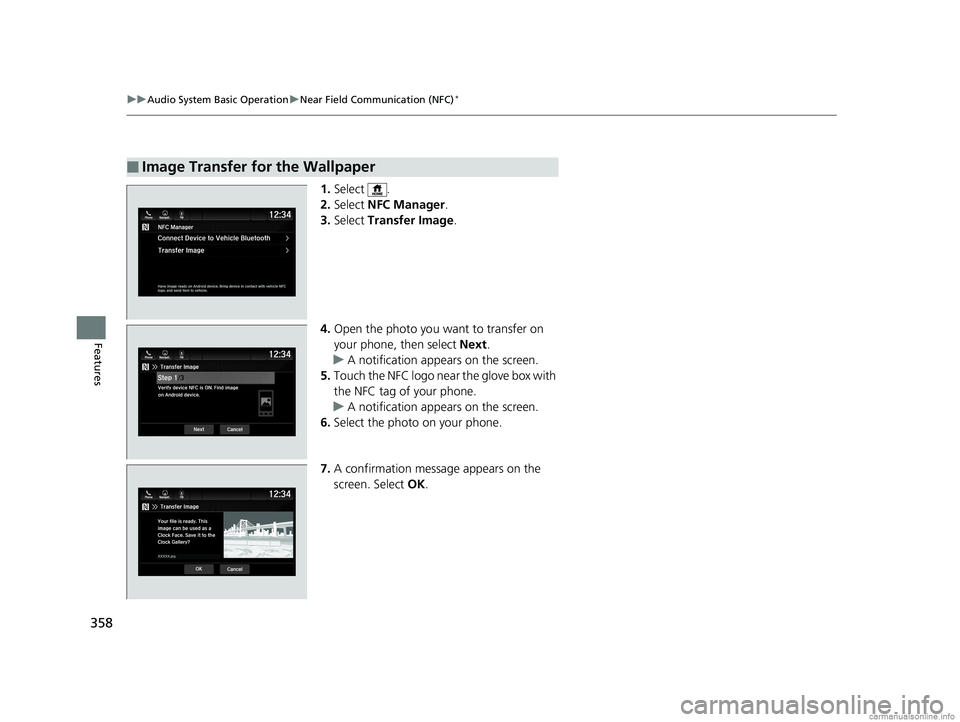
1. Select .
2. Select NFC Manager .
3. Select Transfer Image .
4. Open the photo you want to transfer on
your phone, then select Next.
u A notification appears on the screen.
5. Touch the NFC logo near the glove box with
the NFC tag of your phone.
u A notification appears on the screen.
6. Select the photo on your phone.
7. A confirmation message appears on the
screen. Select OK.
■Image Transfer for the Wallpaper
18 US ODYSSEY-31THR6010.book 358 ページ 2018年12月6日 木曜日 午後4時18分