oil HONDA PASSPORT 2000 2.G Owner's Manual
[x] Cancel search | Manufacturer: HONDA, Model Year: 2000, Model line: PASSPORT, Model: HONDA PASSPORT 2000 2.GPages: 267, PDF Size: 3.03 MB
Page 219 of 267
If the diaphragm inside the
reservoir cap is deformed, return
it to the original (collapsed)
condition, then tighten the cap.
It is normal for the brake fluid
level to go down slightly as the
front brake pads wear. So be sure
to keep the reservoir fluid at the
proper level.
If the reservoir needs frequent
refilling, it may indicate a serious mechanical problem.
Brake fluid absorbs water from
the air. Never use brake fluid that
has been open to the air for an
extended period. Throw it away and use new brake fluid from a
sealed container.
Brake fluid can damage your vehicle's paint. Thoroughly clean
up any brake fluid spills.
Shift-on-the-Fl
y Syste m
The fluid level in the system should
be checked at the intervals shown in the Maintenance Schedule.
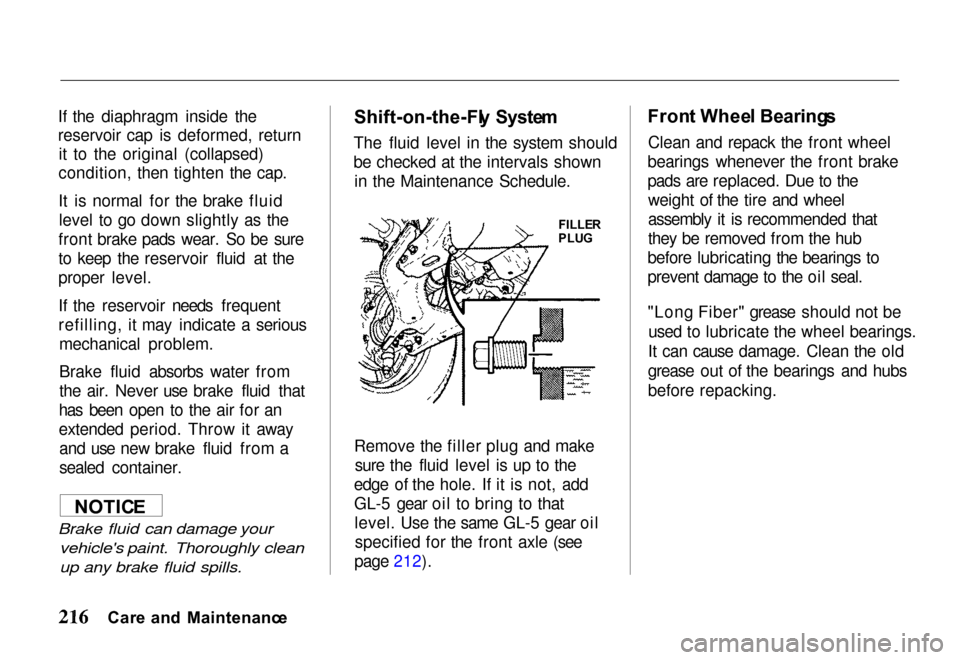
Remove the filler plug and make sure the fluid level is up to the
edge of the hole. If it is not, add
GL-5 gear oil to bring to that level. Use the same GL-5 gear oilspecified for the front axle (see
page 212). Fron
t Whee l Bearing s
Clean and repack the front wheel
bearings whenever the front brake
pads are replaced. Due to the weight of the tire and wheel
assembly it is recommended that
they be removed from the hub
before lubricating the bearings to
prevent damage to the oil seal.
"Long Fiber" grease should not be
used to lubricate the wheel bearings.
It can cause damage. Clean the old
grease out of the bearings and hubs
before repacking.
Car e an d Maintenanc e
NOTIC
E
FILLE
R
PLU G
Page 220 of 267
Hoo
d Latc h an d Hinge s
Lubricate the hood latch assembly
and hood hinge assembly as
follows:
1. Wipe off any accumulatio n of
dirt o
r contamination on the
latch parts.
2. Apply multipurpose-type grease (NLGI No. 1 or 2) to
the hood latch pin cam.
3. Apply light engine oil to all pivot points in the release
mechanism.
4. Lubricate hood hinges with multipurpose-type grease
(NLGI No. 1 or 2).
5. Check the hood hinges and
latch mechanism to assure
they are working correctly.
Ai
r Conditionin g
Periodically have your Honda dealer check your air conditioning
system to be sure there has been
no loss in cooling output. See
your Honda dealer if you suspect
that the system is not performing
as it should.
Bod y Lubricatio n
Normal use of a vehicle causes
metal-to-metal movement at certain
points in the body. Noise, wear and improper operation at these points
will result when a protective film of lubricant is not provided.
For exposed surfaces such as door
checks, door lock bolts, lock striker plates, etc., apply a thin
film of light engine oil.
Any lubricant should be used
sparingly. After application, all excess lubricant should be
carefully wiped off.
The seat adjusters and seat track should be lubricated with water-
resistant EP chassis lubricant.
There are other points on the
vehicle body which may occasionally require lubrication.
Window regulators and controls are confined in the space between
the upholstery and the outside
door panel. Easy access to the
working parts may be made by
removing the trim. Door weatherstrips and rubber hood
bumpers should be lightly coatedwith a rubber lubricant.
Car e an d Maintenanc e
Page 223 of 267
Accelerato
r Peda l Linkag e
Lubricate the accelerator pedal
fulcrum pin with multipurpose
Whee l Alignmen t
Proper wheel alignment improves tire mileage. Your vehicle's
suspension parts should be
inspected often and aligned when
needed (see the "Technical Data" section). Improper alignment will
cause the front tires to roll at an angle that will result in faster tire
wear.
Proper tire balancing provides the
best riding comfort and helps
reduce tire tread wear. Out-of-balance tires can cause
annoying vibration and uneven
tire wear such as cupping and flat
spots.
Exterio
r
Washin g You r Vehicl e
The best way to preserve your vehicle's finish is to keep it clean by
frequent washings. Wash the vehicle
with lukewarm or cold water.
Do not use hot water or wash in direct sunlight. Do not use strong
soap or chemical detergents. All
cleaning agents should be promptly
flushed from the surface and not
allowed to dry on the finish.
Polishin g an d Waxin g
You r Vehicl e
Polishing is recommended to
remove accumulated residue and eliminate any "weathered"
appearance.
Your Honda dealer offers several
polishes and cleaners that have
proven to maintain the original finish appearance and durability. Protectio
n o f Exterio r
Brigh t Meta l Part s
Bright metal parts should be cleaned
regularly to keep their luster.
Washing with water is all that is
usually needed. However, chrome
polish may be used on chrome or stainless steel trim, if necessary. A
coating of wax, rubbed to a high
polish, is recommended for all bright metal parts.
Car e o f Aluminu m Wheel s
Aluminum wheels have a clear-coat finish similar to paint.
Use a chamois skin, sponge or
other soft material when washing
the wheels.
Foreig n Materia l Deposit s
Calcium chloride and other salts, ice melting agents, road oil and
tar, tree sap, bird droppings,
Car e an d Maintenanc e
Page 225 of 267
been coated with corrosion
protectants.
At least every spring, flush thesematerials from the underbody
with plain water. Take care to
thoroughly clean any areas where mud and other debris can collect.
Sediment packed in closed areas
of the frame should be loosened
before being flushed.
Interio
r
With the use of modern trim
materials it is very important that
proper cleaning techniques and
cleaners be used. Failure to do
this on the first cleaning may
result in water spots, spot rings or
setting of stains, all of which
make it more difficult to remove
on a second cleaning.
The portion of the following cleaning instructions that are in
ALL CAPITAL LETTERS are
especially important and MUST
be followed.
Dust and loose dirt thataccumulate on interior fabrics
should be removed often with a
vacuum cleaner or soft brush.
Vinyl or leather trim should be
wiped regularly with a clean
damp cloth. Normal trim soil,
spots or stains can be cleaned with
conventional cleaners. Remembe
r Thes e Basi c Step s
Befor e Cleanin g
1. Remove stains as quickly as possible before they become"set."
2. Use a clean cloth or sponge and change to a clean area
often. (A SOFT brush may be
used if stains persist.)
3. Use solvent-type cleaners only in a well ventilated area; also,
do not saturate the stained
area.
4. If a ring forms after spot cleaning, clean the entire area
IMMEDIATELY.
5. Follow specific instructions on the cleaning products' labels.
Car e an d Maintenanc e
Page 226 of 267
Cleanin
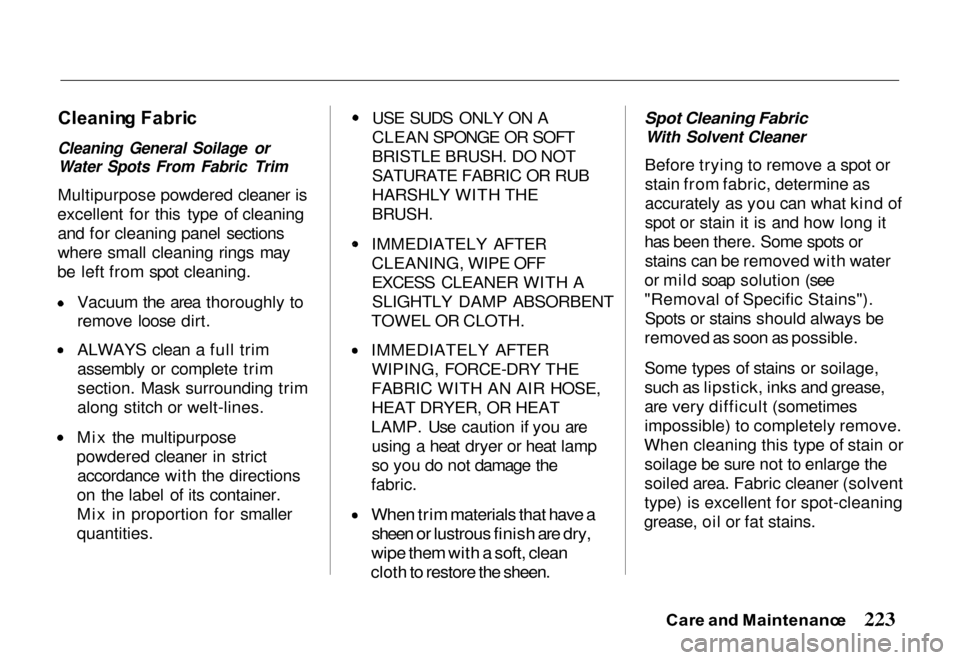
g Fabri c
Cleaning General Soilage or
Water Spots From Fabric Trim
Multipurpose powdered cleaner is
excellent for this type of cleaning and for cleaning panel sections
where small cleaning rings may
be left from spot cleaning. Vacuum the area thoroughly to
remove loose dirt.
ALWAYS clean a full trim
assembly or complete trim
section. Mask surrounding trim
along stitch or welt-lines.
Mix the multipurpose
powdered cleaner in strict accordance with the directions
on the label of its container.
Mix in proportion for smaller
quantities. USE SUDS ONLY ON A
CLEAN SPONGE OR SOFT
BRISTLE BRUSH. DO NOT
SATURATE FABRIC OR RUB
HARSHLY WITH THE
BRUSH.
IMMEDIATELY AFTER
CLEANING, WIPE OFF
EXCESS CLEANER WITH A
SLIGHTLY DAMP ABSORBENT
TOWEL OR CLOTH. IMMEDIATELY AFTER
WIPING, FORCE-DRY THE
FABRIC WITH AN AIR HOSE, HEAT DRYER, OR HEAT
LAMP. Use caution if you are using a heat dryer or heat lamp
so you do not damage the
fabric.
When trim materials that have a
sheen or lustrous finish are dry,
wipe them with a soft, clean
cloth to restore the sheen.
Spot Cleaning Fabric
With Solvent Cleaner
Before trying to remove a spot or
stain from fabric, determine as
accurately as you can what kind of
spot or stain it is and how long it
has been there. Some spots or stains can be removed with water
or mild soap solution (see
"Removal of Specific Stains"). Spots or stains should always be
removed as soon as possible.
Some types of stains or soilage,
such as lipstick, inks and grease,
are very difficult (sometimes
impossible) to completely remove.
When cleaning this type of stain or soilage be sure not to enlarge the
soiled area. Fabric cleaner (solvent
type) is excellent for spot-cleaning
grease, oil or fat stains.
Car e an d Maintenanc e
Page 227 of 267
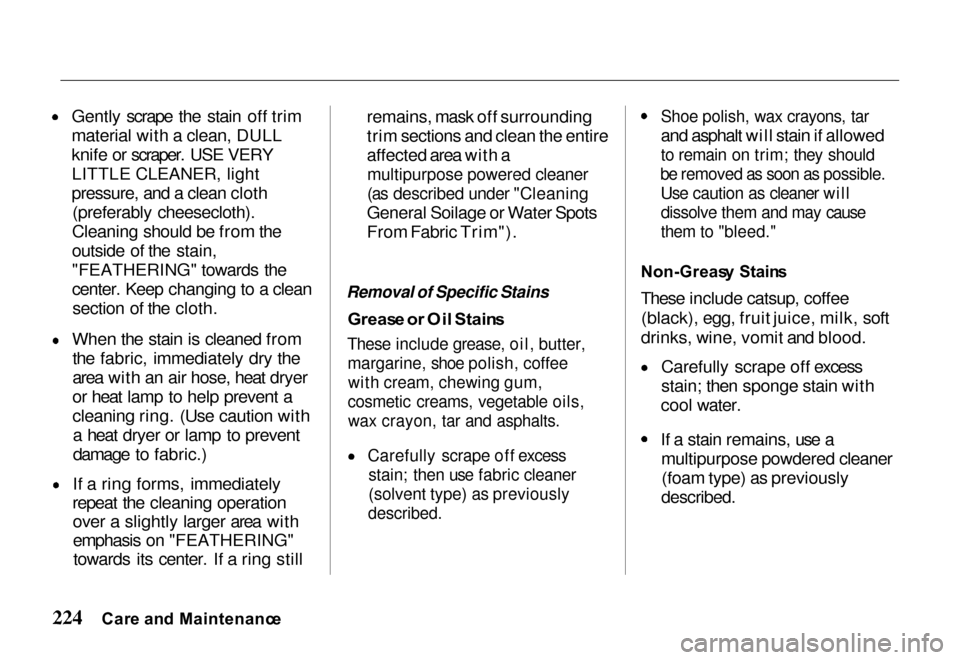
Gently scrape the stain off trim
material with a clean, DULL
knife or scraper. USE VERY
LITTLE CLEANER, light
pressure, and a clean cloth
(preferably cheesecloth).
Cleaning should be from the
outside of the stain,
"FEATHERING" towards the
center. Keep changing to a clean section of the cloth. When the stain is cleaned from
the fabric, immediately dry the
area with an air hose, heat dryer
or heat lamp to help prevent a
cleaning ring. (Use caution witha heat dryer or lamp to prevent
damage to fabric.) If a ring forms, immediately
repeat the cleaning operation over a slightly larger area with
emphasis on "FEATHERING"towards its center. If a ring still remains, mask off surrounding
trim sections and clean the entire
affected area with a
multipurpose powered cleaner
(as described under "Cleaning
General Soilage or Water Spots
From Fabric Trim").
Removal of Specific Stains
Greas e o r Oi l Stain s
These include grease, oil, butter,
margarine, shoe polish, coffee
with cream, chewing gum,
cosmetic creams, vegetable oils,
wax crayon, tar and asphalts.
Carefully scrape off excess
stain; then use fabric cleaner
(solvent type) as previously
described.
Shoe polish, wax crayons, tar
and asphalt will stain if allowed
to remain on trim; they should
be removed as soon as possible.
Use caution as cleaner will
dissolve them and may cause
them to "bleed."
Non-Greas y Stain s
These include catsup, coffee (black), egg, fruit juice, milk, soft
drinks, wine, vomit and blood. Carefully scrape off excess
stain; then sponge stain with
cool water. If a stain remains, use a
multipurpose powdered cleaner(foam type) as previously
described.
Car e an d Maintenanc e
Page 228 of 267

If an odor persists after
cleaning vomit or urine, treat
area with a water-baking soda
solution: 1 teaspoon (5 milliliters)
baking soda to 1 cup (250
milliliters) of warm water.
Finally, if needed, clean lightly
with a fabric cleaner (solvent
type).
Combinatio n Stain s
These include candy, ice cream,
mayonnaise, chili sauce and
unknown stains. Carefully scrape off excess
stain; then clean with cool
water and allow to dry. If stain remains, clean with a
fabric cleaner (solvent type). Cleanin
g Viny l o r Leathe r Tri m
Ordinary soilage can be removed
from vinyl or leather with warm
water and a mild soap such as saddle soap, oil soap or
equivalent. Apply a small amount of soap
solution and allow it to soak for
a few minutes to loosen dirt;
then rub briskly with a clean,
damp cloth to remove dirt and traces of soap. (This may be
repeated several times, if
necessary.)
Some compounds such as tar,
asphalt, shoe polish etc. will stain if allowed to remain on
trim. They should be wiped off
as quickly as possible and the
area cleaned with a clean cloth
dampened with vinyl cleaner (solvent type). Sea
t Bel t Car e Clean seat belts only with mild
soap and lukewarm water. Do not bleach or dye belts
since this may severely weaken
them.
Car e an d Maintenanc e
Page 234 of 267
Specification
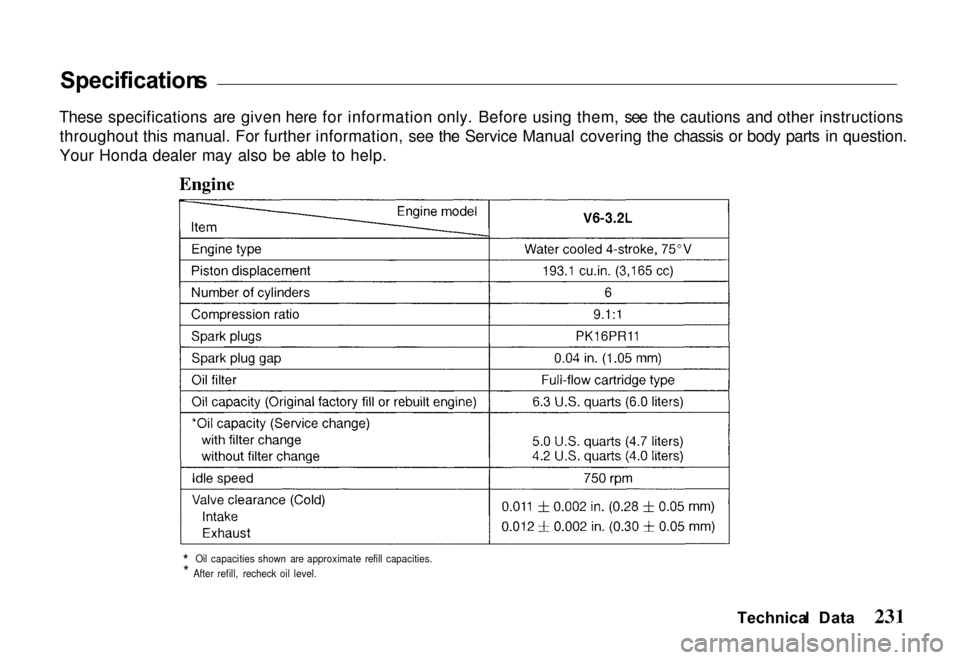
s
These specifications are given here for information only. Before using them, see the cautions and other instructions throughout this manual. For further information, see the Service Manual covering the chassi s or body parts in question.
Your Hond
a dealer may also be able to help.
* Oil capacities shown are approximate refill capacities.
* After refill, recheck oil level.
Technical Dat a
Page 237 of 267
Fron
t Suspensio n
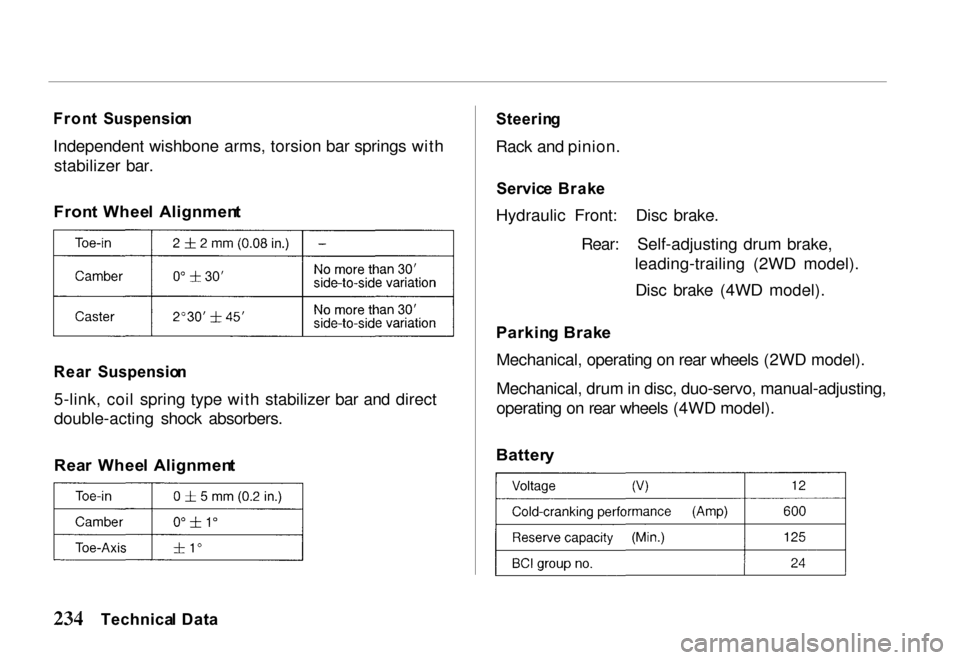
Independent wishbone arms, torsion bar springs with stabilizer bar.
Fron t Whee l Alignmen t
Rea r Suspensio n
5-link, coil spring type with stabilizer bar and direct
double-acting shock absorbers.
Rea r Whee l Alignmen t
Steerin
g
Rack and pinion.
Servic e Brak e
Hydraulic Front: Disc brake.
Rear: Self-adjusting drum brake,leading-trailing (2WD model).
Disc brake (4WD model).
Parkin g Brak e
Mechanical, operating on rear wheels (2WD model).
Mechanical, drum in disc, duo-servo, manual-adjusting,
operating on rear wheels (4WD model).
Batter y
Technical Dat a
Page 254 of 267
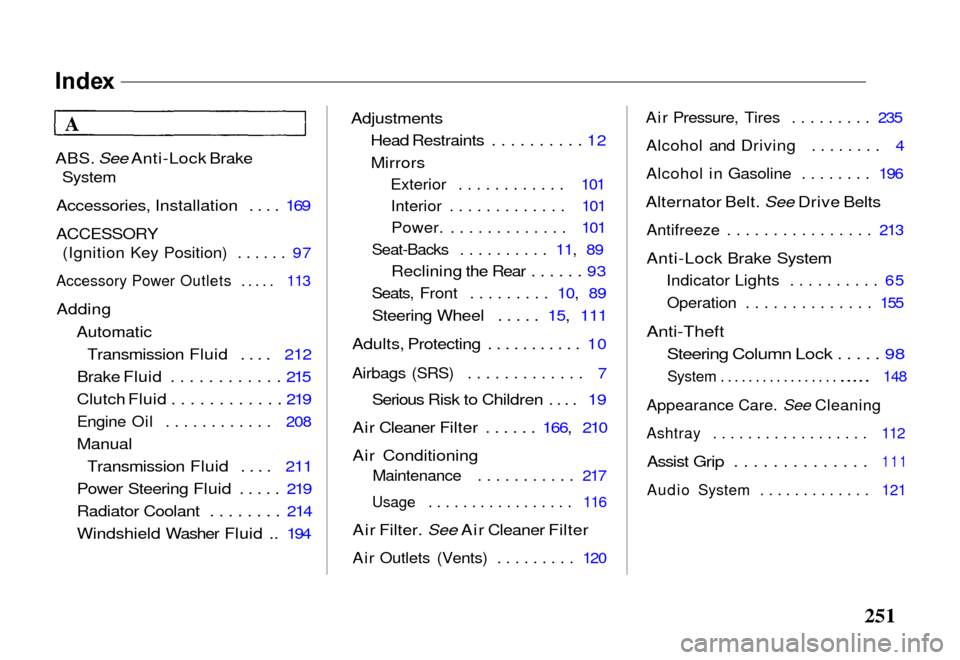
Inde
x
ABS. See Anti-Lock Brake
System
Accessories, Installation .... 169
ACCESSORY
(Ignition Key Position) ...... 97
Accessory Power Outlets ..... 113
Adding AutomaticTransmission Fluid .... 212
Brake Fluid ............ 215
Clutch Fluid ............ 219
Engine Oil ............ 208
Manual Transmission Fluid .... 211
Power Steering Fluid ..... 219
Radiator Coolant ........ 214
Windshield Washer Fluid ..
194
Adjustments
Head
Restraints .......... 12
Mirrors
Exterior ............ 101Interior ............. 101
Power. ............. 101
Seat-Backs .......... 11,
89
Reclining the Rear ...... 93
Seats, Front ......... 10,
89
Steering Wheel ..... 15,
111
Adults, Protecting ........... 10
Airbags (SRS) ............. 7
Serious Risk to Children .... 19
Air Cleaner Filter ......
166, 210
Air Conditioning
Maintenance ........... 217
Usage ................. 116
Air Filter. See Air Cleaner Filter
Air Outlets (Vents) ......... 120
Air Pressure, Tires ......... 235
Alcohol and Driving ........ 4
Alcohol in Gasoline ........ 196
Alternator Belt. See Drive Belts
Antifreeze ................ 213
Anti-Lock Brake System
Indicator Lights .......... 65
Operation .............. 155
Anti-Theft Steering Column Lock ..... 98
System .................
..... 148
Appearance Care. See Cleaning
Ashtray .................. 112
Assist Grip ..............
111
Audio System ............. 121