tailgate HONDA PILOT 2003 1.G User Guide
[x] Cancel search | Manufacturer: HONDA, Model Year: 2003, Model line: PILOT, Model: HONDA PILOT 2003 1.GPages: 392, PDF Size: 5.06 MB
Page 88 of 392
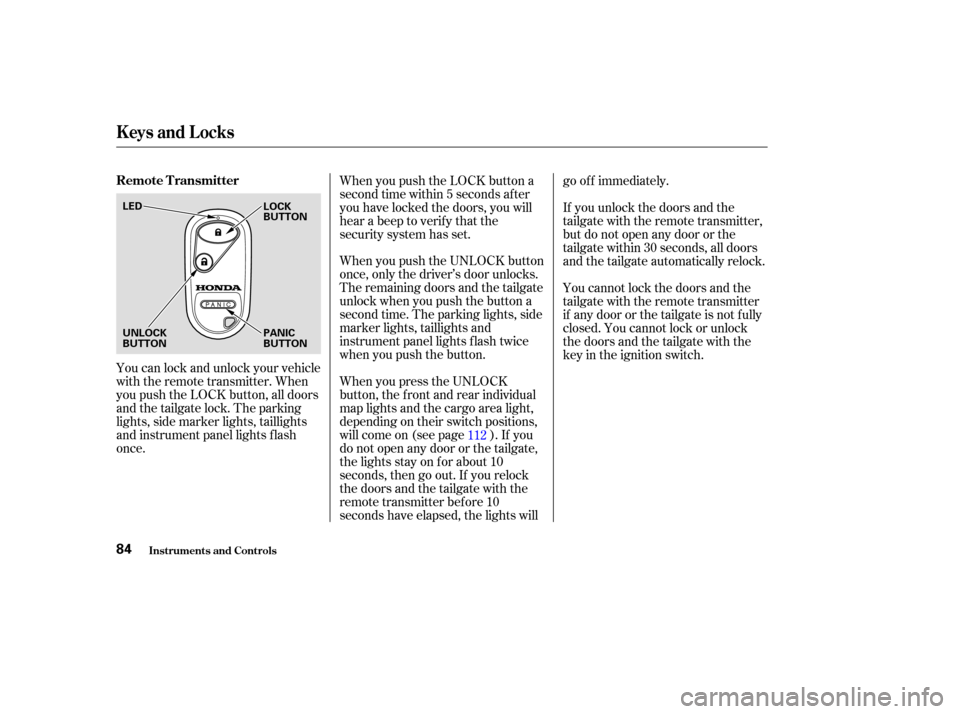
You can lock and unlock your vehicle
with the remote transmitter. When
you push the LOCK button, all doors
and the tailgate lock. The parking
lights, side marker lights, taillights
and instrument panel lights f lash
once.When you push the LOCK button a
second time within 5 seconds after
you have locked the doors, you will
hear a beep to verify that the
security system has set.
When you push the UNLOCK button
once, only the driver’s door unlocks.
The remaining doors and the tailgate
unlock when you push the button a
second time. The parking lights, side
marker lights, taillights and
instrument panel lights f lash twice
when you push the button.
When you press the UNLOCK
button, the f ront and rear individual
map lights and the cargo area light,
depending on their switch positions,
will come on (see page ). If you
do not open any door or the tailgate,
the lights stay on for about 10
seconds, then go out. If you relock
thedoorsandthetailgatewiththe
remote transmitter before 10
seconds have elapsed, the lights willgo of f immediately.
If you unlock the doors and the
tailgate with the remote transmitter,
but do not open any door or the
tailgate within 30 seconds, all doors
and the tailgate automatically relock.
You cannot lock the doors and the
tailgate with the remote transmitter
if any door or the tailgate is not f ully
closed. You cannot lock or unlock
thedoorsandthetailgatewiththe
key in the ignition switch.
112
Keys and Locks
Inst rument s and Cont rols
Remote Transmitter
84
LED LOCK
BUTTON
UNLOCK
BUTTON PANIC
BUTTON
Page 89 of 392
Panic mode allows you to remotely
activate your vehicle’s horn and
lights to attract attention. When
activated, the horn will sound, and
the headlights, parking lights, side
marker lights, taillights and
instrument panel lights will f lash f or
about 30 seconds. To activate panic
mode,pressandholdthePANIC
button f or about one second.When the remote transmitter’s
battery begins to get weak, it may
take several pushes on the button to
lock or unlock the doors and the
tailgate, and the LED will get dim.
Replace the battery as soon as
possible.
Battery type: CR2025
To cancel Panic mode bef ore 30
seconds, press any button on the
remote transmitter. You can also
turn the ignition switch to ON (II).
Panic mode will not activate if the
key is in the ON (II) position.
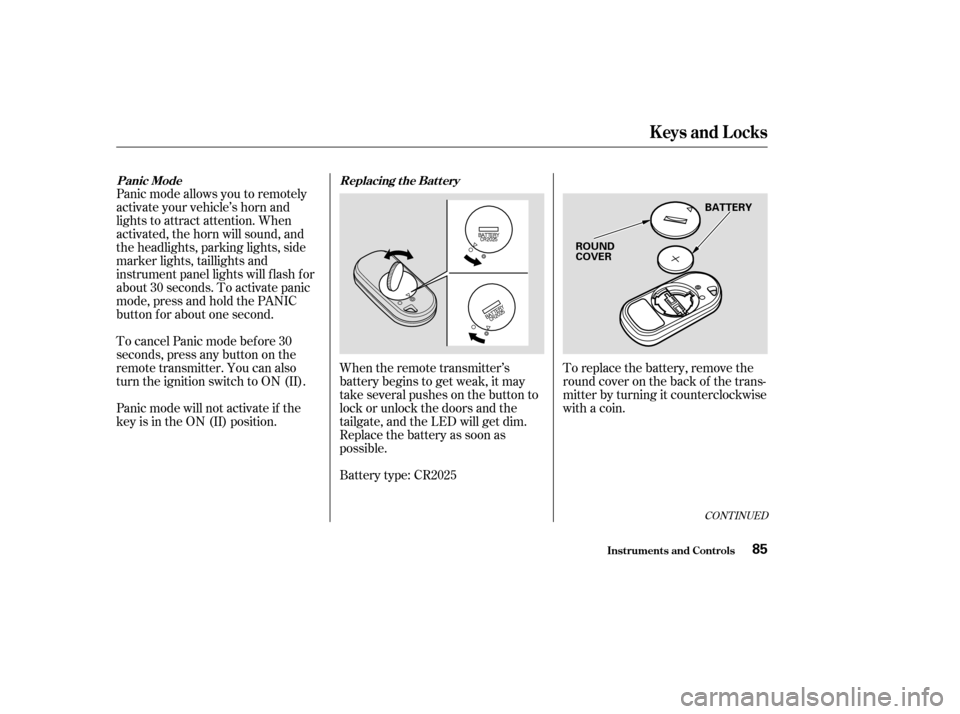
To replace the battery, remove the
round cover on the back of the trans-
mitter by turning it counterclockwise
with a coin.
CONT INUED
Panic Mode
Replacing t he Bat t ery
Keys and Locks
Inst rument s and Cont rols85
ROUND
COVERBATTERY
Page 91 of 392
See page for information on
cargo loading. Keep the tailgate
closed at all times while driving to
avoid damaging the tailgate and to
prevent exhaust gas f rom getting
into the interior. Seeon page .
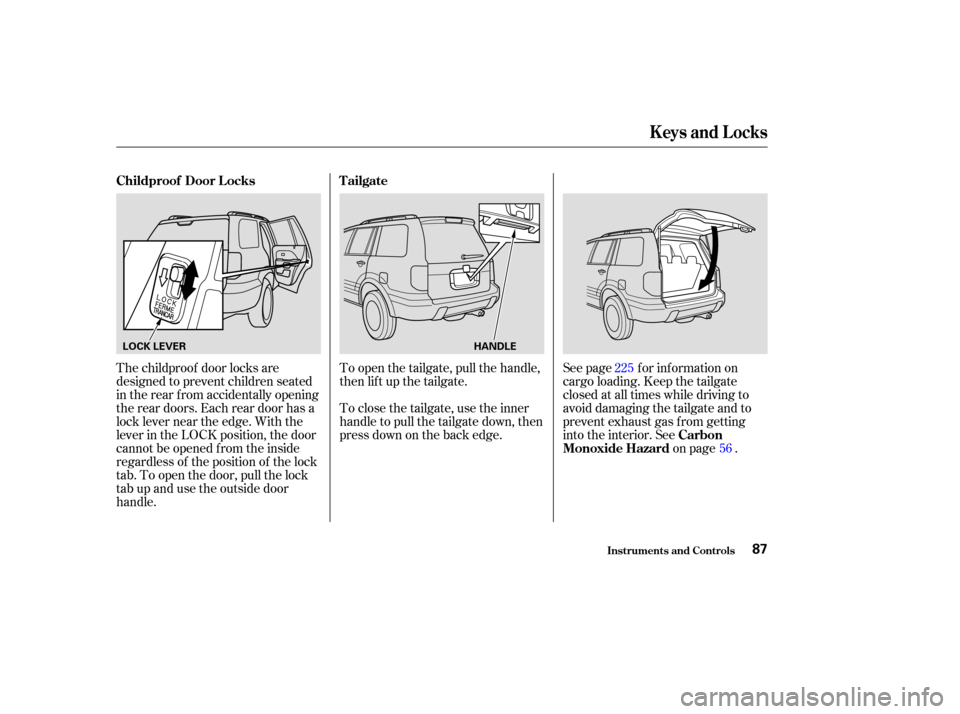
To open the tailgate, pull the handle,
then lif t up the tailgate.
The childproof door locks are
designed to prevent children seated
in the rear f rom accidentally opening
the rear doors. Each rear door has a
lock lever near the edge. With the
lever in the LOCK position, the door
cannot be opened f rom the inside
regardless of the position of the lock
tab. To open the door, pull the lock
tab up and use the outside door
handle. To close the tailgate, use the inner
handle to pull the tailgate down, then
press down on the back edge.
56
225
Carbon
Monoxide Hazard
Childproof Door L ocks
T ailgate
Keys and Locks
Inst rument s and Cont rols87
LOCK LEVER HANDLE
Page 116 of 392
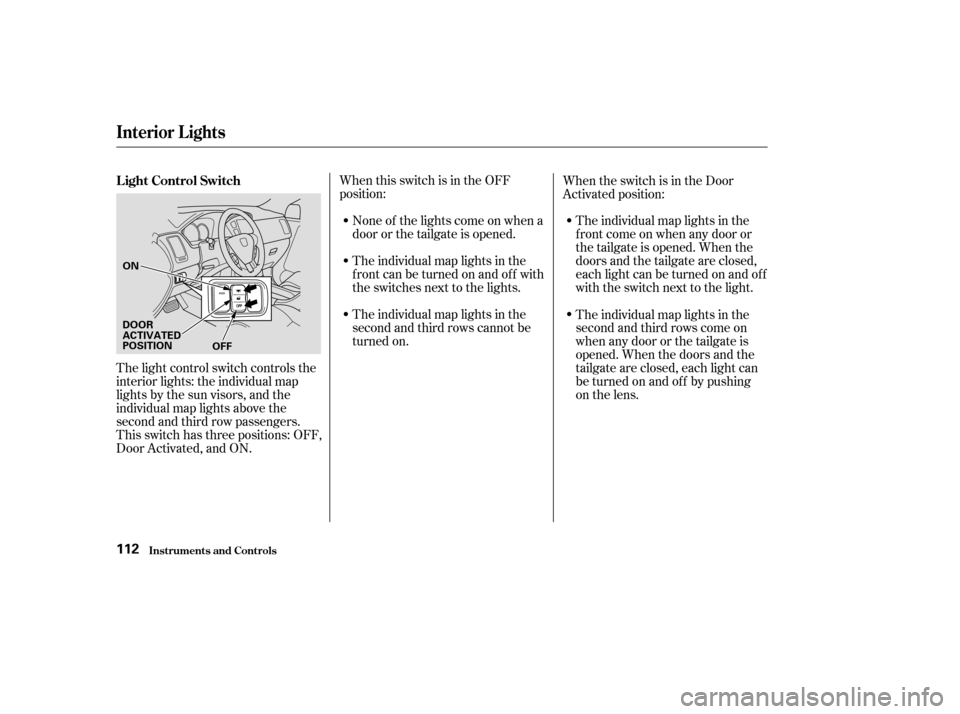
When this switch is in the OFF
position:None of the lights come on when a
door or the tailgate is opened.
The individual map lights in the
f ront can be turned on and of f with
the switches next to the lights. The individual map lights in the
f ront come on when any door or
thetailgateisopened.Whenthe
doors and the tailgate are closed,
eachlightcanbeturnedonandoff
with the switch next to the light.
When the switch is in the Door
Activated position:
The light control switch controls the
interior lights: the individual map
lights by the sun visors, and the
individual map lights above the
second and third row passengers.
This switch has three positions: OFF,
Door Activated, and ON. The individual map lights in the
second and third rows cannot be
turned on.
The individual map lights in the
second and third rows come on
when any door or the tailgate is
opened. When the doors and the
tailgate are closed, each light can
be turned on and of f by pushing
on the lens.
L ight Control Switch
Interior Lights
Inst rument s and Cont rols112
ON
DOOR
ACTIVATED
POSITION OFF
Page 117 of 392

The lights go out about six seconds
after all the doors and the tailgate
are closed.
With the light control switch in the
Door Activated position, all the
individual map lights come on when
you unlock the door with the remote
transmitter (see page ).
Withanydoororthetailgateleft
open, the lights stay on about three
minutes, then go out.When the switch is in the ON
position:
All the individual map lights come on
andstayonaslongastheswitch
remains in the ON position.
84
Interior Lights
Inst rument s and Cont rols113
Page 118 of 392
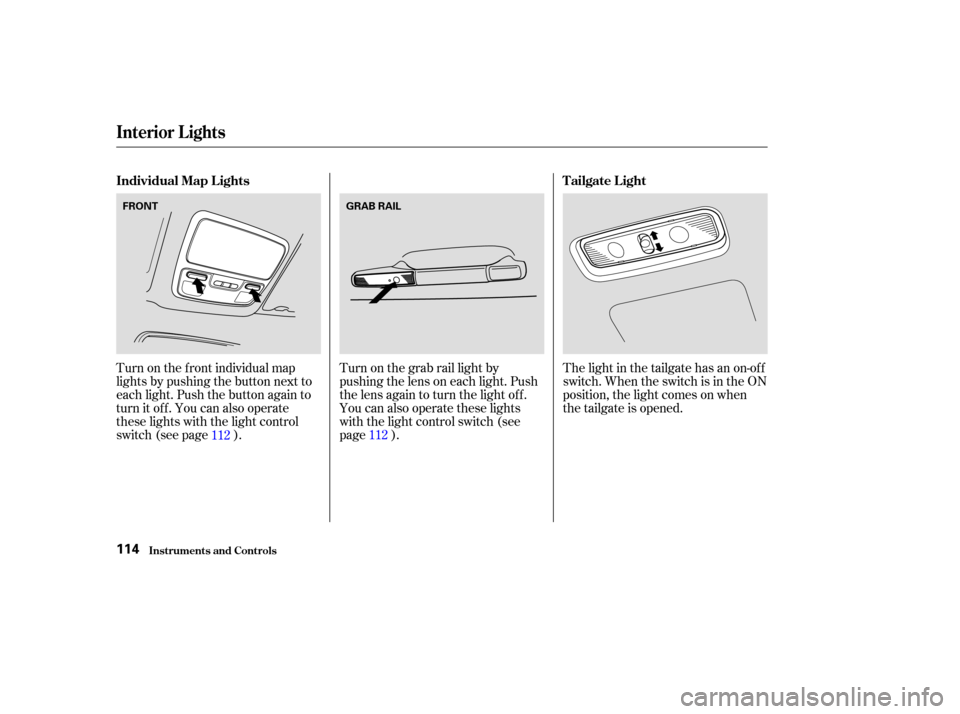
Turn on the f ront individual map
lights by pushing the button next to
each light. Push the button again to
turn it off. You can also operate
these lights with the light control
switch (see page ).Turn on the grab rail light by
pushing the lens on each light. Push
the lens again to turn the light off.
You can also operate these lights
with the light control switch (see
page ).The light in the tailgate has an on-of f
switch. When the switch is in the ON
position, the light comes on when
thetailgateisopened.
112 112
Individual Map L ights
Tailgate L ight
Interior Lights
Inst rument s and Cont rols114
FRONTGRAB RAIL
Page 210 of 392
Once the security system is set,
opening any door (without using the
key or the remote transmitter), or
the hood, will cause it to alarm. It
also alarms if the radio is removed
f rom the dashboard or the wiring is
cut.Do not attempt to alter this system
or add other devices to it. The security system will not set if
the hood, tailgate, or any door is not
f ully closed. If the system will not set,
check the Door and Tailgate Open
Monitor on the instrument panel
(see page ) to see if the doors and
tailgate are f ully closed. Since it is
notpartofthemonitordisplay,
manually check the hood.
The security system helps to protect
your vehicle and valuables f rom thef t.
The horn sounds and a combination
of headlights, parking lights, side
marker lights, and taillights f lash if
someone attempts to break into your
vehicleorremovetheradio.This
alarm continues f or two minutes,
then the system resets. To reset an
alarming system before the two
minutes have elapsed, unlock the
driver’s f ront door with the key or
the remote transmitter.
The security system sets auto-
matically, f if teen seconds af ter you
lock the doors, hood, and tailgate.
For the system to activate, you must
lock the doors f rom the outside with
the key, or remote transmitter. The
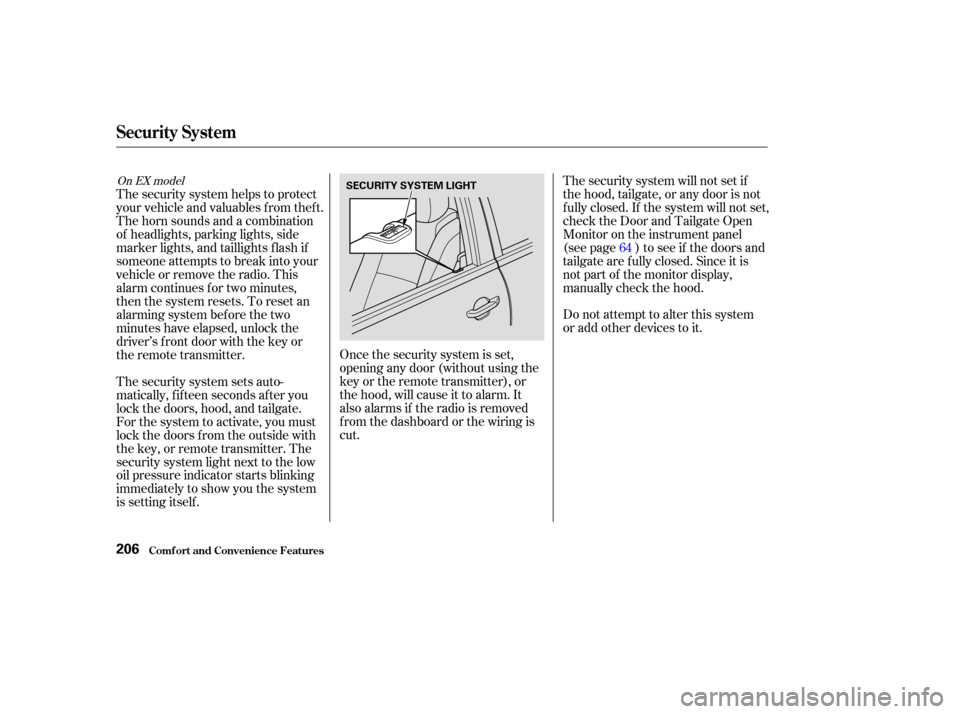
security system light next to the low
oil pressure indicator starts blinking
immediately to show you the system
is setting itself . 64
On EX model
Security System
Comf ort and Convenience Feat ures206
SECURITY SYSTEM LIGHT
Page 231 of 392
Distribute cargo evenly on the
f loor of the cargo area, placing the
heaviest items on the bottom and
as far forward as possible. Tie
down items that could be thrown
about the vehicle during a crash or
sudden stop.If you use an accessory roof rack,
the roof rack weight limit may be
lower. Ref er to the inf ormation that
came with your roof rack.
If you carry large items that
prevent you f rom closing the
tailgate, exhaust gas can enter the
passenger area. To avoid the
possibility of carbon monoxide
poisoning, f ollow the instructions
on page . If you carry any items on a roof
rack,besurethetotalweightof
the rack and the items on it does
not exceed 165 lb (75 kg).
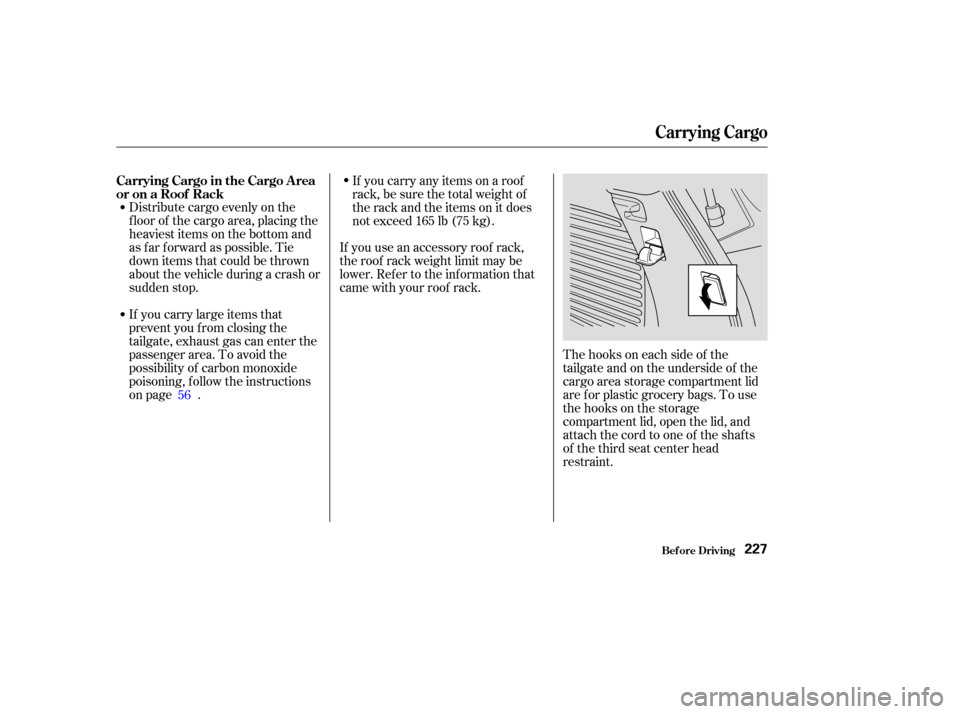
Thehooksoneachsideof the
tailgate and on the underside of the
cargo area storage compartment lid
are f or plastic grocery bags. To use
the hooks on the storage
compartment lid, open the lid, and
attach the cord to one of the shafts
of the third seat center head
restraint.
56
Carrying Cargo in the Cargo A rea
or on a Roof Rack
Carrying Cargo
Bef ore Driving227
Page 235 of 392

Youshoulddothefollowingchecks
and adjustments every day bef ore
you drive your vehicle.Make sure all windows, mirrors,
and outside lights are clean and
unobstructed. Remove f rost, snow,
or ice. Check the adjustment of the seat
(see page ).
Check the adjustment of the
inside and outside mirrors (see
page ).
Check the adjustment of the
steering wheel (see page ).
Fasten your seat belt. Check that
your passengers have f astened
their seat belts (see page ).Turn the ignition switch ON (II).
Check the indicator lights in the
instrument panel.
Start the engine (see page ).
Check the gauges and indicator
lights in the instrument panel (see
page ).
Check that any items you may be
carrying with you inside are stored
properly or f astened down
securely. Visually check the tires. If a tire
looks low, use a gauge to check its
pressure. Check that the hood and tailgate
arefullyclosed. Makesurethedoorsandtailgate
are securely closed and locked.
3. 2.
1.
4. 5.
6.
7.
8.
9. 11.
12. 10.
15
78
61
102
232
89
Preparing to Drive
Driving231
Page 259 of 392
Since lighting and wiring vary in
trailer type and brand, you should
also have a qualif ied mechanic install
a suitable connector between the
vehicleandthetrailer.
All states and Canadian provinces
require some type of trailer lights.
Check requirements f or the areas
where you plan to tow.
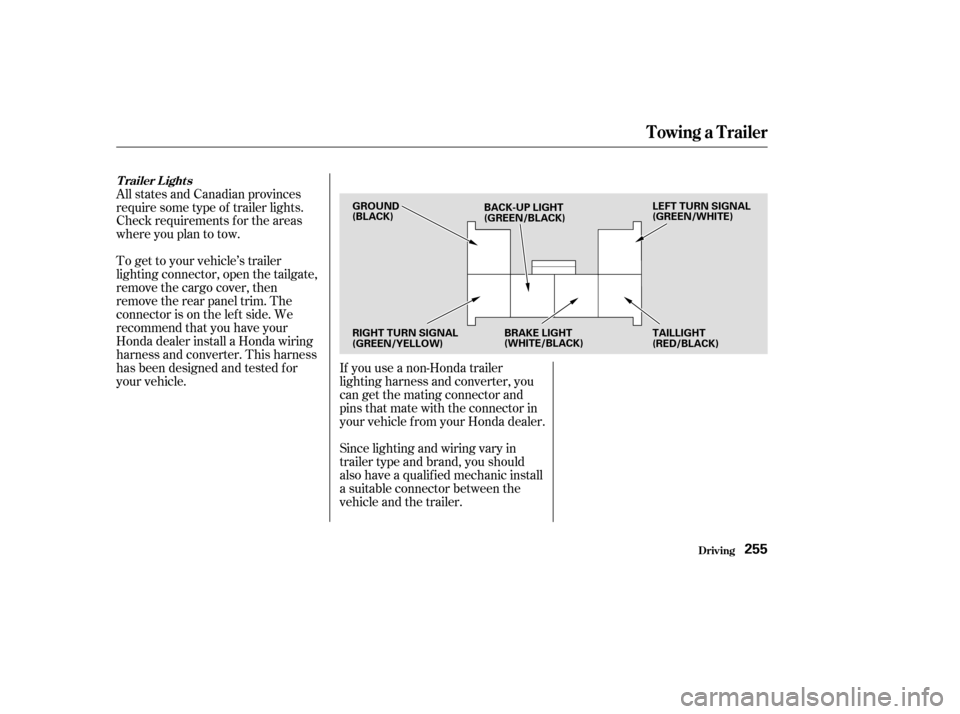
To get to your vehicle’s trailer
lighting connector, open the tailgate,
remove the cargo cover, then
remove the rear panel trim. The
connector is on the lef t side. We
recommend that you have your
Honda dealer install a Honda wiring
harness and converter. This harness
has been designed and tested f or
your vehicle.
If you use a non-Honda trailer
lighting harness and converter, you
cangetthematingconnectorand
pins that mate with the connector in
your vehicle f rom your Honda dealer.
T railer L ights
Towing a Trailer
Driving255
GROUND
(BLACK)
BACK-UP LIGHT
(GREEN/BLACK) LEFT TURN SIGNAL
(GREEN/WHITE)
RIGHT TURN SIGNAL
(GREEN/YELLOW) BRAKE LIGHT
(WHITE/BLACK)
TAILLIGHT
(RED/BLACK)