Control HONDA PILOT 2012 2.G Owners Manual
[x] Cancel search | Manufacturer: HONDA, Model Year: 2012, Model line: PILOT, Model: HONDA PILOT 2012 2.GPages: 681, PDF Size: 15.06 MB
Page 552 of 681
Always use saf ety chains when you
tow a trailer. Make sure the chains
are secured to the trailer and hitch,
and that they cross under the tongue
and can catch the trailer if it
becomes unhitched. Leave enough
slack to allow the trailer to turn
corners easily, but do not let the
chains drag on the ground.
This device is recommended if your
trailer tends to sway. Your trailer
dealer or rental agency can tell you
what kind of sway control you need
and how to install it.
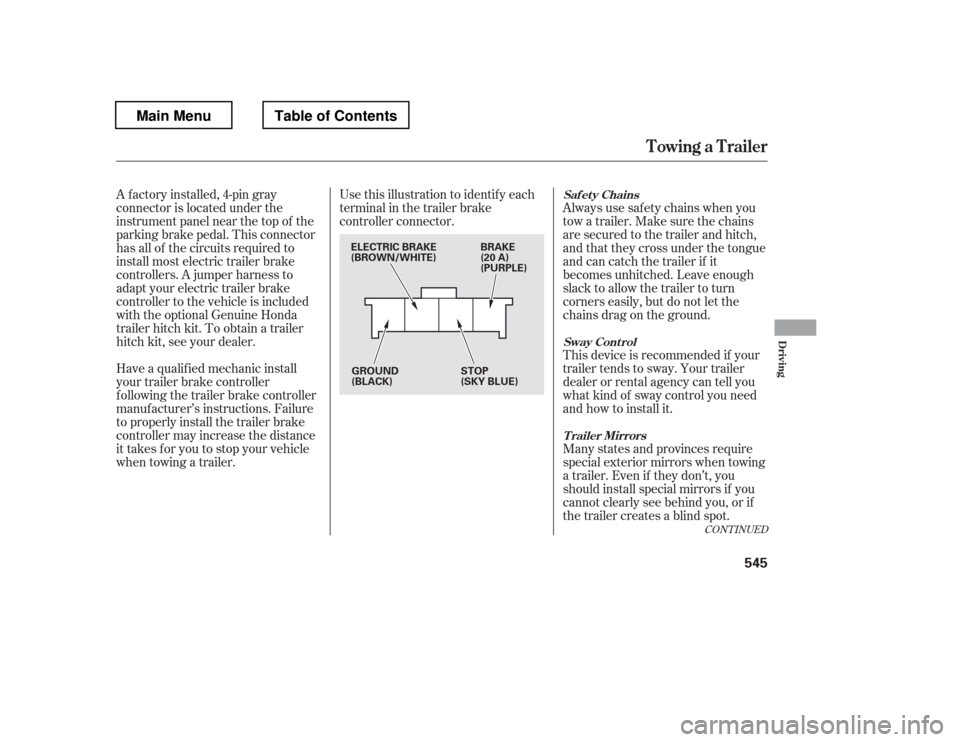
Use this illustration to identif y each
terminal in the trailer brake
controller connector.
A f actory installed, 4-pin gray
connector is located under the
instrument panel near the top of the
parking brake pedal. This connector
has all of the circuits required to
install most electric trailer brake
controllers. A jumper harness to
adapt your electric trailer brake
controller to the vehicle is included
with the optional Genuine Honda
trailer hitch kit. To obtain a trailer
hitch kit, see your dealer.
Have a qualif ied mechanic install
your trailer brake controller
f ollowing the trailer brake controller
manuf acturer
Page 556 of 681
The lights and brakes on your
vehicle and the trailer are working
properly.
Your vehicle tires and spare are in
good condition and properly
inf lated.
Towing perf ormance can be
af f ected by high altitude, high
temperature, or when climbing
steep grades. Theref ore, premium
f uel (premium unleaded gasoline
with pump octane number of 91 or
higher) is recommended when
towing more than 3,500 lbs (1,590
kg).
The trailer tires and spare are in
good condition and inf lated as
recommended by the trailer
maker.
When preparing to tow, and bef ore
driving away, be sure to check the
f ollowing:
The vehicle has been properly
serviced, and the suspension and
the cooling system are in good
operating condition.
The trailer has been properly
serviced and is in good condition.
All weights and loads are within
limits.
Thehitch,safetychains,andany
other attachments are secure.
Allitemsonandinthetrailerare
properly secured and cannot shif t
while you drive.
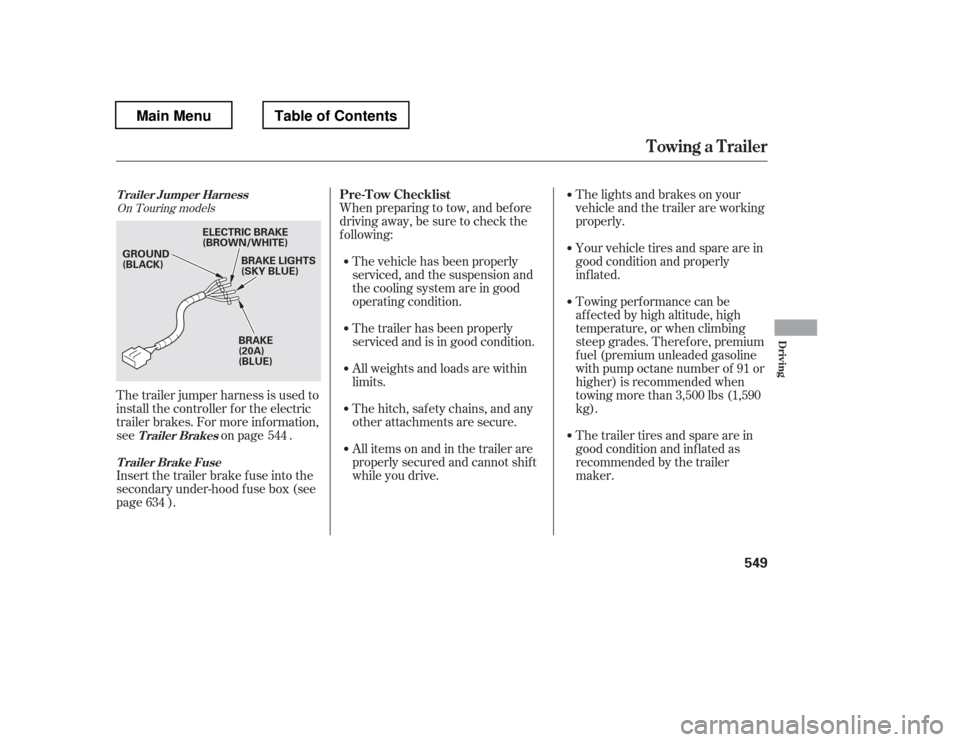
The trailer jumper harness is used to
install the controller f or the electric
trailer brakes. For more inf ormation,
see on page .
Insert the trailer brake f use into the
secondary under-hood f use box (see
page ).
544
634
On Touring models
Pre-T ow ChecklistT railer Jumper Harness
T railer Brake FuseTrailer Brakes
Towing a Trailer
Driving
549
BRAKE LIGHTS
(SKY BLUE)
GROUND
(BLACK)
BRAKE
(20A)
(BLUE)
ELECTRIC BRAKE
(BROWN/WHITE)
Main MenuTable of Contents
Page 559 of 681
To avoid loss of control or rollover,
be sure to f ollow all precautions and
recommendations.Be sure to store cargo properly
and do not exceed your cargo load
limits (see page and ).
Whenever you drive, make sure
you and your passengers always
wear seat belts.
Keep your speed low, and never
go faster than the conditions allow.
It
Page 564 of 681
This section explains why it is
important to keep your vehicle well
maintained and how to f ollow basic
maintenance saf ety precautions.
This section also includes
instructions on how to read the
Maintenance Minder messages on
the inf ormation display or multi-
inf ormation display (depending on
the model), and instructions for
simple maintenance tasks you may
want to take care of yourself.
If you have the skills and tools to
perf orm more complex maintenance
tasks on your vehicle, you may want
to purchase the service manual. See
page f or inf ormation on how to
obtain a copy, or see your dealer.U.S. Vehicles:
......................
Maintenance Saf ety . 558
.................
Maintenance Minder . 559
..............................
Fluid Locations . 574
......
Engine Compartment Covers . 575
........................
Adding Engine Oil . 576
Changing the Engine Oil and
...........................................
Filter . 577
..............................
Engine Coolant . 579
....................
Windshield Washers . 581
....
Automatic Transmission Fluid . 582
....................................
Brake Fluid . 584
....................
Power Steering Fluid . 585
....................................
Timing Belt . 585
.............................................
Lights . 586
..................
Dust and Pollen Filter . 593
................
Cleaning the Seat Belts . 593
.....................................
Floor Mats . 594
.................................
Wiper Blades . 595
...............................................
Tires . 599
...................
Checking the Battery . 607
.............................
Vehicle Storage . 608
..................................
Interior Care . 609
661
Maintenance
Maintenance, replacement, or
repair of emissions control
devices and systems may be done
by any automotive repair
establishment or individual using
parts that are ‘‘certif ied
Page 600 of 681
If your seat belts get dirty, use a sof t
brush with a mixture of mild soap
and warm water to clean them. Do
not use bleach, dye, or cleaning
solvents. Let the belts air-dry bef ore
you use the vehicle.
This f ilter removes the dust and
pollenthatisbroughtinfromthe
outside through the heating and
cooling system/climate control
system.
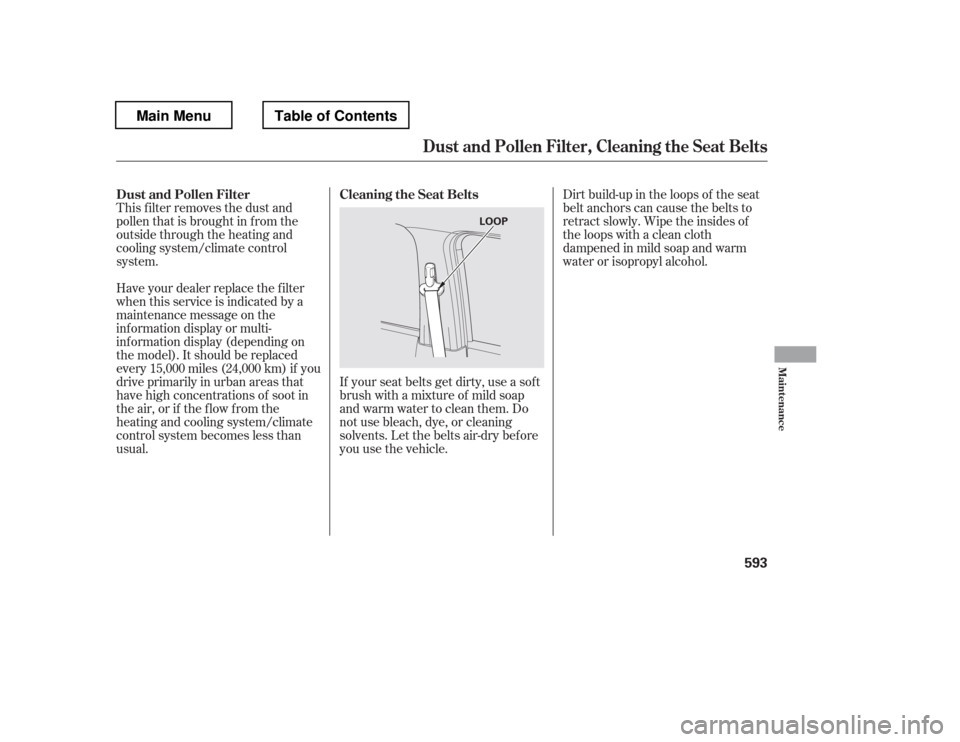
Dirt build-up in the loops of the seat
belt anchors can cause the belts to
retract slowly. Wipe the insides of
the loops with a clean cloth
dampened in mild soap and warm
water or isopropyl alcohol.
Have your dealer replace the filter
when this service is indicated by a
maintenance message on the
inf ormation display or multi-
inf ormation display (depending on
the model). It should be replaced
every 15,000 miles (24,000 km) if you
drive primarily in urban areas that
have high concentrations of soot in
the air, or if the flow from the
heating and cooling system/climate
control system becomes less than
usual. Cleaning the Seat Belts
Dust and Pollen Filter
Dust and Pollen Filter, Cleaning the Seat Belts
Maint enance
593
LOOP
Main MenuTable of Contents
Page 628 of 681
Are you using the proper starting
procedure? Ref er toon page .
Do you have f uel? Check the f uel
gauge; the warning indicator may
not be working.
There may be an electrical
problem, such as no power to the
f uel pump. Check all the f uses
(see page ).
If youfindnothingwrong,youwill
need a qualif ied technician to f ind
the problem. See on page . Although this seems like a simple
procedure, you should take several
precautions.
You cannot start your vehicle by
pushing or pulling it. Put the transmission in neutral or
Park, and set the parking brake.
Turn of f all the electrical acces-
sories: heater, A/C, climate
control, audio system, lights, etc.
Open the hood, and check the
physical condition of the battery.
In very cold weather, check the
condition of the electrolyte. If it
seems slushy or f rozen, do not try
jump starting until it thaws.
1. 2.
513
630 636
CONT INUED
Starting the
Engine
Emergency
Towing Jump Starting
To Jump Start Your Vehicle:
If the Engine Won
Page 631 of 681
If the temperature gauge stays at
the red mark, turn of f the engine.
Look f or any obvious coolant leaks,
such as a split radiator hose.
Everything is still extremely hot,
so use caution. If you f ind a leak, it
must be repaired bef ore you
continue driving (seeon page ).
If you do not f ind an obvious leak,
check the coolant level in the
radiator reserve tank. Add coolant
if the level is below the MIN mark.
If there was no coolant in the
reserve tank, you may need to add
coolant to the radiator. Let the
engine cool down until the pointer
reaches the middle of the tempera-
ture gauge, or lower, bef ore check-
ing the radiator. Using gloves or a large heavy
cloth, turn the radiator cap
counterclockwise, without pushing
down, to the f irst stop. Af ter the
pressure releases, push down on
the cap, and turn it until it comes
off.Start the engine, and set the
temperature to maximum heat
(climate control to AUTO at
‘‘
Page 637 of 681
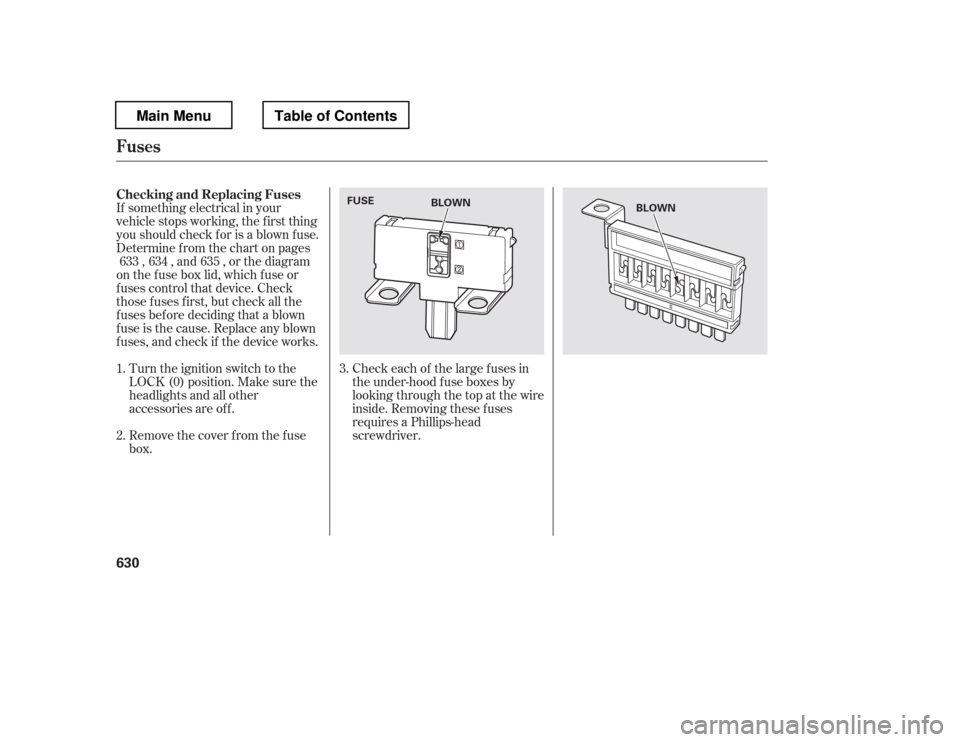
If something electrical in your
vehicle stops working, the first thing
youshouldcheckforisablownfuse.
Determine f rom the chart on pages, , and , or the diagram
on the f use box lid, which f use or
f uses control that device. Check
those fuses first, but check all the
f uses bef ore deciding that a blown
f use is the cause. Replace any blown
f uses, and check if the device works.
Remove the cover f rom the f use
box.
Turn the ignition switch to the
LOCK (0) position. Make sure the
headlights and all other
accessories are of f .
Check each of the large f uses in
the under-hood f use boxes by
looking through the top at the wire
inside. Removing these f uses
requires a Phillips-head
screwdriver.
3.
1. 2. 633 634 635
Checking and Replacing Fuses
Fuses
630
BLOWN
BLOWN
FUSE
Main MenuTable of Contents
Page 651 of 681
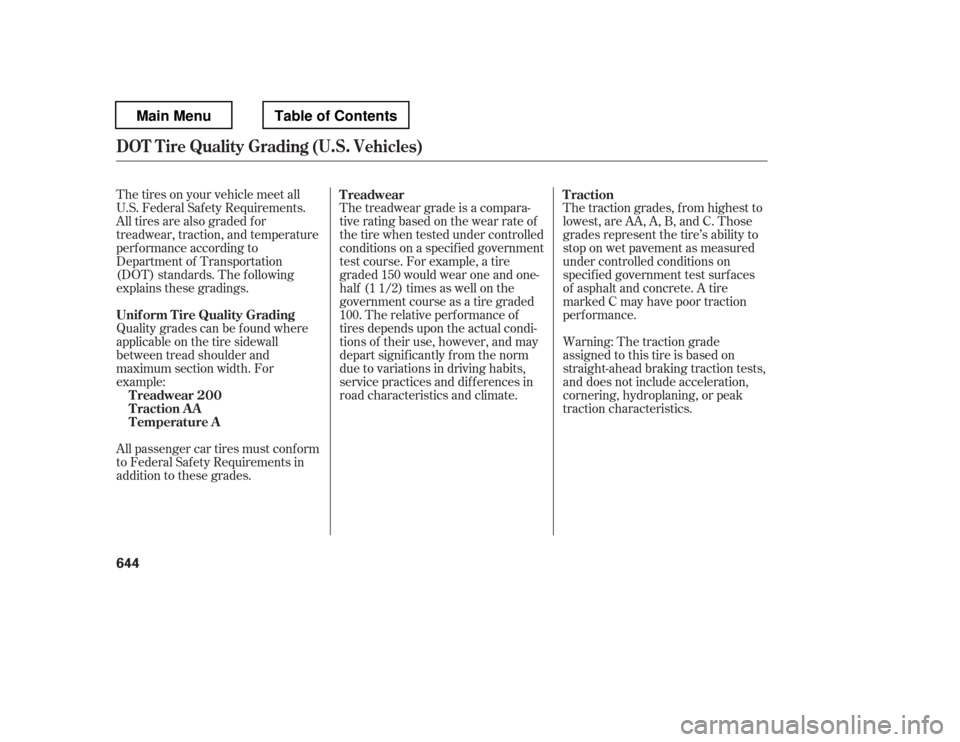
The tires on your vehicle meet all
U.S. Federal Saf ety Requirements.
All tires are also graded f or
treadwear, traction, and temperature
perf ormance according to
Department of Transportation
(DOT) standards. The f ollowing
explains these gradings.The treadwear grade is a compara-
tive rating based on the wear rate of
the tire when tested under controlled
conditions on a specif ied government
test course. For example, a tire
graded 150 would wear one and one-
half (1 1/2) times as well on the
government course as a tire graded
100. The relative perf ormance of
tires depends upon the actual condi-
tions of their use, however, and may
depart signif icantly f rom the norm
due to variations in driving habits,
service practices and dif f erences in
road characteristics and climate. The traction grades, f rom highest to
lowest, are AA, A, B, and C. Those
grades represent the tire
Page 659 of 681
The exhaust emissions controls
include f our systems: PGM-FI,
ignition timing control, exhaust gas
recirculation, and three way catalytic
converter. These f our systems work
together to control the engine