light HONDA PILOT 2013 2.G Navigation Manual
[x] Cancel search | Manufacturer: HONDA, Model Year: 2013, Model line: PILOT, Model: HONDA PILOT 2013 2.GPages: 178, PDF Size: 5.64 MB
Page 107 of 178
Navigation System107
System Setup
Edit Waypoint Search Area
When driving en route to your
destination, you can select a temporary
destination waypoint (marked with a
small flag on the map) along your route
for gas, a restaurant, or other POI.
When you resume your trip from the
waypoint, the system continues the trip
to your original destination. To use this
feature, see Waypoint on page 75 .
This SETUP item allows you to select
the distance from your highlighted route
line (on either side of your route) that
the system will search for a waypoint.
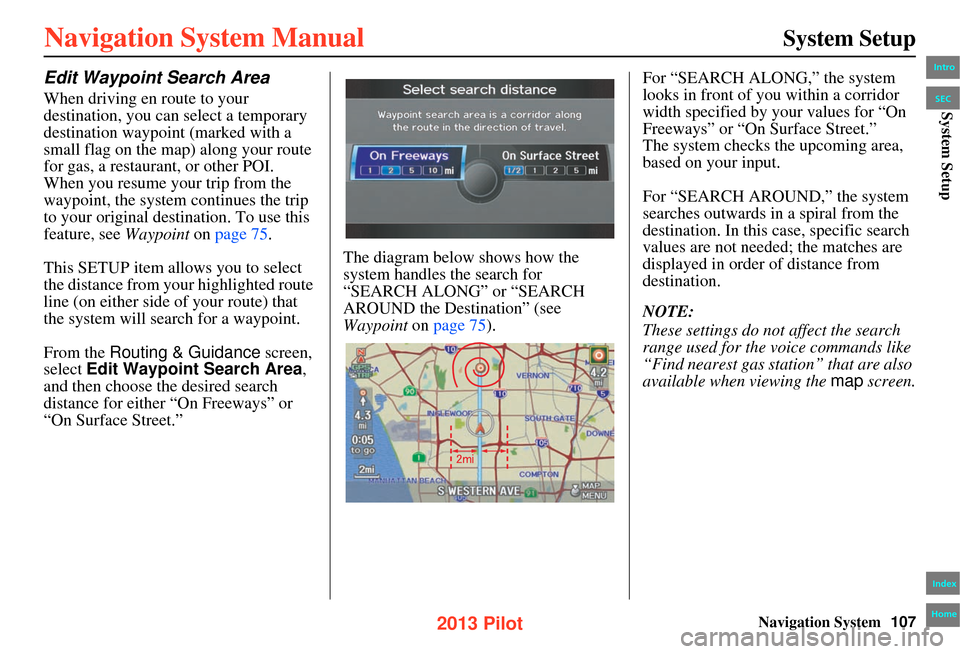
From the Routing & Guidance screen,
select Edit Waypoint Search Area ,
and then choose the desired search
distance for either “On Freeways” or
“On Surface Street.” The diagram below shows how the
system handles the search for
“SEARCH ALONG” or “SEARCH
AROUND the Destination” (see
Waypoint
on page 75). For “SEARCH ALONG,” the system
looks in front of you within a corridor
width specified by your values for “On
Freeways” or “On Surface Street.”
The system checks the upcoming area,
based on your input.
For “SEARCH AROUND,” the system
searches outwards in a spiral from the
destination. In this case, specific search
values are not needed; the matches are
displayed in order of distance from
destination.
NOTE:
These settings do not affect the search
range used for the voice commands like
“Find nearest gas station” that are also
available when viewing the map
screen.
Intro
Index
Home
SECSystem Setup
2013 Pilot
Page 112 of 178
112Navigation System
System Setup
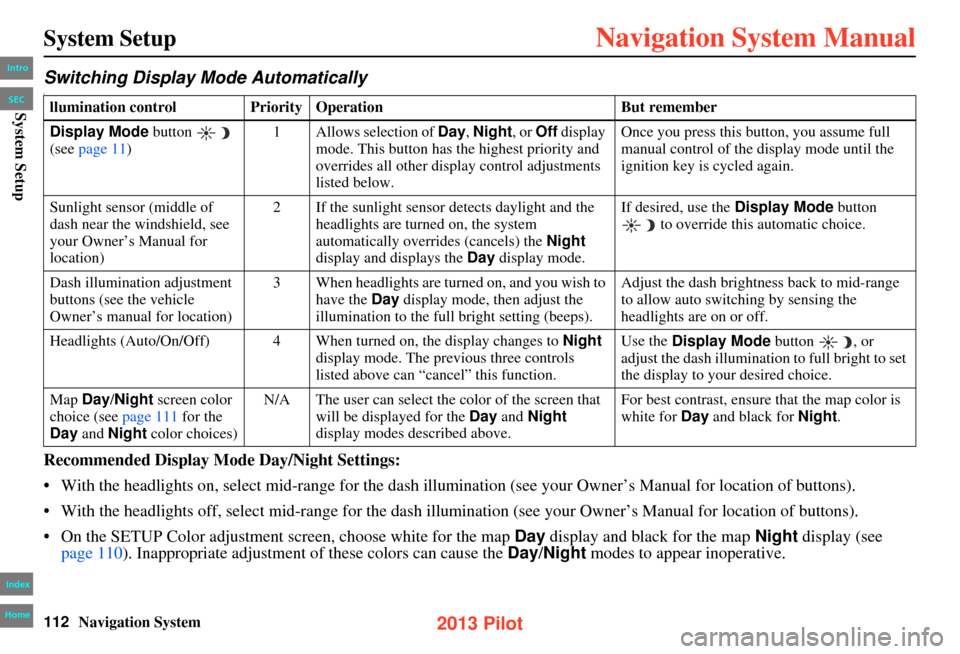
Switching Display Mode AutomaticallyI
Recommended Display Mode Day/Night Settings:
• With the headlights on, select mid-range for the dash illumination (see your Owner’s Manual for location of buttons).
• With the headlights off, select mid-range for the dash illum ination (see your Owner’s Manual for location of buttons).
• On the SETUP Color adjustment screen, choose white for the map Day display and black for the map Night display (see
page 110). Inappropriate adjustment of these colors can cause the Day/Night modes to appear inoperative.
llumination control Prior ity Operation But remember
Display Mode button
(see page 11) 1 Allows selection of Day
, Night , or Off display
mode. This button has the highest priority and
overrides all other display control adjustments
listed below. Once you press this button, you assume full
manual control of the display mode until the
ignition key is cycled again.
Sunlight sensor (middle of
dash near the windshield, see
your Owner’s Manual for
location) 2 If the sunlight sensor detects daylight and the
headlights are turned on, the system
automatically overrides (cancels) the Night
display and displays the Day display mode. If desired, use the
Display Mode button
to override this automatic choice.
Dash illumination adjustment
buttons (see the vehicle
Owner’s manual for location) 3 When headlights are turned on, and you wish to
have the Day display mode, then adjust the
illumination to the full bright setting (beeps). Adjust the dash brightness back to mid-range
to allow auto switching by sensing the
headlights are on or off.
Headlights (Auto/On/Off) 4 When turned on, the display changes to Night
display mode. The previous three controls
listed above can “cancel” this function. Use the
Display Mode button , or
adjust the dash illumination to full bright to set
the display to your desired choice.
Map Day/Night screen color
choice (see page 111 for the
Day and Night color choices) N/A The user can select the color of the screen that
will be displayed for the Day and Night
display modes described above. For best contrast, ensure that the map color is
white for Day
and black for Night.
Intro
Index
Home
SECSystem Setup
2013 Pilot
Page 114 of 178
114Navigation System
System Setup
Clock Adjustment
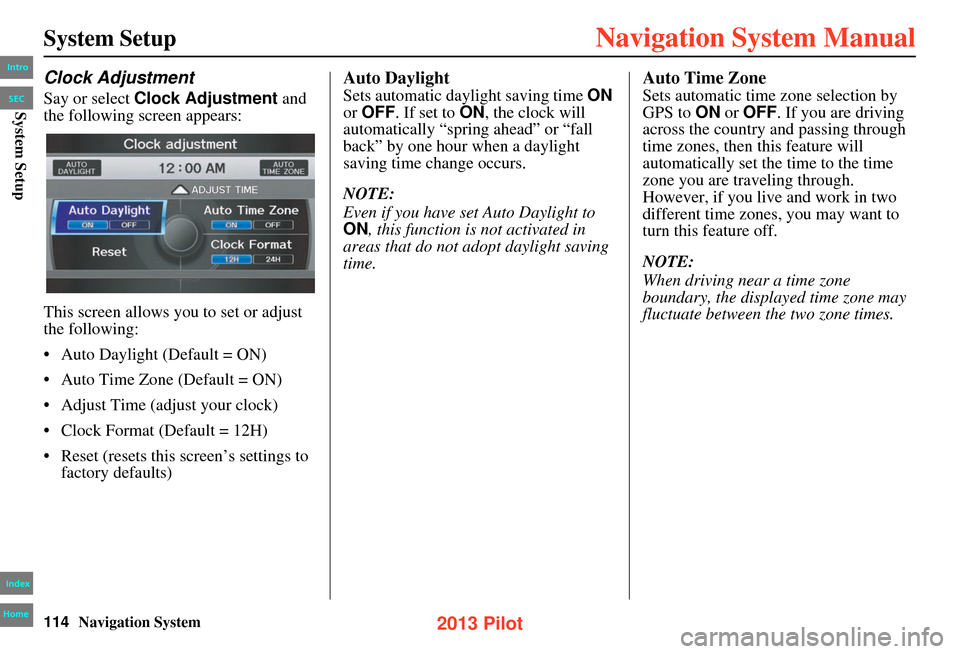
Say or select Clock Adjustment and
the following screen appears:
This screen allows you to set or adjust
the following:
• Auto Daylight (Default = ON)
• Auto Time Zone (Default = ON)
• Adjust Time (adjust your clock)
• Clock Format (Default = 12H)
• Reset (resets this screen’s settings to factory defaults)
Auto Daylight
Sets automatic daylight saving time ON
or OFF . If set to ON , the clock will
automatically “spring ahead” or “fall
back” by one hour when a daylight
saving time change occurs.
NOTE:
Even if you have set Auto Daylight to
ON , this function is not activated in
areas that do not adopt daylight saving
time.
Auto Time Zone
Sets automatic time zone selection by
GPS to ON or OFF . If you are driving
across the country and passing through
time zones, then this feature will
automatically set the time to the time
zone you are traveling through.
However, if you live and work in two
different time zones, you may want to
turn this feature off.
NOTE:
When driving near a time zone
boundary, the displayed time zone may
fluctuate between the two zone times.
Intro
Index
Home
SECSystem Setup
2013 Pilot
Page 115 of 178
Navigation System115
System Setup
Time Adjustment
Adjusts the current time in hours and
minutes. Select ADJUST TIME by
moving the Interface Dial up, and then
switch HOUR and MINUTE by moving
the Interface Dial to the left and right
and changing the value by rotating the
Interface Dial knob . Selecting OK
returns you to the previous screen.
Clock Format
Sets clock format selection 12H or 24H .
Resetting the Clock Settings
Selecting Reset clears any changes you
made to “Auto Daylight,” “Auto Time
Zone” settings, time adjustment, or
“Clock Format”. Depending on your
location, you may need to adjust these
settings.
Clock Type
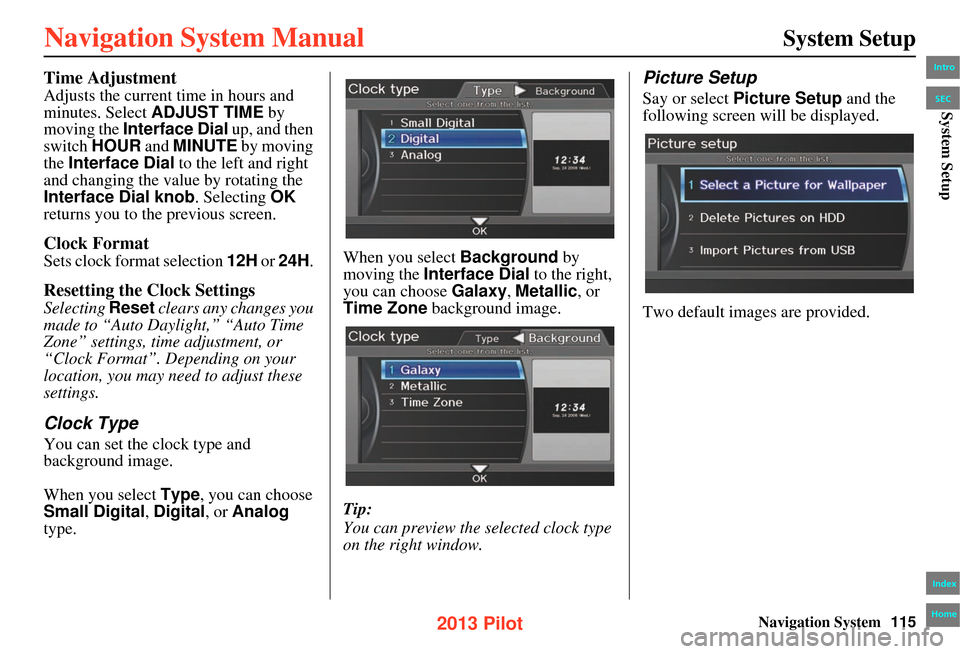
You can set the clock type and
background image.
When you select Type, you can choose
Small Digital, Digital , or Analog
type. When you select
Background by
moving the Interface Dial to the right,
you can choose Galaxy, Metallic , or
Time Zone background image.
Tip:
You can preview the selected clock type
on the right window.
Picture Setup
Say or select Picture Setup and the
following screen w ill be displayed.
Two default images are provided.
Intro
Index
Home
SECSystem Setup
2013 Pilot
Page 116 of 178
116Navigation System
System Setup
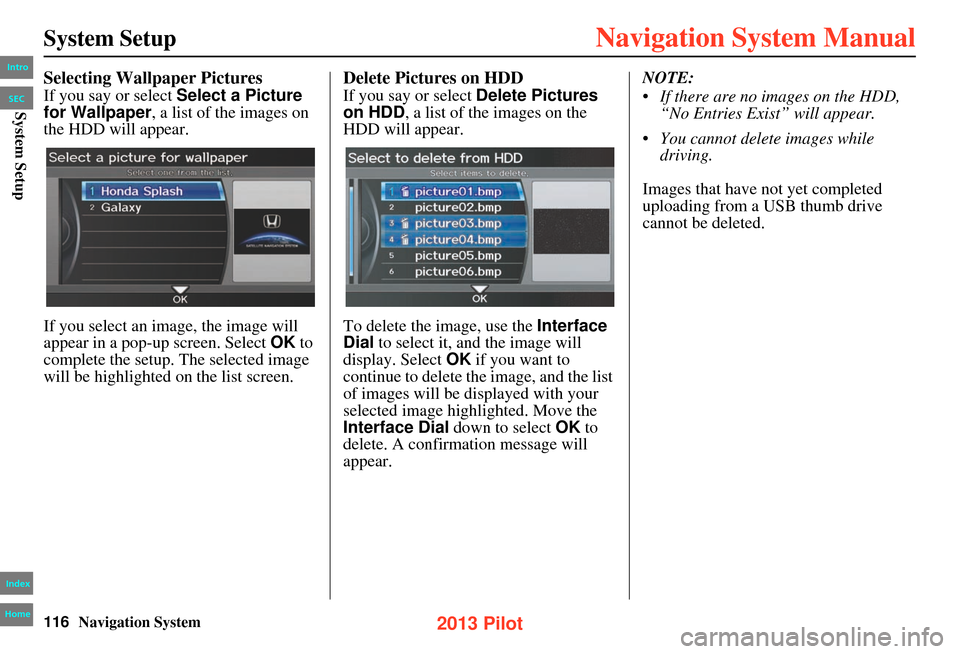
Selecting Wallpaper Pictures
If you say or select Select a Picture
for Wallpaper , a list of the images on
the HDD will appear.
If you select an image, the image will
appear in a pop-up screen. Select OK to
complete the setup. The selected image
will be highlighted on the list screen.
Delete Pictures on HDD
If you say or select Delete Pictures
on HDD , a list of the images on the
HDD will appear.
To delete the image, use the Interface
Dial to select it, and the image will
display. Select OK if you want to
continue to delete the image, and the list
of images will be displayed with your
selected image highlighted. Move the
Interface Dial down to select OK to
delete. A confirmation message will
appear. NOTE:
• If there are no images on the HDD,
“No Entries Exist” will appear.
• You cannot delete images while driving.
Images that have not yet completed
uploading from a USB thumb drive
cannot be deleted.
Intro
Index
Home
SECSystem Setup
2013 Pilot
Page 118 of 178
118Navigation System
System Setup
• Basic Settings: Units, Voice Recognition Tutor
• Routing & Guidance: Rerouting, Unverified Area Rerouting, Edit
Waypoint Search Area, Guidance
Mode, Street Name Guidance,
Guidance Screen Interruption
• Clock Adjustment: Auto Daylight, Auto Time Zone, Time
• Vehicle: Off-road Tracking
• Color: Map Color, Menu Color
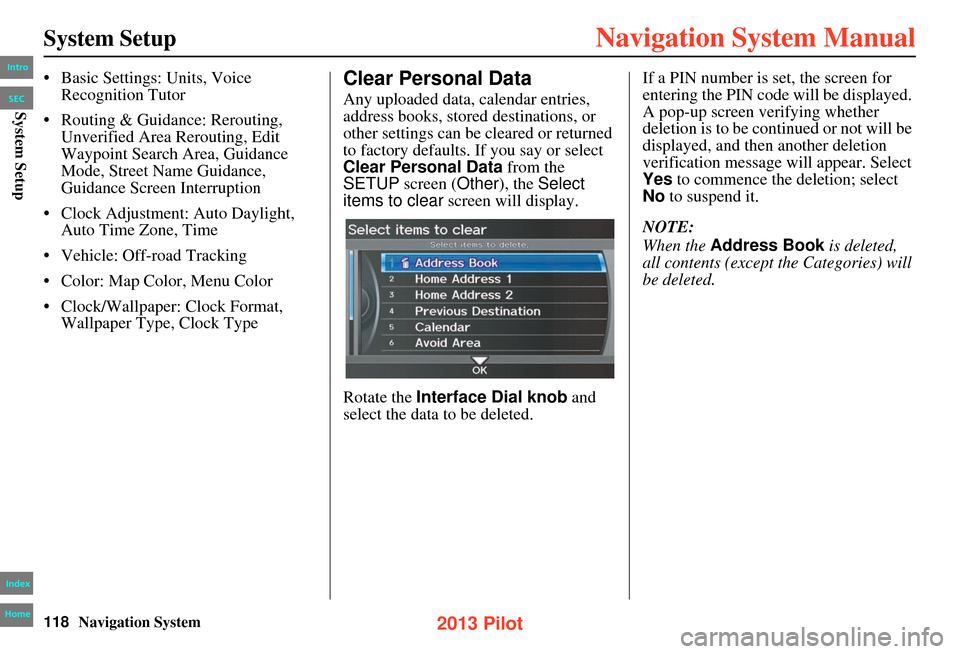
• Clock/Wallpaper: Clock Format, Wallpaper Type, Clock TypeClear Personal Data
Any uploaded data, calendar entries,
address books, stored destinations, or
other settings can be cleared or returned
to factory defaults. If you say or select
Clear Personal Data from the
SETUP screen (Other ), the Select
items to clear screen will display.
Rotate the Interface Dial knob and
select the data to be deleted. If a PIN number is set, the screen for
entering the PIN code will be displayed.
A pop-up screen verifying whether
deletion is to be continued or not will be
displayed, and then another deletion
verification message will appear. Select
Yes to commence the deletion; select
No
to suspend it.
NOTE:
When the Address Book is deleted,
all contents (except the Categories) will
be deleted.
Intro
Index
Home
SECSystem Setup
2013 Pilot
Page 120 of 178
120Navigation System
System Setup
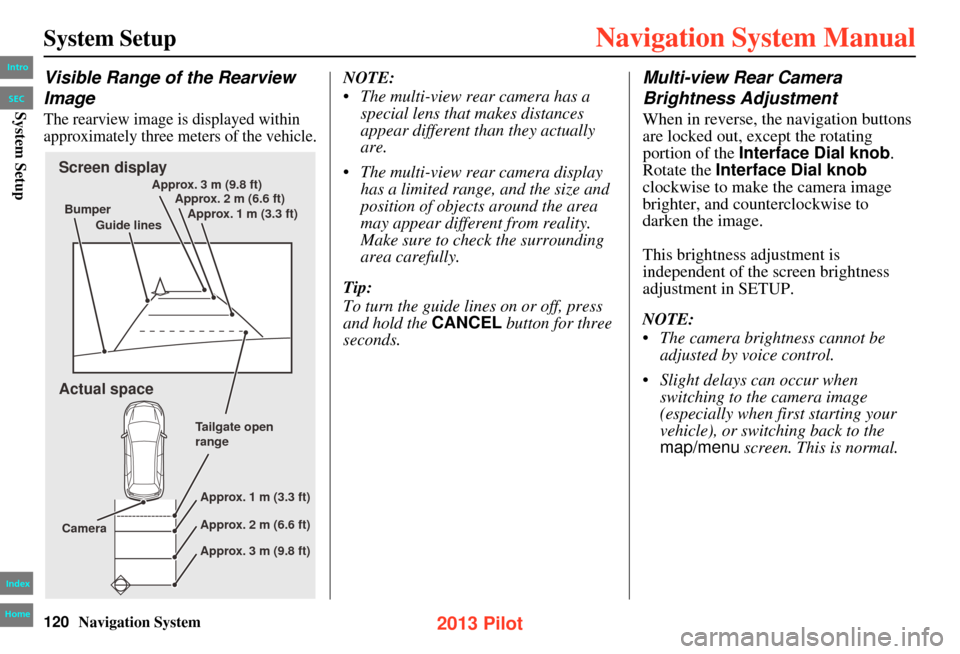
Visible Range of the Rearview
Image
The rearview image is displayed within
approximately three meters of the vehicle.
NOTE:
• The multi-view rear camera has a special lens that makes distances
appear different than they actually
are.
• The multi-view rear camera display has a limited range, and the size and
position of objects around the area
may appear differe nt from reality.
Make sure to check the surrounding
area carefully.
Tip:
To turn the guide lines on or off, press
and hold the CANCEL button for three
seconds.Multi-view Rear Camera
Brightness Adjustment
When in reverse, the navigation buttons
are locked out, except the rotating
portion of the Interface Dial knob.
Rotate the Interface Dial knob
clockwise to make the camera image
brighter, and counterclockwise to
darken the image.
This brightness adjustment is
independent of the screen brightness
adjustment in SETUP.
NOTE:
• The camera brightness cannot be adjusted by voice control.
• Slight delays can occur when switching to the camera image
(especially when first starting your
vehicle), or switching back to the
map/menu screen. This is normal.
Screen display
Actual space
Bumper
Guide lines Approx. 3 m (9.8 ft)
Approx. 2 m (6.6 ft)
Approx. 1 m (3.3 ft)
Tailgate open
rangeApprox. 1 m (3.3 ft)
Approx. 2 m (6.6 ft)
Approx. 3 m (9.8 ft)
Camera
Intro
Index
Home
SECSystem Setup
2013 Pilot
Page 148 of 178
148Navigation System
Frequently Asked Questions
Guidance, Routing
ProblemSolution
The navigation system does not route me the same way I
would go, or the way some other mapping program displays.
Why is this? The navigation system attempts to generate the optimum route. See
Changing the Route Preference
on page 53.
Why is the street I’m on not shown on the map? It has been
here for more than a year. The mapping database is constantly undergoing revision. See page 128 for
ways to obtain the latest detailed coverage information.
The vehicle position icon is not following the road and the
“GPS icon” text in the upper left hand corner of the screen is
white or missing. • The GPS antenna (located in the dashboard) may be blocked by personal
items. For best reception, remove items from the dashboard, such as radar
detectors, cell phones, or loose articles.
• Metallic tinting or other aftermarket devices can interfere with the GPS
reception. Please see your dealer. Also see System Limitations on
page 123.
I entered a destination, but the blue highlighted route and
voice guidance stopped, or turned into a blue/pink dashed line
before I got to my destination. Why is this? Your route has entered an
unverified area. See Unverified Area Routing on
page 101.
The map rotates while I make turns. How can I stop this? Select the North-up map orientation by voice, or by selecting North-up
from the Map menu. See Map Screen on page 54.
Sometimes, I cannot select between the North-up and
Heading-up map orientations. Why is this? The Heading-up map orientation can only be shown in the lower scales
Map Scale on page 66.
While driving to my destination, the “time to go” display
sometimes increases, even th ough I am getting closer. The “Time to go” is based on actual road speeds. However if your speed
slows down when you encounter slower traffic, the system updates the
“Time to go” based on your actual speed to give you a better estimate of
arrival time.
The vehicle position icon on th e map “lags” a short distance
behind, especially when I arrive at an intersection. Is there
anything wrong? No. When at an in
tersection, the system is un aware of the width of the
intersecting road. Large differences in vehicle position can indicate a
temporary loss of the GPS signal. See GPS Reception Issues on page 123.
Intro
Index
Home
SECFrequently Asked Questions
(1/20 - 1 mile scales). See
2013 Pilot
Page 151 of 178
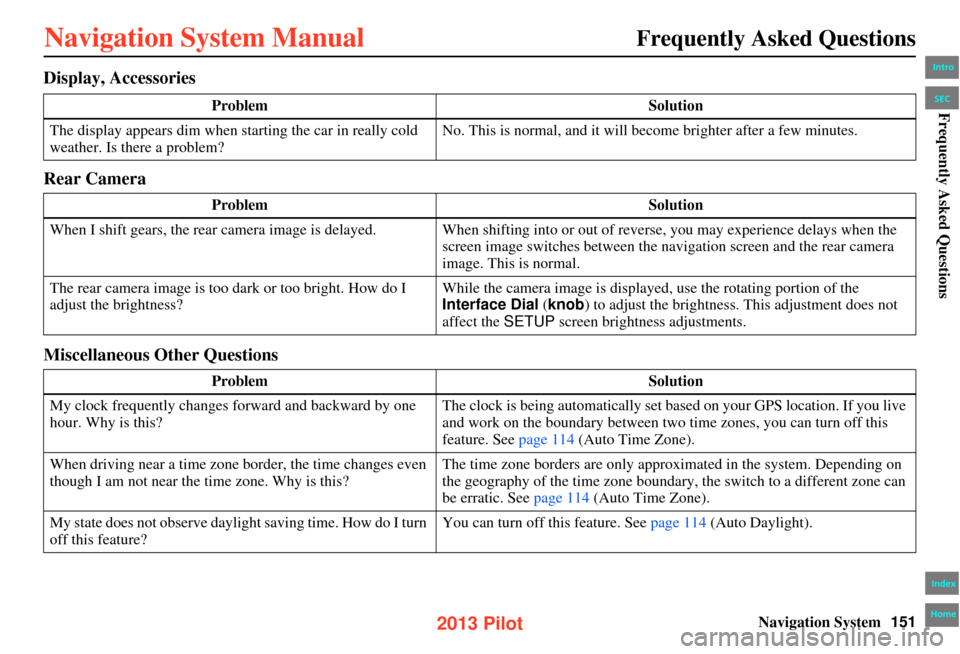
Navigation System151
Frequently Asked Questions
Display, Accessories
Rear Camera
Miscellaneous Other Questions
Problem Solution
The display appears dim when st arting the car in really cold
weather. Is there a problem? No. This is normal, and it will become brighter after a few minutes.
Problem Solution
When I shift gears, the rear camera image is delayed. When shifti ng into or out of reverse, you may experience delays when the
screen image switches between the na vigation screen and the rear camera
image. This is normal.
The rear camera image is too da rk or too bright. How do I
adjust the brightness? While the camera image is displayed, use the rotating portion of the
Interface Dial
(knob) to adjust the brightness. This adjustment does not
affect the SETUP screen brightness adjustments.
Problem Solution
My clock frequently changes forward and backward by one
hour. Why is this? The clock is being automatically set based on your GPS location. If you live
and work on the boundary between two time zones, you can turn off this
feature. See page 114 (Auto Time Zone).
When driving near a time zone border, the time changes even
though I am not near the time zone. Why is this? The time zone borders are only approximated in the system. Depending on
the geography of the time zone boundary, the switch to a different zone can
be erratic. See page 114 (Auto Time Zone).
My state does not observe daylight saving time. How do I turn
off this feature? You can turn off this feature. See page 114
(Auto Daylight).
Intro
Index
Home
SECFrequently Asked Questions
2013 Pilot
Page 152 of 178
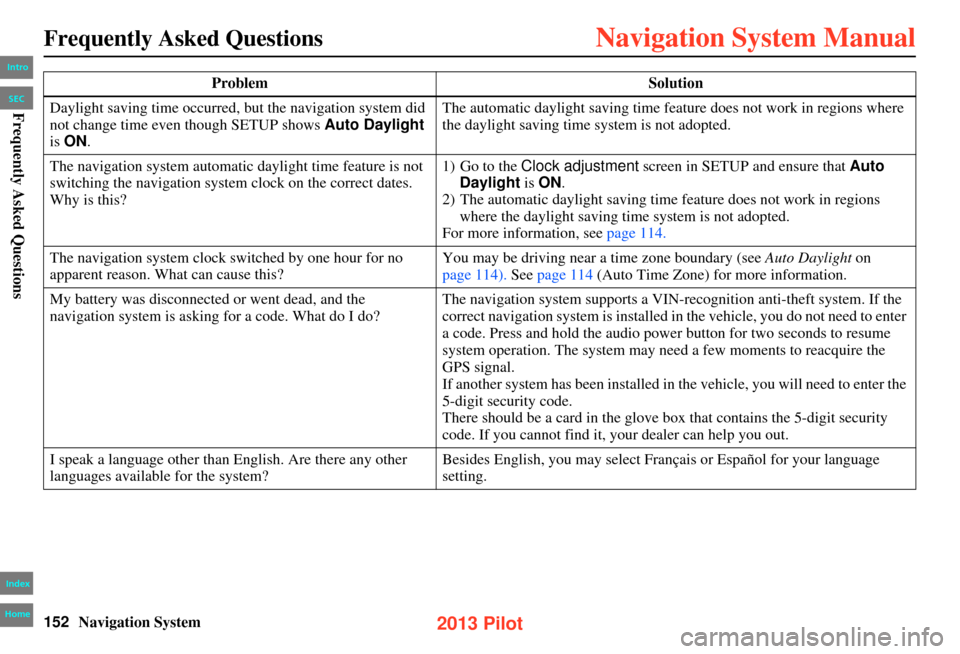
152Navigation System
Frequently Asked Questions
Daylight saving time occurred, but the navigation system did
not change time even though SETUP shows Auto Daylight
is ON . The automatic daylight saving time feature does not work in regions where
the daylight saving time system is not adopted.
The navigation system automatic daylight time feature is not
switching the navigation system clock on the correct dates.
Why is this? 1) Go to the Clock adjustment
screen in SETUP and ensure that Auto
Daylight is ON .
2) The automatic daylight saving time feature does not work in regions
where the daylight saving time system is not adopted.
For more information, see page 114.
The navigation system clock switched by one hour for no
apparent reason. What can cause this? You may be driving near a time zone boundary (see
Auto Daylight on
page 114). See page 114 (Auto Time Zone) for more information.
My battery was disconnected or went dead, and the
navigation system is asking for a code. What do I do? The navigation system supports a VIN-recognition anti-theft system. If the
correct navigation system is installed in the vehicle, you do not need to enter
a code. Press and hold the audio power button for two seconds to resume
system operation. The system may n
eed a few moments to reacquire the
GPS signal.
If another system has been installed in the vehicle, you will need to enter the
5-digit security code.
There should be a card in the glove bo x that contains the 5-digit security
code. If you cannot find it, your dealer can help you out.
I speak a language other than English. Are there any other
languages available for the system? Besides English, you may select Français or Español for your language
setting.
Problem
Solution
Intro
Index
Home
SECFrequently Asked Questions
2013 Pilot