clock HONDA PILOT 2013 2.G Owners Manual
[x] Cancel search | Manufacturer: HONDA, Model Year: 2013, Model line: PILOT, Model: HONDA PILOT 2013 2.GPages: 488, PDF Size: 10.18 MB
Page 1 of 488
Contents
This owner’s manual should be considered a permanent part of the
vehicle and should remain with the vehicle when it is sold.
This owner’s manual covers all models of your vehicle. You may find
descriptions of equipment and features that are not on your
particular model.
Images throughout this owner’s manual (including the front cover)
represent features and equipment that are available on some, but
not all, models. Your particular model may not have some of these
features.
This owner’s manual is for vehicles sold in the United States and
Canada.
The information and specifications included in this publication were
in effect at the time of approval for printing. Honda Motor Co., Ltd.
reserves the right, however, to discontinue or change specifications
or design at any time without notice and without incurring any
obligation.
2Safe Driving P. 23
For Safe Driving P. 24 Seat Belts P. 29Airbags P. 37
2Instrument Panel P. 67
Indicators P. 68Gauges and Displays P. 80
2Controls P. 97
Setting the Clock P. 98 Locking and Unlocking the Doors P. 99
Opening and Closing the Moonroof* P. 123
Adjusting the Seats P. 137
2Features P. 171
Audio System P. 172Audio System Basic Operation P. 216
General Information on the Audio System P. 272
Compass* P. 320
2Driving P. 323
Before Driving P. 324 Towing a Trailer P. 329
Parking Your Vehicle P. 364 Rearview Camera* P. 369
Accessories and Modifications P. 375
2Maintenance P. 377
Before Performing Maintenance P.378 Maintenance Minder™ P. 381
Checking and Maintaining Wiper Blades P. 410
Remote Control and Wireless Headphone Care* P. 425
2Handling the Unexpected P. 433
Tools P. 434If a Tire Goes Flat P. 435
Overheating P. 448Indicator, Coming On/Blinking P. 450
2Information P. 463
Specifications P. 464Identification Numbers P. 466Emissions Testing P. 470Warranty Coverages P. 472
Gracenote® End User License Agreement P. 476
Page 10 of 488
9
Quick Reference Guide
Controls (P97)
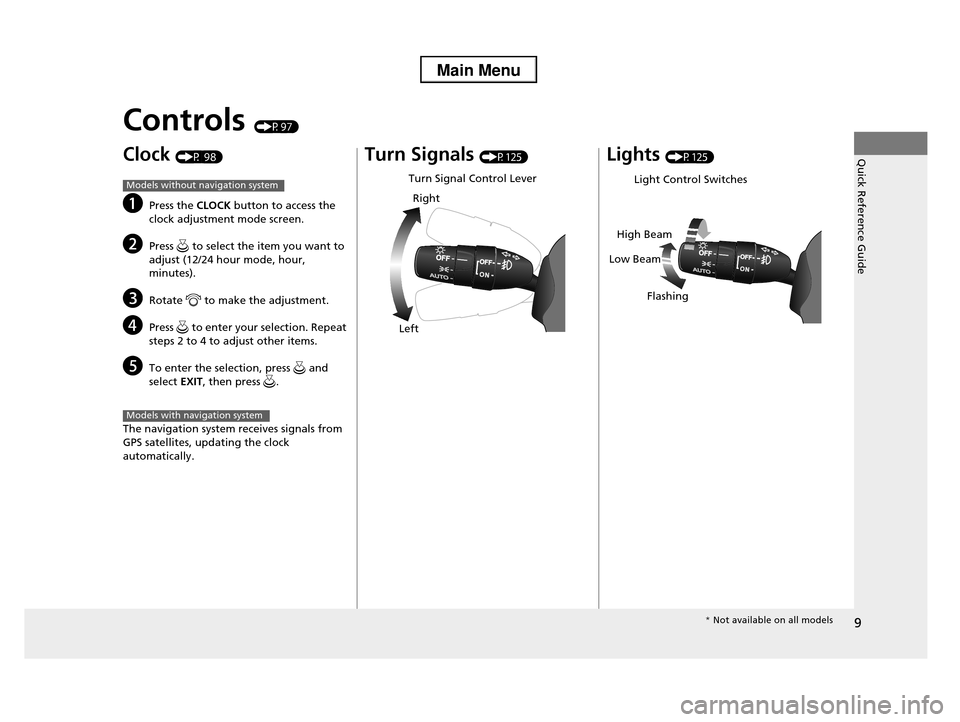
Clock (P 98)
aPress the CLOCK button to access the
clock adjustment mode screen.
bPress to select the item you want to
adjust (12/24 hour mode, hour, minutes).
cRotate to make the adjustment.
dPress to enter your selection. Repeat
steps 2 to 4 to adjust other items.
eTo enter the selection, press and
select EXIT, then press .
The navigation system receives signals from
GPS satellites, updating the clock automatically.
Models without navigation system
Models with navigation system
Turn Signals (P125)
Turn Signal Control Lever
Right
Left
Lights (P125)
Light Control Switches
Low Beam
High Beam
Flashing
* Not available on all models
Page 98 of 488
97
Controls
This chapter explains how to operate the various controls necessary for driving.
Setting the Clock................................ 98Locking and Unlocking the DoorsKey Types and Functions .................... 99 Locking/Unlocking the Doors from the Outside .......................................... 101Locking/Unlocking the Doors from the Inside ............................................. 103Childproof Door Locks ..................... 104Auto Door Locking/Unlocking .......... 105Opening and Closing the Tailgate... 110Security System................................ 118Immobilizer System .......................... 118Security System Alarm*.................... 118Opening and Closing the Windows..... 120
Opening and Closing the Moonroof*...... 123Operating the Switches Around the Steering WheelIgnition Switch ................................. 124 Turn Signals ..................................... 125 Light Switches.................................. 125Fog Lights*...................................... 127Daytime Running Lights ................... 127Wipers and Washers ........................ 128Brightness Control ........................... 130 Rear Defogger/Heated Door Mirror* Button ........................................... 131Driving Position Memory System*.... 132Adjusting the Steering Wheel........... 134
Adjusting the Mirrors....................... 135Interior Rearview Mirror ................... 135 Power Door Mirrors ......................... 136Adjusting the Seats.......................... 137Adjusting the Seat Positions ............. 137Interior Lights/Interior Convenience Items................................................ 150Interior Lights .................................. 150Interior Convenience Items .............. 152Climate Control System................... 165Using Automatic Climate Control .... 165Automatic Climate Control Sensors ...... 170
* Not available on all models
Page 99 of 488
98
Controls
Setting the Clock
Clock
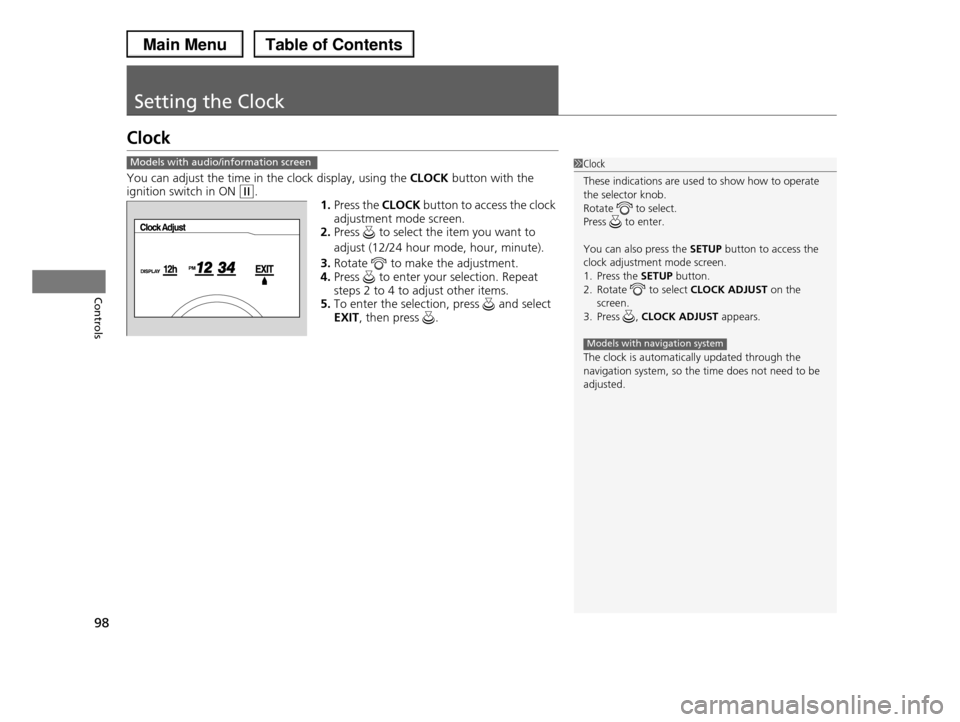
You can adjust the time in the clock display, using the CLOCK button with the ignition switch in ON (w.
1.Press the CLOCK button to access the clock
adjustment mode screen.2.Press to select the item you want to
adjust (12/24 hour mode, hour, minute).
3.Rotate to make the adjustment.4.Press to enter your selection. Repeat
steps 2 to 4 to adjust other items.
5.To enter the selection, press and select EXIT, then press .
Models with audio/information screen1Clock
These indications are used to show how to operate
the selector knob.
Rotate to select. Press to enter.
You can also press the SETUP button to access the clock adjustment mode screen.
1. Press the SETUP button.
2. Rotate to select CLOCK ADJUST on the screen.
3. Press , CLOCK ADJUST appears.
The clock is automatically updated through the
navigation system, so the time does not need to be adjusted.
Models with navigation system
Page 159 of 488
uuInterior Lights/Interior Convenience ItemsuInterior Convenience Items
158
Controls
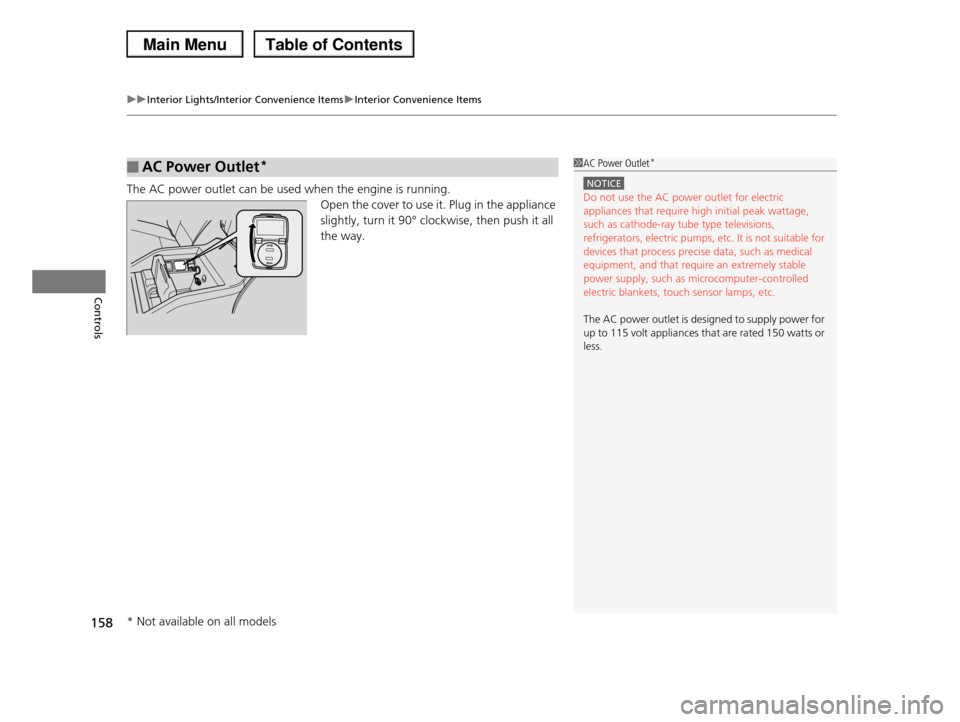
The AC power outlet can be used when the engine is running.
Open the cover to use it. Plug in the appliance
slightly, turn it 90° clockwise, then push it all
the way.
■AC Power Outlet*1AC Power Outlet*
NOTICE
Do not use the AC power outlet for electric appliances that require high initial peak wattage,
such as cathode-ray tube type televisions,
refrigerators, electric pumps, etc. It is not suitable for devices that process precise data, such as medical
equipment, and that require an extremely stable
power supply, such as microcomputer-controlled electric blankets, touch sensor lamps, etc.
The AC power outlet is designed to supply power for up to 115 volt appliances that are rated 150 watts or
less.
* Not available on all models
Page 178 of 488
Continued177
uuAudio System Basic OperationuAudio/Information Screen*
Features
Shows the current audio information.
2Audio System Basic Operation P. 175
Shows the instant fuel economy, average fuel economy, distance (trip meter),
average speed, elapsed time, and range.
2Instant Fuel Economy P. 82
2Trip Meter P. 82
2Range P. 82
■Average speed
Shows the average speed in mph (U.S.) or km/h (Canada).
■Elapsed time
Shows the time during one drive cycle.
Shows a clock screen or an image you import.
2Wallpaper Setup P. 179
Minimizes the display by only showing the compass, audio status, and clock on the
upper part of the display.
■Audio Display
■Trip Computer
■Wallpaper
■Minimum Display
1Trip Computer
You can reset the trip computer.
2Trip Computer P. 88
Page 181 of 488
180
uuAudio System Basic OperationuAudio/Information Screen*
Features
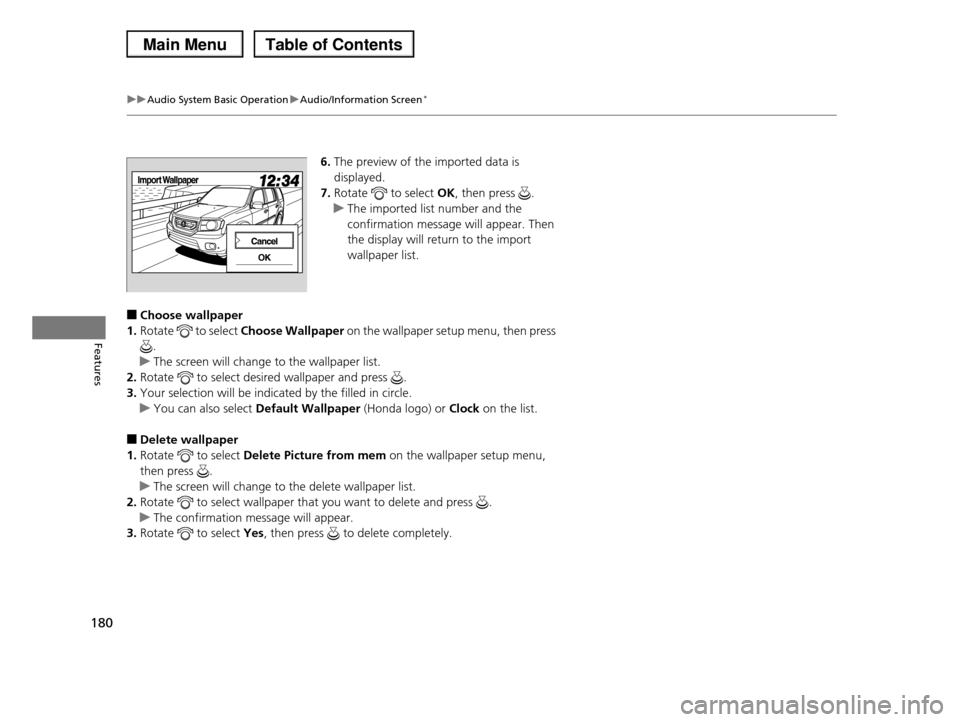
6.The preview of the imported data is
displayed.
7.Rotate to select OK, then press .
uThe imported list number and the
confirmation message will appear. Then
the display will return to the import
wallpaper list.
■Choose wallpaper
1.Rotate to select Choose Wallpaper on the wallpaper setup menu, then press
.
uThe screen will change to the wallpaper list.
2.Rotate to select desired wallpaper and press .
3.Your selection will be indicated by the filled in circle.
uYou can also select Default Wallpaper (Honda logo) or Clock on the list.
■Delete wallpaper
1.Rotate to select Delete Picture from mem on the wallpaper setup menu,
then press .
uThe screen will change to the delete wallpaper list.
2.Rotate to select wallpaper that you want to delete and press .
uThe confirmation message will appear.
3.Rotate to select Yes, then press to delete completely.
Page 399 of 488
uuMaintenance Under the HooduEngine Coolant
398
Maintenance
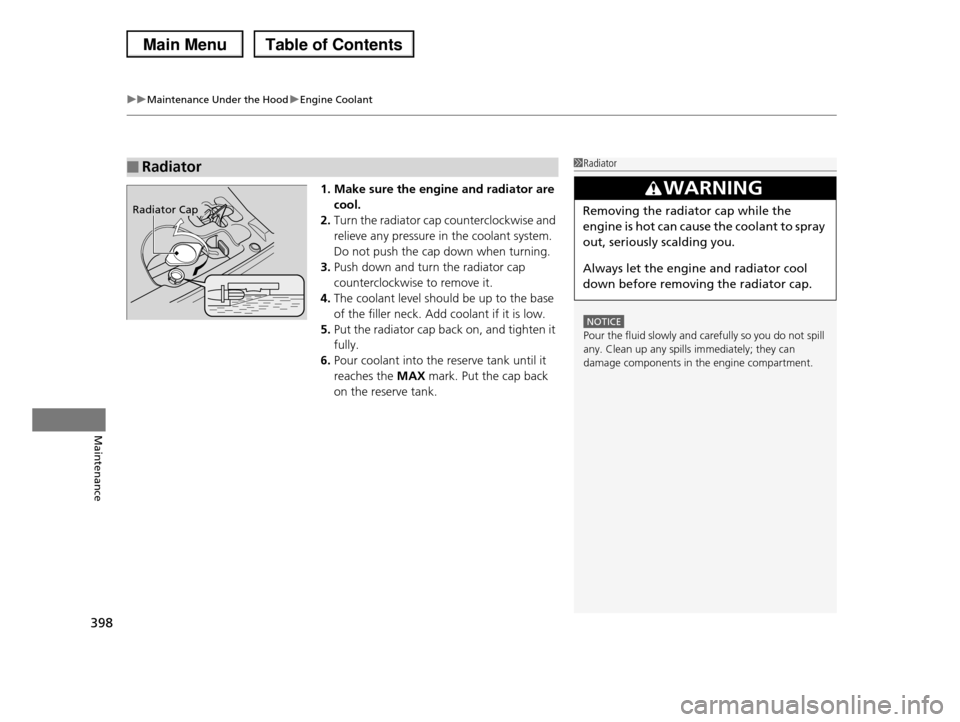
1. Make sure the engine and radiator are
cool.
2.Turn the radiator cap counterclockwise and
relieve any pressure in the coolant system.
Do not push the cap down when turning.
3.Push down and turn the radiator cap
counterclockwise to remove it.
4.The coolant level should be up to the base
of the filler neck. Add coolant if it is low.
5.Put the radiator cap back on, and tighten it
fully.
6.Pour coolant into the reserve tank until it
reaches the MAX mark. Put the cap back
on the reserve tank.
■Radiator1Radiator
NOTICE
Pour the fluid slowly and carefully so you do not spill
any. Clean up any spills immediately; they can damage components in the engine compartment.
3WARNING
Removing the radiator cap while the
engine is hot can cause the coolant to spray
out, seriously scalding you.
Always let the engine and radiator cool
down before removing the radiator cap.
Radiator Cap
Page 424 of 488
423
Maintenance
Battery
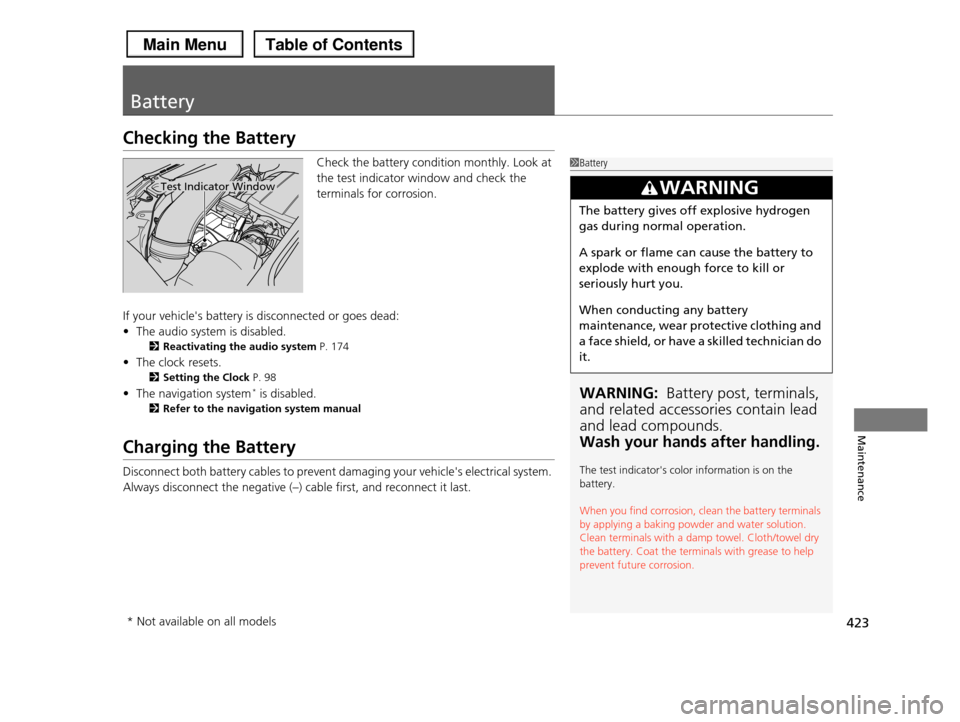
Checking the Battery
Check the battery condition monthly. Look at
the test indicator window and check the
terminals for corrosion.
If your vehicle's battery is disconnected or goes dead:
•The audio system is disabled.
2Reactivating the audio system P. 174
•The clock resets.
2Setting the Clock P. 98
•The navigation system* is disabled.
2Refer to the navigation system manual
Charging the Battery
Disconnect both battery cables to prevent damaging your vehicle's electrical system.
Always disconnect the negative (–) cable first, and reconnect it last.
1Battery
WARNING: Battery post, terminals,
and related accessories contain lead
and lead compounds.
Wash your hands after handling.
The test indicator's color information is on the battery.
When you find corrosion, clean the battery terminals by applying a baking powder and water solution.
Clean terminals with a damp towel. Cloth/towel dry
the battery. Coat the terminals with grease to help prevent future corrosion.
3WARNING
The battery gives off explosive hydrogen
gas during normal operation.
A spark or flame can cause the battery to
explode with enough force to kill or
seriously hurt you.
When conducting any battery
maintenance, wear protective clothing and
a face shield, or have a skilled technician do
it.
Test Indicator Window
* Not available on all models
Page 480 of 488
479
Index
Foot Brake .............................................. 361
Indicator ........................................... 68, 452
Parking Brake.......................................... 360
Brightness Control (Instrument Panel)... 130
Bulb Replacement.................................... 402
Brake Light, Taillight, Back-Up Light, Rear Turn
Signal Light and Rear Side Marker Light 406
Fog Lights ............................................... 403
Front Turn Signal/Parking Light and Front Side
Marker Light ......................................... 405
Headlights .............................................. 402
High-Mount Brake Light.......................... 409
Rear License Plate Light ........................... 408
Side Turn Signal/Emergency Indicator Light ....
404
Bulb Specifications................................... 464
C
Carbon Monoxide Gas............................... 65
Cargo Hook.............................................. 160
Cargo Net................................................. 159
Carrying Cargo................................. 325, 327
CD Library................................................. 197
CD Player.......................................... 193, 226
Certification Label................................... 466
Changing Bulbs........................................ 402
Charging System Indicator................ 69, 450
Child Safety................................................ 52
Childproof Door Locks ............................ 104
Child Seat................................................... 52
Booster Seats ............................................. 64
Child Seat for Infants ................................. 54
Child Seat for Small Children ..................... 55
Installing a Child Seat with a Lap/Shoulder Seat
Belt.......................................................... 60
Larger Children .......................................... 63
Rear-facing Child Seat ............................... 54
Selecting a Child Seat ................................ 56
Childproof Door Locks............................. 104
Cleaning the Exterior............................... 430
Cleaning the Interior................................ 428
Climate Control System............................ 165
Changing the Mode ................................ 165
Defrosting the Windshield and Windows . 166
Dust and Pollen Filter ............................... 427
Recirculation/Fresh Air Mode ................... 165
Sensors .................................................... 170
Synchronized Mode ................................. 167
Using Automatic Climate Control ............ 165
Clock............................................................ 98
Coat Hook................................................. 159
Compact Spare Tire.......................... 435, 465
Console Compartment............................. 152
Controls....................................................... 97
Coolant (Engine)....................................... 397
Adding to the Radiator ............................ 398
Adding to the Reserve Tank ..................... 397
Overheating ............................................ 448
Creeping (Automatic Transmission)........ 345
Cruise Control........................................... 348
Indicator .................................................... 77
Cup Holders.............................................. 154
Customer Service Information................. 475
Customized Features.................................. 90
D
Daytime Running Lights.......................... 127
Dead Battery............................................. 445
Defrosting the Windshield and Windows 166
Detachable Anchor.................................... 34
Devices that Emit Radio Waves............... 467
Dimming
Headlights ............................................... 125
Rearview Mirror....................................... 135
Dipstick (Engine Oil)................................. 393
Directional Signals (Turn Signal)............. 125
Display/Information Button....................... 85
Door Mirrors............................................. 136
Doors........................................................... 99
Auto Door Locking .................................. 105
Auto Door Unlocking .............................. 105
Door Open Indicator............................ 28, 72
Keys .......................................................... 99
Locking/Unlocking the Doors from the Inside..
103
Locking/Unlocking the Doors from the Outside
101
Lockout Prevention System ...................... 102
DOT Tire Quality Grading........................ 417
Driver’s Seat Lumbar Support.................. 137
Driving...................................................... 323