door lock HONDA PILOT 2013 2.G Owners Manual
[x] Cancel search | Manufacturer: HONDA, Model Year: 2013, Model line: PILOT, Model: HONDA PILOT 2013 2.GPages: 488, PDF Size: 10.18 MB
Page 1 of 488
Contents
This owner’s manual should be considered a permanent part of the
vehicle and should remain with the vehicle when it is sold.
This owner’s manual covers all models of your vehicle. You may find
descriptions of equipment and features that are not on your
particular model.
Images throughout this owner’s manual (including the front cover)
represent features and equipment that are available on some, but
not all, models. Your particular model may not have some of these
features.
This owner’s manual is for vehicles sold in the United States and
Canada.
The information and specifications included in this publication were
in effect at the time of approval for printing. Honda Motor Co., Ltd.
reserves the right, however, to discontinue or change specifications
or design at any time without notice and without incurring any
obligation.
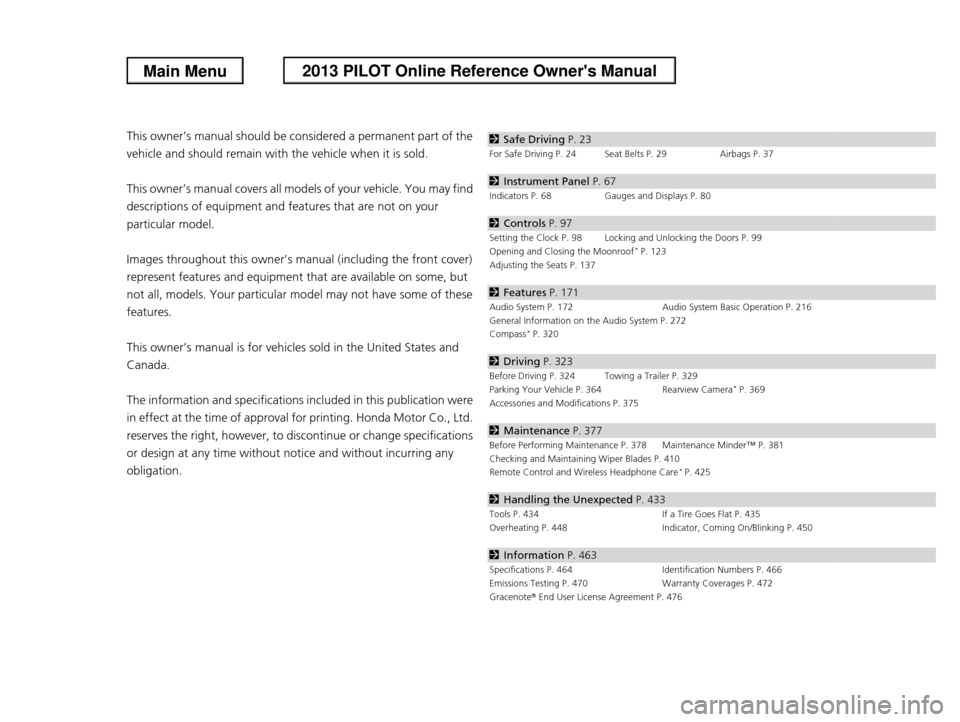
2Safe Driving P. 23
For Safe Driving P. 24 Seat Belts P. 29Airbags P. 37
2Instrument Panel P. 67
Indicators P. 68Gauges and Displays P. 80
2Controls P. 97
Setting the Clock P. 98 Locking and Unlocking the Doors P. 99
Opening and Closing the Moonroof* P. 123
Adjusting the Seats P. 137
2Features P. 171
Audio System P. 172Audio System Basic Operation P. 216
General Information on the Audio System P. 272
Compass* P. 320
2Driving P. 323
Before Driving P. 324 Towing a Trailer P. 329
Parking Your Vehicle P. 364 Rearview Camera* P. 369
Accessories and Modifications P. 375
2Maintenance P. 377
Before Performing Maintenance P.378 Maintenance Minder™ P. 381
Checking and Maintaining Wiper Blades P. 410
Remote Control and Wireless Headphone Care* P. 425
2Handling the Unexpected P. 433
Tools P. 434If a Tire Goes Flat P. 435
Overheating P. 448Indicator, Coming On/Blinking P. 450
2Information P. 463
Specifications P. 464Identification Numbers P. 466Emissions Testing P. 470Warranty Coverages P. 472
Gracenote® End User License Agreement P. 476
Page 5 of 488
Visual Index
4
Quick Reference Guide
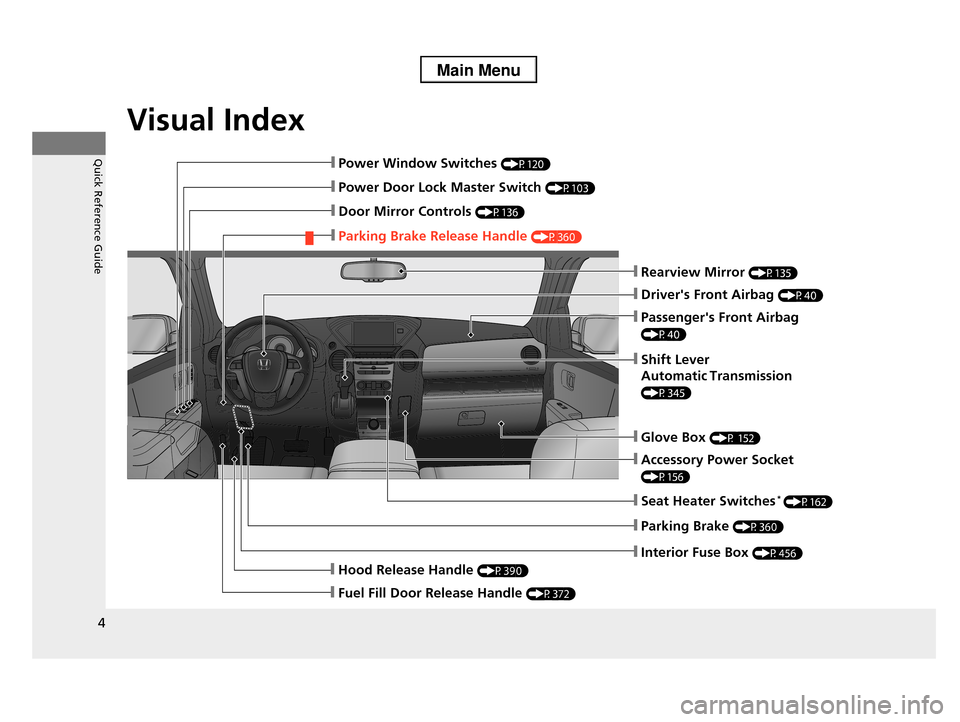
❙Power Door Lock Master Switch (P103)
❙Power Window Switches (P120)
❙Rearview Mirror (P135)
❙Hood Release Handle (P390)
❙Glove Box (P 152)
❙Driver's Front Airbag (P40)
❙Door Mirror Controls (P136)
❙Passenger's Front Airbag
(P40)
❙Fuel Fill Door Release Handle (P372)
❙Parking Brake Release Handle (P360)
❙Shift Lever
Automatic Transmission
(P345)
❙Accessory Power Socket
(P156)
❙Interior Fuse Box (P456)
❙Seat Heater Switches* (P162)
❙Parking Brake (P360)
Page 7 of 488
Visual Index
6
Quick Reference Guide
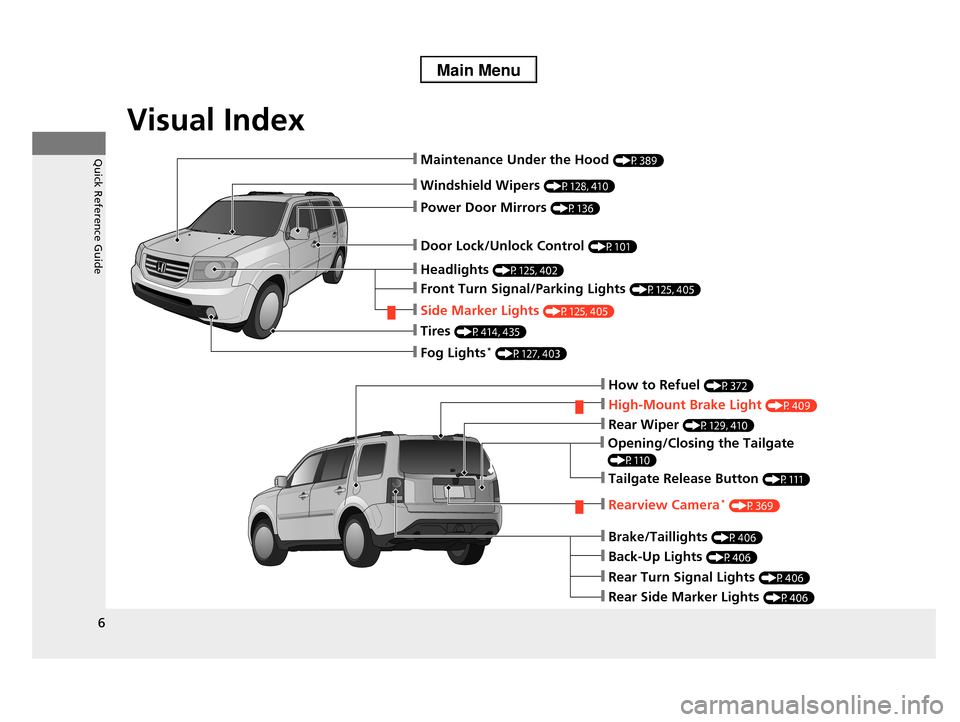
❙Windshield Wipers (P128, 410)
❙Door Lock/Unlock Control (P101)
❙How to Refuel (P372)
❙High-Mount Brake Light (P409)
❙Opening/Closing the Tailgate
(P110)
❙Rear Wiper (P129, 410)
❙Back-Up Lights (P406)
❙Brake/Taillights (P406)
❙Rear Turn Signal Lights (P406)
❙Rear Side Marker Lights (P406)
❙Power Door Mirrors (P136)
❙Maintenance Under the Hood (P389)
❙Fog Lights* (P127, 403)
❙Rearview Camera* (P369)
❙Front Turn Signal/Parking Lights (P125, 405)
❙Side Marker Lights (P125, 405)
❙Tires (P414, 435)
❙Headlights (P125, 402)
❙Tailgate Release Button (P111)
Page 9 of 488
8
Quick Reference Guide
Instrument Panel (P 67)
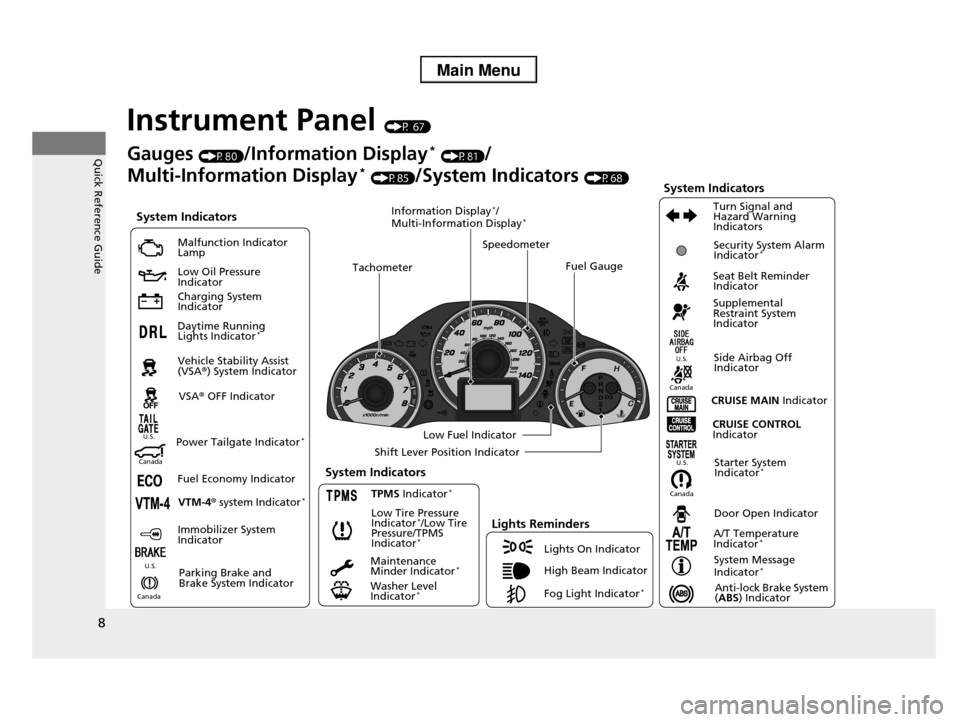
System Indicators
Malfunction Indicator Lamp
Low Oil Pressure Indicator
Charging System Indicator
Daytime Running Lights Indicator*
Vehicle Stability Assist (VSA®) System Indicator
VSA® OFF Indicator
Low Tire Pressure Indicator*/Low Tire Pressure/TPMS Indicator*
Lights Reminders
Lights On Indicator
High Beam Indicator
Fog Light Indicator*
Immobilizer System Indicator
Seat Belt Reminder Indicator
System Indicators
CRUISE CONTROL Indicator
Parking Brake and Brake System Indicator
Supplemental Restraint System Indicator
Side Airbag Off Indicator
Door Open Indicator
CRUISE MAIN Indicator
Tachometer
Speedometer
Fuel Gauge
Low Fuel Indicator
Shift Lever Position Indicator
System Message Indicator*
Gauges (P80)/Information Display* (P81)/
Multi-Information Display* (P85)/System Indicators (P68)
Fuel Economy Indicator
VTM-4r system Indicator*TPMS Indicator*
Maintenance Minder Indicator*
Washer Level Indicator*
A/T Temperature Indicator*
Turn Signal and Hazard Warning Indicators
Starter System Indicator*System Indicators
Canada
U.S.
Canada
U.S.
Anti-lock Brake System (ABS) Indicator
Power Tailgate Indicator*
Security System Alarm Indicator*
Information Display*/Multi-Information Display*
Canada
U.S.
Canada
U.S.
Page 11 of 488
10
Quick Reference Guide
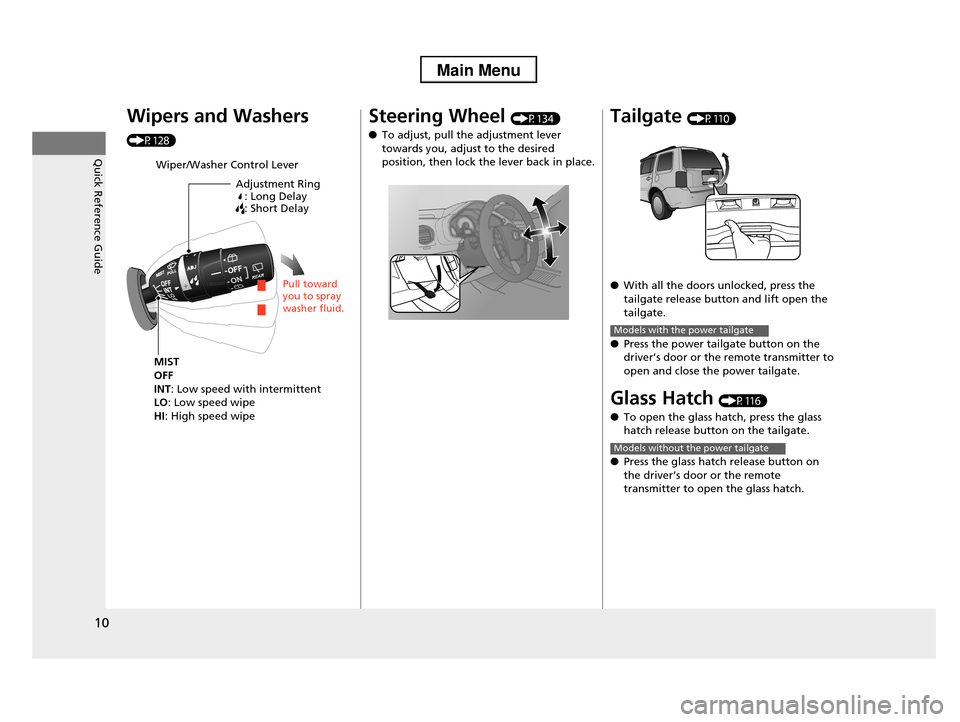
Wipers and Washers
(P128)
Wiper/Washer Control Lever
Adjustment Ring: Long Delay : Short Delay
MIST
OFF
INT: Low speed with intermittentLO: Low speed wipe
HI: High speed wipe
Pull toward you to spray washer fluid.
Steering Wheel (P134)
●To adjust, pull the adjustment lever
towards you, adjust to the desired position, then lock the lever back in place.
Tailgate (P110)
●With all the doors unlocked, press the
tailgate release button and lift open the
tailgate.
●Press the power tailgate button on the
driver’s door or the remote transmitter to open and close the power tailgate.
Glass Hatch (P116)
●To open the glass hatch, press the glass
hatch release button on the tailgate.
●Press the glass hatch release button on
the driver’s door or the remote transmitter to open the glass hatch.
Models with the power tailgate
Models without the power tailgate
Page 12 of 488
11
Quick Reference Guide
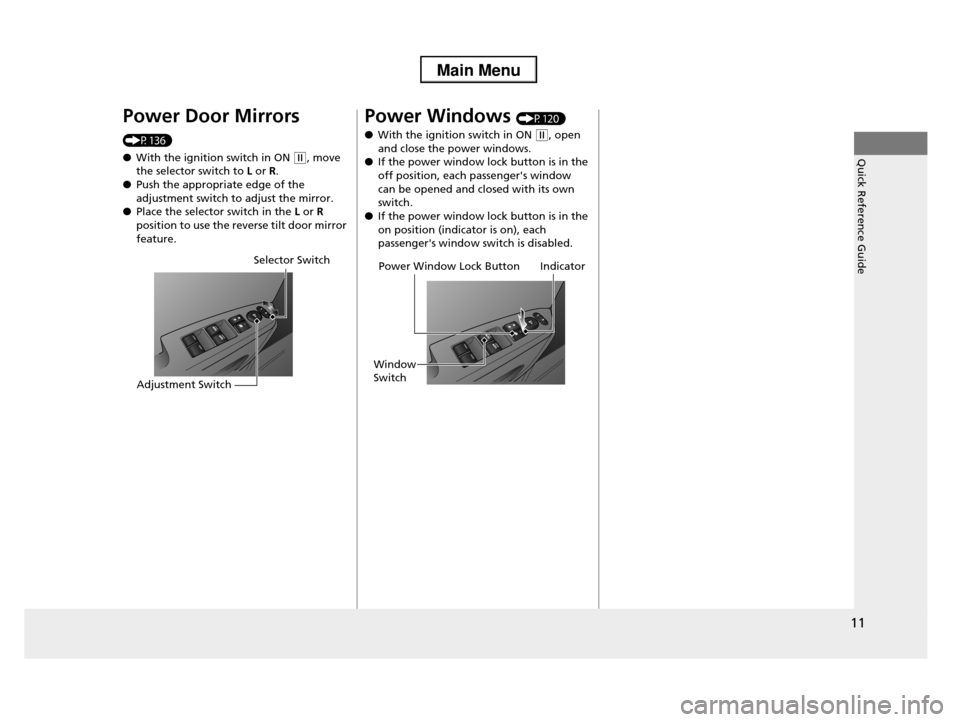
Power Door Mirrors
(P136)
●With the ignition switch in ON (w, move the selector switch to L or R.
●Push the appropriate edge of the
adjustment switch to adjust the mirror.●Place the selector switch in the L or R
position to use the reverse tilt door mirror
feature.
Selector Switch
Adjustment Switch
Power Windows (P120)
●With the ignition switch in ON (w, open
and close the power windows.●If the power window lock button is in the
off position, each passenger's window
can be opened and closed with its own switch.
●If the power window lock button is in the
on position (indicator is on), each passenger's window switch is disabled.
Power Window Lock Button
Window
Switch
Indicator
Page 19 of 488
18
Quick Reference Guide
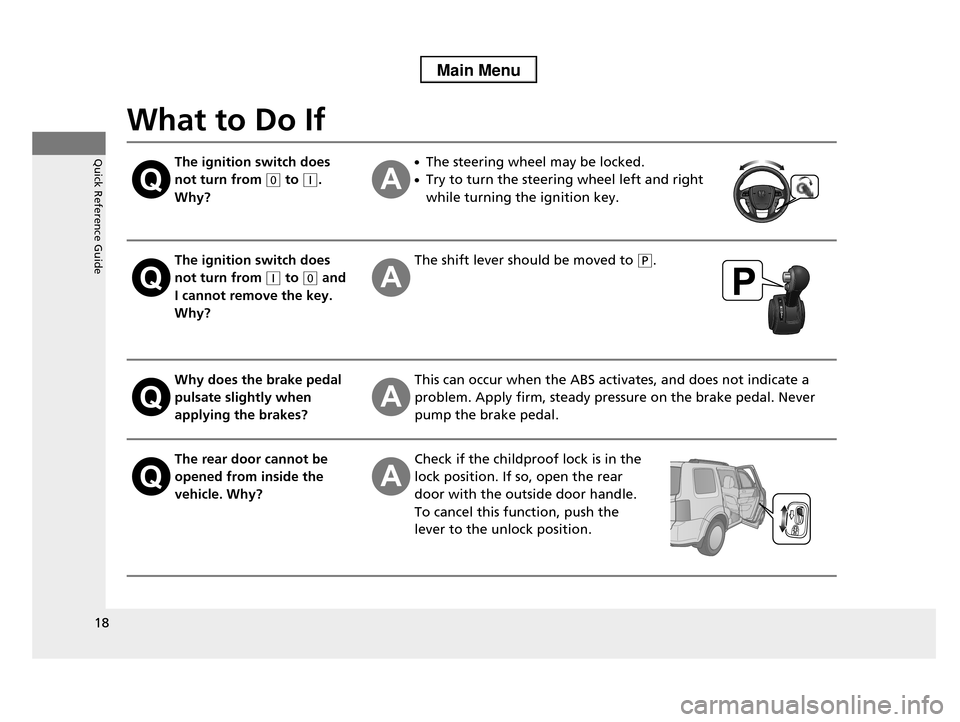
What to Do If
The ignition switch does
not turn from (0 to (q.
Why?
●The steering wheel may be locked.
●Try to turn the steering wheel left and right
while turning the ignition key.
The ignition switch does
not turn from (q to (0 and
I cannot remove the key.
Why?
The shift lever should be moved to (P.
Why does the brake pedal
pulsate slightly when
applying the brakes?
This can occur when the ABS activates, and does not indicate a
problem. Apply firm, steady pressure on the brake pedal. Never
pump the brake pedal.
The rear door cannot be
opened from inside the
vehicle. Why?
Check if the childproof lock is in the
lock position. If so, open the rear
door with the outside door handle.
To cancel this function, push the
lever to the unlock position.
Page 20 of 488
19
Quick Reference Guide
Why do the doors lock
after I unlocked the doors
using a remote
transmitter?
If you do not open the doors within 30 seconds, the doors are
relocked automatically for security.
Why does the beeper
sound when I open the
driver's door?
The beeper sounds when:
●The key is left in the ignition switch.
●The exterior lights are left on.
Why does the beeper
sound when I start driving?
The beeper sounds when:
●Driver and/or front passenger are not wearing their seat belts.
●The parking brake lever is not fully released.
Why do I hear a screeching
sound when I apply the
brake pedal?
The brake pads may need to be replaced. Have your vehicle
inspected by a dealer.
Page 28 of 488
27
uuFor Safe DrivinguYour Vehicle's Safety Features
Continued
Safe Driving
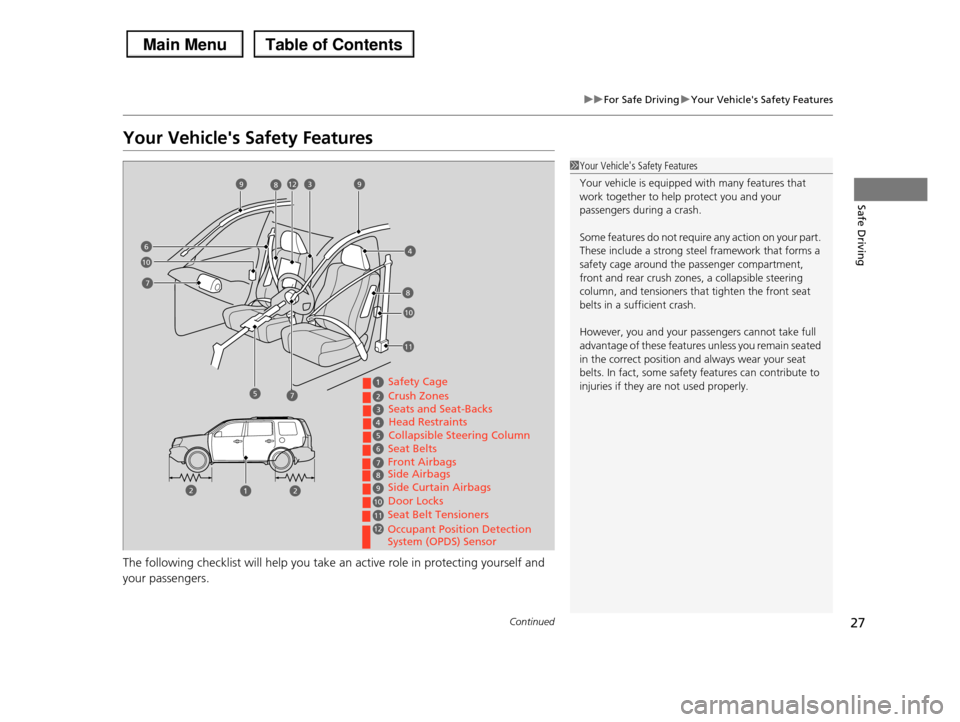
Your Vehicle's Safety Features
The following checklist will help you take an active role in protecting yourself and
your passengers.
1Your Vehicle's Safety Features
Your vehicle is equipped with many features that work together to help protect you and your
passengers during a crash.
Some features do not require any action on your part.
These include a strong steel framework that forms a
safety cage around the passenger compartment, front and rear crush zones, a collapsible steering
column, and tensioners that tighten the front seat
belts in a sufficient crash.
However, you and your passengers cannot take full
advantage of these features unless you remain seated
in the correct position and always wear your seat belts. In fact, some safety features can contribute to
injuries if they are not used properly.
2
3
4
5
6
78
9
10
11
12
Safety Cage
Crush ZonesSeats and Seat-BacksHead RestraintsCollapsible Steering ColumnSeat BeltsFront AirbagsSide AirbagsSide Curtain AirbagsDoor Locks
Seat Belt Tensioners
Occupant Position Detection System (OPDS) Sensor
2
10
9
7
8
3456
78
10
1112
2
9
Page 29 of 488
uuFor Safe DrivinguYour Vehicle's Safety Features
28
Safe DrivingFor the safety of you and your passengers, make a habit of checking these items
each time before you drive.
•After everyone has entered the vehicle, be sure all doors and the tailgate are
closed and locked. Locking the doors and the tailgate helps prevent an occupant
from being ejected and an outsider from unexpectedly opening a door or the
tailgate.
2Locking/Unlocking the Doors from the Inside P. 103
•Adjust your seat to a position suitable for driving. Be sure the front seats are
adjusted as far to the rear as possible while allowing the driver to control the
vehicle. Sitting too close to a front airbag can result in serious or fatal injury in a
crash.
2Adjusting the Seats P. 137
•Adjust head restraints to the proper position. Head restraints are most effective
when the center of the head restraint aligns with the center of your head. Taller
persons should adjust their head restraint to the highest position.
2Adjusting the Head Restraints P. 141
•Always wear your seat belt, and make sure you wear it properly. Confirm that any
passengers are properly belted as well.
2Fastening a Seat Belt P. 32
•Protect children by using seat belts or child seats according to a child's age, height
and weight.
2Child Safety P. 52
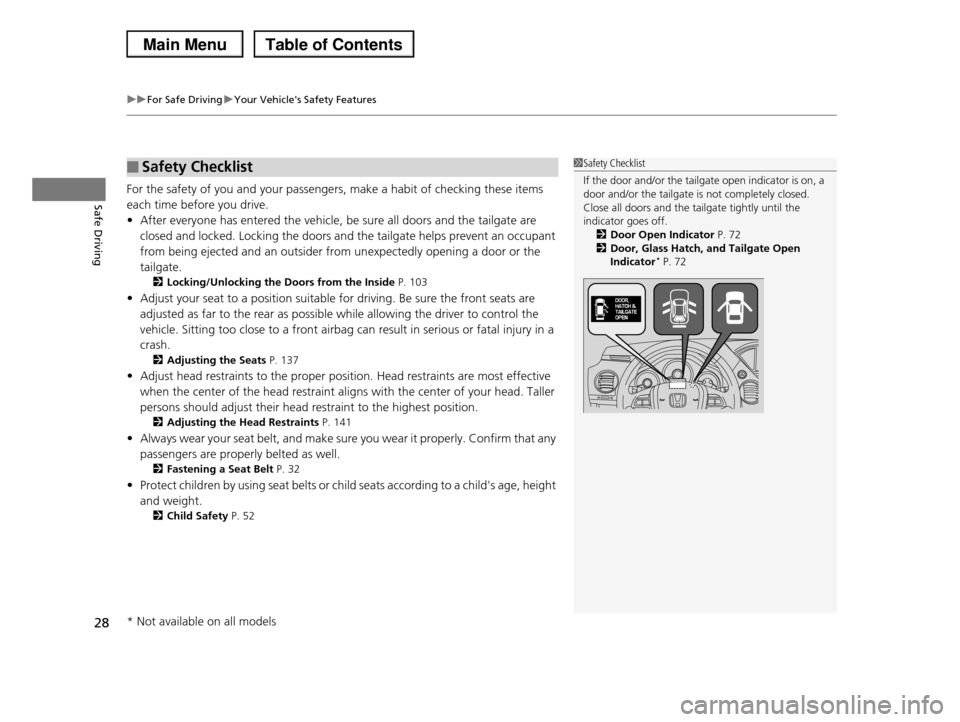
■Safety Checklist1Safety Checklist
If the door and/or the tailgate open indicator is on, a
door and/or the tailgate is not completely closed. Close all doors and the tailgate tightly until the
indicator goes off.
2Door Open Indicator P. 722Door, Glass Hatch, and Tailgate Open
Indicator* P. 72
* Not available on all models