homelink HONDA PILOT 2013 2.G Owners Manual
[x] Cancel search | Manufacturer: HONDA, Model Year: 2013, Model line: PILOT, Model: HONDA PILOT 2013 2.GPages: 488, PDF Size: 10.18 MB
Page 2 of 488
Contents
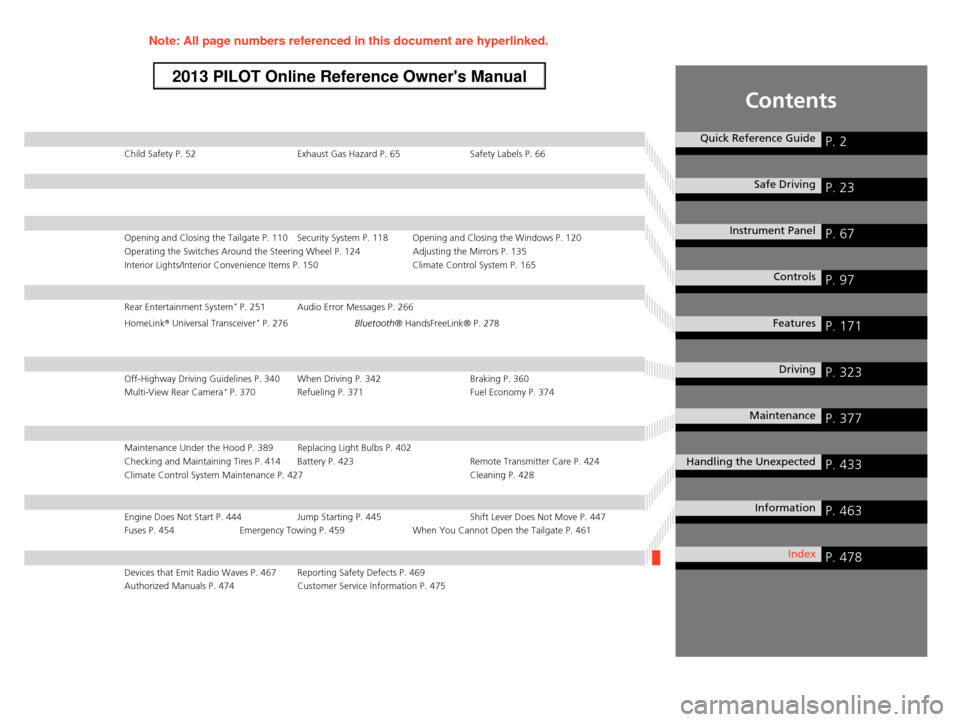
Child Safety P. 52Exhaust Gas Hazard P. 65Safety Labels P. 66
Opening and Closing the Tailgate P. 110 Security System P. 118 Opening and Closing the Windows P. 120
Operating the Switches Around the Steering Wheel P. 124 Adjusting the Mirrors P. 135
Interior Lights/Interior Convenience Items P. 150 Climate Control System P. 165
Rear Entertainment System* P. 251 Audio Error Messages P. 266
HomeLink® Universal Transceiver* P. 276Bluetooth® HandsFreeLink® P. 278
Off-Highway Driving Guidelines P. 340 When Driving P. 342Braking P. 360Multi-View Rear Camera* P. 370 Refueling P. 371Fuel Economy P. 374
Maintenance Under the Hood P. 389 Replacing Light Bulbs P. 402 Checking and Maintaining Tires P. 414 Battery P. 423 Remote Transmitter Care P. 424
Climate Control System Maintenance P. 427 Cleaning P. 428
Engine Does Not Start P. 444Jump Starting P. 445Shift Lever Does Not Move P. 447Fuses P. 454Emergency Towing P. 459When You Cannot Open the Tailgate P. 461
Devices that Emit Radio Waves P. 467 Reporting Safety Defects P. 469
Authorized Manuals P. 474 Customer Service Information P. 475
Quick Reference GuideP. 2
Safe DrivingP. 23
Instrument PanelP. 67
ControlsP. 97
FeaturesP. 171
DrivingP. 323
MaintenanceP. 377
Handling the UnexpectedP. 433
InformationP. 463
IndexP. 478
Page 6 of 488
5
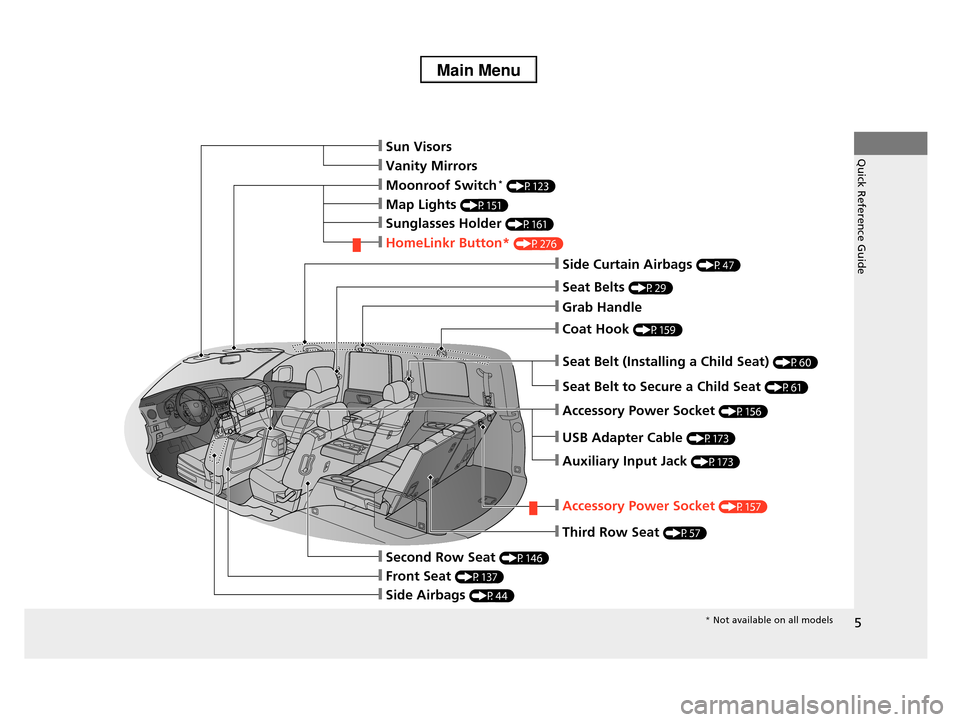
Quick Reference Guide❙Sun Visors
❙Vanity Mirrors
❙Moonroof Switch* (P123)
❙Map Lights (P151)
❙Sunglasses Holder (P161)
❙HomeLinkr Button* (P276)
❙Side Curtain Airbags (P47)
❙Seat Belts (P29)
❙Grab Handle
❙Coat Hook (P159)
❙Seat Belt (Installing a Child Seat) (P60)
❙Seat Belt to Secure a Child Seat (P61)
❙Accessory Power Socket (P156)
❙USB Adapter Cable (P173)
❙Auxiliary Input Jack (P173)
❙Accessory Power Socket (P157)
❙Third Row Seat (P57)
❙Second Row Seat (P146)
❙Front Seat (P137)
❙Side Airbags (P44)
* Not available on all models
Page 172 of 488
171
Features
This chapter describes how to operate technology features.
Audio SystemAbout Your Audio System ................ 172 USB Adapter Cable .......................... 173 Auxiliary Input Jack .......................... 173 Audio System Theft Protection ......... 174
Audio System Basic Operation........ 175Audio/Information Screen*.............. 176Audio Remote Controls .................... 184Adjusting the Sound ........................ 185 Playing the AM/FM Radio ................. 186 Playing the XM® Radio*................... 190Playing a CD .................................... 193
Models without navigation system
Playing an iPod®............................... 203Playing a USB Flash Drive ................. 207Playing Bluetooth® Audio................. 211
Audio System Basic Operation........ 216Audio Remote Controls.................... 217Adjusting the Sound ........................ 218 Playing the AM/FM Radio ................. 219 Playing the XM® Radio ..................... 223Playing a CD .................................... 226Playing Hard Disc Drive (HDD) Audio .... 230Playing an iPod®............................... 240Rear Entertainment System*........... 251
Models with navigation system
Audio Error Messages...................... 266General Information on the Audio System............................................. 272HomeLink® Universal Transceiver*.. 276
Bluetooth® HandsFreeLink®Using HFL ........................................ 278 HFL Menus ...................................... 280
Bluetooth® HandsFreeLink®Using HFL ........................................ 301HFL Menus ...................................... 303Compass*.......................................... 320
Models without navigation system
Models with navigation system
* Not available on all models
Page 277 of 488
276
Features
HomeLink® Universal Transceiver*
The HomeLink® Universal Transceiver can be programmed to operate up to three
remote controlled devices around your home, such as garage doors, lighting, or
home security systems.
Refer to the safety information that comes with your garage door opener to test that
the safety features are functioning properly. If you do not have the safety
information, contact the manufacturer.
Before programming HomeLink, make sure that people and objects are out of the
way of the garage or gate to prevent potential injury or damage.
When programming a garage door opener, park just outside the garage door’s
path.
Training HomeLink
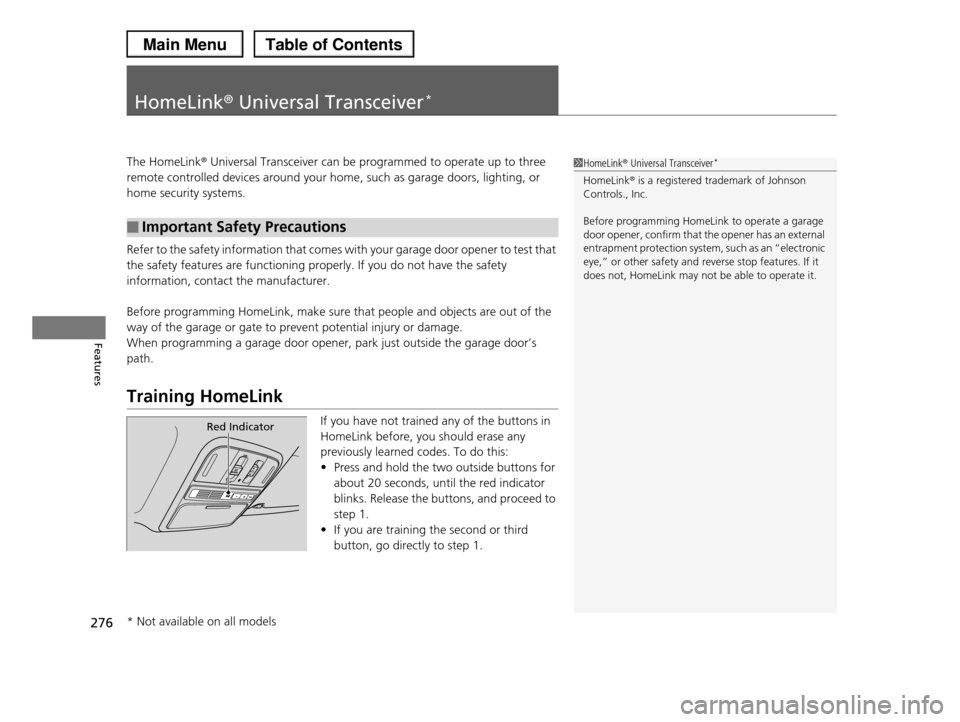
If you have not trained any of the buttons in
HomeLink before, you should erase any
previously learned codes. To do this:
•Press and hold the two outside buttons for
about 20 seconds, until the red indicator
blinks. Release the buttons, and proceed to
step 1.
•If you are training the second or third
button, go directly to step 1.
■Important Safety Precautions
1HomeLink® Universal Transceiver*
HomeLink® is a registered trademark of Johnson Controls., Inc.
Before programming HomeLink to operate a garage door opener, confirm that the opener has an external
entrapment protection system, such as an “electronic
eye,” or other safety and reverse stop features. If it does not, HomeLink may not be able to operate it.
Red Indicator
* Not available on all models
Page 278 of 488
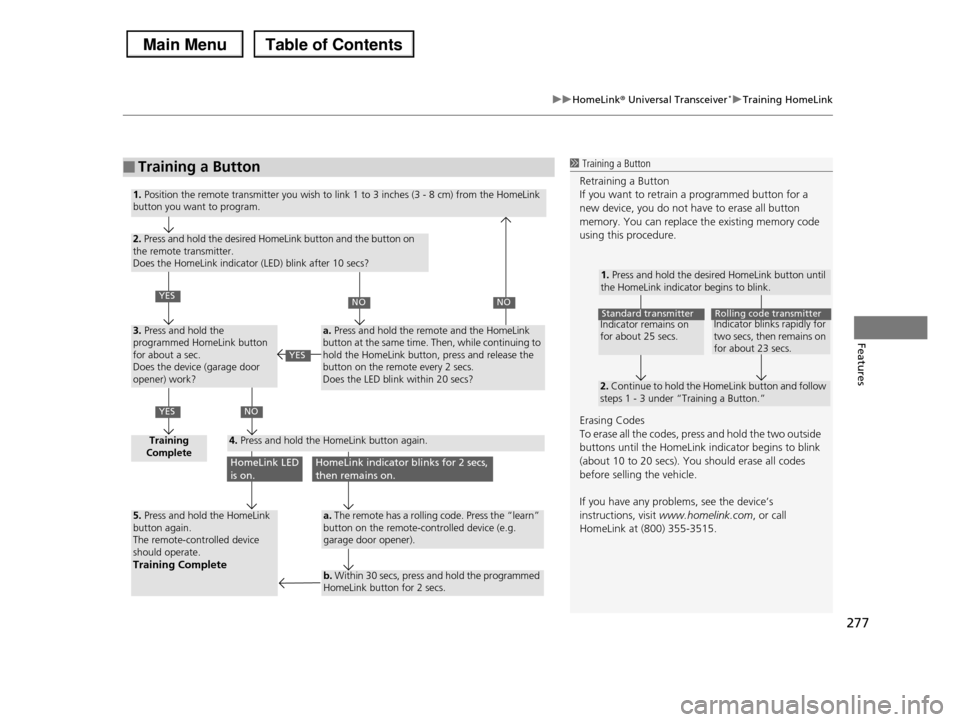
277
uuHomeLink® Universal Transceiver*uTraining HomeLink
Features
■Training a Button1 Training a Button
Retraining a Button
If you want to retrain a programmed button for a new device, you do not have to erase all button
memory. You can replace the existing memory code
using this procedure.
Erasing Codes
To erase all the codes, press and hold the two outside
buttons until the HomeLink indicator begins to blink (about 10 to 20 secs). You should erase all codes
before selling the vehicle.
If you have any problems, see the device’s
instructions, visit www.homelink.com, or call
HomeLink at (800) 355-3515.
1. Press and hold the desired HomeLink button until the HomeLink indicator begins to blink.
2. Continue to hold the HomeLink button and follow steps 1 - 3 under “Training a Button.”
Indicator remains on for about 25 secs.
Standard transmitterIndicator blinks rapidly for two secs, then remains on for about 23 secs.
Rolling code transmitter
1. Position the remote transmitter you wish to link 1 to 3 inches (3 - 8 cm) from the HomeLink button you want to program.
2. Press and hold the desired HomeLink button and the button on the remote transmitter. Does the HomeLink indicator (LED) blink after 10 secs?
3. Press and hold the programmed HomeLink button for about a sec. Does the device (garage door opener) work?
Training Complete4. Press and hold the HomeLink button again.
5. Press and hold the HomeLink button again.The remote-controlled device should operate.Training Complete
a. Press and hold the remote and the HomeLink button at the same time. Then, while continuing to hold the HomeLink button, press and release the button on the remote every 2 secs.Does the LED blink within 20 secs?
a. The remote has a rolling code. Press the “learn” button on the remote-controlled device (e.g. garage door opener).
b. Within 30 secs, press and hold the programmed HomeLink button for 2 secs.
YES
YES
NONO
NO
HomeLink LED is on.HomeLink indicator blinks for 2 secs, then remains on.
YES