traction control HONDA PILOT 2014 2.G Owners Manual
[x] Cancel search | Manufacturer: HONDA, Model Year: 2014, Model line: PILOT, Model: HONDA PILOT 2014 2.GPages: 488, PDF Size: 12.11 MB
Page 16 of 488
15
Quick Reference Guide
VSA® OFF Button (P 353)
● The v
ehicle stability assist (VSA ®) system
helps stabilize the vehicle during
cornering, and helps maintain traction
while accelerating on loose or slippery
road surfaces.
● VSA ® co
mes on automatically every time
you start the engine.
● To
turn VSA ® on or off, press and hold
the button until you hear a beep.
Cruise Control (P 348)
● Cru
ise control allows you to maintain a
set speed without keeping your foot on
the accelerator pedal.
● To use crui
se control, press the CRUISE
button, then press DECEL/SET button
once you have achieved the desired speed
(above 25 mph or 40 km/h).
Tire Pressure Monitoring
System (TPMS)
(P355)
● TPMS monit
ors tire pressure.
● TPMS is turn ed on automatically every
time you start the engine.
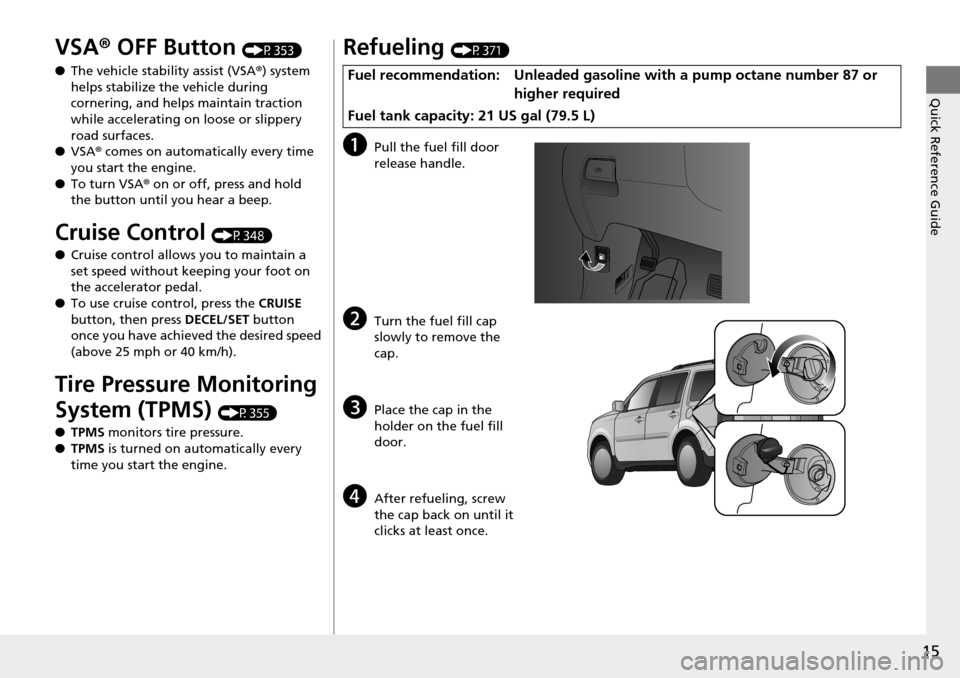
Refueling (P 371)
aPull the fuel fill door
release handle.
bTurn the fuel fill cap
slowly to remove the
cap.
cPlace the cap in the
holder on the fuel fill
door.
dAfter refueling, screw
the cap back on until it
clicks at least once.
Fuel recommendation: Unleaded gasoline with a pump octane number 87 or
hi
gher required
Fuel tank capacity: 21 US gal (79.5 L)
Page 332 of 488
331
uu Towing a Trailer u Towing Preparation
Continued
Driving
■To estimate the tongue load
Excessive tongue load reduces front tire traction and steering control. Too little
tongu
e load can make the trailer unstable and cause it to sway.
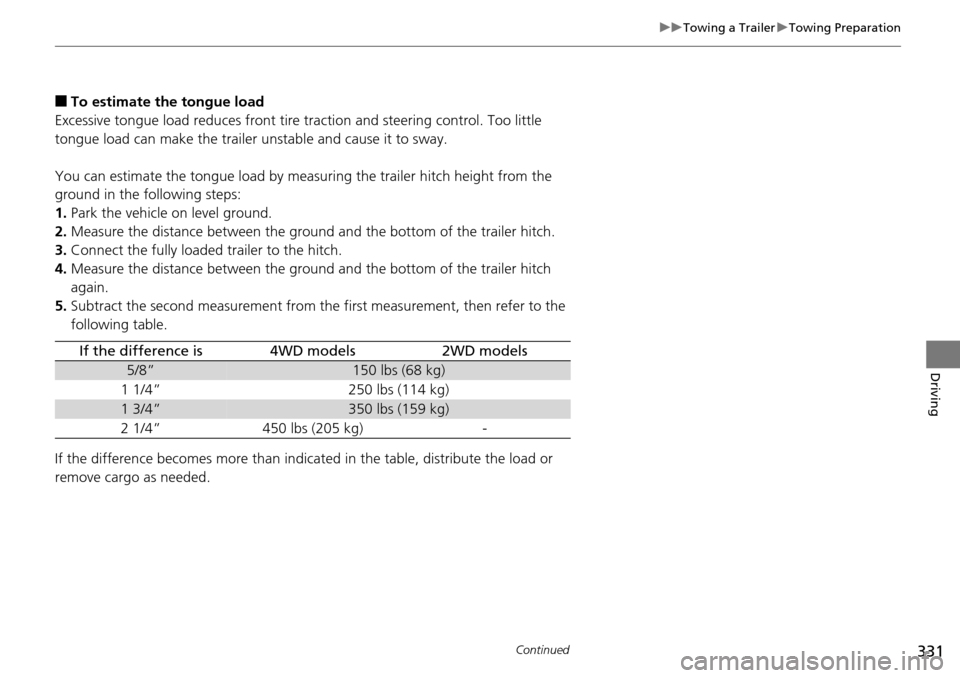
You can estimate the tongue load by measuring the trailer hitch height from the
groun
d in the following steps:
1. Park the
vehicle on level ground.
2.Measur
e the distance between the groun d and the bottom of the trailer hitch.
3. Connect
the fully loaded trailer to the hitch.
4.Measur
e the distance between the groun d and the bottom of the trailer hitch
again.
5. Sub
tract the second measurement from the first measurement, then refer to the
following table.
If the difference becomes more than indica ted in the ta
ble, distribute the load or
remove cargo as needed.
If the difference is4WD models2WD models
5/8”150 lbs (68 kg)
1 1/4”250 lbs (114 kg)
1 3/4”350 lbs (159 kg)
2 1/4”450 lbs (205 kg)-
Page 342 of 488
341
uu Off-Highway Driving Guidelines u Avoiding Trouble
Driving
Avoiding Trouble
• Check Out Your Vehicle before you leave the pavement and make sure that all
scheduled maintenance has been completed. Pay special attention to the
condition of the tires, and check the tire pressures.
• Remember the route
you choose presents limits (too steep or bumpy), you have
limits (driving skill and comfort), and your vehicle has limits (traction, stability, and
power). Failing to recognize these limits will likely put you and your passengers in
a hazardous situation.
• Ac
celerating and Braking should be done slowly and gradually. Trying to start
or stop too fast can cause a loss of traction and you could lose control.
• Av
oiding Obstacles and Debris in the road reduces the likelihood of a rollover
or damage to your suspension or other components.
• Dri
ving on Slopes increasing your risk of a rollove r, particularly if you attempt to
drive across a slope that is too steep. Going straight or down a slope is usually the
safest. If you can’t clearly see all conditions or obstacles on a slope, walk it before
you drive it. If there is any doubt whether you can safely pass, don’t try it. Find
another route. If you get stuck when climbing, do not try to turn around. Back
down slowly following the same route you took up the hill.
• Cros
sing a Stream - Avoid driving through deep water. If you encounter water
in your route (a small stream or large pu ddle, for example), evaluate it carefully
before going ahead. Make sure it is shallow, flowing slowly, and has firm ground
underneath. If you are not sure of the depth or the ground, turn around and find
another route. Driving through deep water can also damage your vehicle. The
water can get into the transmission and di fferential, diluting the lubricant and
causing an eventual failure. It can also wash the grease out of the wheel bearings.
• If Yo
u Get Stuck , carefully go in the direction that you think will get you
unstuck. Do not spin the tires as this will only make things worse and could
damage the transmission. If you are unable to free yourself, your vehicle will need
to be towed. Front and rear tow ho oks are provided for this purpose.
Page 353 of 488
352
uu When Driving u VSA ® (Vehicle Stability Assist), aka ESC (Electronic Stability Control), System
Driving
VSA ® (Vehicle Stability Assist ), aka ESC (Electronic
Stability Control), System
VSA® helps to stabilize the vehicle during cornering if the vehicle turns more or less
than what was intended. It also assists in maintaining traction on slippery surfaces.
It does so by regulating engine output and select ively applying the brakes.
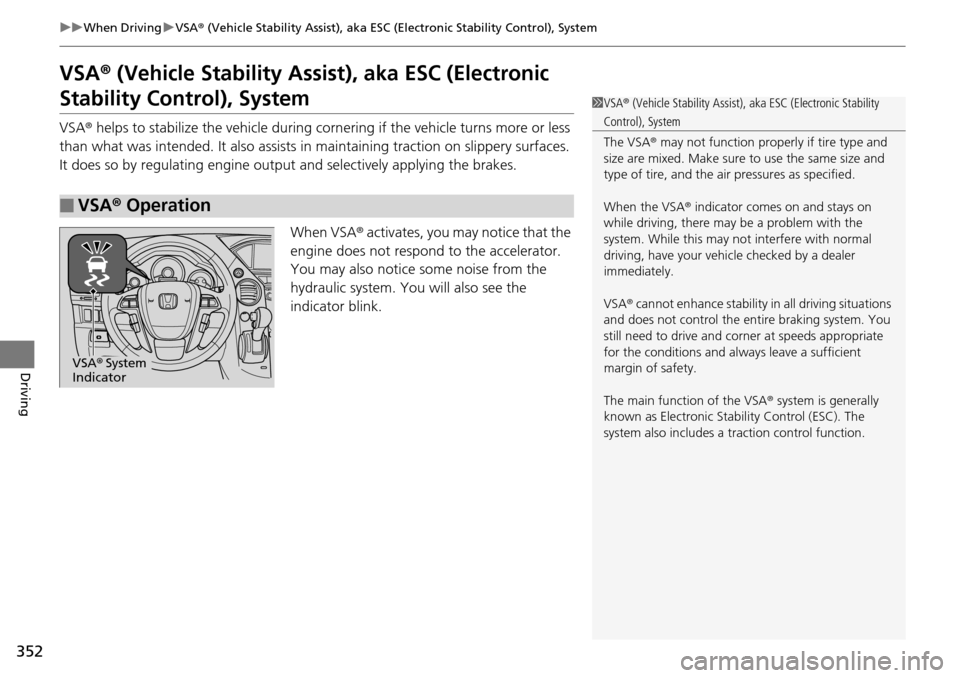
When VSA ® activate
s, you may notice that the
engine does not respond to the accelerator.
You may also notice some noise from the
hydraulic system. You will also see the
indicator blink.
■VSA ® Operation
1 VSA ® (Vehicle Stability Assist), aka ESC (Electronic Stability
Control), System
The VSA® may not function properl y if tire type and
size are mixed. Make sure to use the same size and
type of tire, and the air pressures as specified.
When the VSA ® indicator comes on and stays on
while driving, there may be a problem with the
system. While this may not interfere with normal
driving, have your vehi cle checked by a dealer
immediately.
VSA ® cannot enhance stability in all driving situations
and does not control the entire braking system. You
still need to drive and corner at speeds appropriate
for the conditions and always leave a sufficient
margin of safety.
The main function of the VSA ® system is generally
known as Electronic Stability Control (ESC). The
system also includes a traction control function.
VSA® System
Indicator
Page 354 of 488
353
uu When Driving u VSA ® (Vehicle Stability Assist), aka ESC (Electronic Stability Control), System
Driving
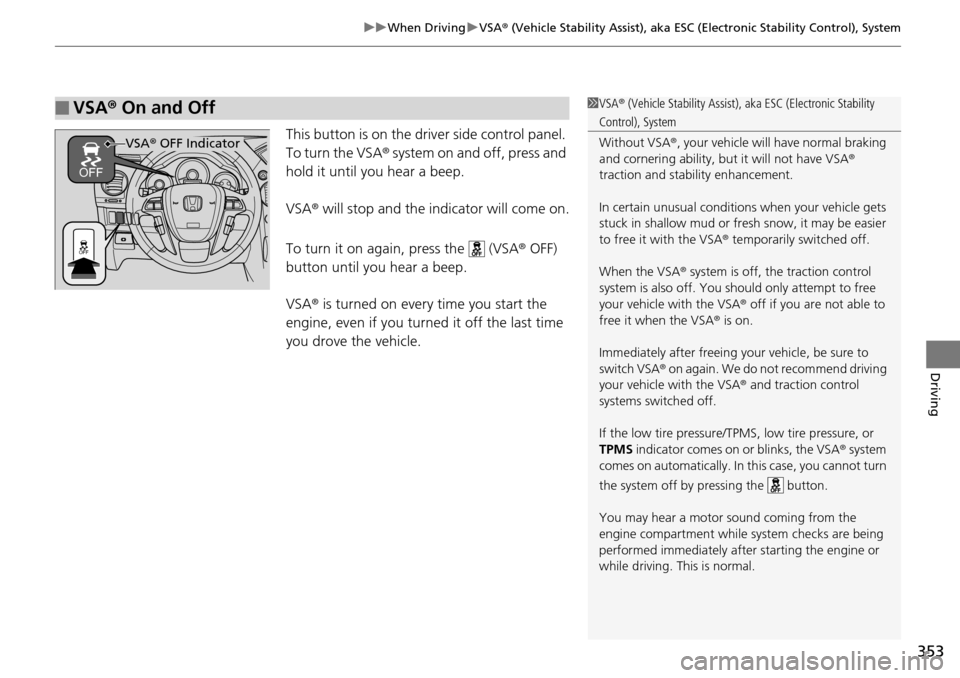
This button is on the driver side control panel.
To turn the VSA ® system on and off, press and
hold it until you hear a beep.
VSA ® will stop and the indicator will come on.
To turn it on again, press the (VSA® OFF)
button until you hear a beep.
VSA ®
is turned on every time you start the
engine, even if you turned it off the last time
you drove the vehicle.
■VSA ® On and Off1 VSA ® (Vehicle Stability Assist), aka ESC (Electronic Stability
Control), System
Without VSA®, your vehicle will have normal braking
and cornering ability, bu t it will not have VSA®
traction and stability enhancement.
In certain unusual conditions when your vehicle gets
stuck in shallow mud or fr esh snow, it may be easier
to free it with the VSA ® temporarily switched off.
When the VSA ® system is off, the traction control
system is also off. You should only atte mpt to free
your vehicle with the VSA ® off if you ar e not able to
free it when the VSA ® is on.
Immediately after freeing your vehicle, be sure to
switch VSA ® on again. We do not recommend driving
your vehicle with the VSA ® and traction control
systems switched off.
If the low tire pressure/TPMS, low tire pressure, or
TPMS indicator comes on or blinks, the VSA® system
comes on automatically. In this case, you cannot turn
the system off by pressing the button.
You may hear a motor sound coming from the
engine compartment while system checks are being
performed immediately after starting the engine or
while driving. This is normal.
VSA ® OFF Indicator
Page 418 of 488
417
uu Checking and Maintaining Tires u DOT Tire Quality Grading (U.S. Vehicles)
Continued
Maintenance
DOT Tire Quality Grading (U.S. Vehicles)
The tires on your vehicle m eet all U.S. Federal Safety
Requirements. All tires are also graded for treadwear, traction,
and temperature performance according to Department of
Transportation (DOT) standards. The following explains these
gradings.
Quality grades can be found where appl
icable on the tire sidewall
between tread shoulder and maximum section width.
The treadwear grade is a comparative rating based on the wear
r
ate of the tire when tested un der controlled conditions on a
specified government test course. For example, a tire graded 150
would wear one and one-half (1 1/2) times as well on the
gove
rnment course as a tire graded 100. The relative performance
of tires depends upon the actual co nditions of their use, however,
and may depart significantly from the norm due to variations in
driving habits, service practi ces and differences in road
characteristics and climate.
■Uniform Tire Quality Grading
■Treadwear
1 Uniform Tire Quality Grading
For example:
Treadwear 200
Traction AA
Temperature A
All passenger car tires must conform
to Federal Safety Requirements in
addition to these grades.
Page 419 of 488
uu Checking and Maintaining Tires u DOT Tire Quality Grading (U.S. Vehicles)
418
Maintenance
The traction grades, from highest to lowest, are AA, A, B, and C.
Those grades represent the tire's ability to stop on wet pavement
as measured under controlled conditions on specified
government test surfaces of asphalt and concrete. A tire marked
C may have poor traction performance.
The temperature grades are A (the highest), B, and C,
representing the tire's resistance to the generation of heat and its
ability to dissipate h eat when tested under controlled conditions
on a specified indoor laboratory test wheel. Sustained high
temperature can cause the material of the tire to degenerate and
reduce tire life, and excessive temp erature can lead to sudden tire
failure. The grade C corresponds to a level of performance which
all passenger car tires must meet under the Federal Motor Vehicle
Safety Standard No. 109. Grades B and A represent higher levels
of performance on the laboratory test wheel than the minimum
required by law.
■Traction
■Temperature
1 Traction
Warning: The traction grade
assigned to this tire is based on
straight-ahead braking traction tests,
and does not include acceleration,
cornering, hydroplaning, or peak
traction characteristics.
1Temperature
Warning: The temperature grade for
this tire is establishe d for a tire that is
properly inflated and not
overloaded. Excessive speed,
underinflation, or excessive loading,
either separately or in combination,
can cause heat buildup and possible
tire failure.