sensor HONDA PILOT 2016 3.G Owner's Manual
[x] Cancel search | Manufacturer: HONDA, Model Year: 2016, Model line: PILOT, Model: HONDA PILOT 2016 3.GPages: 661, PDF Size: 37.79 MB
Page 125 of 661
uuLocking and Unlocking the Doors uLocking/Unlocking the Doors from the Outside
124
Controls
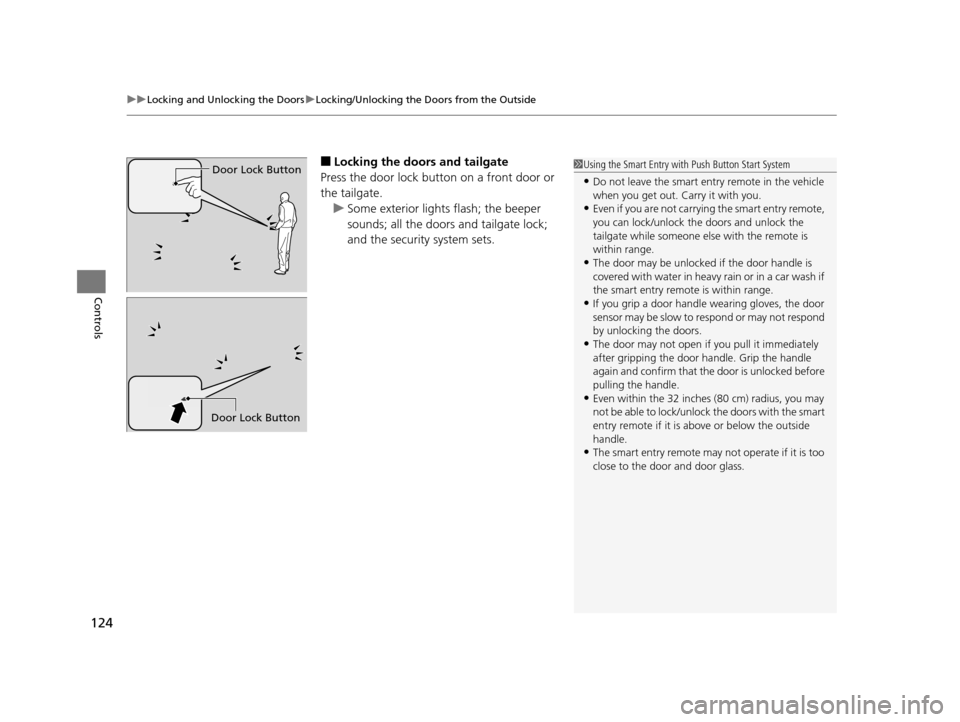
■Locking the doors and tailgate
Press the door lock button on a front door or
the tailgate. u Some exterior lights flash; the beeper
sounds; all the doors and tailgate lock;
and the security system sets.1Using the Smart Entry with Push Button Start System
•Do not leave the smart entry remote in the vehicle
when you get out. Carry it with you.
•Even if you are not carrying the smart entry remote,
you can lock/unlock the doors and unlock the
tailgate while someone else with the remote is
within range.
•The door may be unlocked if the door handle is
covered with water in heavy rain or in a car wash if
the smart entry remote is within range.
•If you grip a door handle wearing gloves, the door
sensor may be slow to respond or may not respond
by unlocking the doors.
•The door may not open if you pull it immediately
after gripping the door handle. Grip the handle
again and confirm that th e door is unlocked before
pulling the handle.
•Even within the 32 inches (80 cm) radius, you may
not be able to lock/unlock the doors with the smart
entry remote if it is a bove or below the outside
handle.
•The smart entry remote may not operate if it is too
close to the door and door glass.
Door Lock Button
Door Lock Button
16 PILOT-31TG76000.book 124 ページ 2015年6月15日 月曜日 午前11時30分
Page 142 of 661
Continued141
uuOpening and Closing the Tailgate uOpening/Closing the Power Tailgate*
Controls
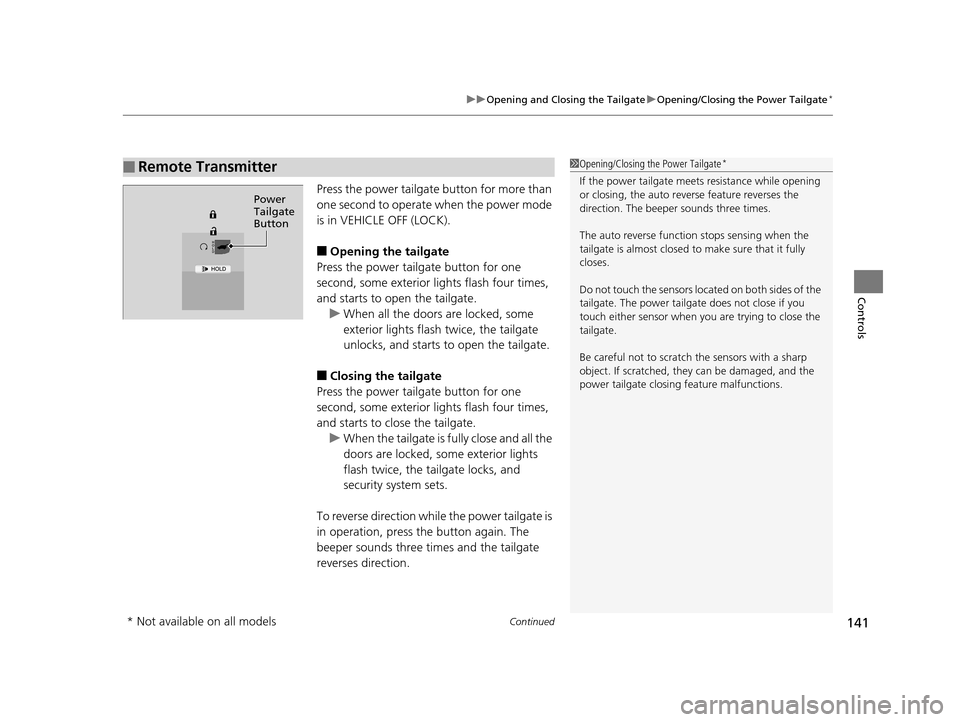
Press the power tailgate button for more than
one second to operate when the power mode
is in VEHICLE OFF (LOCK).
■Opening the tailgate
Press the power tailgate button for one
second, some exterior lights flash four times,
and starts to open the tailgate. u When all the doors are locked, some
exterior lights flash twice, the tailgate
unlocks, and starts to open the tailgate.
■Closing the tailgate
Press the power tailgate button for one
second, some exterior lights flash four times,
and starts to close the tailgate. u When the tailgate is fu lly close and all the
doors are locked, some exterior lights
flash twice, the tailgate locks, and
security system sets.
To reverse direction while the power tailgate is
in operation, press th e button again. The
beeper sounds three times and the tailgate
reverses direction.
■Remote Transmitter1 Opening/Closing the Power Tailgate*
If the power tailgate meet s resistance while opening
or closing, the auto reverse feature reverses the
direction. The beeper sounds three times.
The auto reverse function stops sensing when the
tailgate is almost closed to make sure that it fully
closes.
Do not touch the sensors located on both sides of the
tailgate. The power tailga te does not close if you
touch either sensor when you are trying to close the
tailgate.
Be careful not to scratch the sensors with a sharp
object. If scratched, they can be damaged, and the
power tailgate closing feature malfunctions.
Power
Tailgate
Button
* Not available on all models
16 PILOT-31TG76000.book 141 ページ 2015年6月15日 月曜日 午前11時30分
Page 157 of 661
uuOperating the Switches Around the Steering Wheel uLight Switches
156
Controls
Automatic lighting control can be used when
the power mode is in ON.
When the light switch is in AUTO, the
headlights and other exterior lights will switch
on and off automatica lly depending on the
ambient brightness. u You can change the au to light sensitivity
setting.
2 Customized Features P. 342
■Automatic Lighting Control1Automatic Lighting Control
We recommend that you tu rn on the lights manually
when driving at night, in a dense fog, or in dark areas
such as long tunnels or parking facilities.
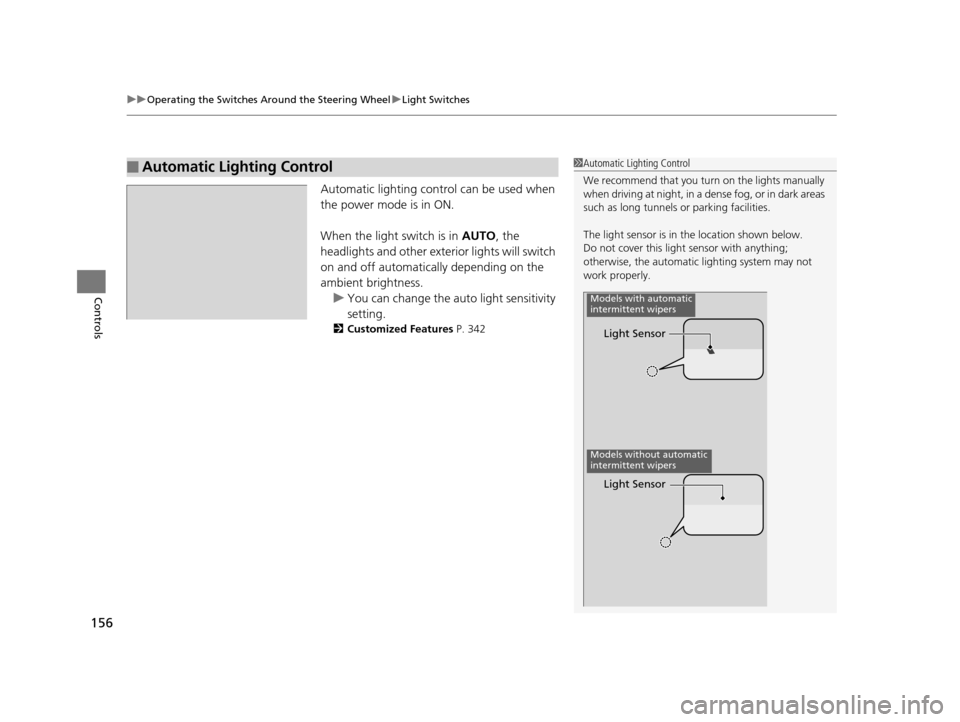
The light sensor is in the location shown below.
Do not cover this light sensor with anything;
otherwise, the automatic lighting system may not
work properly.
Light Sensor
Models with automatic
intermittent wipers
Models without automatic
intermittent wipers
Light Sensor
16 PILOT-31TG76000.book 156 ページ 2015年6月15日 月曜日 午前11時30分
Page 165 of 661
uuOperating the Switches Around the Steering Wheel uWipers and Washers
164
Controls
When you push the lever down to AUTO, the
windshield wipers sweep once, and go into
the automatic mode.
The wipers operate intermittently, at low
speed, or at high speed and stops in
accordance with the am ount of rainfall the
rainfall sensor detects.
■Auto sensitivity adjustment
When in AUTO, you can also adjust the
rainfall sensor sensitivity using the intermittent
time adjustment ring.
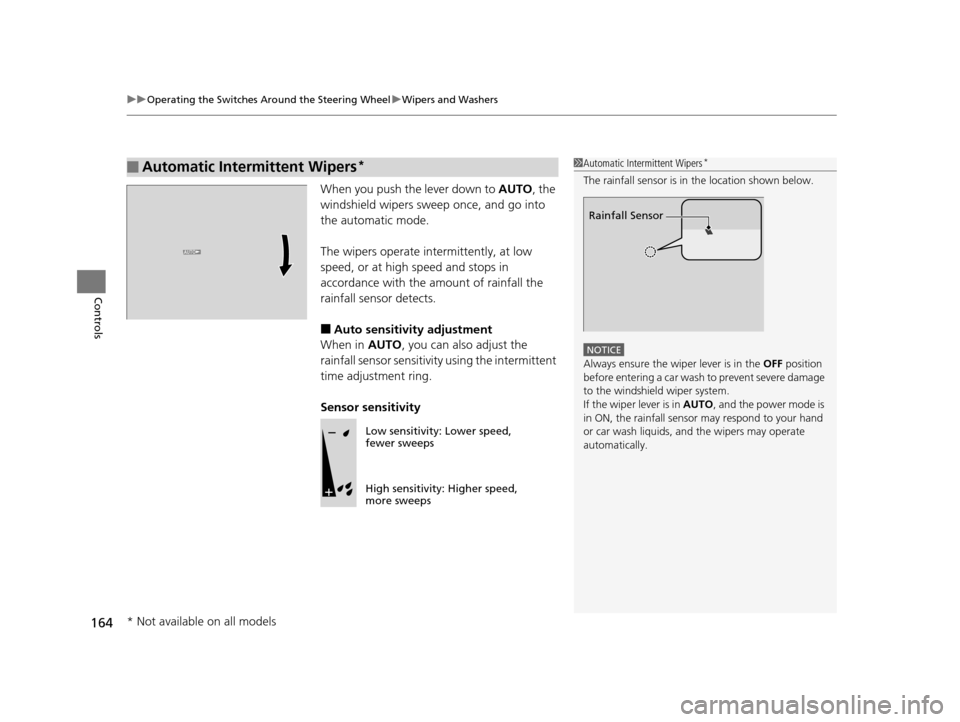
Sensor sensitivity
■Automatic Intermittent Wipers*1 Automatic Intermittent Wipers*
The rainfall sensor is in the location shown below.
NOTICE
Always ensure the wiper lever is in the OFF position
before entering a car wash to prevent severe damage
to the windshiel d wiper system.
If the wiper lever is in AUTO , and the power mode is
in ON, the rainfall sensor may respond to your hand
or car wash liquids, and the wipers may operate
automatically.
Rainfall Sensor
Low sensitivity: Lower speed,
fewer sweeps
High sensitivity: Higher speed,
more sweeps
* Not available on all models
16 PILOT-31TG76000.book 164 ページ 2015年6月15日 月曜日 午前11時30分
Page 172 of 661
171
Controls
Adjusting the Mirrors
Interior Rearview Mirror
Adjust the angle of the rearview mirror when you are sitting in the correct driving
position.
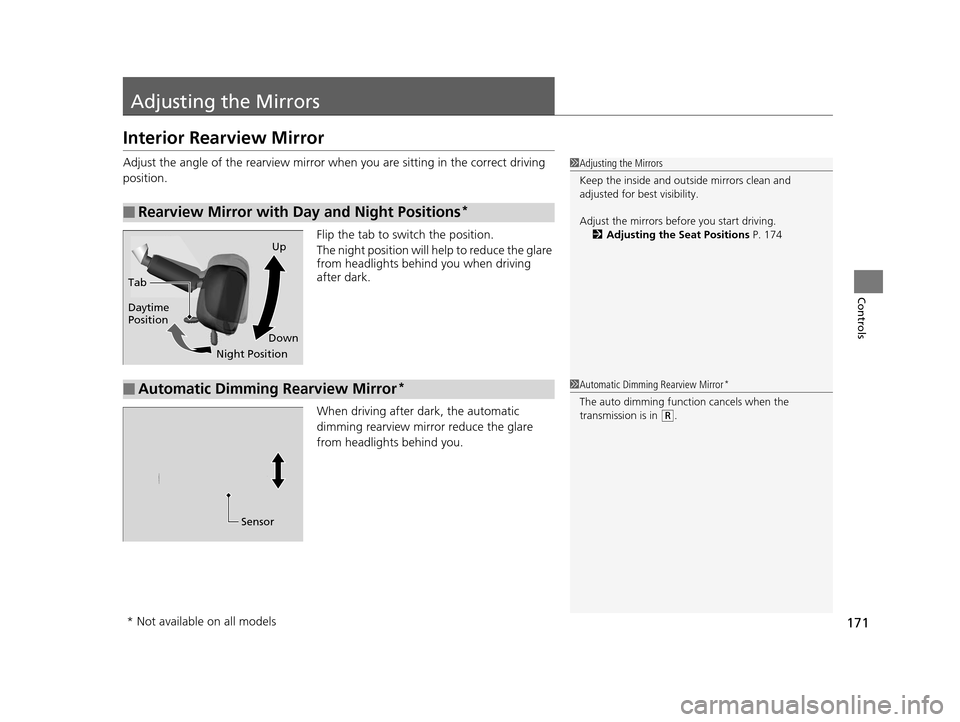
Flip the tab to switch the position.
The night position will help to reduce the glare
from headlights behind you when driving
after dark.
When driving after dark, the automatic
dimming rearview mirror reduce the glare
from headlights behind you.
■Rearview Mirror with Day and Night Positions*
1Adjusting the Mirrors
Keep the inside and out side mirrors clean and
adjusted for best visibility.
Adjust the mirrors befo re you start driving.
2 Adjusting the Seat Positions P. 174
Tab
Daytime
Position
Night PositionUp
Down
■Automatic Dimming Rearview Mirror*1 Automatic Dimming Rearview Mirror*
The auto dimming function cancels when the
transmission is in
(R.
Sensor
* Not available on all models
16 PILOT-31TG76000.book 171 ページ 2015年6月15日 月曜日 午前11時30分
Page 185 of 661
uuAdjusting the Seats uRear Seats
184
Controls
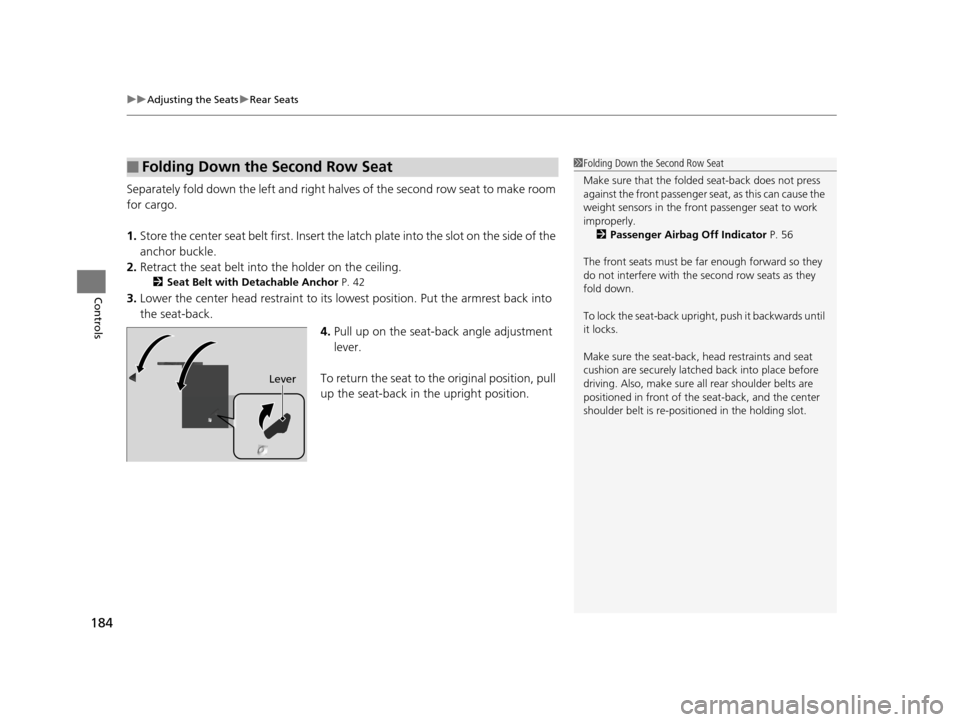
Separately fold down the left and right halves of the second row seat to make room
for cargo.
1. Store the center seat belt first. Insert the latch plate into the slot on the side of the
anchor buckle.
2. Retract the seat belt into the holder on the ceiling.
2 Seat Belt with Detachable Anchor P. 42
3.Lower the center head restraint to its lo west position. Put the armrest back into
the seat-back.
4.Pull up on the seat-back angle adjustment
lever.
To return the seat to th e original position, pull
up the seat-back in the upright position.
■Folding Down the Second Row Seat1Folding Down the Second Row Seat
Make sure that the folded seat-back does not press
against the front passenger seat, as this can cause the
weight sensors in the front passenger seat to work
improperly. 2 Passenger Airbag Off Indicator P. 56
The front seats must be far enough forward so they
do not interfere with the second row seats as they
fold down.
To lock the seat-back upri ght, push it backwards until
it locks.
Make sure the seat-back, head restraints and seat
cushion are securely latche d back into place before
driving. Also, make sure all rear shoulder belts are
positioned in front of the seat-back, and the center
shoulder belt is re-posit ioned in the holding slot.
Lever
16 PILOT-31TG76000.book 184 ページ 2015年6月15日 月曜日 午前11時30分
Page 198 of 661
Continued197
uuInterior Lights/Interior Convenience Items uInterior Convenience Items
Controls
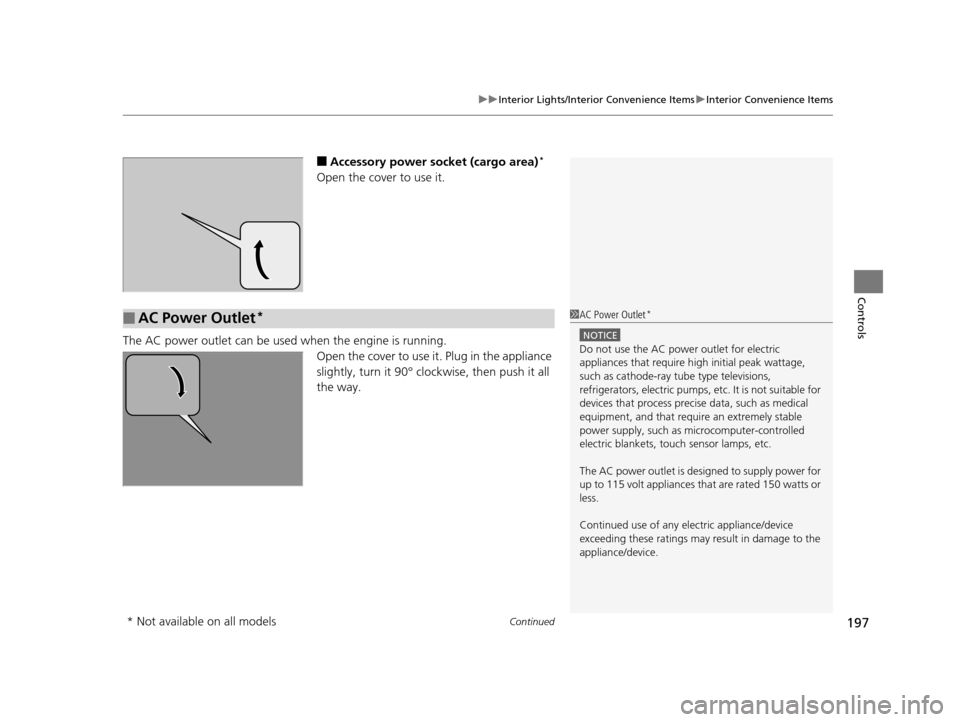
■Accessory power socket (cargo area)*
Open the cover to use it.
The AC power outlet can be used when the engine is running.
Open the cover to use it. Plug in the appliance
slightly, turn it 90° clockwise, then push it all
the way.
■AC Power Outlet*1AC Power Outlet*
NOTICE
Do not use the AC power outlet for electric
appliances that require hi gh initial peak wattage,
such as cathode-ray tube type televisions,
refrigerators, electric pumps, etc. It is not suitable for
devices that process precis e data, such as medical
equipment, and that require an extremely stable
power supply, such as microcomputer-controlled
electric blankets, touc h sensor lamps, etc.
The AC power outlet is desi gned to supply power for
up to 115 volt appliances that are rated 150 watts or
less.
Continued use of any elec tric appliance/device
exceeding these ratings may result in damage to the
appliance/device.
* Not available on all models
16 PILOT-31TG76000.book 197 ページ 2015年6月15日 月曜日 午前11時30分
Page 217 of 661
216
uuClimate Control System*uAutomatic Climate Control Sensors
Controls
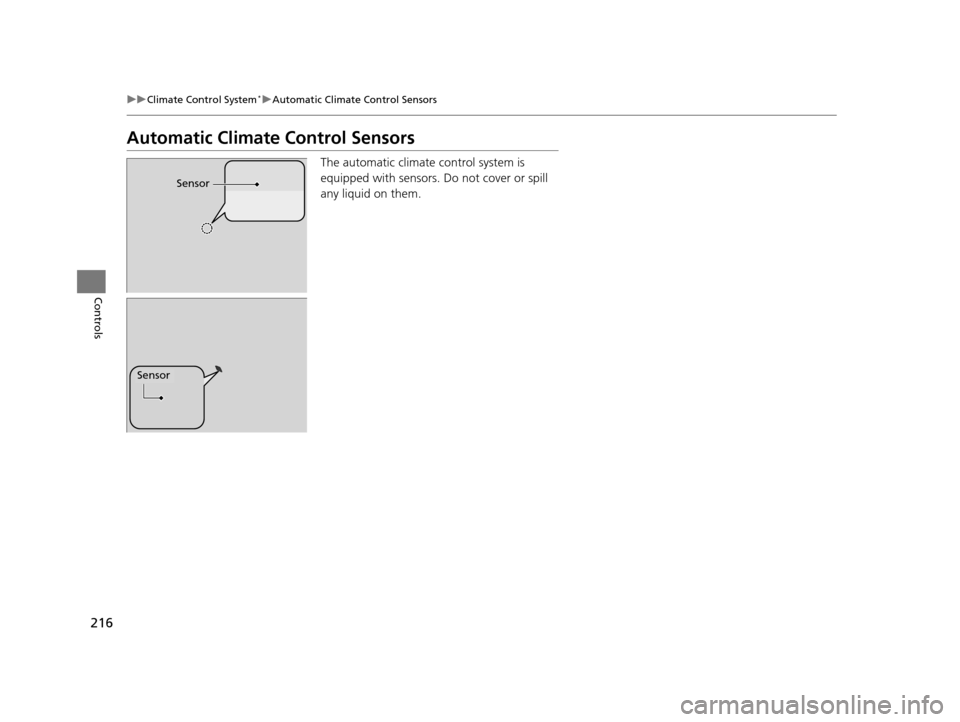
Automatic Climate Control Sensors
The automatic climate control system is
equipped with sensors. Do not cover or spill
any liquid on them.
Sensor
Sensor
16 PILOT-31TG76000.book 216 ページ 2015年6月15日 月曜日 午前11時30分
Page 442 of 661
441
Driving
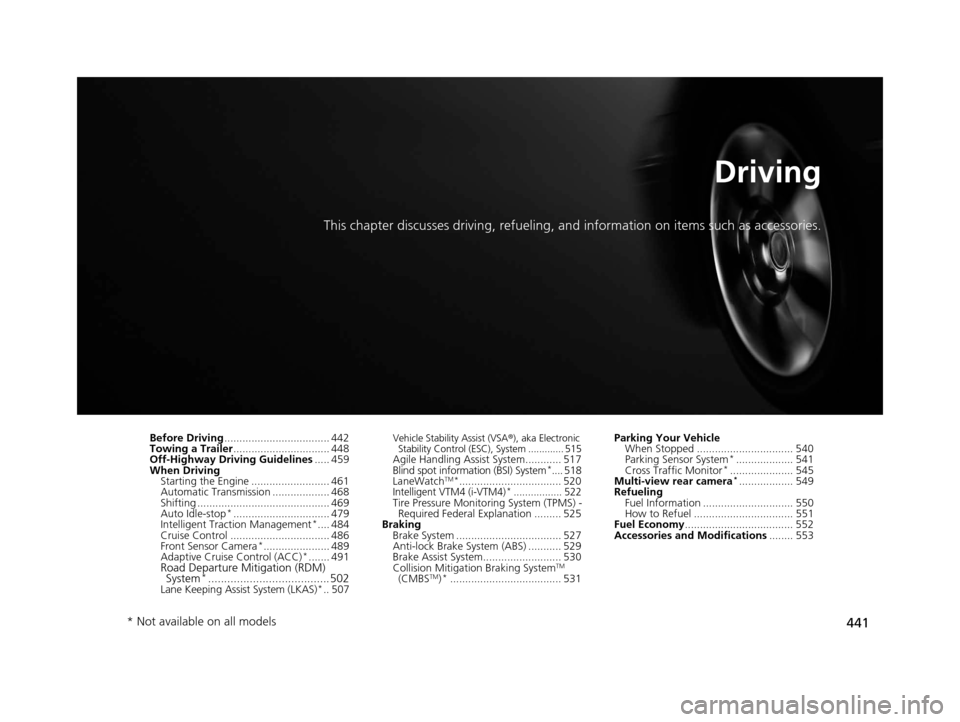
This chapter discusses driving, refueling, and information on items such as accessories.
Before Driving................................... 442
Towing a Trailer ................................ 448
Off-Highway Driving Guidelines ..... 459
When Driving Starting the Engine .......................... 461
Automatic Transmission ................... 468
Shifting ............................................ 469
Auto Idle-stop
*................................ 479
Intelligent Traction Management*.... 484
Cruise Control ................................. 486
Front Sensor Camera
*...................... 489
Adaptive Cruise Control (ACC)*....... 491Road Departure Mi tigation (RDM)
System*...................................... 502Lane Keeping Assist System (LKAS)*.. 507
Vehicle Stability Assist (VSA ®), aka Electronic
Stability Control (ESC), System ............. 515
Agile Handling Assist System............ 517
Blind spot inform ation (BSI) System*.... 518
LaneWatchTM*.................................. 520Intelligent VTM4 (i-VTM4)*................. 522Tire Pressure Monitoring System (TPMS) - Required Federal Explanation ......... 525
Braking
Brake System ................................... 527
Anti-lock Brake System (ABS) ........... 529
Brake Assist System.......................... 530
Collision Mitigati on Braking System
TM
(CMBSTM)*..................................... 531 Parking Your Vehicle
When Stopped ................................ 540
Parking Sensor System
*................... 541
Cross Traffic Monitor*..................... 545
Multi-view rear camera*.................. 549
Refueling
Fuel Information .............................. 550
How to Refuel ................................. 551
Fuel Economy .................................... 552
Accessories and Modifications ........ 553
* Not available on all models
16 PILOT-31TG76000.book 441 ページ 2015年6月15日 月曜日 午前11時30分
Page 445 of 661
444
uuBefore Driving uDriving Preparation
Driving
• Be sure items placed on the floor behind the front seats cannot roll under the
seats.
u They can interfere with the driver’s ability to operate the pedals, the operation
of the seats, or the operation of the sensors under the seats.
• Everyone in the vehicle must fasten their seat belt.
2Fastening a Seat Belt P. 40
•Make sure that the indicators in the ins trument panel come on when you start the
vehicle, and go off soon after.
u Always have a dealer check the vehicle if a problem is indicated.
2 Indicators P. 78
16 PILOT-31TG76000.book 444 ページ 2015年6月15日 月曜日 午前11時30分