display HONDA PILOT 2019 Owner's Manual (in English)
[x] Cancel search | Manufacturer: HONDA, Model Year: 2019, Model line: PILOT, Model: HONDA PILOT 2019Pages: 747, PDF Size: 45.81 MB
Page 498 of 747
uuBluetooth ® HandsFreeLink ®u HFL Menus
496
Features
HFL can display newly received text messa ges as well as the last 20 messages
received on a linked cell phone. Each received message can be read aloud and
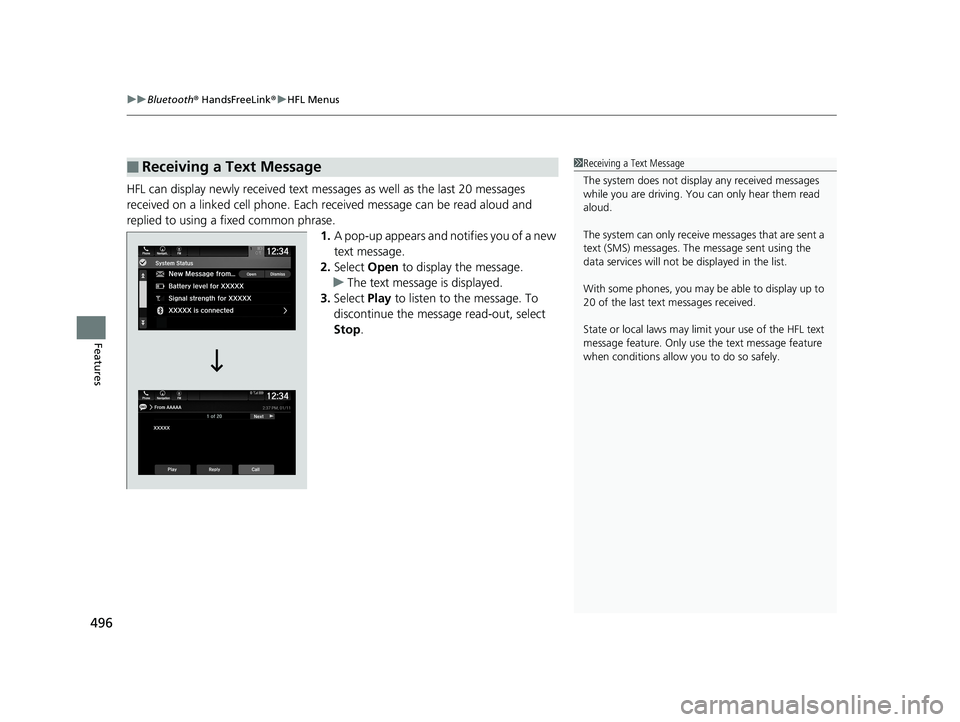
replied to using a fixed common phrase. 1.A pop-up appears and notifies you of a new
text message.
2. Select Open to display the message.
u The text message is displayed.
3. Select Play to listen to the message. To
discontinue the message read-out, select
Stop .
■Receiving a Text Message1Receiving a Text Message
The system does not display any received messages
while you are driving. You can only hear them read
aloud.
The system can only receive messages that are sent a
text (SMS) messages. The message sent using the
data services will not be displayed in the list.
With some phones, you may be able to display up to
20 of the last text messages received.
State or local laws may limit your use of the HFL text
message feature. Only use the text message feature
when conditions allow you to do so safely.
19 PILOT HMA ELP-31TG76310.book 496 ページ 2019年3月15日 金曜日 午後6時8分
Page 500 of 747
uuBluetooth ® HandsFreeLink ®u HFL Menus
498
Features
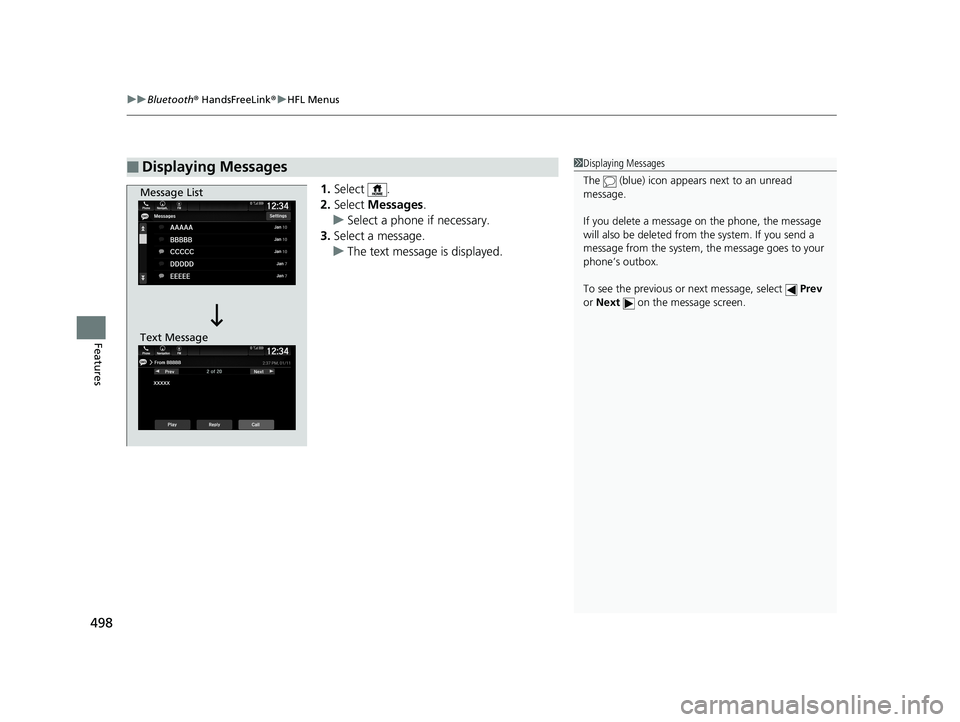
1. Select .
2. Select Messages .
u Select a phone if necessary.
3. Select a message.
u The text message is displayed.
■Displaying Messages1Displaying Messages
The (blue) icon appears next to an unread
message.
If you delete a message on the phone, the message
will also be dele ted from the system. If you send a
message from the system, the message goes to your
phone’s outbox.
To see the previous or next message, select Prev
or Next on the message screen.
Message List
Text Message
19 PILOT HMA ELP-31TG76310.book 498 ページ 2019年3月15日 金曜日 午後6時8分
Page 502 of 747
uuBluetooth ® HandsFreeLink ®u HFL Menus
500
Features
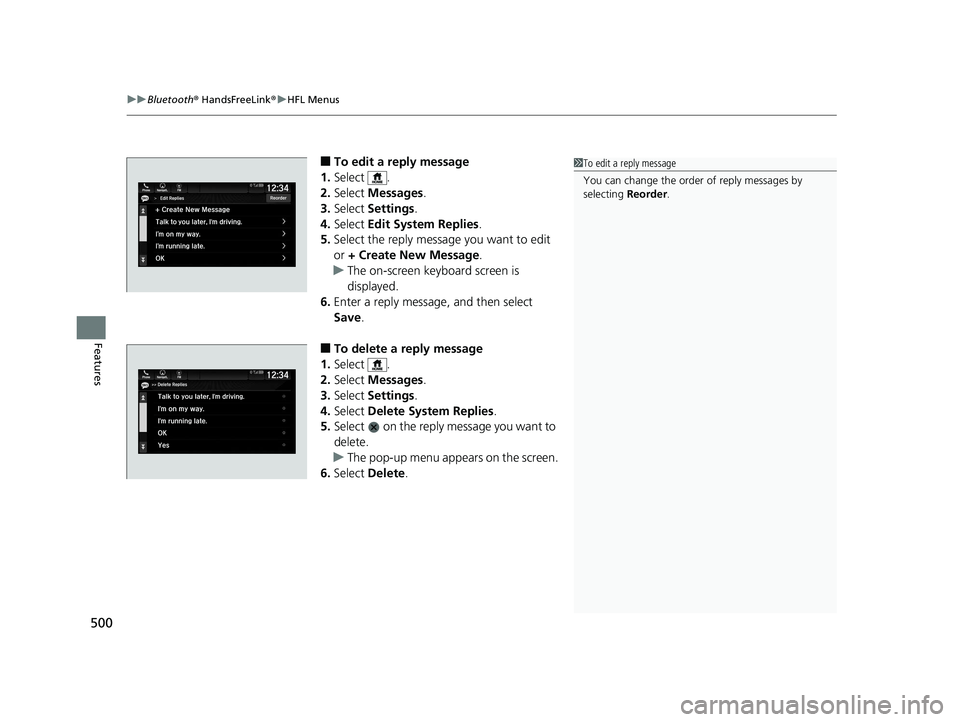
■To edit a reply message
1. Select .
2. Select Messages .
3. Select Settings .
4. Select Edit System Replies .
5. Select the reply message you want to edit
or + Create New Message .
u The on-screen keyboard screen is
displayed.
6. Enter a reply message, and then select
Save.
■To delete a reply message
1. Select .
2. Select Messages .
3. Select Settings .
4. Select Delete System Replies .
5. Select on the reply message you want to
delete.
u The pop-up menu appears on the screen.
6. Select Delete.
1To edit a reply message
You can change the order of reply messages by
selecting Reorder.
19 PILOT HMA ELP-31TG76310.book 500 ページ 2019年3月15日 金曜日 午後6時8分
Page 543 of 747
![HONDA PILOT 2019 Owners Manual (in English) Continued541
uuWhen Driving uShifting
Driving
■If you want to keep the transmission in (N position [car wash mode]
With the engine running:
1. Press and hold the brake pedal.
2. Select
(N, then rel HONDA PILOT 2019 Owners Manual (in English) Continued541
uuWhen Driving uShifting
Driving
■If you want to keep the transmission in (N position [car wash mode]
With the engine running:
1. Press and hold the brake pedal.
2. Select
(N, then rel](/img/13/34508/w960_34508-542.png)
Continued541
uuWhen Driving uShifting
Driving
■If you want to keep the transmission in (N position [car wash mode]
With the engine running:
1. Press and hold the brake pedal.
2. Select
(N, then release the button to display (Neutral) (N hold mode on the driver
information interface.
3. Press and hold
(N again for two seconds.
u This puts the vehicle in car wash mode which must be used when your vehicle
is pulled through a conveyor type automatic car wash where you or an
attendant do not remain in the vehicle.
If the ENGINE STOP/START button is pressed
after car wash mode has been activated, the
power mode will change to ACCESSORY and a
message will be displayed on the driver
information interface. u For 15 minutes the g ear position remains
in
(N with the power mode in
ACCESSORY. After that, the position
automatically changes to
( P and the
power mode changes to OFF.
u Manually changing to
(P cancels
ACCESSORY mode. The
(P indicator
comes on and the power mode changes
to OFF. You must always shift to
(P
when car wash mode is no longer
needed.
1If you want to keep the transmission in ( N position [car wash mode]
To keep the vehicle (N position, you can also follow
this procedure:
While the power mode is on, select
( N, and then
within five seconds, press the ENGINE STOP/START
button.
Note that the transmiss ion may not stay in
(N
position while any of the following indicators is on:
•Transmission system indicator.
•Malfunction indicator lamp.•Charging system indicator.
19 PILOT HMA ELP-31TG76310.book 541 ページ 2019年3月15日 金曜日 午後6時8分
Page 561 of 747
559
uuWhen Driving uLaneWatchTM*
Continued
Driving
LaneWatchTM*
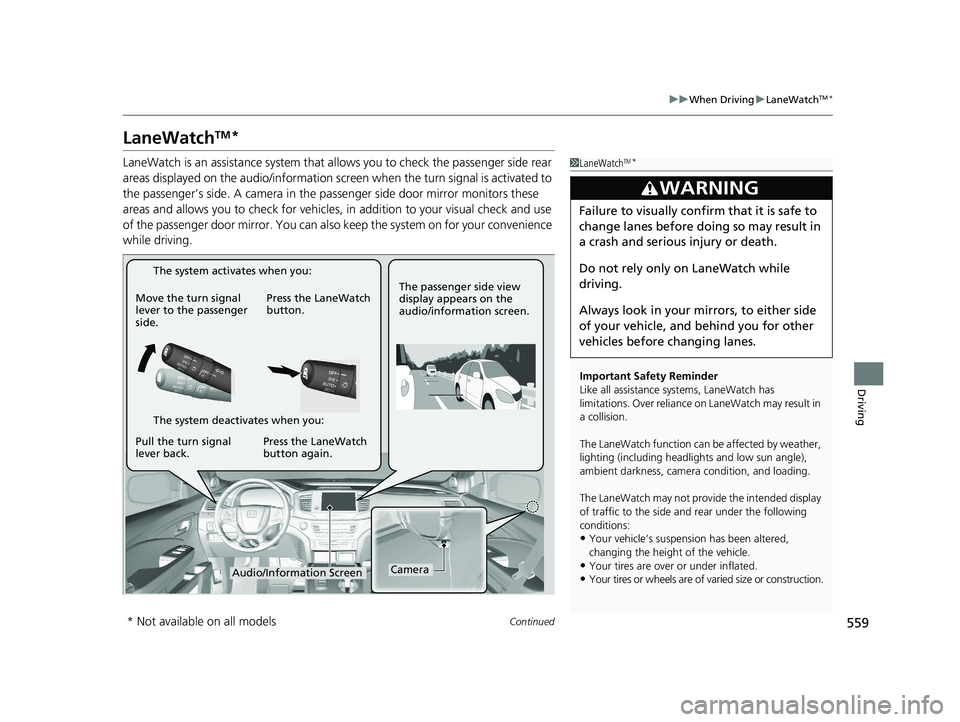
LaneWatch is an assistance system that al lows you to check the passenger side rear
areas displayed on the audio/information screen when the turn signal is activated to
the passenger’s side. A camera in the pa ssenger side door mirror monitors these
areas and allows you to check for vehicles, in addition to your visual check and use
of the passenger door mirror. You can also keep the system on for your convenience
while driving.1 LaneWatchTM*
Important Safety Reminder
Like all assistance systems, LaneWatch has
limitations. Over reliance on LaneWatch may result in
a collision.
The LaneWatch func tion can be affected by weather,
lighting (including headli ghts and low sun angle),
ambient darkness, camera condition, and loading.
The LaneWatch may not prov ide the intended display
of traffic to the side and rear under the following
conditions:
•Your vehicle’s suspension has been altered,
changing the height of the vehicle.
•Your tires are over or under inflated.
•Your tires or wheels are of varied size or construction.
3WARNING
Failure to visually confirm that it is safe to
change lanes before doing so may result in
a crash and serious injury or death.
Do not rely only on LaneWatch while
driving.
Always look in your mi rrors, to either side
of your vehicle, and behind you for other
vehicles before changing lanes.
CameraAudio/Information Screen
Move the turn signal
lever to the passenger
side.
Press the LaneWatch
button.
Pull the turn signal
lever back. Press the LaneWatch
button again. The passenger side view
display appears on the
audio/information screen.
The system activates when you:
The system deactivates when you:
* Not available on all models
19 PILOT HMA ELP-31TG76310.book 559 ページ 2019年3月15日 金曜日 午後6時8分
Page 562 of 747
uuWhen Driving uLaneWatchTM*
560
Driving
■Customizing the LaneWatch settings
You can customize the following items using the audio/information screen.
• Show with Turn Signal : Selects whether LaneWatch monitor comes on when
you operate the turn signal light lever.
• Show Reference Line : Selects whether the reference lines appear on the
LaneWatch monitor.
• Display : Adjusts display settings.
2Customized Features P. 432
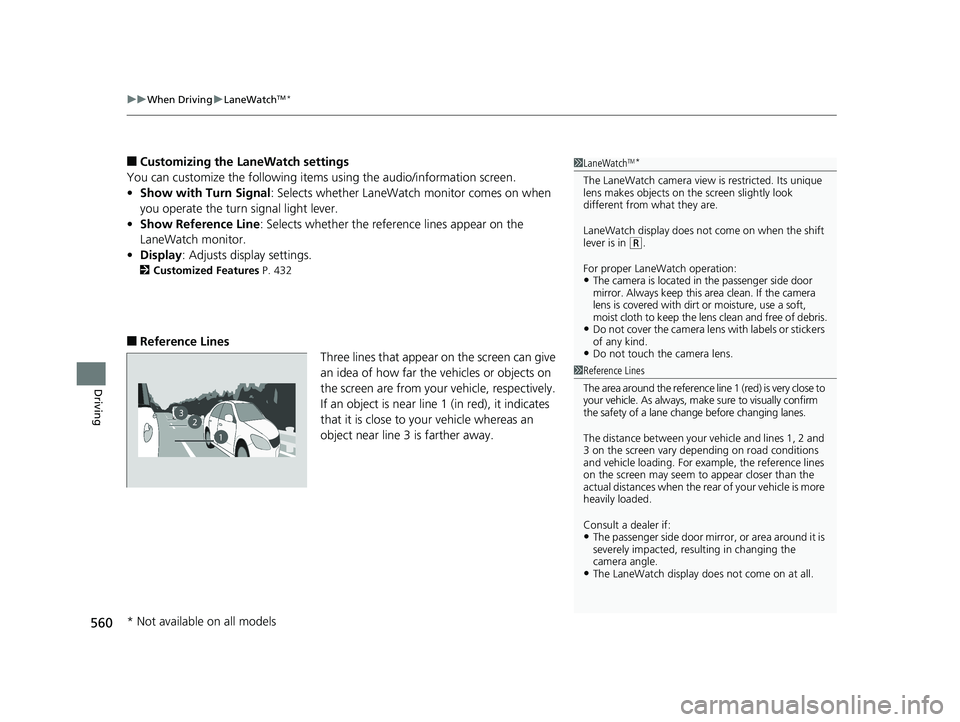
■Reference Lines
Three lines that appear on the screen can give
an idea of how far the vehicles or objects on
the screen are from your vehicle, respectively.
If an object is near line 1 (in red), it indicates
that it is close to your vehicle whereas an
object near line 3 is farther away.
1 LaneWatchTM*
The LaneWatch camera view is restricted. Its unique
lens makes objects on the screen slightly look
different from what they are.
LaneWatch display does not come on when the shift
lever is in
( R.
For proper LaneWatch operation:
•The camera is located in the passenger side door
mirror. Always keep this area clean. If the camera
lens is covered with dirt or moisture, use a soft,
moist cloth to keep the lens clean and free of debris.
•Do not cover the camera lens with labels or stickers
of any kind.
•Do not touch the camera lens.
1Reference Lines
The area around the reference line 1 (red) is very close to
your vehicle. As always, m ake sure to visually confirm
the safety of a lane chan ge before changing lanes.
The distance betwee n your vehicle and lines 1, 2 and
3 on the screen vary depending on road conditions
and vehicle loading. For ex ample, the reference lines
on the screen may seem to appear closer than the
actual distances when the rear of your vehicle is more
heavily loaded.
Consult a dealer if:
•The passenger side door mirr or, or area around it is
severely impacted, resulting in changing the
camera angle.
•The LaneWatch display doe s not come on at all.
23
1
* Not available on all models
19 PILOT HMA ELP-31TG76310.book 560 ページ 2019年3月15日 金曜日 午後6時8分
Page 565 of 747
563
uuWhen Driving uTire Pressure Monitoring System (TPMS) with Tire Fill Assist
Driving
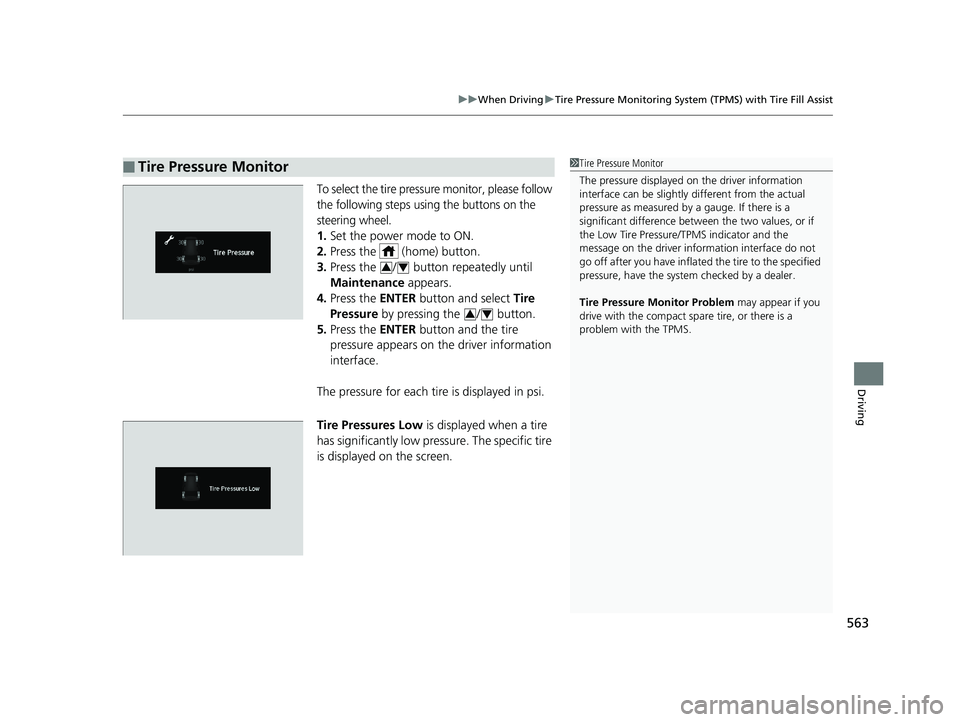
To select the tire pressure monitor, please follow
the following steps using the buttons on the
steering wheel.
1. Set the power mode to ON.
2. Press the (home) button.
3. Press the / button repeatedly until
Maintenance appears.
4. Press the ENTER button and select Tire
Pressure by pressing the / button.
5. Press the ENTER button and the tire
pressure appears on th e driver information
interface.
The pressure for each tire is displayed in psi.
Tire Pressures Low is displayed when a tire
has significantly low pressure. The specific tire
is displayed on the screen.
■Tire Pressure Monitor1 Tire Pressure Monitor
The pressure displayed on the driver information
interface can be slightly different from the actual
pressure as measured by a gauge. If there is a
significant di fference between the two values, or if
the Low Tire Pressure/TPMS indicator and the
message on the driver info rmation interface do not
go off after you have inflated the tire to the specified
pressure, have the system checked by a dealer.
Tire Pressure Monitor Problem may appear if you
drive with the compact spare tire, or there is a
problem with the TPMS.
34
34
19 PILOT HMA ELP-31TG76310.book 563 ページ 2019年3月15日 金曜日 午後6時8分
Page 570 of 747
568
uuHonda Sensing ®u
Driving
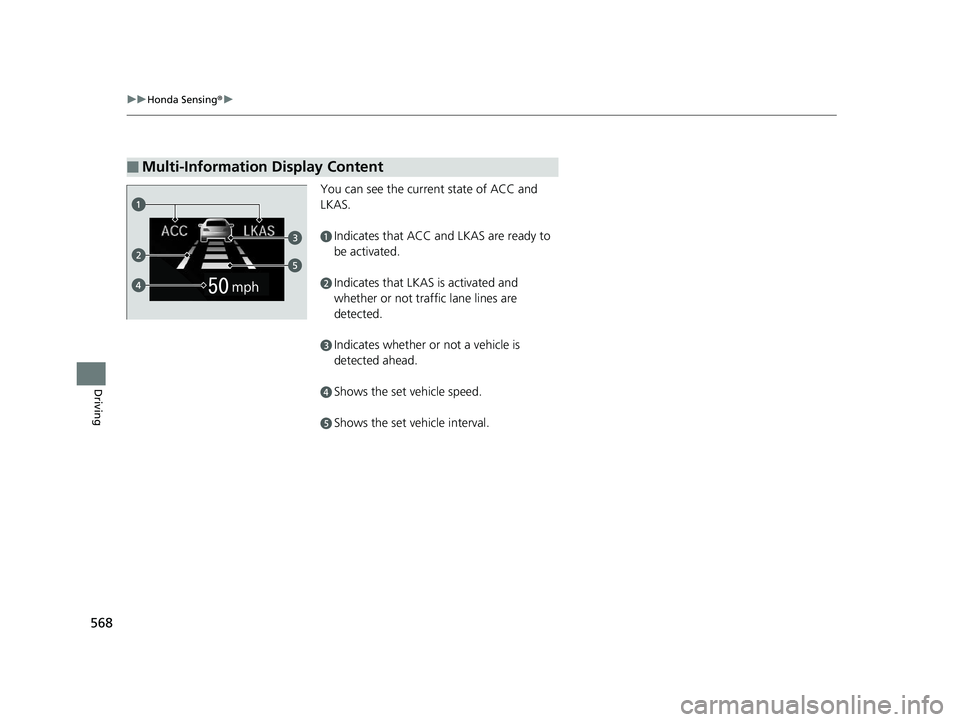
You can see the current state of ACC and
LKAS.
aIndicates that ACC and LKAS are ready to
be activated.
bIndicates that LKAS is activated and
whether or not traffic lane lines are
detected.
cIndicates whether or not a vehicle is
detected ahead.
dShows the set vehicle speed.
eShows the set vehicle interval.
■Multi-Information Display Content
19 PILOT HMA ELP-31TG76310.book 568 ページ 2019年3月15日 金曜日 午後6時8分
Page 585 of 747
Continued583
uuHonda Sensing ®u Adaptive Cruise Control (ACC)
Driving
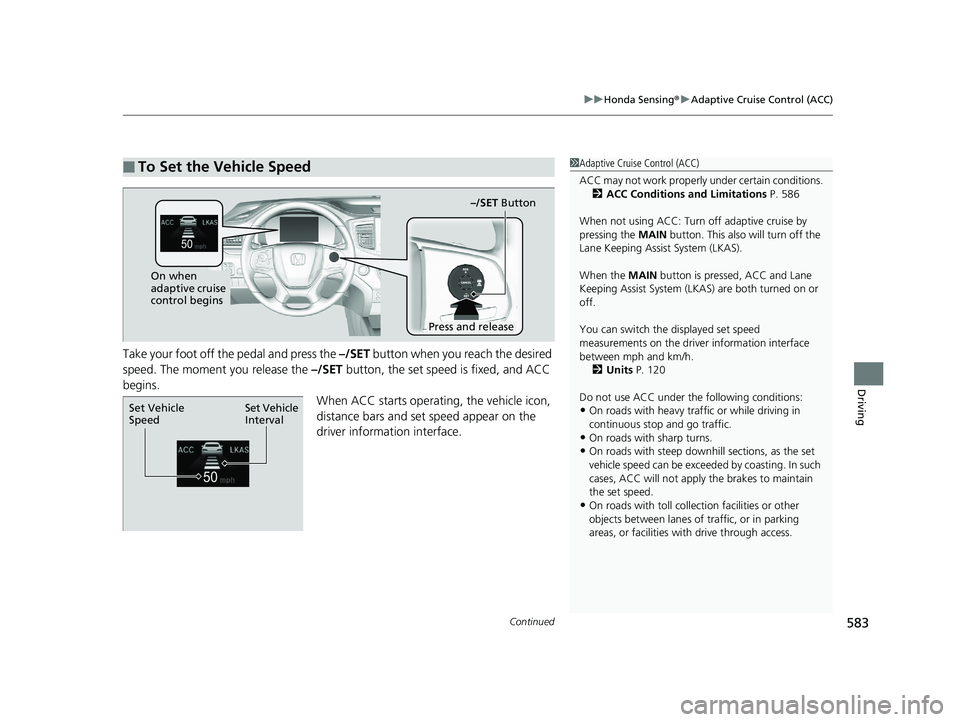
Take your foot off the pedal and press the –/SET button when you reach the desired
speed. The moment you release the –/SET button, the set speed is fixed, and ACC
begins.
When ACC starts operating, the vehicle icon,
distance bars and set speed appear on the
driver information interface.
■To Set the Vehicle Speed1Adaptive Cruise Control (ACC)
ACC may not work properly under certain conditions.
2 ACC Conditions and Limitations P. 586
When not using ACC: Turn off adaptive cruise by
pressing the MAIN button. This also will turn off the
Lane Keeping Assist System (LKAS).
When the MAIN button is pressed, ACC and Lane
Keeping Assist System (LKAS) are both turned on or
off.
You can switch the displayed set speed
measurements on the driver information interface
between mph and km/h.
2 Units P. 120
Do not use ACC under the following conditions:
•On roads with heavy traf fic or while driving in
continuous stop and go traffic.
•On roads with sharp turns.•On roads with steep downhill sections, as the set
vehicle speed can be exceeded by coasting. In such
cases, ACC will not apply the brakes to maintain
the set speed.
•On roads with toll collection facilities or other
objects between lanes of traffic, or in parking
areas, or faci lities with driv e through access.
On when
adaptive cruise
control begins
Press and release–/SET Button
Set Vehicle
Interval
Set Vehicle
Speed
19 PILOT HMA ELP-31TG76310.book 583 ページ 2019年3月15日 金曜日 午後6時8分
Page 591 of 747
Continued589
uuHonda Sensing ®u Adaptive Cruise Control (ACC)
Driving
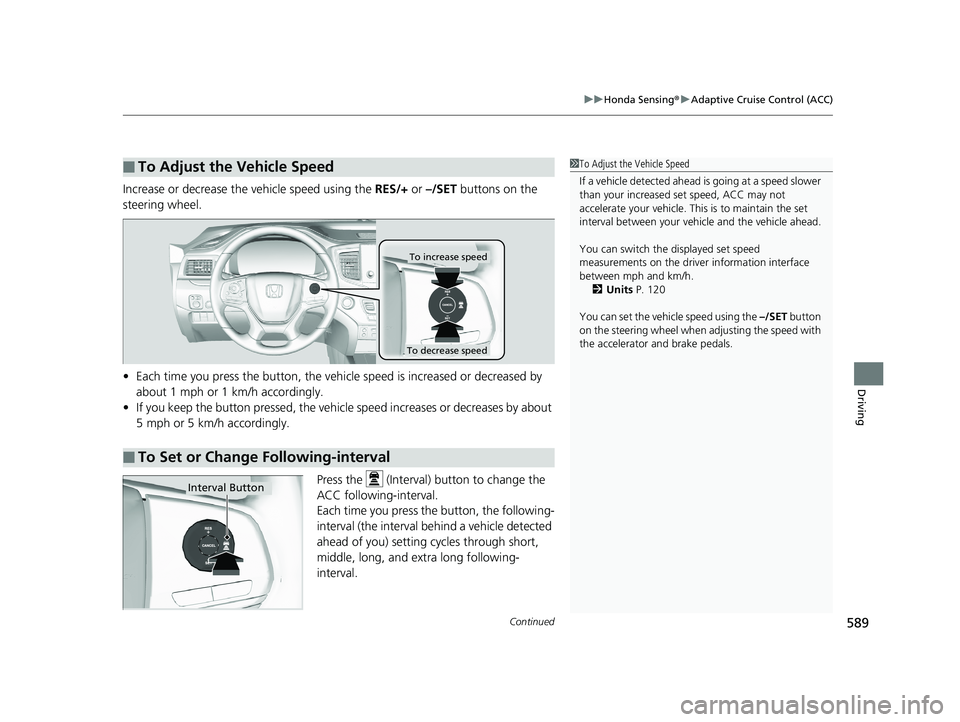
Increase or decrease the vehicle speed using the RES/+ or –/SET buttons on the
steering wheel.
• Each time you press the button, the vehicl e speed is increased or decreased by
about 1 mph or 1 km/h accordingly.
• If you keep the button pressed, the vehicle speed increases or decreases by about
5 mph or 5 km/h accordingly.
Press the (Interval) button to change the
ACC following-interval.
Each time you press th e button, the following-
interval (the interval behind a vehicle detected
ahead of you) setting cycles through short,
middle, long, and extra long following-
interval.
■To Adjust the Vehicle Speed1 To Adjust the Vehicle Speed
If a vehicle detected ahead is going at a speed slower
than your increased set speed, ACC may not
accelerate your vehicle. This is to maintain the set
interval between your vehi cle and the vehicle ahead.
You can switch the displayed set speed
measurements on the driver information interface
between mph and km/h. 2 Units P. 120
You can set the vehicle speed using the –/SET button
on the steering wheel when adjusting the speed with
the accelerator and brake pedals.
■To Set or Change Following-interval
To increase speed
To decrease speed
Interval Button
19 PILOT HMA ELP-31TG76310.book 589 ページ 2019年3月15日 金曜日 午後6時8分