engine HONDA PILOT 2020 (in English) Service Manual
[x] Cancel search | Manufacturer: HONDA, Model Year: 2020, Model line: PILOT, Model: HONDA PILOT 2020Pages: 743, PDF Size: 45.53 MB
Page 177 of 743
175
uuOperating the Switches Around the Steering Wheel uLight Switches
Continued
Controls
Light Switches
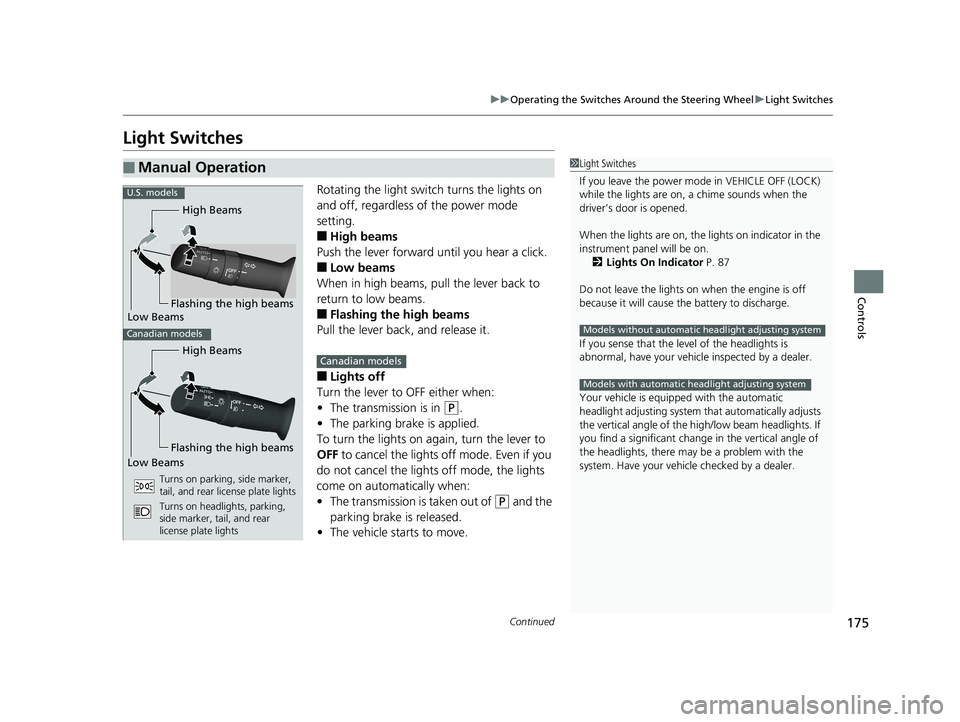
Rotating the light switch turns the lights on
and off, regardless of the power mode
setting.
■High beams
Push the lever forward until you hear a click.
■Low beams
When in high beams, pull the lever back to
return to low beams.
■Flashing the high beams
Pull the lever back, and release it.
■Lights off
Turn the lever to OFF either when:
• The transmission is in
(P.
• The parking brake is applied.
To turn the light s on again, turn the lever to
OFF to cancel the lights off mode. Even if you
do not cancel the lights off mode, the lights
come on automatically when:
• The transmission is taken out of
(P and the
parking brake is released.
• The vehicle starts to move.
■Manual Operation1Light Switches
If you leave the power mode in VEHICLE OFF (LOCK)
while the lights are on, a chime sounds when the
driver’s door is opened.
When the lights are on, the lights on indicator in the
instrument pane l will be on.
2 Lights On Indicator P. 87
Do not leave the lights on when the engine is off
because it will cause the battery to discharge.
If you sense that the le vel of the headlights is
abnormal, have your vehicle inspected by a dealer.
Your vehicle is equipped with the automatic
headlight adjusting system that automatically adjusts
the vertical angle of the high/low beam headlights. If
you find a significant change in the vertical angle of
the headlights, there may be a problem with the
system. Have your vehicle checked by a dealer.
Models without automatic headlight adjusting system
Models with automatic headlight adjusting system
High Beams
Flashing the high beams
Low Beams
Turns on parking, side marker,
tail, and rear license plate lights
Turns on headlights, parking,
side marker, tail, and rear
license plate lights
U.S. models
Canadian models
High Beams
Flashing the high beams
Low BeamsCanadian models
20 PILOT-31TG76401.book 175 ページ 2019年7月24日 水曜日 午後3時32分
Page 188 of 743
186
uuOperating the Switches Around the Steering Wheel uRear Defogger/Heated Door Mirror* Button
Controls
Rear Defogger/Heated Door Mirror* Button
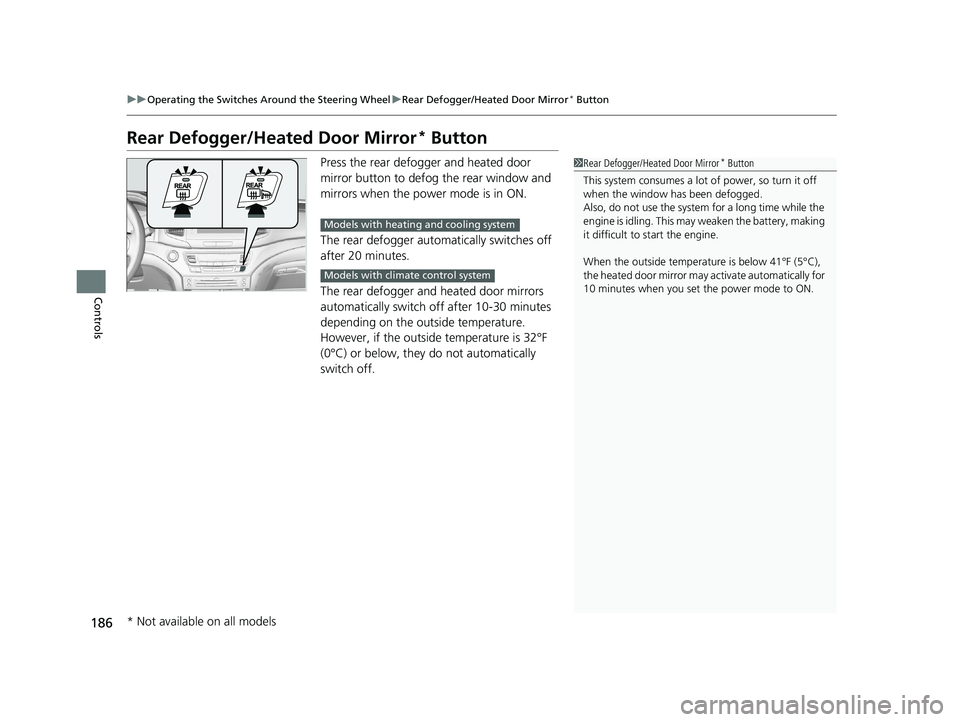
Press the rear defogger and heated door
mirror button to defog the rear window and
mirrors when the power mode is in ON.
The rear defogger automatically switches off
after 20 minutes.
The rear defogger and heated door mirrors
automatically switch off after 10-30 minutes
depending on the outside temperature.
However, if the outside temperature is 32°F
(0°C) or below, they do not automatically
switch off.1Rear Defogger/Heated Door Mirror* Button
This system consumes a lot of power, so turn it off
when the window has been defogged.
Also, do not use the system for a long time while the
engine is idling. This may weaken the battery, making
it difficult to start the engine.
When the outside temperature is below 41°F (5°C),
the heated door mirror may activate automatically for
10 minutes when you set the power mode to ON.
Models with heating and cooling system
Models with climate control system
* Not available on all models
20 PILOT-31TG76401.book 186 ページ 2019年7月24日 水曜日 午後3時32分
Page 189 of 743
187
uuOperating the Switches Around the Steering Wheel uHeated Windshield Button
Controls
Heated Windshield Button
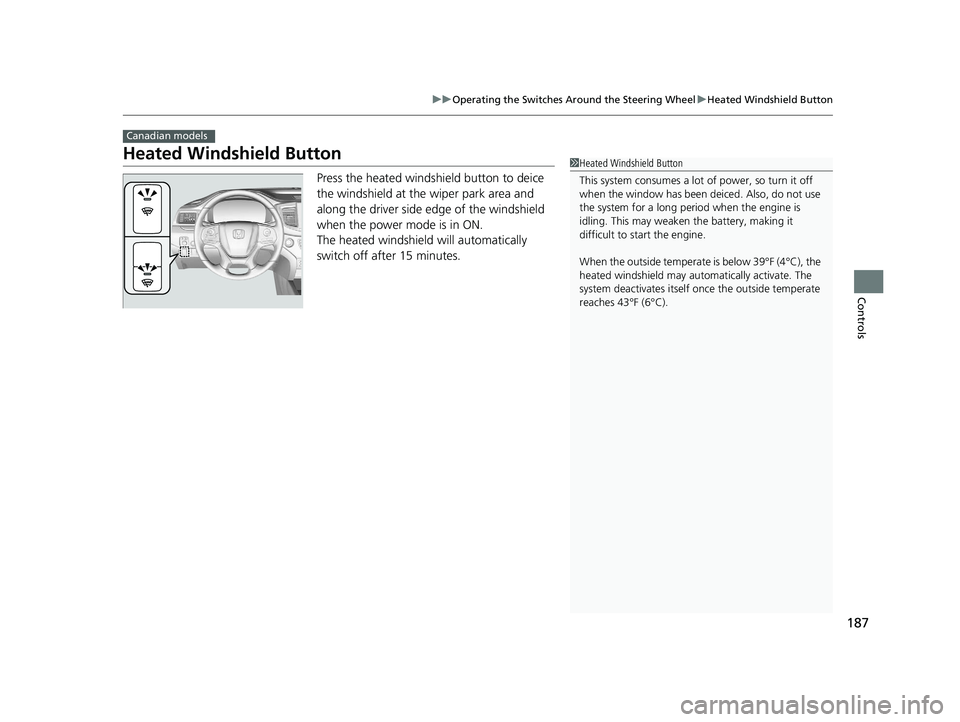
Press the heated windshield button to deice
the windshield at the wiper park area and
along the driver side edge of the windshield
when the power mode is in ON.
The heated windshield will automatically
switch off after 15 minutes.
Canadian models
1Heated Windshield Button
This system consumes a lot of power, so turn it off
when the window has been deiced. Also, do not use
the system for a long peri od when the engine is
idling. This may weaken the battery, making it
difficult to start the engine.
When the outside temperate is below 39°F (4°C), the
heated windshield may auto matically activate. The
system deactivates itself once the outside temperate
reaches 43°F (6°C).
20 PILOT-31TG76401.book 187 ページ 2019年7月24日 水曜日 午後3時32分
Page 191 of 743
189
uuOperating the Switches Around the Steering Wheel uDriving Position Memory System*
Continued
Controls
Driving Position Memory System*
You can store two driver’s seat (except for power lumbar) and door mirror positions
with the driving position memory system.
When you unlock and open the driver’s door with a remote transmitter, or smart
entry system, door mirrors adjust to one of the two preset positions and the seat
adjusts to retracted positions of one of the two preset positions automatically.
The seat will move to the stored position when you set the power mode to
ACCESSORY.
When you enter the vehicle, the driver information interface briefly shows you which
remote transmitter you used to unlock the vehicle.
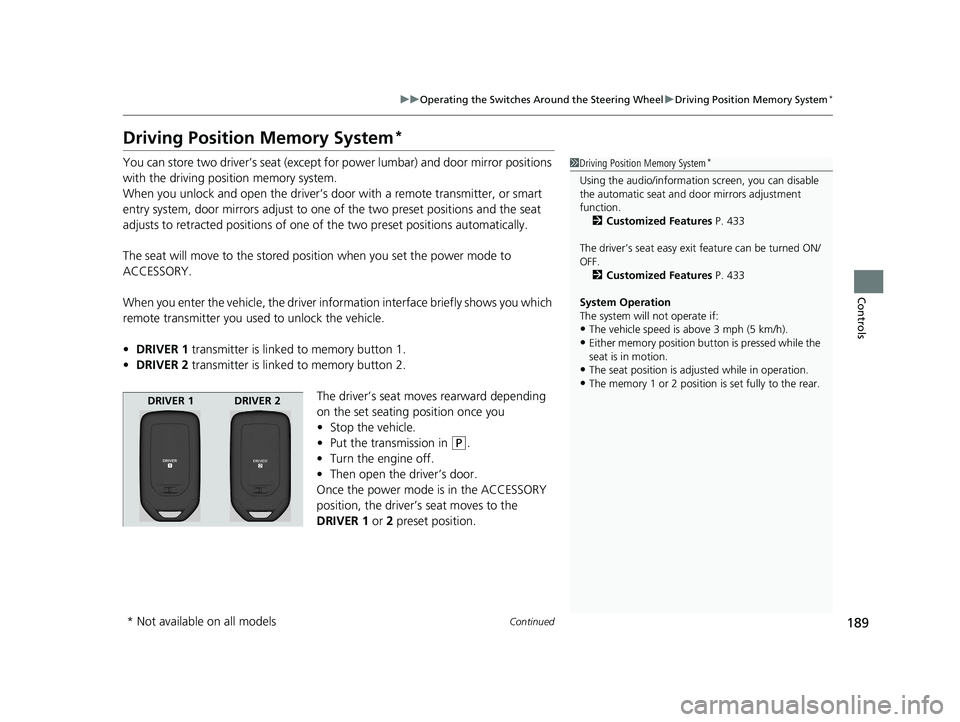
• DRIVER 1 transmitter is linked to memory button 1.
• DRIVER 2 transmitter is linked to memory button 2.
The driver’s seat moves rearward depending
on the set seating position once you
•Stop the vehicle.
• Put the transmission in
(P.
• Turn the engine off.
• Then open the driver’s door.
Once the power mode is in the ACCESSORY
position, the driver’s seat moves to the
DRIVER 1 or 2 preset position.
1 Driving Position Memory System*
Using the audio/informati on screen, you can disable
the automatic seat and d oor mirrors adjustment
function. 2 Customized Features P. 433
The driver’s seat easy exit feature can be turned ON/
OFF. 2 Customized Features P. 433
System Operation
The system will not operate if:
•The vehicle speed is above 3 mph (5 km/h).
•Either memory position button is pressed while the
seat is in motion.
•The seat position is adju sted while in operation.
•The memory 1 or 2 position is set fully to the rear.
DRIVER 1 DRIVER 2
* Not available on all models
20 PILOT-31TG76401.book 189 ページ 2019年7月24日 水曜日 午後3時32分
Page 205 of 743
203
uuAdjusting the Seats uMaintain a Proper Sitting Position
Controls
Maintain a Proper Sitting Position
After all occupants have adjusted their s eats and head restraints, and put on their
seat belts, it is very important that they continue to sit upright, well back in their
seats, with their feet on the floor until the vehicle is safely parked and the engine is
off.
Sitting improperly can increase the chance of injury during a crash. For example, if
an occupant slouches, lies down, turns si deways, sits forward, leans forward or
sideways, or puts one or both feet up, the chance of injury during a crash is greatly
increased.
In addition, an occupant who is out of posi tion in the front seat can be seriously or
fatally injured in a crash by striking interior parts of the vehicle or being struck by an
inflating front airbag.1 Maintain a Proper Sitting Position
3WARNING
Sitting improperly or out of position can
result in serious injury or death in a crash.
Always sit upright, well back in the seat,
with your feet on the floor.
20 PILOT-31TG76401.book 203 ページ 2019年7月24日 水曜日 午後3時32分
Page 211 of 743
209Continued
Controls
Interior Lights/Interior Convenience Items
Interior Lights
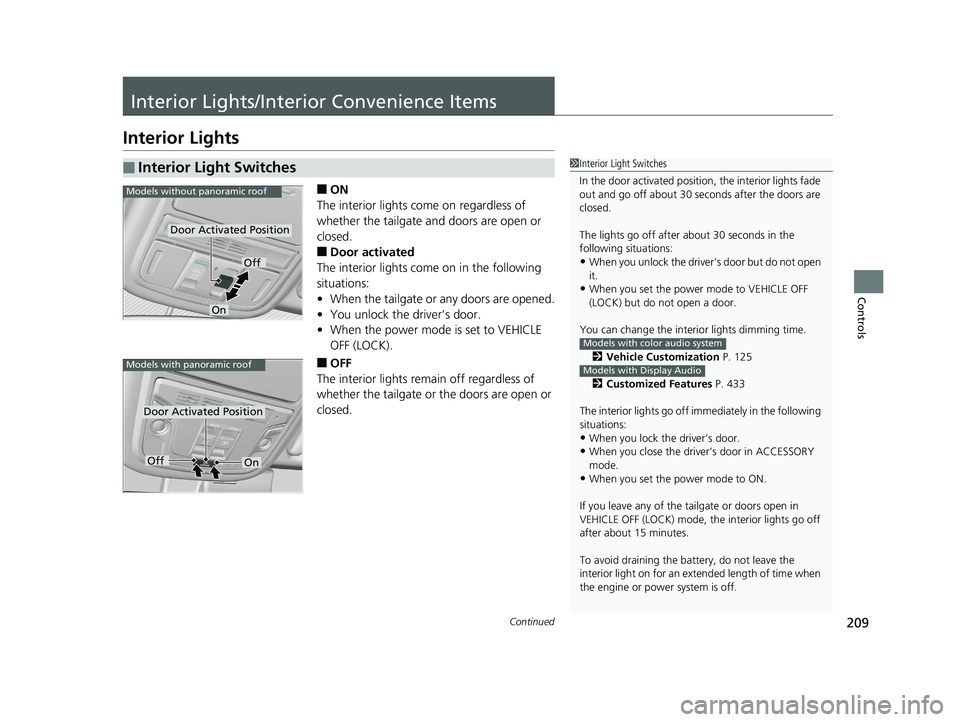
■ON
The interior lights come on regardless of
whether the tailgate and doors are open or
closed.
■Door activated
The interior lights come on in the following
situations:
• When the tailgate or any doors are opened.
• You unlock the driver’s door.
• When the power mode is set to VEHICLE
OFF (LOCK).
■OFF
The interior lights remain off regardless of
whether the tailgate or the doors are open or
closed.
■Interior Light Switches1 Interior Light Switches
In the door activated position, the interior lights fade
out and go off about 30 se conds after the doors are
closed.
The lights go off after about 30 seconds in the
following situations:
•When you unlock the driver’s door but do not open
it.
•When you set the power mode to VEHICLE OFF
(LOCK) but do not open a door.
You can change the interi or lights dimming time.
2 Vehicle Customization P. 125
2 Customized Features P. 433
The interior lights go off i mmediately in the following
situations:
•When you lock the driver’s door.•When you close the driver’s door in ACCESSORY
mode.
•When you set the power mode to ON.
If you leave any of the tailgate or doors open in
VEHICLE OFF (LOCK) mode, th e interior lights go off
after about 15 minutes.
To avoid draining the ba ttery, do not leave the
interior light on for an extended length of time when
the engine or power system is off.
Models with color audio system
Models with Display Audio
Models without panoramic roof
Door Activated Position
Off
On
Models with panoramic roof
Door Activated Position
OffOn
20 PILOT-31TG76401.book 209 ページ 2019年7月24日 水曜日 午後3時32分
Page 219 of 743
Continued217
uuInterior Lights/Interior Convenience Items uInterior Convenience Items
Controls
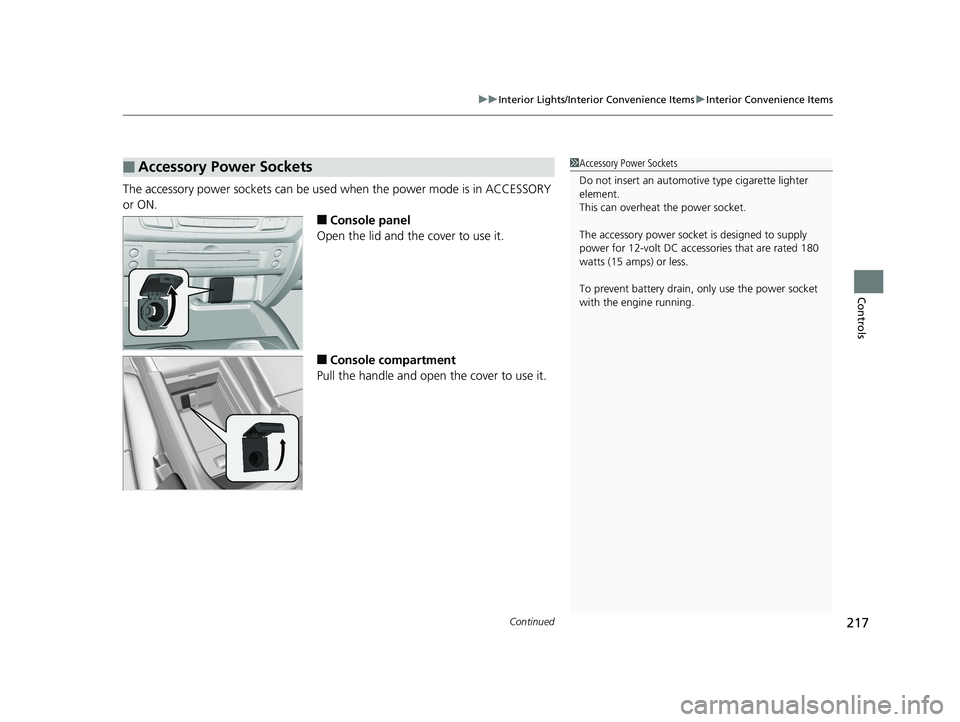
The accessory power sockets can be used when the power mode is in ACCESSORY
or ON.
■Console panel
Open the lid and the cover to use it.
■Console compartment
Pull the handle and open the cover to use it.
■Accessory Power Sockets1 Accessory Power Sockets
Do not insert an automotive type cigarette lighter
element.
This can overheat the power socket.
The accessory power socket is designed to supply
power for 12-volt DC accessories that are rated 180
watts (15 amps) or less.
To prevent battery drain, only use the power socket
with the engine running.
20 PILOT-31TG76401.book 217 ページ 2019年7月24日 水曜日 午後3時32分
Page 220 of 743
uuInterior Lights/Interior Convenience Items uInterior Convenience Items
218
Controls
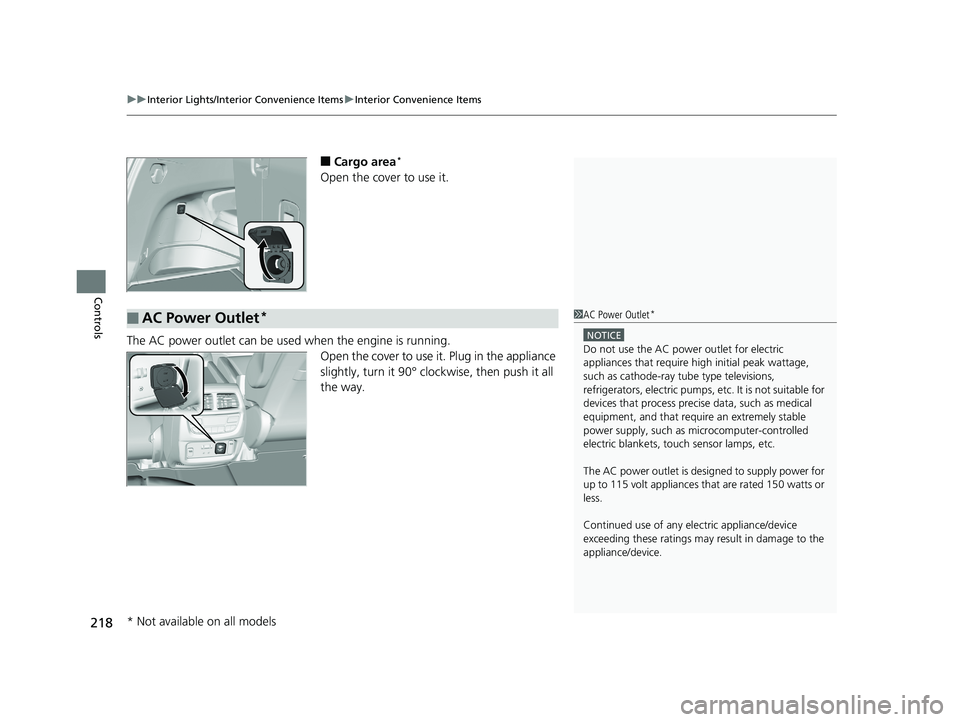
■Cargo area*
Open the cover to use it.
The AC power outlet can be used when the engine is running. Open the cover to use it. Plug in the appliance
slightly, turn it 90° clockwise, then push it all
the way.
■AC Power Outlet*1AC Power Outlet*
NOTICE
Do not use the AC power outlet for electric
appliances that require hi gh initial peak wattage,
such as cathode-ray tube type televisions,
refrigerators, electric pumps, etc. It is not suitable for
devices that process precis e data, such as medical
equipment, and that require an extremely stable
power supply, such as microcomputer-controlled
electric blankets, touc h sensor lamps, etc.
The AC power outlet is desi gned to supply power for
up to 115 volt appliances that are rated 150 watts or
less.
Continued use of any elec tric appliance/device
exceeding these ratings may result in damage to the
appliance/device.
* Not available on all models
20 PILOT-31TG76401.book 218 ページ 2019年7月24日 水曜日 午後3時32分
Page 222 of 743
uuInterior Lights/Interior Convenience Items uInterior Convenience Items
220
Controls
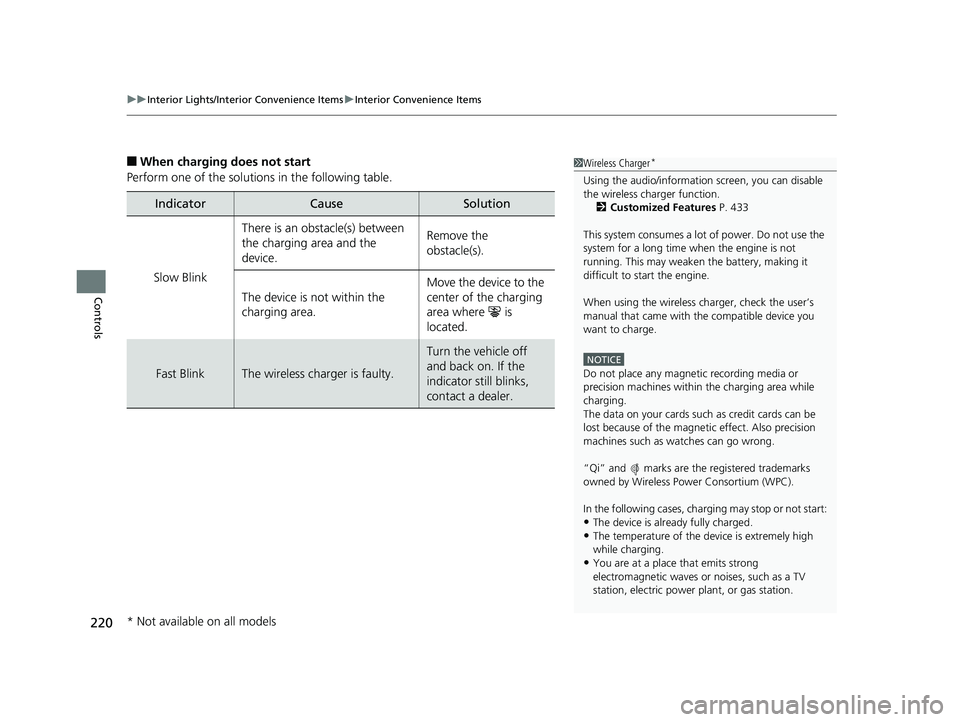
■When charging does not start
Perform one of the solution s in the following table.
IndicatorCauseSolution
Slow Blink
There is an obstacle(s) between
the charging area and the
device.Remove the
obstacle(s).
The device is not within the
charging area. Move the device to the
center of the charging
area where is
located.
Fast BlinkThe wireless charger is faulty.
Turn the vehicle off
and back on. If the
indicator still blinks,
contact a dealer.
1
Wireless Charger*
Using the audio/informati on screen, you can disable
the wireless ch arger function.
2 Customized Features P. 433
This system consumes a lot of power. Do not use the
system for a long time when the engine is not
running. This may weaken the battery, making it
difficult to start the engine.
When using the wireless charger, check the user’s
manual that came with th e compatible device you
want to charge.
NOTICE
Do not place any magneti c recording media or
precision machines within the charging area while
charging.
The data on your cards such as credit cards can be
lost because of the magneti c effect. Also precision
machines such as watches can go wrong.
“Qi” and marks are the registered trademarks
owned by Wire less Power Consortium (WPC).
In the following cases, ch arging may stop or not start:
•The device is already fully charged.•The temperature of the device is extremely high
while charging.
•You are at a place that emits strong
electromagnetic waves or noises, such as a TV
station, electric power plant, or gas station.
* Not available on all models
20 PILOT-31TG76401.book 220 ページ 2019年7月24日 水曜日 午後3時32分
Page 226 of 743
uuInterior Lights/Interior Convenience Items uInterior Convenience Items
224
Controls
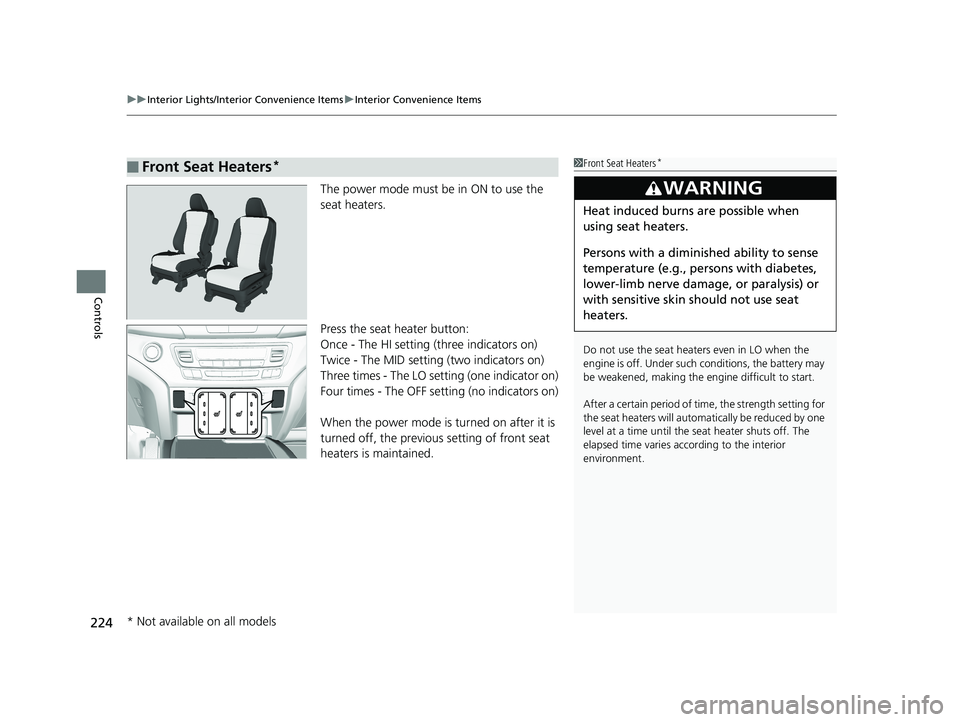
The power mode must be in ON to use the
seat heaters.
Press the seat heater button:
Once - The HI setting (three indicators on)
Twice - The MID setting (two indicators on)
Three times - The LO setting (one indicator on)
Four times - The OFF se tting (no indicators on)
When the power mode is turned on after it is
turned off, the previous setting of front seat
heaters is maintained.
■Front Seat Heaters*1 Front Seat Heaters*
Do not use the seat heaters even in LO when the
engine is off. Under such conditions, the battery may
be weakened, making the engine difficult to start.
After a certain period of time, the strength setting for
the seat heaters will automatically be reduced by one
level at a time until the seat heater shuts off. The
elapsed time varies according to the interior
environment.
3WARNING
Heat induced burns are possible when
using seat heaters.
Persons with a diminished ability to sense
temperature (e.g., persons with diabetes,
lower-limb nerve damage, or paralysis) or
with sensitive skin should not use seat
heaters.
* Not available on all models
20 PILOT-31TG76401.book 224 ページ 2019年7月24日 水曜日 午後3時32分