lock HONDA PILOT 2021 Owner's Manual (in English)
[x] Cancel search | Manufacturer: HONDA, Model Year: 2021, Model line: PILOT, Model: HONDA PILOT 2021Pages: 739, PDF Size: 44.86 MB
Page 618 of 739
uuParking Your Vehicle uParking Sensor System*
616
Driving
1. Make sure that the parking sensor system is not activated. Set the power mode to
VEHICLE OFF (LOCK).
2. Press and hold the parking sensor system button, and set the power mode to ON.
3. Keep pressing the button for 10 seconds. Release the button when the indicator
in the button flashes.
4. Press the button again. The indi cator in the button goes off.
u The beeper sounds twice. The re ar sensors are now turned off.
To turn the rear sensors on again, follow the above procedure. The beeper sounds
three times when the rear sensors come back on.
■Turning off All Rear Sensors1 Turning off All Rear Sensors
When you set the gear position to
(R, the indicator
in the parking sensor system button blinks as a
reminder that the rear sens ors have been turned off.
21 PILOT-31TG76500.book 616 ページ 2020年3月18日 水曜日 午後4時38分
Page 620 of 739
uuParking Your Vehicle uCross Traffic Monitor*
618
Driving
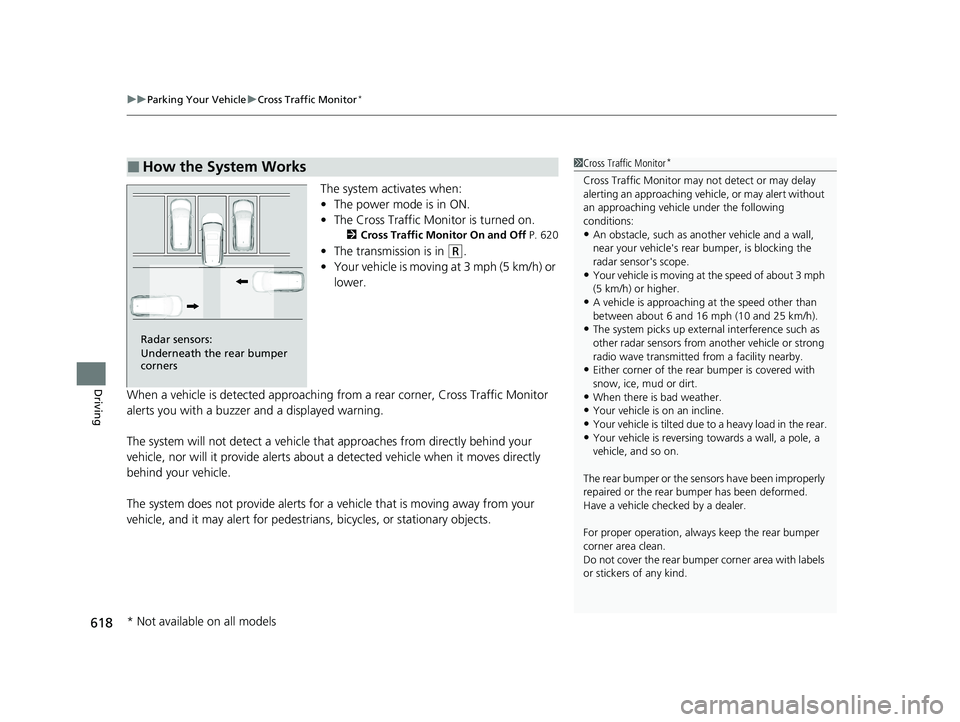
The system activates when:
• The power mode is in ON.
• The Cross Traffic Monitor is turned on.
2 Cross Traffic Monitor On and Off P. 620
•The transmission is in (R.
• Your vehicle is moving at 3 mph (5 km/h) or
lower.
When a vehicle is detected approaching from a rear corner, Cross Traffic Monitor
alerts you with a buzzer and a displayed warning.
The system will not detect a vehicle that approaches from directly behind your
vehicle, nor will it provide alerts about a detected vehicle when it moves directly
behind your vehicle.
The system does not provide alerts for a vehicle that is moving away from your
vehicle, and it may alert for pedestri ans, bicycles, or stationary objects.
■How the System Works1Cross Traffic Monitor*
Cross Traffic Monitor may not detect or may delay
alerting an approach ing vehicle, or may alert without
an approaching vehicle under the following
conditions:
•An obstacle, such as a nother vehicle and a wall,
near your vehicle's rear bumper, is blocking the
radar sensor's scope.
•Your vehicle is moving at the speed of about 3 mph
(5 km/h) or higher.
•A vehicle is approaching at the speed other than
between about 6 and 16 mph (10 and 25 km/h).
•The system picks up external interference such as
other radar sensors from an other vehicle or strong
radio wave transmitted fr om a facility nearby.
•Either corner of the rear bumper is covered with
snow, ice, mud or dirt.
•When there is bad weather.
•Your vehicle is on an incline.
•Your vehicle is tilted due to a heavy load in the rear.
•Your vehicle is reversing towards a wall, a pole, a
vehicle, and so on.
The rear bumper or the sens ors have been improperly
repaired or the rear bum per has been deformed.
Have a vehicle checked by a dealer.
For proper operation, always keep the rear bumper
corner area clean.
Do not cover the rear bumper corner area with labels
or stickers of any kind.
Radar sensors:
Underneath the rear bumper
corners
* Not available on all models
21 PILOT-31TG76500.book 618 ページ 2020年3月18日 水曜日 午後4時38分
Page 648 of 739
uuMaintenance Under the Hood uEngine Coolant
646
Maintenance
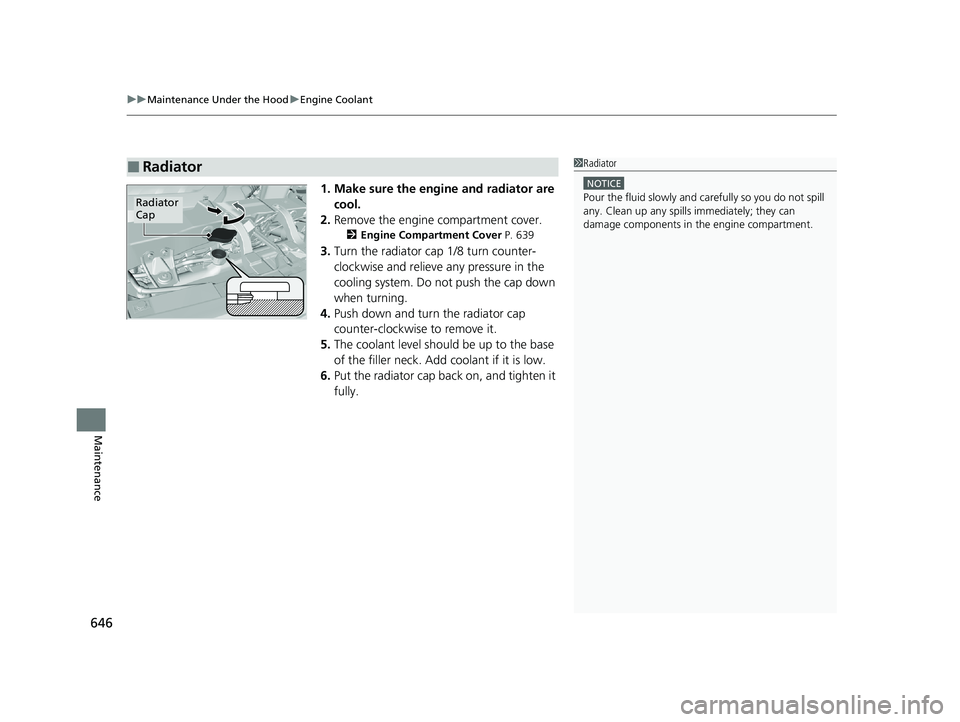
1. Make sure the engine and radiator are
cool.
2. Remove the engine compartment cover.
2 Engine Compartment Cover P. 639
3.Turn the radiator cap 1/8 turn counter-
clockwise and relieve any pressure in the
cooling system. Do not push the cap down
when turning.
4. Push down and turn the radiator cap
counter-clockwise to remove it.
5. The coolant level should be up to the base
of the filler neck. Add coolant if it is low.
6. Put the radiator cap back on, and tighten it
fully.
■Radiator1Radiator
NOTICE
Pour the fluid slowly and ca refully so you do not spill
any. Clean up any spills immediately; they can
damage components in the engine compartment.Radiator
Cap
21 PILOT-31TG76500.book 646 ページ 2020年3月18日 水曜日 午後4時38分
Page 652 of 739
uuReplacing Light Bulbs uDaytime Running Lights and Parking Lights
650
Maintenance
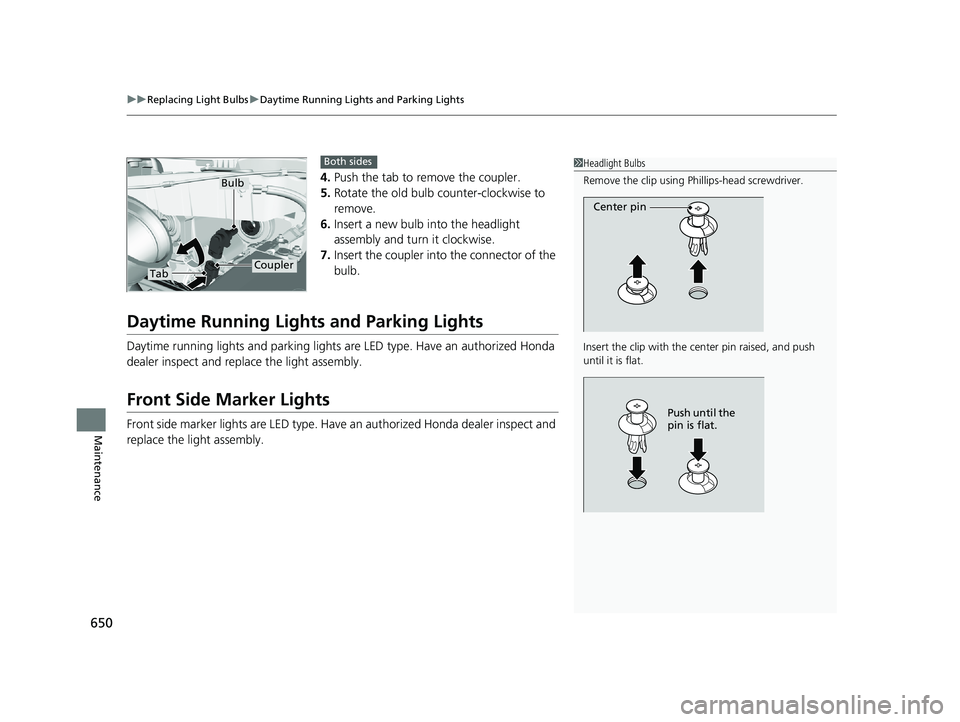
4. Push the tab to remove the coupler.
5. Rotate the old bulb counter-clockwise to
remove.
6. Insert a new bulb into the headlight
assembly and turn it clockwise.
7. Insert the coupler into the connector of the
bulb.
Daytime Running Lights and Parking Lights
Daytime running lights and parking lights are LED type. Have an authorized Honda
dealer inspect and replace the light assembly.
Front Side Marker Lights
Front side marker lights are LED type. Have an authorized Honda dealer inspect and
replace the light assembly.
1Headlight Bulbs
Remove the clip using Ph illips-head screwdriver.
Insert the clip with the center pin raised, and push
until it is flat.
Center pin
Push until the
pin is flat.
TabCoupler
Bulb
Both sides
21 PILOT-31TG76500.book 650 ページ 2020年3月18日 水曜日 午後4時38分
Page 653 of 739
651
uuReplacing Light Bulbs uFront Turn Signal Light Bulbs
Maintenance
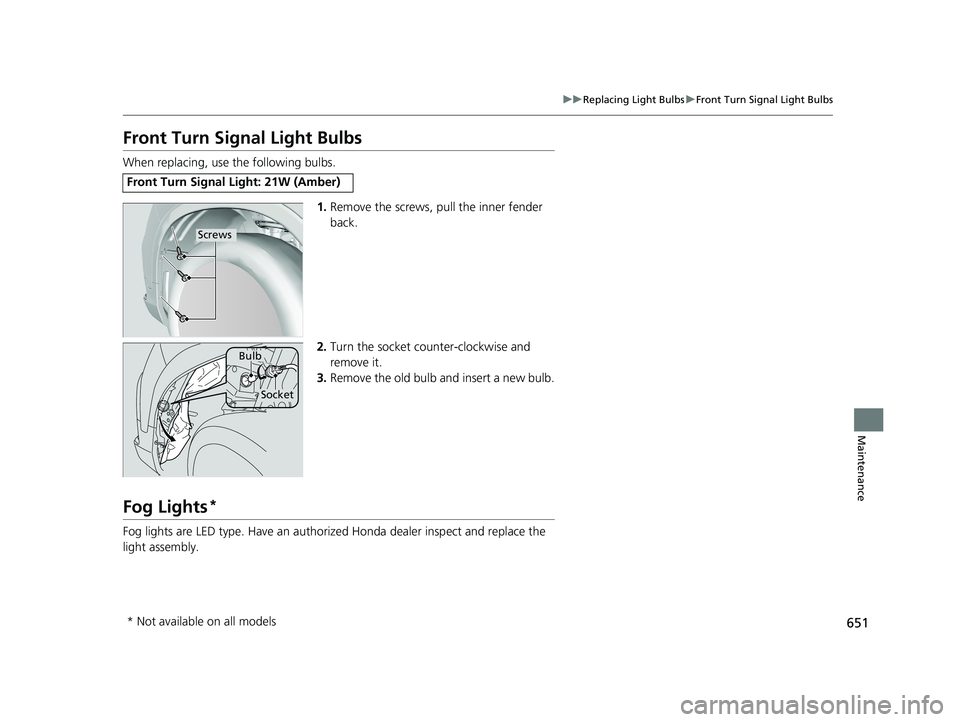
Front Turn Signal Light Bulbs
When replacing, use the following bulbs.
1.Remove the screws, pull the inner fender
back.
2. Turn the socket counter-clockwise and
remove it.
3. Remove the old bulb and insert a new bulb.
Fog Lights*
Fog lights are LED type. Have an authoriz ed Honda dealer inspect and replace the
light assembly.
Front Turn Signal Light: 21W (Amber)
Screws
Bulb
Socket
* Not available on all models
21 PILOT-31TG76500.book 651 ページ 2020年3月18日 水曜日 午後4時38分
Page 654 of 739
652
uuReplacing Light Bulbs uSide Turn Signal/Emergency Indicator Lights*
Maintenance
Side Turn Signal/Emergency Indicator Lights*
Side turn lights are LED type. Have an au thorized Honda dealer inspect and replace
the light assembly.
Brake/Taillight, Rear Side Marker Light, and Rear
Turn Signal Light Bulbs
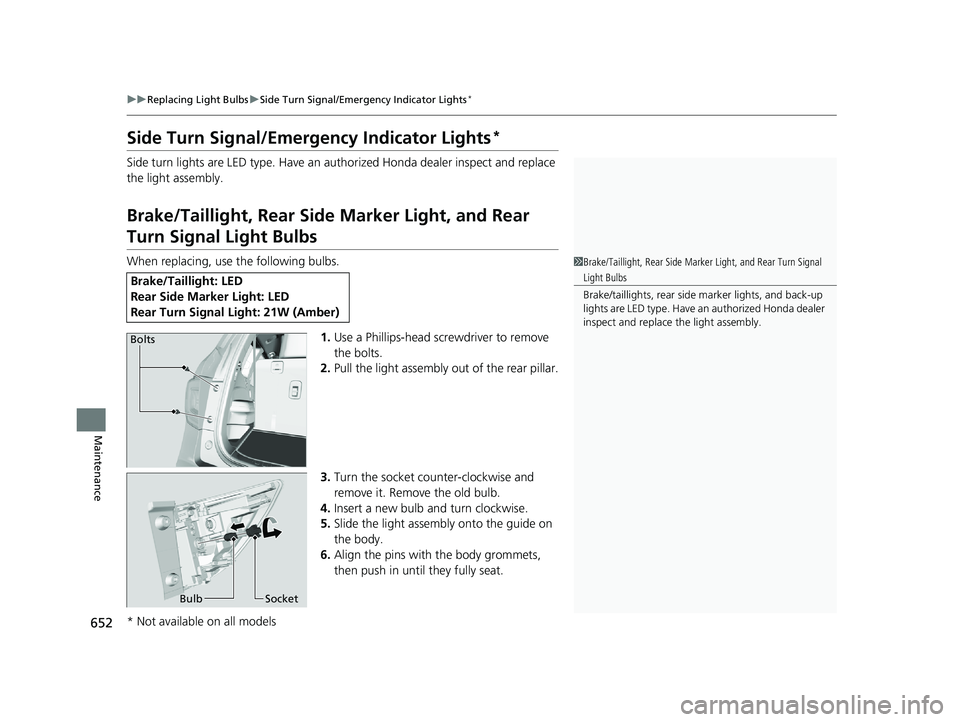
When replacing, use the following bulbs.
1.Use a Phillips-head screwdriver to remove
the bolts.
2. Pull the light assembly out of the rear pillar.
3. Turn the socket counter-clockwise and
remove it. Remove the old bulb.
4. Insert a new bulb and turn clockwise.
5. Slide the light assembly onto the guide on
the body.
6. Align the pins with the body grommets,
then push in unt il they fully seat.
Brake/Taillight: LED
Rear Side Marker Light: LED
Rear Turn Signal Light: 21W (Amber)
1Brake/Taillight, Rear Side Marker Light, and Rear Turn Signal
Light Bulbs
Brake/taillights, rear side marker lights, and back-up
lights are LED type. Have an authorized Honda dealer
inspect and replace the light assembly.
Bolts
Bulb Socket
* Not available on all models
21 PILOT-31TG76500.book 652 ページ 2020年3月18日 水曜日 午後4時38分
Page 656 of 739
654
Maintenance
Checking and Maintaining Wiper Blades
Checking Wiper Blades
If the wiper blade rubber has deteriorated, it will leave streaks and the hard surfaces
of the blade may scratch the window glass.
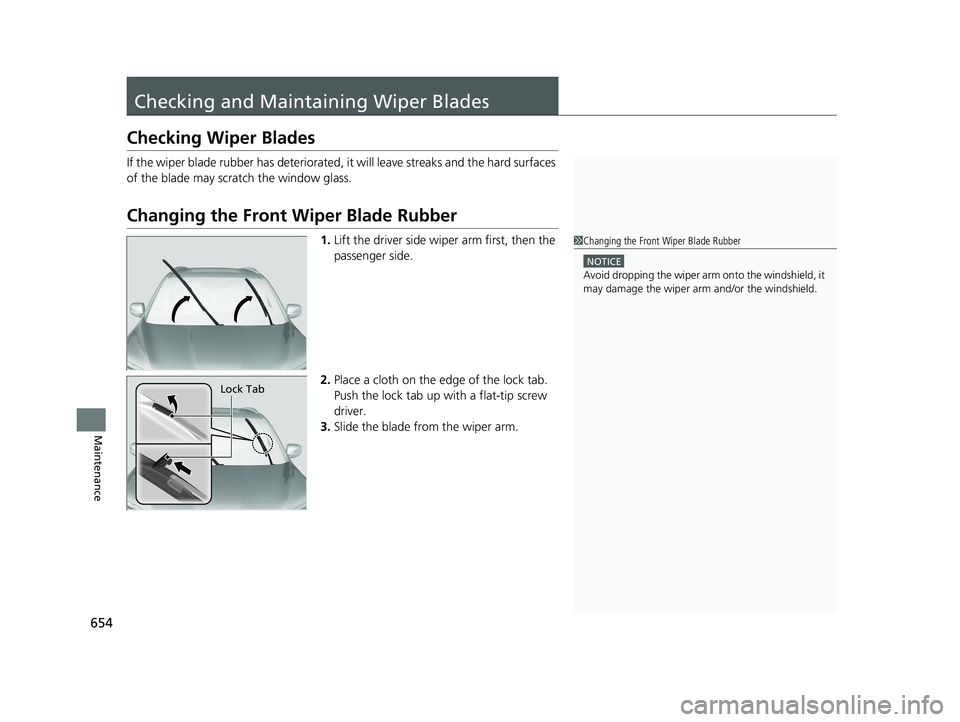
Changing the Front Wiper Blade Rubber
1. Lift the driver side wiper arm first, then the
passenger side.
2. Place a cloth on the edge of the lock tab.
Push the lock tab up with a flat-tip screw
driver.
3. Slide the blade from the wiper arm.1Changing the Front Wiper Blade Rubber
NOTICE
Avoid dropping the wiper arm onto the windshield, it
may damage the wiper arm and/or the windshield.
Lock Tab
21 PILOT-31TG76500.book 654 ページ 2020年3月18日 水曜日 午後4時38分
Page 657 of 739
655
uuChecking and Maintaining Wiper Blades uChanging the Front Wiper Blade Rubber
Maintenance
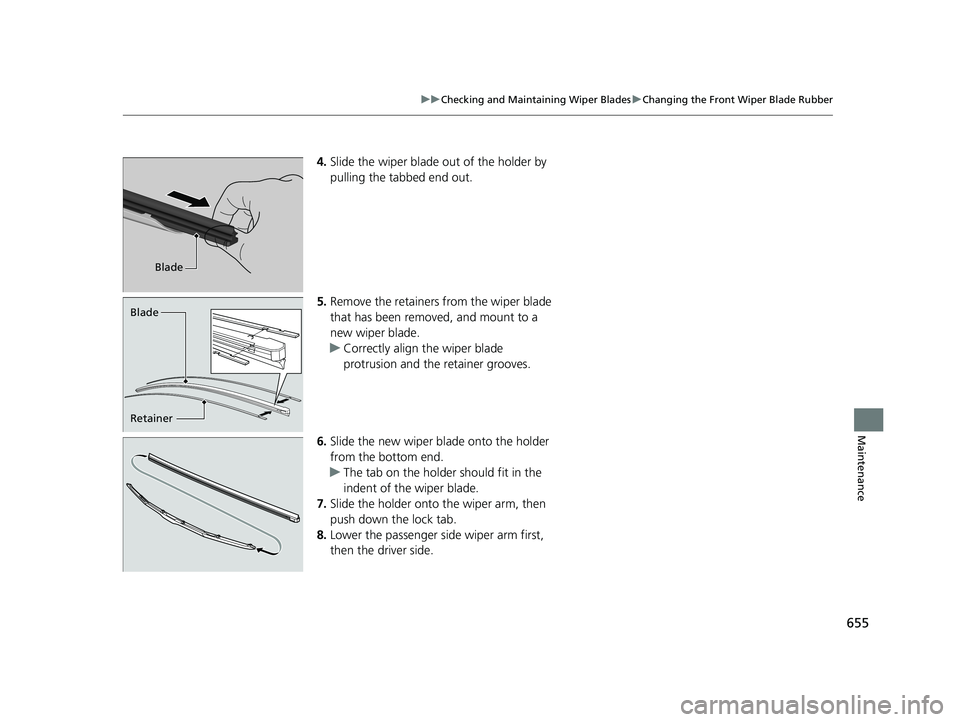
4. Slide the wiper blade out of the holder by
pulling the tabbed end out.
5. Remove the retainers from the wiper blade
that has been removed, and mount to a
new wiper blade.
u Correctly align the wiper blade
protrusion and the retainer grooves.
6. Slide the new wiper bl ade onto the holder
from the bottom end.
u The tab on the holder should fit in the
indent of the wiper blade.
7. Slide the holder onto the wiper arm, then
push down the lock tab.
8. Lower the passenger side wiper arm first,
then the driver side.
Blade
Retainer Blade
21 PILOT-31TG76500.book 655 ページ 2020年3月18日 水曜日 午後4時38分
Page 669 of 739
667
Maintenance
Battery
Checking the Battery
The condition of the battery is monitored by a
sensor located on the negative terminal of the
battery. If there is a problem with this sensor,
the driver information interface will display a
warning message. If this happens, have your
vehicle inspected by a dealer.
Check the battery termina ls for corrosion monthly.
To access the battery terminals:
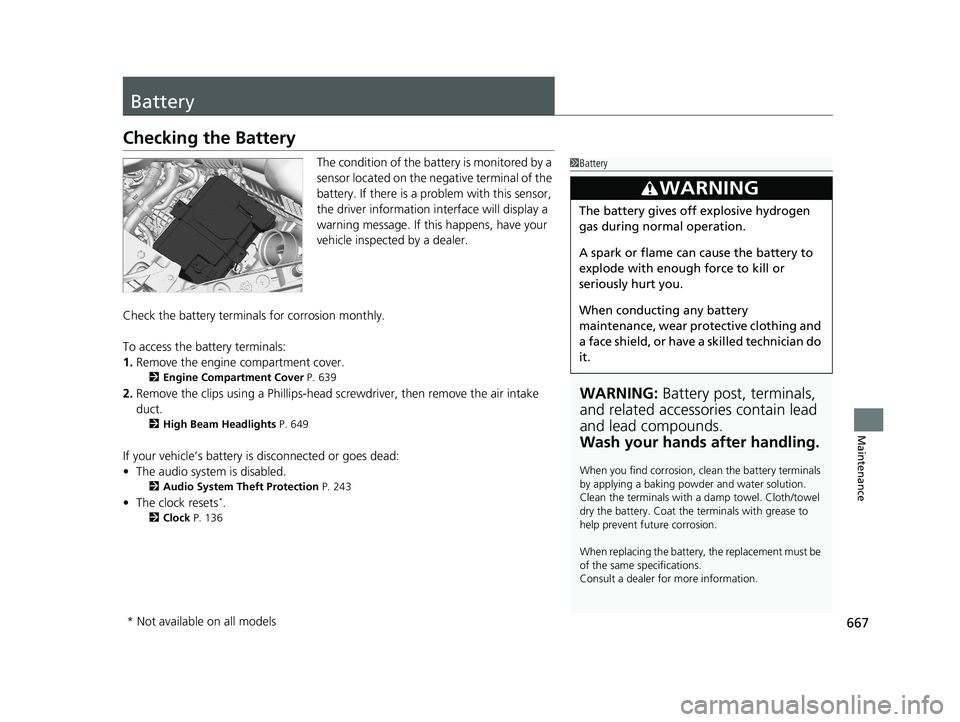
1. Remove the engine compartment cover.
2 Engine Compartment Cover P. 639
2.Remove the clips using a Ph illips-head screwdriver, then remove the air intake
duct.
2 High Beam Headlights P. 649
If your vehicle’s battery is disconnected or goes dead:
•The audio system is disabled.
2 Audio System Theft Protection P. 243
•The clock resets*.
2 Clock P. 136
1Battery
WARNING: Battery post, terminals,
and related accessories contain lead
and lead compounds.
Wash your hands after handling.
When you find corrosion, cl ean the battery terminals
by applying a baking powder and water solution.
Clean the terminals with a damp towel. Cloth/towel
dry the battery. Coat the terminals with grease to
help prevent future corrosion.
When replacing the battery, the replacement must be
of the same specifications.
Consult a dealer for more information.
3WARNING
The battery gives off explosive hydrogen
gas during normal operation.
A spark or flame can cause the battery to
explode with enough force to kill or
seriously hurt you.
When conducting any battery
maintenance, wear prot ective clothing and
a face shield, or have a skilled technician do
it.
* Not available on all models
21 PILOT-31TG76500.book 667 ページ 2020年3月18日 水曜日 午後4時38分
Page 677 of 739
675
uuCleaning uInterior Care
Maintenance
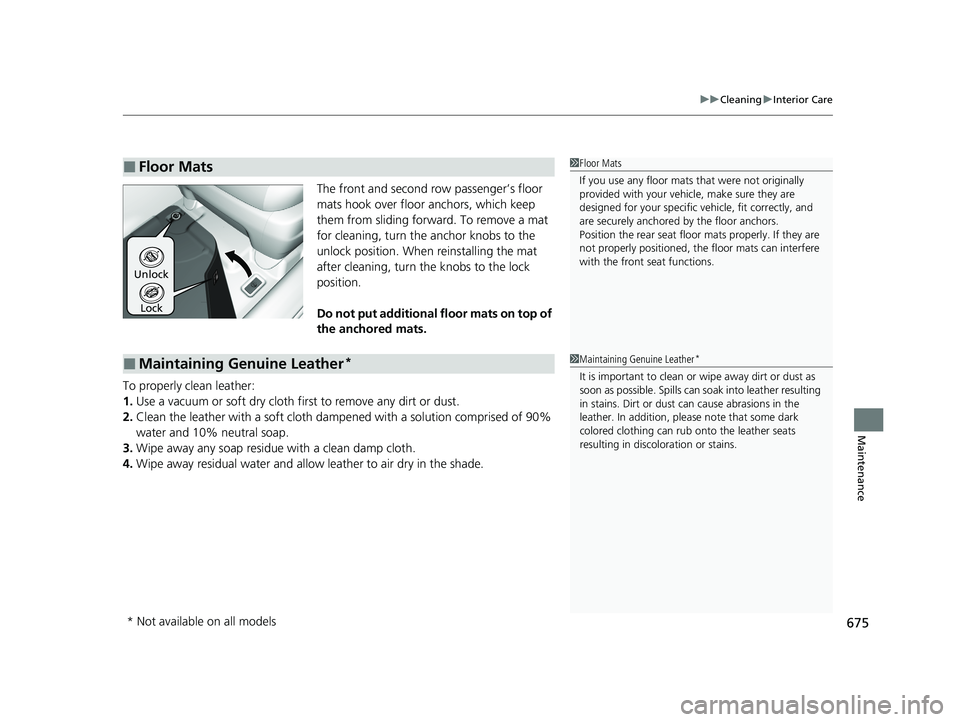
The front and second row passenger’s floor
mats hook over floor anchors, which keep
them from sliding forward. To remove a mat
for cleaning, turn the anchor knobs to the
unlock position. When reinstalling the mat
after cleaning, turn the knobs to the lock
position.
Do not put additional floor mats on top of
the anchored mats.
To properly clean leather:
1. Use a vacuum or soft dry cloth first to remove any dirt or dust.
2. Clean the leather with a soft cloth dampen ed with a solution comprised of 90%
water and 10% neutral soap.
3. Wipe away any soap residu e with a clean damp cloth.
4. Wipe away residual water and allo w leather to air dry in the shade.
■Floor Mats1Floor Mats
If you use any floor mats that were not originally
provided with your vehicle, make sure they are
designed for your specific ve hicle, fit correctly, and
are securely anchored by the floor anchors.
Position the rear seat floor mats properly. If they are
not properly positioned, the floor mats can interfere
with the front seat functions.
Lock
Unlock
■Maintaining Genuine Leather*1
Maintaining Genuine Leather*
It is important to clean or wipe away dirt or dust as
soon as possible. Spills can soak into leather resulting
in stains. Dirt or dust ca n cause abrasions in the
leather. In addition, pl ease note that some dark
colored clothing can rub onto the leather seats
resulting in discol oration or stains.
* Not available on all models
21 PILOT-31TG76500.book 675 ページ 2020年3月18日 水曜日 午後4時38分