headlights HONDA PRELUDE 1992 Owners Manual
[x] Cancel search | Manufacturer: HONDA, Model Year: 1992, Model line: PRELUDE, Model: HONDA PRELUDE 1992Pages: 225, PDF Size: 2.1 MB
Page 29 of 225
Instruments and Controls
This section gives information
about the controls and displays that
contribute to the daily operation of
your Honda. All the essential
controls are within easy reach.
Control Locations......................... 30
Indicator Lights.............................. 31
Gauges............................................. 37
Speedometer
.............................
37
Tachometer................................. 37
Odometer
.................................... 37
Trip Meter................................... 37
Fuel Gauge..................................
38
Temperature Gauge
..................
38
Controls Near the
Steering
Wheel
....................................... 39
Headlights................................... 40
Daytime Running Lights.......... 40
Instrument Panel Brightness... 41
Turn Signals................................ 41
Windshield Wipers.....................
42
Windshield Washers.................
42
Steering Wheel Adjustment ....
. 43
Steering Wheel Controls............... 44
Cruise Control............................ 44
Horn ............................................ 47
Keys and Locks.............................. 47
Keys.............................................. 47
Ignition Switch........................... 47
Door Locks.................................. 48
Power Door Locks ..................... 48
Trunk.......................................... 50
Seat Adjustments........................... 51
Rear Seat Access........................ 52
Additional Driver' s
Seat
Adjustments...........................
53
Seat Heaters.................................... 54
Folding Rea r
Seat.......................... 55
Hazard Warning............................ 56
Rear Window Defogger ................ 56
Power Windows.............................. 57
Sunroof ...........................................
58
Mirrors ........................................... 59
Parking Brake................................ .
61
Glove Box........................................
.
62
Digital Clock..................................
.
63
Center Console Compartment .... 64
Vanity
Mirror
..............................
64
Cigarette Lighter
..........................
.
65
Ashtray........................................... 65
Interior Lights...............................
.
66
Instruments an
d
ControlsProCarManuals.comMain Menu s t
Page 35 of 225
Indicator Lights
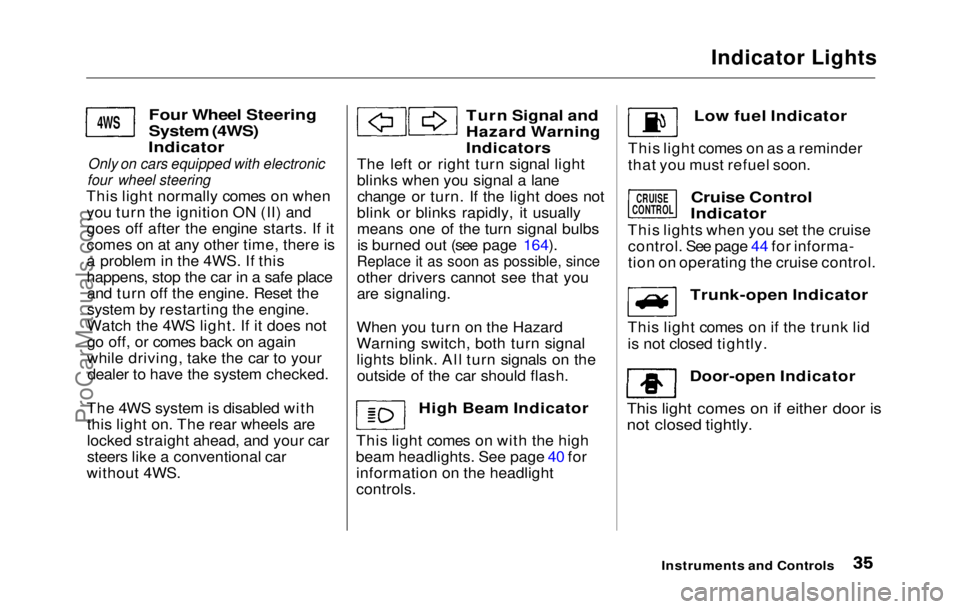
Four Wheel Steering
System (4WS)
Indicator
Only on cars equipped with electronic
four wheel steering
This light normally comes on when you turn the ignition ON (II) and
goes off after the engine starts. If it
comes on at any other time, there is
a problem in the 4WS. If this
happens, stop the car in a safe placeand turn off the engine. Reset the
system by restarting the engine.
Watch the 4WS light. If it does not
go off, or comes back on again
while driving, take the car to yourdealer to have the system checked.
The 4WS system is disabled with this light on. The rear wheels are
locked straight ahead, and your car
steers like a conventional car
without 4WS.
Turn Signal and
Hazard Warning
Indicators
The left or right turn signal light
blinks when you signal a lane change or turn. If the light does not
blink or blinks rapidly, it usually
means one of the turn signal bulbs is burned out (see page 164).Replace it as soon as possible, since
other driver s
cannot see that you
are signaling.
When you turn on the Hazard
Warning switch, both turn signal
lights blink. All turn signals on the outside of the car should flash.
High Beam Indicator
This light comes on with the high
beam headlights. See page 40 for information on the headlight
controls.
Instruments and Controls
4WS
Low fuel Indicator
This light comes on as a reminder
that you must refuel soon.
Cruise Control
Indicator
This lights when you set the cruise control. See page 44 for informa-
tion on operating the cruise control.
Trunk-open Indicator
This light comes on if the trunk lid
is not closed tightly.
Door-open Indicator
This light comes on if either door is
not closed tightly.
CRUISE
CONTROL
ProCarManuals.comMain Menu Table of Contents s t
Page 36 of 225
Indicator Lights
"Daytime Running
Lights" Indicator
Canadian models only
This indicator lights when you turn
the ignition to ON (II) with the
headlight switch off and the
parking brake set. It should go off
if you turn on the headlights or
release the parking brake. If it comes on at any other time, it
means there is a problem with the
DRL. There may also be a problem
with the high beam headlights.
Shift Lever Position
Indicator
(Automatic Transmission only)
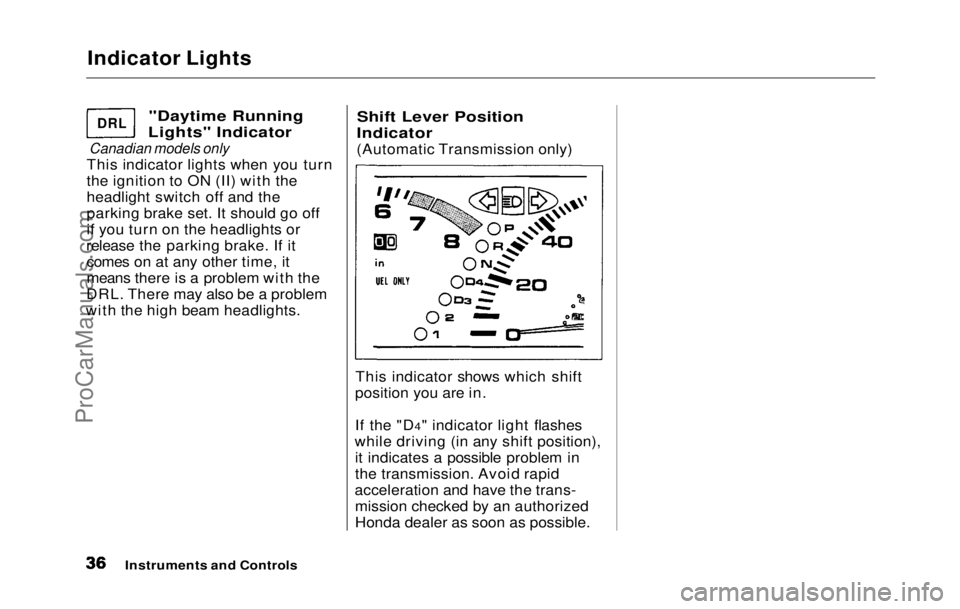
This indicator shows which shift
position you are in.
If the "D4" indicator light flashes
while driving (in any shift position), it indicates a possible problem in
the transmission. Avoid rapid
acceleration and have the trans- mission checked by an authorized
Honda dealer as soon as possible.
Instruments and Controls
DRL
ProCarManuals.comMain Menu Table of Contents s t
Page 39 of 225
Controls Near the Steering Wheel
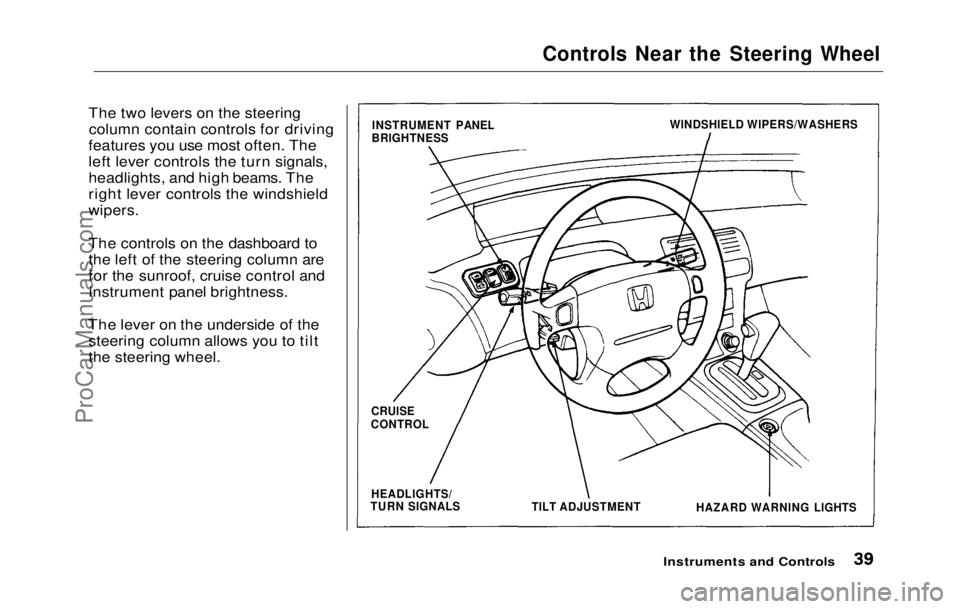
The two levers on the steering column contain controls for driving
features you use most often. The
left lever controls the turn signals,
headlights, and high beams. The
right lever controls the windshield
wipers.
The controls on the dashboard to
the left of the steering column are
for the sunroof, cruise control and instrument panel brightness.
The lever on the underside of the steering column allows you to tilt
the steering wheel.
Instruments and Controls
INSTRUMENT PANEL
BRIGHTNESS WINDSHIELD WIPERS/WASHERS
CRUISE
CONTROL
HEADLIGHTS/
TURN SIGNALS
TILT ADJUSTMENT
HAZARD WARNING LIGHTSProCarManuals.comMain Menu Table of Contents s t
Page 40 of 225
Controls Near the Steering Wheel
Headlights
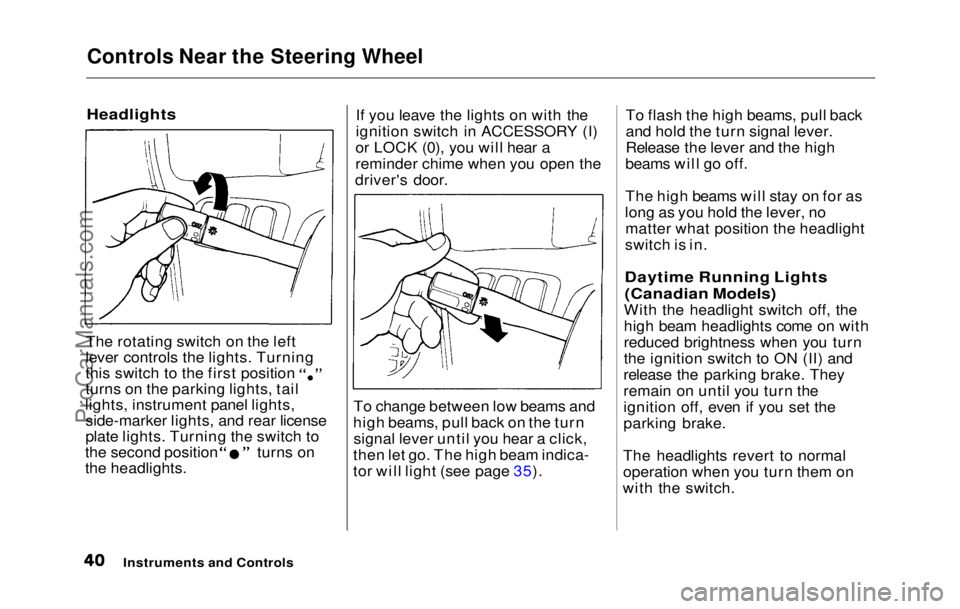
The rotating switch on the left
lever controls the lights. Turning this switch to the first position
turns on the parking lights, tail
lights, instrument panel lights, side-marker lights, and rear license
plate lights. Turning the switch to the second position turns on
the headlights. If you leave the lights on with the
ignition switch in ACCESSORY (I)
or LOCK (0), you will hear a
reminder chime when you open the
driver's door.
To change between low beams and
high beams, pull back on the turn signal lever until you hear a click,
then let go. The high beam indica-
tor will light (see page 35). To flash the high beams, pull back
and hold the turn signal lever.
Release the lever and the high
beams will go off.
The high beams will stay on for as
long as you hold the lever, no matter what position the headlight
switch is in.
Daytime Running Lights
(Canadian Models)
With the headlight switch off, the
high beam headlights come on with
reduced brightness when you turn
the ignition switch to ON (II) and
release the parking brake. They
remain on until you turn the
ignition off, even if you set the
parking brake.
The headlights revert to normal
operation when you turn them on
with the switch.
Instruments and ControlsProCarManuals.comMain Menu Table of Contents s t
Page 41 of 225
Controls Near the Steering Wheel
Instrument Panel Brightness
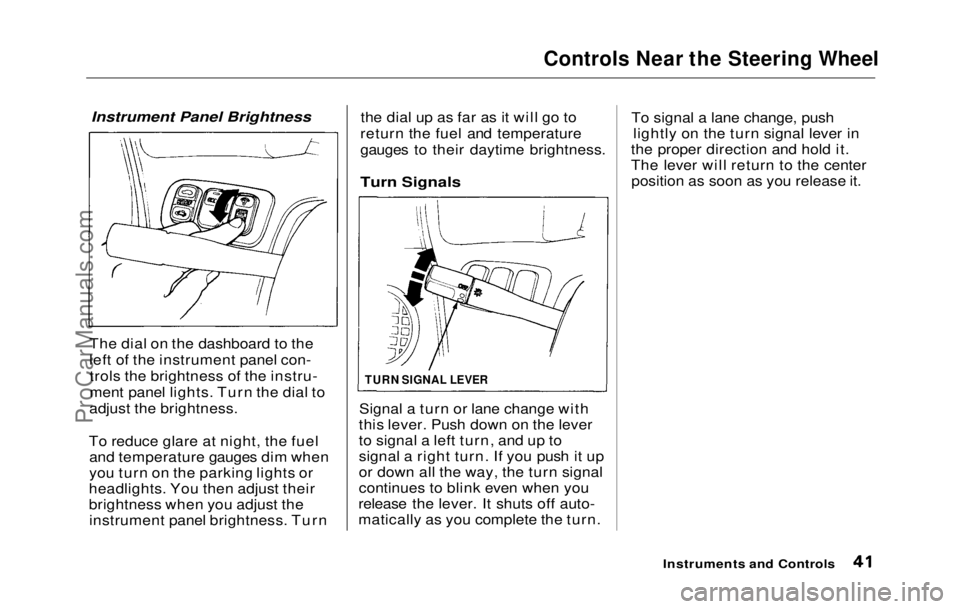
The dial
on the dashboard to the
left of the instrument panel con- trols the brightness of the instru-
ment panel lights. Turn the dial to
adjust the brightness.
To reduce glare at night, the fuel and temperature gauges dim when
you turn on the parking lights or
headlights. You then adjust their
brightness when you adjust the instrument panel brightness. Turn the dial up as far as it will go to
return the fuel and temperature
gauges to their daytime brightness.
Turn Signals
Signal a turn or lane change with
this lever. Push down on the lever
to signal a left turn, and up to
signal a right turn. If you push it up
or down all the way, the turn signal
continues to blink even when you
release the lever. It shuts off auto-
matically as you complete the turn. To signal a lane change, push
lightly on the turn signal lever in
the proper direction and hold it.
The lever will return to the center position as soon as you release it.
Instruments and Controls
TURN SIGNAL LEVERProCarManuals.comMain Menu Table of Contents s t
Page 59 of 225
Sunroof, Mirrors
The sunroof has a key-off delay.
You can still open and close the sunroof for up to ten minutes after
you turn off the ignition. The key- off delay cancels as soon as you
open either
front door. You must
then turn the ignition ON (II) for
the sunroof to operate.
If you try to open the sunroof in
below-freezing temperatures, or
when it is covered with snow or ice,
you can damage the sunroof panel
or motor.
Mirrors
Keep the inside and outside mirrors
clean and adjusted for best visibili-
ty. Be sure to adjust the mirrors
before you start driving.
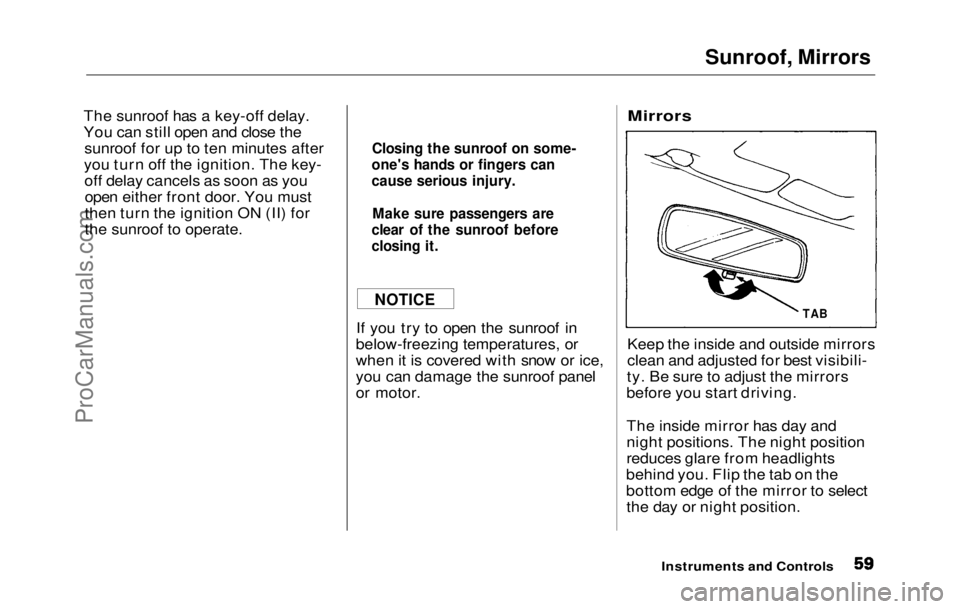
The inside mirror has day and
night positions. The night position
reduces glare from headlights
behind you. Flip the tab on the
bottom edge of the mirror to select the day or night position.
Instruments and Controls
Closing the sunroof on some-
one's hands or fingers can
cause serious injury.
Make sure passengers are
clear of the sunroof before
closing it.
NOTICE
TABProCarManuals.comMain Menu Table of Contents s t
Page 119 of 225
Driving in Bad Weather
Driving Technique — Always
drive slower than you would in dry
weather. It takes your car longer to react, even in conditions that may
seem just barely damp. Apply
smooth, even pressure to all the
controls. Abrupt steering wheel
movements or sudden, hard appli-
cation of the brakes can cause loss
of control in wet weather. Be extra
cautious for the first few miles of
driving while you adjust to the change in driving conditions. This
is especially true in snow. A person
can forget some snow-driving tech- niques during the summer months.
Practice is needed to relearn those
skills.
Exercise extra caution when
driving in rain after a long dry spell.
After months of dry weather, the
first rains bring oil to the surface of
the roadway, making it slippery. Visibility — Being able to see
clearly in all directions and being
visible to other drivers are impor-
tant in all weather conditions. This is more difficult in bad weather. To
be seen more clearly during day-
light hours, turn on your headlights.
Inspect your windshield wipers and
washers frequently. Keep the wind- shield washer reservoir full of the
proper fluid. Replace the wind-
shield wiper blades if they start to
streak the windshield or leave parts
unwiped. Use the defrosters and air conditioner to keep the windows
from fogging up on the inside (see
page 73).
Traction — Check your tires
frequently for wear and proper pressure. Both are important in
preventing "hydroplaning" (loss of
traction on a wet surface). In the
winter, mount snow tires on all four
wheels for the best handling.
Watch road conditions carefully, they can change from moment to
moment. Wet leaves can be as slip-
pery as ice. "Clear" roads can have
patches of ice. Driving conditions
can be very hazardous when the
outside temperature is near freez-
ing. The road surface can become
covered with areas of water pud-
dles mixed with areas of ice, so
your traction can change without
warning.
Be careful when downshifting. If
traction is low, you can lock up the
drive wheels for a moment and
cause a skid.
DrivingProCarManuals.comMain Menu Table of Contents s t
Page 131 of 225
Periodic Checks
You should check the following items at the specified intervals. If
you are unsure of how to perform
any check, turn to the page given. Engine oil level — Check every
time you fill the gas tank. See
page 102.
Engine coolant level — Check
the radiator reserve tank every
time you fill the gas tank. See
page 103.
Windshield washer fluid —
Check the level in the reservoir
monthly. If weather conditions
cause you to use the washers
frequently, check the reservoir each time you stop for gas. See
page 143 .
Automatic transmission — Check the fluid level monthly.
See page 144. Brakes, clutch and power
steering — Check the fluid level
monthly. See page 146.Tires — Check the tire pressure
monthly. Examine the tread for
wear and foreign objects. See
page 159.
Battery — Check its condition
and the terminals for corrosion
monthly. See page 152.
Air conditioner — Check its operation weekly. See page 157.
Lights — Check the operation of
the headlights, parking lights,
taillights, high-mount brake light,
turn signals, brake lights, and
license plate lights monthly. See
page 164.
MaintenanceProCarManuals.comMain Menu Table of Contents s t
Page 162 of 225
Lights
Check the operation of your car's
exterior lights at least once a
month. A burned out bulb can
create an unsafe condition by
reducing your car's visibility and
the ability to signal your intentions
to other drivers. Check the following:
Headlights (low and high beam) Parking lights
Taillights
Brake lights
High-mount brake light
Turn signals Back-up lights
Hazard light function
License plate light
Side marker lights
Daytime running lights
(Canadian cars)
If you find any
bulbs are burned
out, replace them as soon as
possible. Refer to the chart on page
207 to determine what
type of
replacement bulb is needed.
Replacing a Headligh
t Bulb
Your car has two bulbs on each
side, four in total. Make sure you
are replacing the bulb that is
burned out. Your car uses halogen
headlight bulbs. When replacing a
bulb, handle it by its plastic case
and protect the glass from contact
with your skin or hard objects. If
you touch the glass, clean it with
denatured alcohol and a clean cloth.
Halogen headlight bulbs get very
hot when lit. Oil, perspiration, or a
scratch on the glass can cause the
bulb to overheat and shatter.
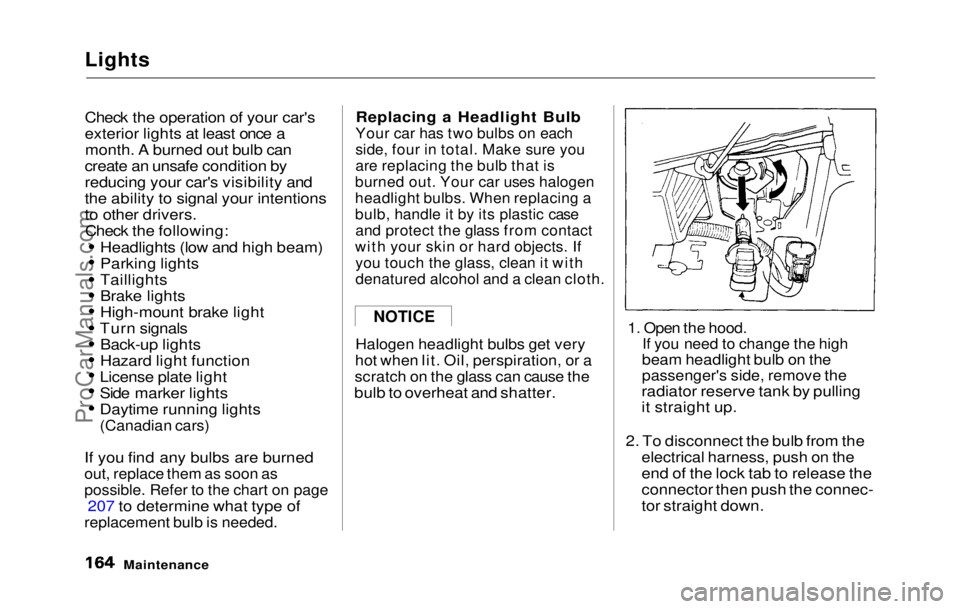
1. Open the hood.
If you need to change the high
beam headlight bulb
on
the
passenger's side, remove the
radiator reserve tank by pulling
it straight up.
2. To disconnect the bulb from the
electrical harness, push on the
end of the lock tab to release the
connector then push the connec-
tor straight down.
Maintenance
NOTICEProCarManuals.comMain Menu Table of Contents s t