ESP HONDA PRELUDE 1998 Owner's Manual
[x] Cancel search | Manufacturer: HONDA, Model Year: 1998, Model line: PRELUDE, Model: HONDA PRELUDE 1998Pages: 278, PDF Size: 2.61 MB
Page 138 of 278
Automatic Transmission
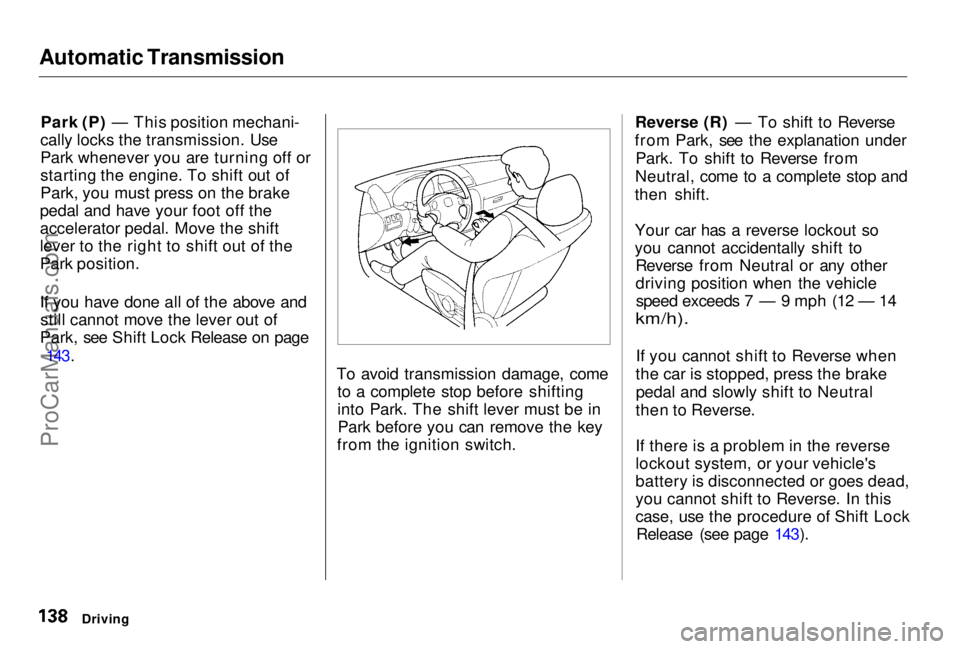
Park (P) — This position mechani-
cally locks the transmission. Use
Park whenever you are turning off or
starting the engine. To shift out of
Park, you must press on the brake
pedal and have your foot off the
accelerator pedal. Move the shift
lever to the right to shift out of the
Park position.
If you have done all of the above and still cannot move the lever out of
Park, see Shift Lock Release on page
143.
To avoid transmission damage, cometo a complete stop before shifting
into Park. The shift lever must be inPark before you can remove the key
from the ignition switch. Reverse (R) — To shift to Reverse
from Park, see the explanation under Park. To shift to Reverse from
Neutral, come to a complete stop and
then shift.
Your car has a reverse lockout so
you cannot accidentally shift to Reverse from Neutral or any other
driving position when the vehiclespeed exceeds 7 — 9 mph (12 — 14
km/h).
If you cannot shift to Reverse when
the car is stopped, press the brake pedal and slowly shift to Neutral
then to Reverse.
If there is a problem in the reverse
lockout system, or your vehicle's
battery is disconnected or goes dead,
you cannot shift to Reverse. In this
case, use the procedure of Shift Lock Release (see page 143).
DrivingProCarManuals.comMain Menu Table of Contents s t
Page 149 of 278
Active Torque Transfer System
Type SH only
Your Honda is equipped with an
Active Torque Transfer System (ATTS). Under certain driving
conditions, the ATTS enhances the
vehicle's cornering performance by transferring some torque between
the inside and outside front wheelsduring a turn.
Based on steering wheel turn angle,
lateral acceleration, and engine power, the ATTS regulates the
driving force to each drive wheel
through an electronically-controlled
hydraulic system and two sets of clutches and gears.
Important Safety Information
The ATTS cannot prevent
skidding if you enter a corner too
fast. It has almost no effect on
braking and vehicle speed.
It is still your responsibility to driveat reasonable speeds and to leave a
sufficient margin of safety.
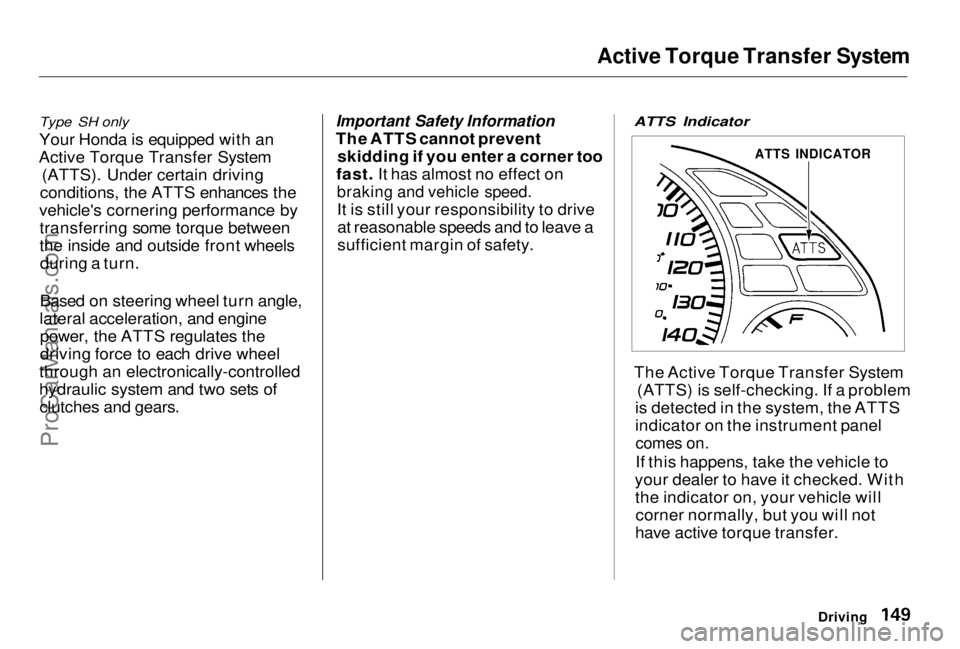
ATTS Indicator
The Active Torque Transfer System
(ATTS) is self-checking. If a problem
is detected in the system, the ATTS
indicator on the instrument panel
comes on.
If this happens, take the vehicle to
your dealer to have it checked. With the indicator on, your vehicle willcorner normally, but you will not
have active torque transfer.
Driving
ATTS INDICATORProCarManuals.comMain Menu Table of Contents s t
Page 150 of 278
Driving in Bad Weather
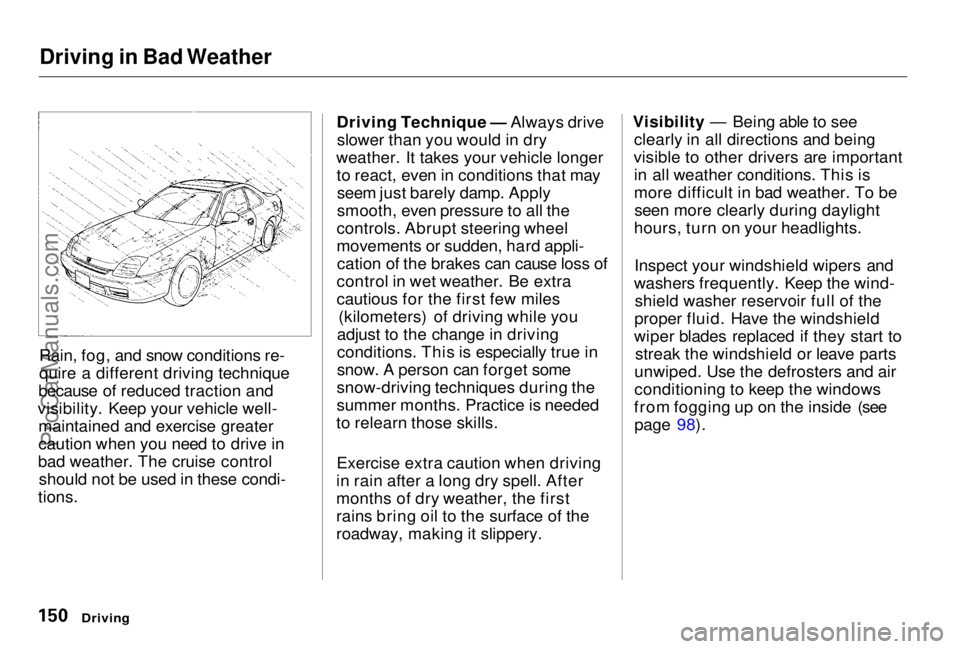
Rain, fog, and snow conditions re-
quire a different driving technique
because of reduced traction and
visibility. Keep your vehicle well- maintained and exercise greater
caution when you need to drive in
bad weather. The cruise control should not be used in these condi-
tions. Driving Technique — Always drive
slower than you would in dry
weather. It takes your vehicle longer to react, even in conditions that mayseem just barely damp. Apply
smooth, even pressure to all the
controls. Abrupt steering wheel
movements or sudden, hard appli- cation of the brakes can cause loss of
control in wet weather. Be extra
cautious for the first few miles (kilometers) of driving while you
adjust to the change in driving
conditions. This is especially true in
snow. A person can forget some
snow-driving techniques during the
summer months. Practice is needed
to relearn those skills.
Exercise extra caution when driving
in rain after a long dry spell. After
months of dry weather, the first
rains bring oil to the surface of the
roadway, making it slippery. Visibility — Being able to see
clearly in all directions and being
visible to other drivers are important in all weather conditions. This is
more difficult in bad weather. To beseen more clearly during daylight
hours, turn on your headlights.
Inspect your windshield wipers and
washers frequently. Keep the wind- shield washer reservoir full of the
proper fluid. Have the windshield
wiper blades replaced if they start to streak the windshield or leave parts
unwiped. Use the defrosters and air
conditioning to keep the windows
from fogging up on the inside (see page 98).
DrivingProCarManuals.comMain Menu Table of Contents s t
Page 153 of 278
Towing a Trailer
The best way to confirm that your total towing package is within thesespecifications is to get it weighed.
Load the vehicle and trailer as you
normally would while towing, and
take them to a public scale. Have
them check the total weight and the
weight at each axle, then compare the weights to the specifications.
Trailer Hitches
The trailer hitch must be the proper size and construction for your
vehicle and the trailer you intend to tow. Consult with an expert before
you purchase a trailer hitch, andhave it installed by a qualifiedmechanic.
The hitch should bolt to the underbody of the vehicle, anddistribute the load over a wide area.
Never use a hitch that mounts only
to the rear bumper. The bumper is
not designed to handle that type of
load.
A trailer hitch that is not adequate for the size of the trailer, or a hitch that is
improperly installed, can cause damage
to the underside of your vehicle.
Driving
Improperly loading your vehicle
and trailer can seriously affect
its steering and braking
performance, causing a crash
in which you can be seriously
injured.
Check the loading of your
vehicle and trailer carefully before starting to drive.
NOTICEProCarManuals.comMain Menu Table of Contents s t
Page 157 of 278

Towing a Trailer
When towing a trailer in the Sequential SportShift mode, select
Third, Second, or First gear; depending on the vehicle speeds and
road condition. Do not use Fourth
gear. The recommended speed
range for each gear position is shown in the table. When parking your vehicle and
trailer, especially on a hill, be sure to
follow all the normal precautions.
Turn your front wheels into the curb, set the parking brake firmly, and put
the transmission in 1st or Reverse (manual) or Park (automatic). In
addition, place wheel chocks at each
of the trailer's tires.
Backing up with a trailer is difficult and takes practice. Drive slowly,
make small movements with thesteering wheel, and have someone
stand outside to guide you. Grip the
steering wheel on the bottom (rather
than the usual position near the top). Move your hand to the left to get the
trailer to move to the left, and right
to move the trailer right.
DrivingProCarManuals.comMain Menu Table of Contents s t
Page 218 of 278

Exterior Care
Washing
Frequent washing helps preserve
your vehicle's beauty. Dirt and grit can scratch the paint, while tree sap
and bird droppings can permanently
ruin the finish.
Wash your vehicle in a shady area, not in direct sunlight. If the vehicle is
parked in the sun, move it into the shade and let the exterior cool down
before you start.
Only use the solvents and cleaners
recommended in this Owner's
Manual.
Chemical solvents and strong cleaners
can damage the paint, metal, and
plastic on your vehicle.
Rinse the vehicle thoroughly with
cool water to remove loose dirt. Fill a bucket with cool water. Mix
in a mild detergent, such as
dishwashing liquid or a product
made especially for vehicle
washing.
Wash the vehicle using the water and detergent solution and a soft-
bristle brush, sponge, or soft cloth. Start at the top and work your waydown. Rinse frequently.
Check the body for road tar, tree sap, etc. Remove these stains with
tar remover or turpentine. Rinse it off immediately so it does not
harm the finish. Remember to re-
wax these areas, even if the rest of the vehicle does not need waxing. When you have washed and rinsed
the whole exterior, dry it with achamois or soft towel. Letting it
air-dry will cause dulling and water
spots.
As you dry the vehicle, inspect it for chips and scratches that could allow
corrosion to start. Repair them with
touch-up paint (see page 221).
Appearance Care
NOTICEProCarManuals.comMain Menu Table of Contents s t
Page 222 of 278
Interior Care, Corrosion Protection
Air Fresheners If you want to use an air freshener/
deodorizer in the interior of your
vehicle, it is best to use a solid type. Some liquid air fresheners contain
chemicals that may cause parts of
the interior trim and fabric to crack or discolor.
If you use a liquid air freshener,
make sure you fasten it securely so it does not spill as you drive. Corrosion Protection
Two factors normally contribute to causing corrosion in your vehicle:
1. Moisture trapped in body cavities. Dirt and road salt that collects in
hollows on the underside of the
vehicle stays damp, promoting corrosion in that area.
2. Removal of paint and protective coatings from the exterior and
underside of the vehicle.
Many corrosion-preventive measures
are built into your Honda. You can
help keep your vehicle from corroding by performing somesimple periodic maintenance: Repair chips and scratches in the
paint as soon as you discover them.Inspect and clean out the drain
holes in the bottom of the doors and body.
Check the floor coverings for
dampness. Carpeting and floor
mats may remain damp for a long
time, especially in winter. This dampness can eventually cause
the floor panels to corrode.
Use a high-pressure spray to clean
the underside of your vehicle. This is especially important in areas
that use road salt in winter. It isalso a good idea in humid climates
and areas subject to salt air. Be
careful of the ABS wheel sensors
and wiring at each wheel.
Have the corrosion-preventive
coatings on the underside of your
vehicle inspected and repaired periodically.
Appearance CareProCarManuals.comMain Menu Table of Contents s t
Page 225 of 278
Compact Spare Tire
Your vehicle has a compact spare tire that takes up less space. Use thisspare tire as a temporary replace-
ment only. Get your regular tire
repaired or replaced and put back on
your vehicle as soon as you can.
Check the inflation pressure of the
compact spare tire every time you
check the other tires. It should be
inflated to: 60 psi (420 kPa , 4.2 kgf/cm2) Follow these precautions whenever
you are using the compact spare tire: Do not exceed 50 mph (80 km/h)
under any circumstances.
This tire gives a harsher ride and
less traction on some road sur-
faces than the regular tire. Use
greater caution while driving on
this tire.
Do not mount snow chains on the
compact spare.
The wheel of the compact spare
tire is designed especially to fit
your vehicle. Do not use your
spare tire on another vehicle
unless it is the same make and
model.
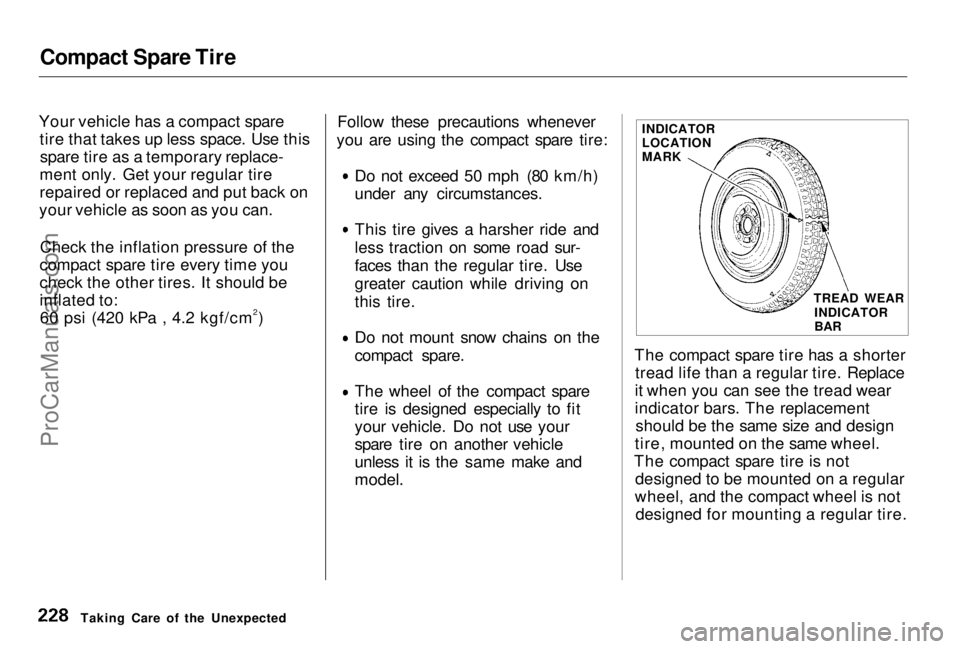
The compact spare tire has a shorter
tread life than a regular tire. Replace
it when you can see the tread wear
indicator bars. The replacement should be the same size and design
tire, mounted on the same wheel.
The compact spare tire is not designed to be mounted on a regular
wheel, and the compact wheel is not designed for mounting a regular tire.
Taking Care of the Unexpected INDICATOR
LOCATION
MARK
TREAD WEARINDICATOR
BARProCarManuals.comMain Menu Table of Contents s t
Page 253 of 278
Tire Information
Tire Size Designation
A tire's sidewall is marked with a tire size designation. You will need this
information when selecting replace-
ment tires for your vehicle. The
following explains what the letters and numbers in the tire size
designation mean.
(Example tire size designation)
205/50R16 87V
205 — Tire width in millimeters.
50 — Aspect ratio. The tire's section
height as a percentage of its width.
R — Tire construction code (Radial).
16 Rim diameter in inches.
87 — Load Index, a numerical code
associated with the maximum load
the tire can carry.
V — Speed Symbol. See the speed
rating chart in this section for
additional information.
Wheel Size Designation
Wheels are also marked with important information that you need
if you ever have to replace one. The
following explains what the letters and numbers in the wheel size
designation mean.
(Example wheel size designation)
16
x 6-1/2 JJ
16 — Rim diameter in inches.
6-1/2 — Rim width in inches.
JJ — Rim contour designation.
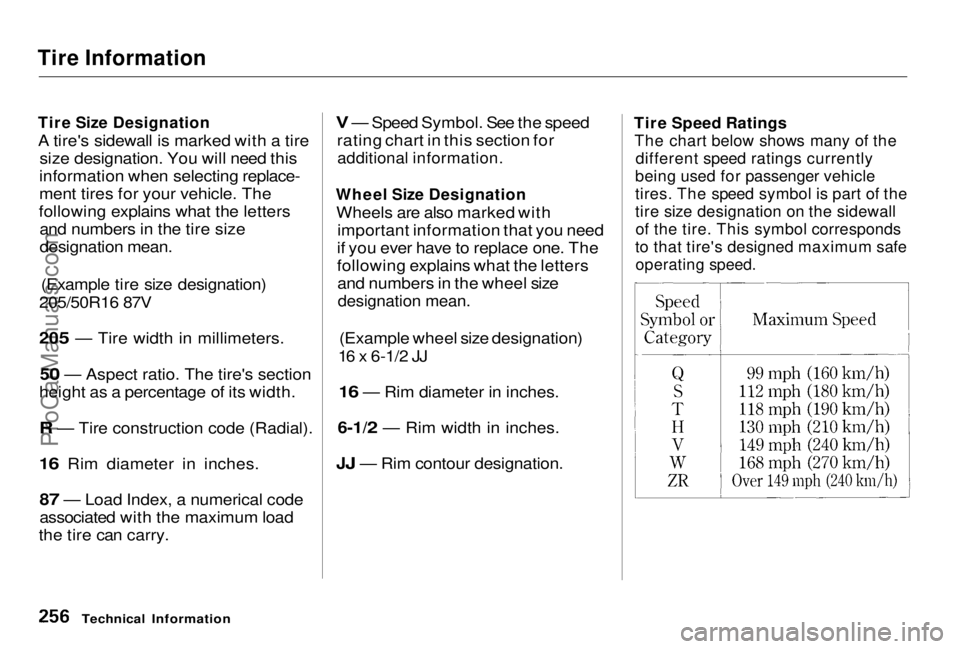
Tire Speed Ratings
The chart below shows many of the
different speed ratings currently
being used for passenger vehicle
tires. The speed symbol is part of the
tire size designation on the sidewall
of the tire. This symbol corresponds
to that tire's designed maximum safe
operating speed.
Technical Information
ProCarManuals.comMain Menu Table of Contents s t
Page 255 of 278

Tire Information
Traction
The traction grades, from highest tolowest, are A, B, and C, and theyrepresent the tire's ability to stop on
wet pavement as measured under controlled conditions on specified
government test surfaces of asphalt and concrete. A tire marked C may
have poor traction performance.
Warning: The traction grade as- signed to this tire is based on brak-
ing (straight ahead) traction tests and does not include cornering (turning) traction.
Temperature
The temperature grades are A (the
highest), B, and C, representing the
tire's resistance to the generation of
heat and its ability to dissipate heat
when tested under controlled conditions on a specified indoor
laboratory test wheel. Sustained high temperature can cause the materialof the tire to degenerate and reduce
tire life, and excessive temperature can lead to sudden tire failure. The
grade C corresponds to a level of
performance which all passenger car
tires must meet under the Federal Motor Vehicle Safety Standard No. 109. Grades B and A represent
higher levels of performance on the
laboratory test wheel than the minimum required by law. Warning: The temperature grade for
this tire is established for a tire thatis properly inflated and not over-
loaded. Excessive speed, underinfla-
tion, or excessive loading either separately or in combination, can
cause heat build-up and possible tire
failure.
Technical InformationProCarManuals.comMain Menu Table of Contents s t