Ground HONDA PRELUDE 2000 Owner's Manual (in English)
[x] Cancel search | Manufacturer: HONDA, Model Year: 2000, Model line: PRELUDE, Model: HONDA PRELUDE 2000Pages: 293, PDF Size: 3.43 MB
Page 62 of 293

Gauges
Fue l Gaug e
This shows how much fuel you have. It is most accurate when the car is on
level ground. It may show slightly more or less than the actual amount
when you are driving on curvy or hilly roads. The gauge stays at the same fuel
level reading after you turn off theignition. When you add fuel, the
gauge slowly changes to the new
reading after you turn the ignition switch back ON (II). Temperatur
e Gaug e
This shows the temperature of the engine's coolant. During normal
operation, the pointer should rise
from the bottom white mark to about the middle of the gauge. In severedriving conditions, such as very hot
weather or a long period of uphill driving, the pointer may rise to near
the upper white mark. If it reaches
the red (Hot) mark, pull safely to the side of the road. Turn to page 246 for
instructions and precautions on
checking the engine's cooling
system.
Instrument s an d Control s
FUE
L GAUG E
TRI
P METE R
SPEEDOMETE
R
TACHOMETE R
TEMPERATUR E
GAUG E MAINTENANC
E
REQUIRE D INDICATO R
ODOMETE
R TRIP METE R
RESE T BUTTO N
Page 137 of 293
Accessorie
s an d Modification s
Modification s
Do not remove any original
equipment or modify your car in any
way that would alter its design or operation. This could make your car
unsafe and illegal to drive.
For example, do not make any
modifications that would change the
ride height of your car, or install
wheels and tires with a different overall diameter.
Such modifications can adversely
affect handling, and interfere with
the operation of the car's anti-lock brakes and other systems. In addition, any modifications that
decrease ground clearance increase
the chance of undercarriage parts striking a curb, speed bump, or other
raised object, which could cause
your airbags to deploy.
Do not modify your steering wheelor any other part of your
Supplemental Restraint System.
Modifications could make the
system ineffective. Additiona
l Safet y Precautio n
Do not attach or place objects on the
airbag covers. Any object attached to
or placed on the covers marked "SRS
AIRBAG," in the center of the steering wheel and on top of the
dashboard, could interfere with the
proper operation of the airbags. Or, if the airbags inflate, the objects
could be propelled inside the car and
hurt someone.
Befor e Drivin g
Page 164 of 293

Towin
g a Traile r
Checkin g Load s
The best way to confirm that vehicle and trailer weights are within limits
is to have them checked at a public
scale.
Using a suitable scale or a special
tongue load gauge, check the tongue
load the first time you set up a
towing combination (a fully-loaded
vehicle and trailer), then recheck the
tongue load whenever the conditions
change.
Towin
g Equipmen t an d
Accessorie s
Towing can require a variety of equipment, depending on the size of
your trailer, how it will be used, and how much load you are towing.
Discuss your needs with your trailer
sales or rental agency, and follow the
guidelines in the rest of this section.
Also make sure that all equipment is properly installed and that it meets
federal, state, province, and local
regulations.
Hitches
Any hitch used on your vehicle must be properly bolted to the underbody.
Safety Chain
Always use a safety chain. Make sure that it is secured to both the
trailer and hitch, and that it crosses
under the tongue so it can catch the
trailer if it becomes unhitched. Leave enough slack to allow the
trailer to turn corners easily, but do not let the chain drag on the ground.
CONTINUED
Drivin g
Page 172 of 293
Maintenanc
e Safet y
Importan t Safet y Precaution s
Before you begin any maintenance, make sure your car is parked on
level ground and that the parking
brake is set. Also, be sure the engine
is off. This will help to eliminate several potential hazards:
Carbo n monoxid e poisonin g
fro m engin e exhaust . Be sure
there is adequate ventilation
whenever you operate the engine.
Burn
s fro m ho t parts . Let the
engine and exhaust system cool
before touching any parts. Injur
y fro m movin g parts . Do
not run the engine unless in- structed to do so. Read the instructions before you
begin, and make sure you have the tools and skills required.
To reduce the possibility of fire or explosion, be careful when working
around gasoline or batteries. Use a
commercially available degreaser or
parts cleaner, not gasoline, to clean
parts. Keep cigarettes, sparks, and
flames away from the battery and all
fuel-related parts.
You should wear eye protection and protective clothing when working
near the battery or when usingcompressed air.
Maintenance
Page 187 of 293
Engin
e Oi l
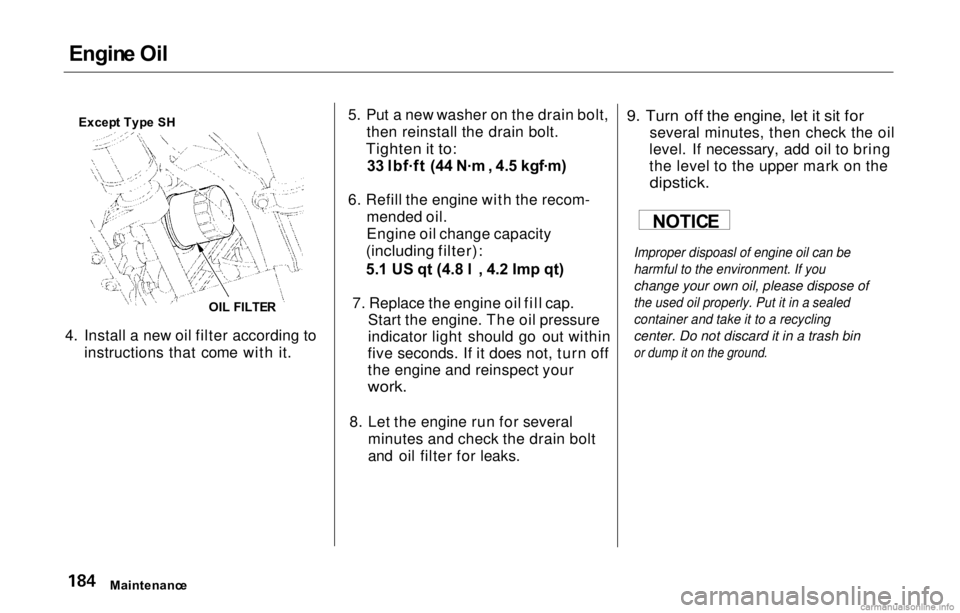
4. Install a new oil filter according to instructions that come with it. 5. Put a new washer on the drain bolt,
then reinstall the drain bolt.
Tighten it to:
33 lbf .
ft (44 N.
m , 4. 5 kgf .
m)
6. Refill the engine with the recom-
mended oil.
Engine oil change
capacity
(including filter):
5. 1 US qt (4.8 l , 4.2 Imp qt)
7. Replace the engine oil fill cap.
Start the engine. The oil pressure
indicator light should go out within
five seconds. If it does not, turn off
the engine and reinspect your
work.
8. Let the engine run for several minutes and check the drain bolt
and oil filter for leaks.
9. Turn off the engine, let it sit for
several minutes, then check the oil
level. If necessary, add oil to bring
the level to the upper mark on the
dipstick.
Improper dispoasl of engine oil can be
harmful to the environment. If you
change your own oil, please dispose of
the used oil properly. Put it in a sealed
container and take it to a recycling
center. Do not discard it in a trash bin
or dump it on the ground.
Maintenanc e
Excep
t Typ e S H
OIL FILTE R NOTIC
E
Page 194 of 293
Transmissio
n Flui d
Automati c Transmissio n
Check the fluid level with the engine
at normal operating temperature.
1. Park the car on level ground. Shut off the engine.
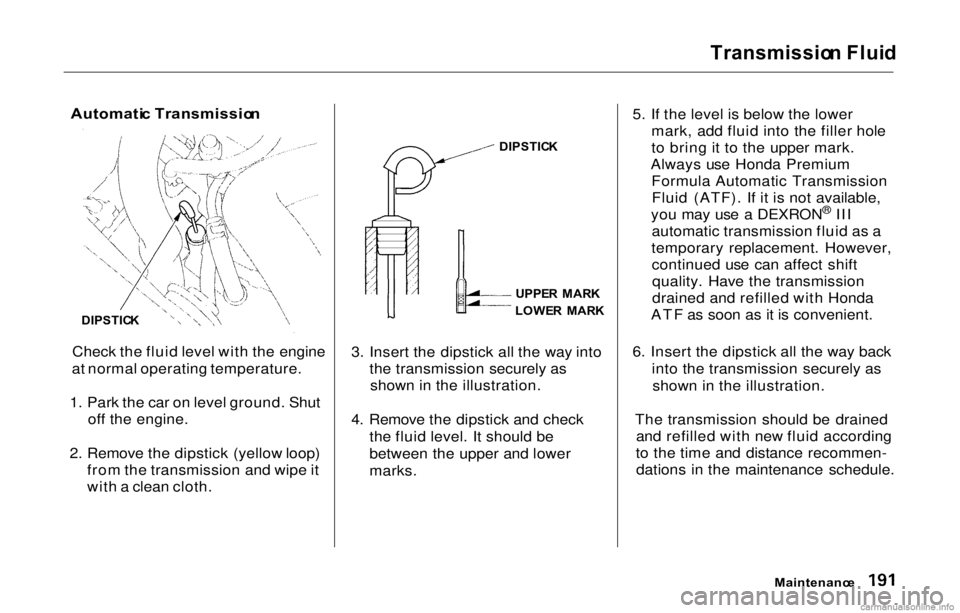
2. Remove the dipstick (yellow loop) from the transmission and wipe it
with a clean cloth. 3. Insert the dipstick all the way into
the transmission securely asshown in the illustration.
4. Remove the dipstick and check the fluid level. It should be
between the upper and lower
marks. 5. If the level is below the lower
mark, add fluid into the filler hole
to bring it to the upper mark.
Always use Honda Premium Formula Automatic TransmissionFluid (ATF). If it is not available,
you may use a DEXRON ®
III
automatic transmission fluid as a
temporary replacement. However, continued use can affect shiftquality. Have the transmission
drained and refilled with Honda
ATF as soon as it is convenient.
6. Insert the dipstick all the way back into the transmission securely asshown in the illustration.
The transmission should be drained and refilled with new fluid according
to the time and distance recommen- dations in the maintenance schedule.
Maintenance
DIPSTIC
K
UPPE
R MAR K
LOWE R MAR K
DIPSTIC
K
Page 195 of 293
Transmissio
n Flui d
5-spee d Manua l Transmissio n
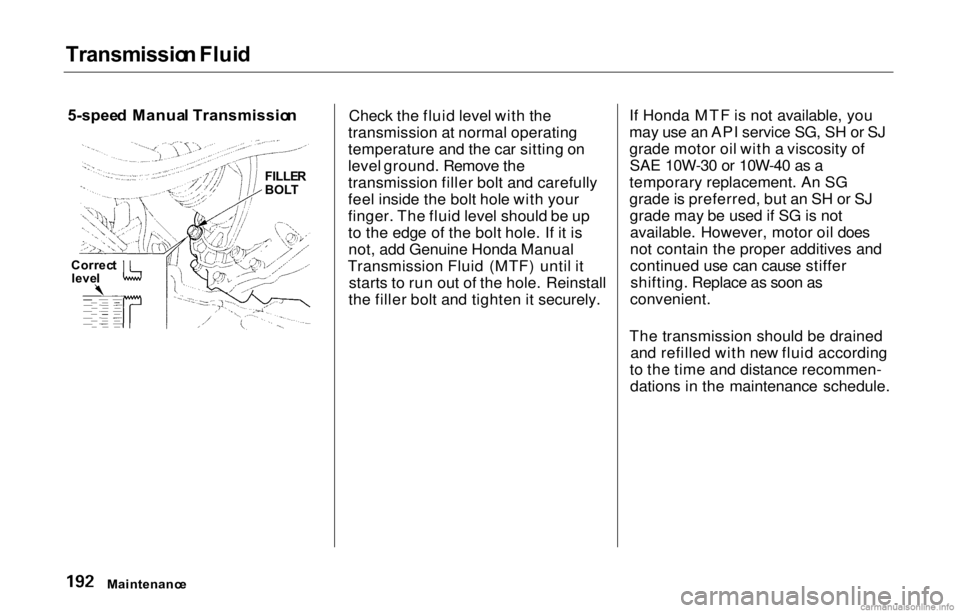
Check the fluid level with the
transmission at normal operating
temperature and the car sitting on
level ground. Remove the
transmission filler bolt and carefully
feel inside the bolt hole with your
finger. The fluid level should be up
to the edge of the bolt hole. If it is not, add Genuine Honda Manual
Transmission Fluid (MTF) until it starts to run out of the hole. Reinstall
the filler bolt and tighten it securely. If Honda MTF is not available, you
may use an API service SG, SH or SJ
grade motor oil with a viscosity of
SAE 10W-30 or 10W-40 as a
temporary replacement. An SG
grade is preferred, but an SH or SJ grade may be used if SG is notavailable. However, motor oil does
not contain the proper additives and
continued use can cause stiffershifting. Replace as soon as
convenient.
The transmission should be drained and refilled with new fluid according
to the time and distance recommen- dations in the maintenance schedule.
Maintenanc e
FILLE
R
BOL T
Correc t
leve l
Page 216 of 293
Light
s
Headligh t Aimin g
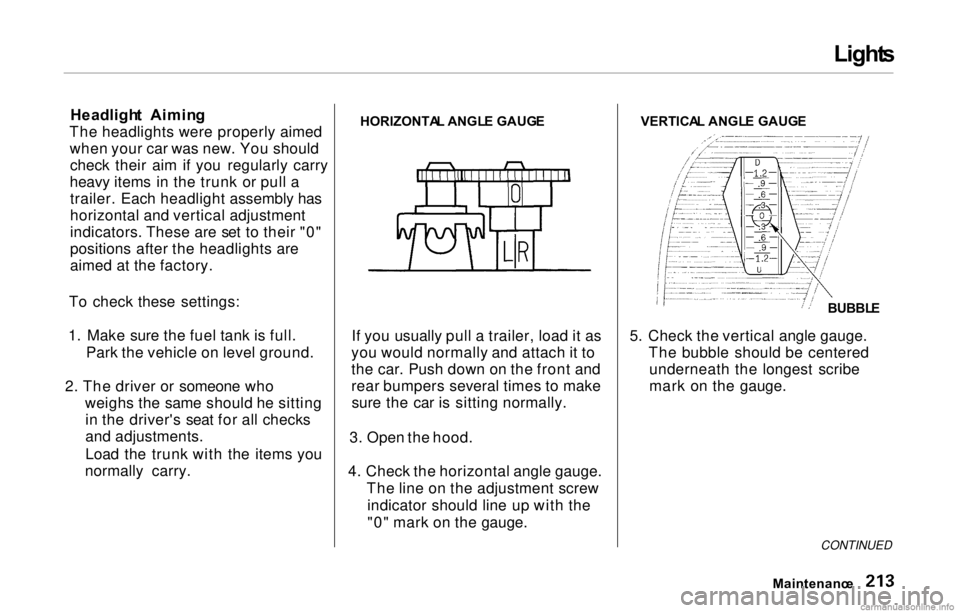
The headlights were properly aimed when your car was new. You shouldcheck their aim if you regularly carry
heavy items in the trunk or pull a trailer. Each headlight assembly has
horizontal and vertical adjustment
indicators. These are set to their "0"
positions after the headlights are
aimed at the factory.
To check these settings:
1. Make sure the fuel tank is full. Park the vehicle on level ground.
2. The driver or someone who weighs the same should he sittingin the driver's seat for all checks
and adjustments.
Load the trunk with the items you
normally carry. HORIZONTA
L ANGL E GAUG E
If you usually pull a trailer, load it as
you would normally and attach it to
the car. Push down on the front and
rear bumpers several times to make sure the car is sitting normally.
3. Open the hood.
4. Check the horizontal angle gauge. The line on the adjustment screwindicator should line up with the
"0" mark on the gauge. VERTICA
L ANGL E GAUG E
5. Check the vertical angle gauge. The bubble should be centeredunderneath the longest scribe
mark on the gauge.
MaintenanceCONTINUED
BUBBLE
Page 228 of 293
Storin
g You r Ca r
If you need to park your car for an
extended period (more than one
month), there are several things you should do to prepare it for storage.
Proper preparation helps prevent deterioration and makes it easier to
get your car back on the road. If possible, store your car indoors. Fill the fuel tank.
Change the engine oil and filter
(see page 183 ). Wash and dry the exterior
completely. Clean the interior. Make sure the
carpeting, floor mats, etc. are
completely dry. Leave the parking brake off. Put
the transmission in Reverse (5- speed manual) or Park (automatic). Block the rear wheels.
If the car is to be stored for a
longer period, it should be
supported on jackstands so the
tires are off the ground. Leave one window open slightly (if
the car is being stored indoors). Disconnect the battery.
Support the front wiper blade
arms with a folded towel or rag so
they do not touch the windshield. To minimize sticking, apply a
silicone spray lubricant to all door
and trunk seals. Also, apply a
vehicle body wax to the painted surfaces that mate with the door
and trunk seals. Cover the car with a "breathable"
cover, one made from a porous
material such as cotton.
Nonporous materials, such as
plastic sheeting, trap moisture,
which can damage the paint. If possible, run the engine for a
while periodically (preferably once a month).
If you store your car for 12 months or longer, have your Honda dealer
perform the inspections called for in
the 24 months/30,000 miles (48,000
km) maintenance schedule (Normal Conditions) as soon as you take it
out of storage (see page 172). The
replacements called for in the
maintenance schedule are not
needed unless the car has actually
reached that time or mileage.
Maintenance
Page 233 of 293
Interio
r Car e
Carpetin g
Vacuum the carpeting frequently to remove dirt. Ground-in dirt will make
the carpet wear out faster. Periodically shampoo the carpet to
keep it looking new. Use one of the foam-type carpet cleaners on the
market. Follow the instructions that
come with the cleaner, applying it
with a sponge or soft brush. Keep the carpeting as dry as possible by
not adding water to the foam. Fabri
c
Vacuum dirt and dust out of the material frequently. For general
cleaning, use a solution of mild soap
and lukewarm water, letting it air dry.
To clean off stubborn spots, use a commercially-available fabric cleaner.
Test it on a hidden area of the fabric first, to make sure it does not bleachor stain the fabric. Follow the
instructions that come with the
cleaner.
Viny
l
Remove dirt and dust with a vacuum
cleaner. Wipe the vinyl with a soft
cloth dampened in a solution of mild soap and water. Use the same
solution with a soft-bristle brush on
more difficult spots. You can also use commercially-available spray or
foam-type vinyl cleaners.
Appearanc e Car e