transmission HONDA RIDGELINE 2017 2.G Owners Manual
[x] Cancel search | Manufacturer: HONDA, Model Year: 2017, Model line: RIDGELINE, Model: HONDA RIDGELINE 2017 2.GPages: 606, PDF Size: 13.21 MB
Page 21 of 606
20
Quick Reference Guide
Driving (P395)
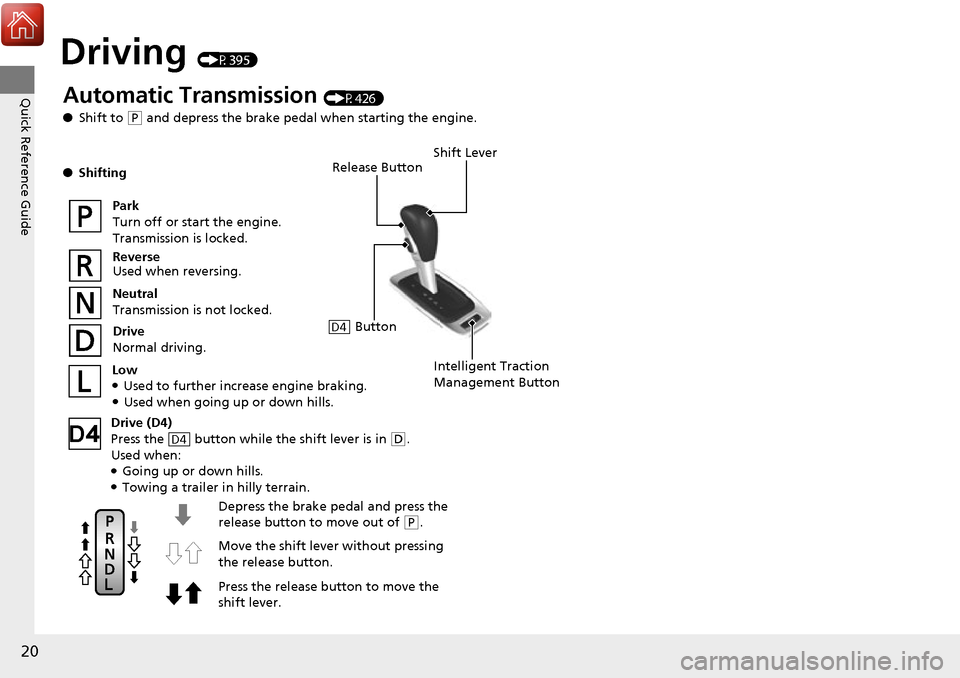
Release Button
Depress the brake pedal and press the
release button to move out of
( P.
Move the shift lever without pressing
the release button.
Press the release button to move the
shift lever.
Automatic Transmission (P426)
● Shift to
(P and depress the brake pedal when starting the engine.
● Shifting
Park
Turn off or start the engine.
Transmission is locked.
Reverse
Used when reversing.
Neutral
Transmission is not locked.
Drive
Normal driving.
Shift Lever
Intelligent Traction
Management ButtonLow●Used to further increase engine braking.●Used when going up or down hills.
Drive (D4)
Press the button while the shift lever is in
( D.
Used when:
●Going up or down hills.●Towing a trailer in hilly terrain.
D4
ButtonD4
Page 75 of 606
74
uuIndicators u
Instrument Panel
IndicatorNameOn/BlinkingExplanationMessage
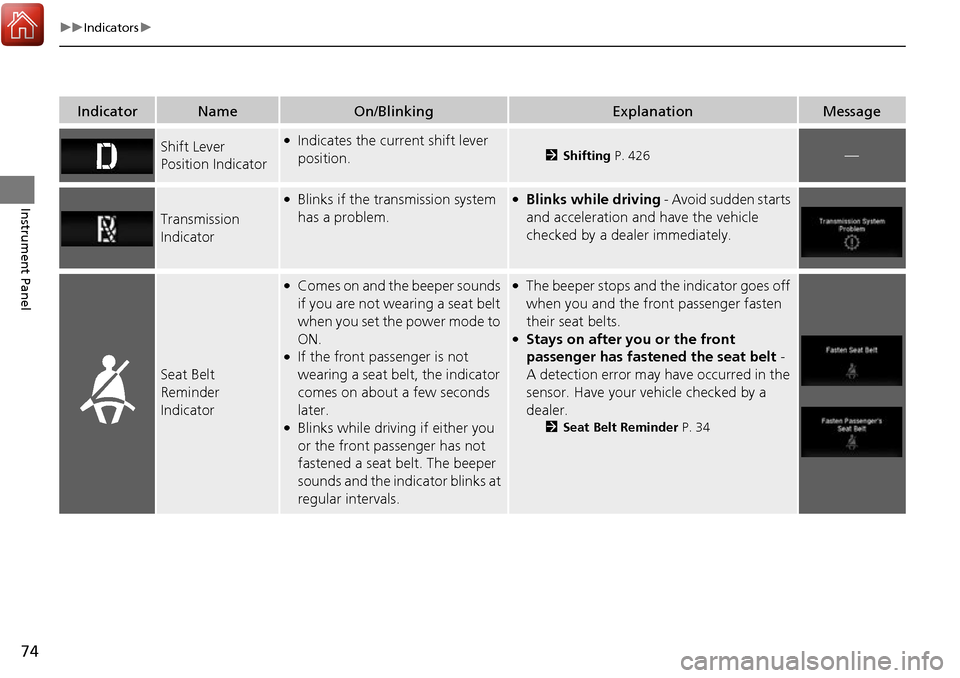
Shift Lever
Position Indicator●Indicates the current shift lever
position.2Shifting P. 426—
Transmission
Indicator
●Blinks if the transmission system
has a problem.●Blinks while driving - Avoid sudden starts
and acceleration and have the vehicle
checked by a dealer immediately.
Seat Belt
Reminder
Indicator
●Comes on and the beeper sounds
if you are not wearing a seat belt
when you set the power mode to
ON.
●If the front passenger is not
wearing a seat belt, the indicator
comes on about a few seconds
later.
●Blinks while driving if either you
or the front passenger has not
fastened a seat belt. The beeper
sounds and the indicator blinks at
regular intervals.
●The beeper stops and the indicator goes off
when you and the front passenger fasten
their seat belts.
●Stays on after you or the front
passenger has fastened the seat belt -
A detection error may have occurred in the
sensor. Have your vehicle checked by a
dealer.
2 Seat Belt Reminder P. 34
Page 94 of 606
93
uuIndicators uMulti-Information Display Warning and Information Messages
Continued
Instrument Panel
MessageConditionExplanation
●Appears if there is a problem with the cooling system.●Drive slowly to prevent overheating and have your
vehicle checked by a dealer as soon as possible.
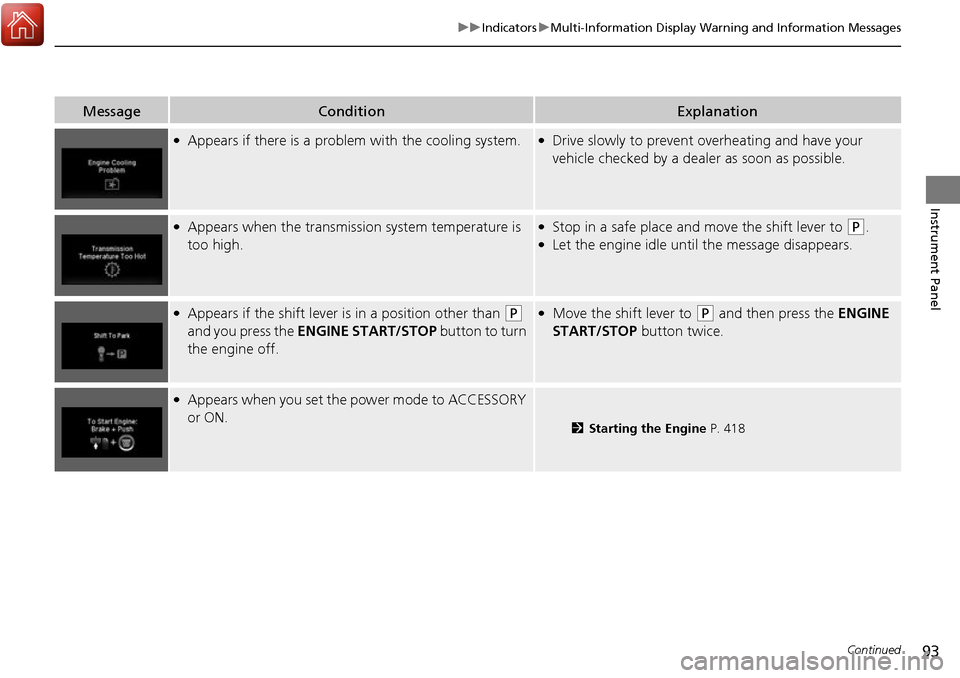
●Appears when the transmission system temperature is
too high.●Stop in a safe place and move the shift lever to (P.●Let the engine idle until the message disappears.
●Appears if the shift lever is in a position other than (P
and you press the ENGINE START/STOP button to turn
the engine off. ●Move the shift lever to (P and then press the ENGINE
START/STOP button twice.
●Appears when you set the power mode to ACCESSORY
or ON.
2 Starting the Engine P. 418
Page 157 of 606
156
uuOperating the Switches Around the Steering Wheel uDriving Position Memory System*
Controls
Driving Position Memory System*
You can store two driver’s seat (except for power lumbar) and door mirror positions
with the driving position memory system.
When you unlock and open the driver’s do or with a remote transmitter or smart
entry system, the seat and door mirrors adju st automatically to one of the two preset
positions.
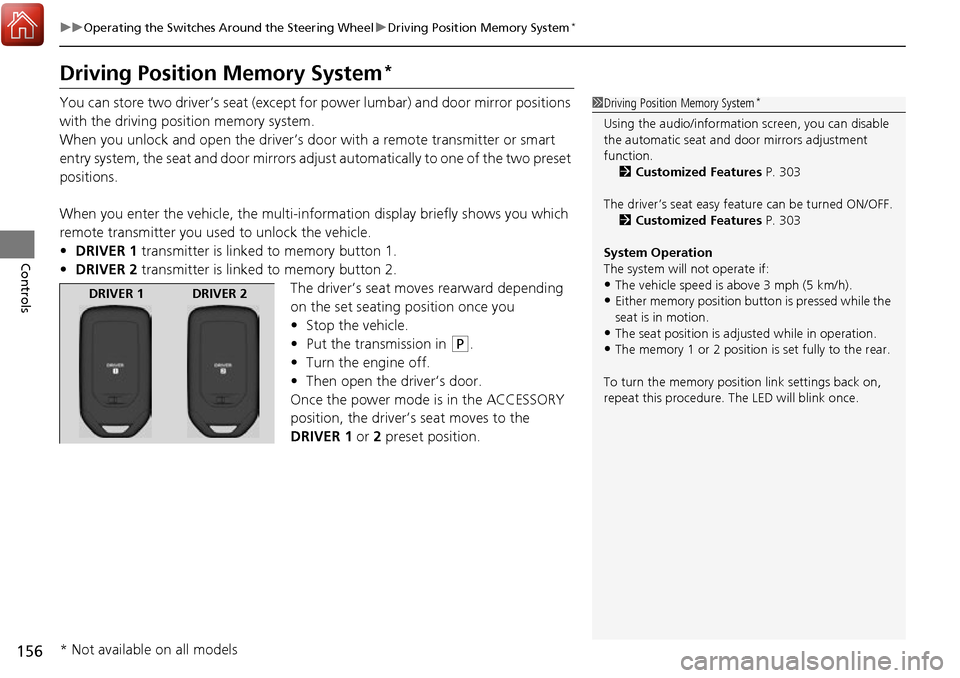
When you enter the vehicle, the multi-in formation display briefly shows you which
remote transmitter you used to unlock the vehicle.
• DRIVER 1 transmitter is linked to memory button 1.
• DRIVER 2 transmitter is linked to memory button 2.
The driver’s seat moves rearward depending
on the set seating position once you
•Stop the vehicle.
• Put the transmission in
(P.
• Turn the engine off.
• Then open the driver’s door.
Once the power mode is in the ACCESSORY
position, the driver’s seat moves to the
DRIVER 1 or 2 preset position.
1Driving Position Memory System*
Using the audio/informati on screen, you can disable
the automatic seat and d oor mirrors adjustment
function. 2 Customized Features P. 303
The driver’s seat easy feature can be turned ON/OFF. 2 Customized Features P. 303
System Operation
The system will not operate if:
•The vehicle speed is above 3 mph (5 km/h).
•Either memory position button is pressed while the
seat is in motion.
•The seat position is adju sted while in operation.
•The memory 1 or 2 position is set fully to the rear.
To turn the memory positi on link settings back on,
repeat this procedure. The LED will blink once.
DRIVER 1 DRIVER 2
* Not available on all models
Page 282 of 606
281
uuAudio System Basic Operation uWi-Fi Connection
Continued
Features
Wi-Fi Connection
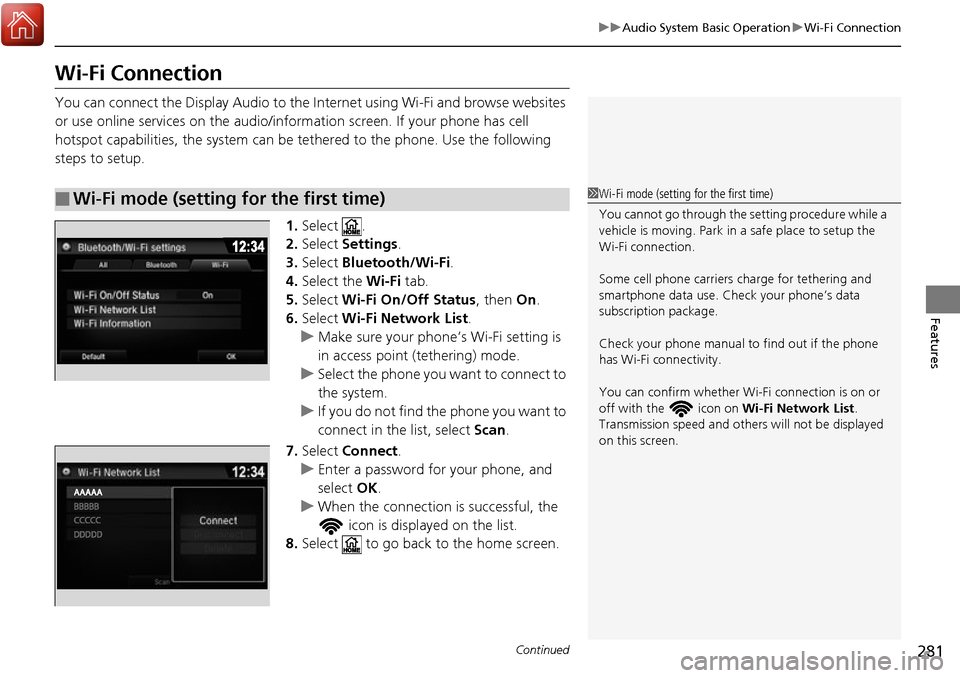
You can connect the Display Audio to the Internet using Wi-Fi and browse websites
or use online services on the audio/information screen. If your phone has cell
hotspot capabilities, the system can be tethered to the phone. Use the following
steps to setup.
1.Select .
2. Select Settings .
3. Select Bluetooth/Wi-Fi .
4. Select the Wi-Fi tab.
5. Select Wi-Fi On/Off Status , then On.
6. Select Wi-Fi Network List .
u Make sure your phone’ s Wi-Fi setting is
in access point (tethering) mode.
u Select the phone you want to connect to
the system.
u If you do not find the phone you want to
connect in the list, select Scan .
7. Select Connect .
u Enter a password for your phone, and
select OK .
u When the connection is successful, the
icon is displayed on the list.
8. Select to go back to the home screen.
■Wi-Fi mode (setting for the first time)1Wi-Fi mode (setting for the first time)
You cannot go through the setting procedure while a
vehicle is moving. Park in a safe place to setup the
Wi-Fi connection.
Some cell phone carriers charge for tethering and
smartphone data use. Check your phone’s data
subscription package.
Check your phone manual to find out if the phone
has Wi-Fi connectivity.
You can confirm whether Wi -Fi connection is on or
off with the icon on Wi-Fi Network List.
Transmission speed and others will not be displayed
on this screen.
Page 286 of 606
Continued285
uuAudio System Basic Operation uApple CarPlay
Features
■Maps
Display Apple CarPlay map and use the navigation function just as you would on
your iPhone.
Only one navigation system (pre-installed navigation or Apple CarPlay) can give
directions at a time. When you are using one system, directions to any prior
destination set on the other system will be canceled, and the system you are
currently using will direct you to your destination.
After you have connected your iPhone to the system via USB, use the following
procedure to set up Apple CarPlay. Us e of Apple CarPlay will result in the
transmission of certain user and vehicle in formation (such as vehicle location, speed,
and status) to your iPhone to enhance th e Apple CarPlay experience. You will need
to consent to the sharing of this in formation on the Display Audio Screen.
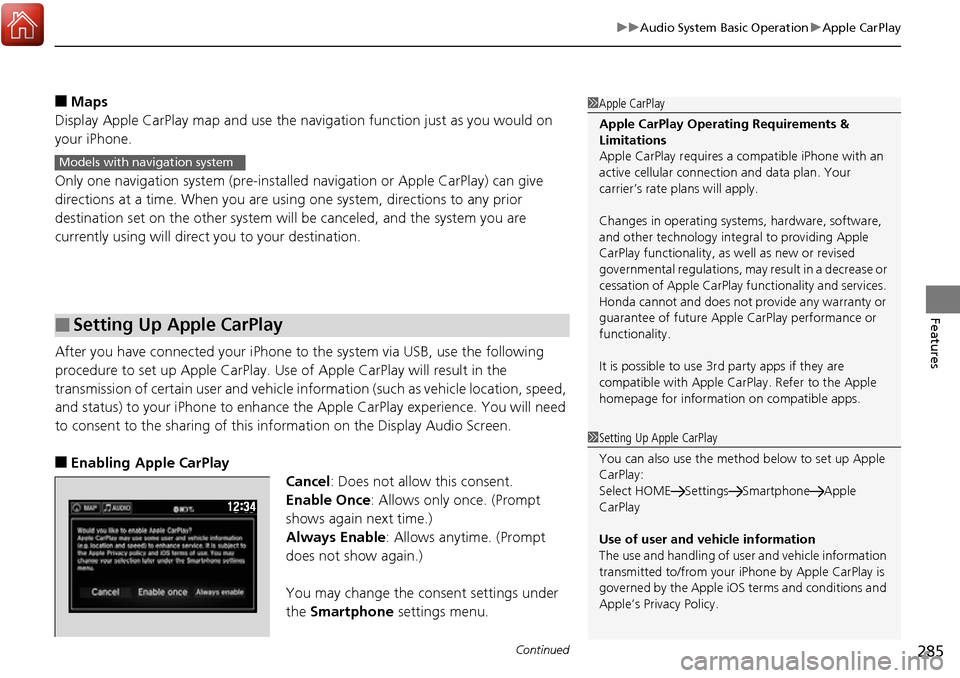
■Enabling Apple CarPlay
Cancel: Does not allow this consent.
Enable Once: Allows only once. (Prompt
shows again next time.)
Always Enable: Allows anytime. (Prompt
does not show again.)
You may change the consent settings under
the Smartphone settings menu.
■Setting Up Apple CarPlay
1Apple CarPlay
Apple CarPlay Operating Requirements &
Limitations
Apple CarPlay requires a co mpatible iPhone with an
active cellular connecti on and data plan. Your
carrier’s rate plans will apply.
Changes in operating system s, hardware, software,
and other technology integr al to providing Apple
CarPlay functionality, as well as new or revised
governmental regulations, may result in a decrease or
cessation of Apple CarPlay functionality and services.
Honda cannot and does not provide any warranty or
guarantee of future Appl e CarPlay performance or
functionality.
It is possible to use 3r d party apps if they are
compatible with Apple CarPlay. Refer to the Apple
homepage for information on compatible apps.
Models with navigation system
1 Setting Up Apple CarPlay
You can also use the method below to set up Apple
CarPlay:
Select HOME Settings Smartphone Apple
CarPlay
Use of user and vehicle information
The use and handling of user and vehicle information
transmitted to/from your iP hone by Apple CarPlay is
governed by the Apple iOS terms and conditions and
Apple’s Privacy Policy.
Page 396 of 606
395
Driving
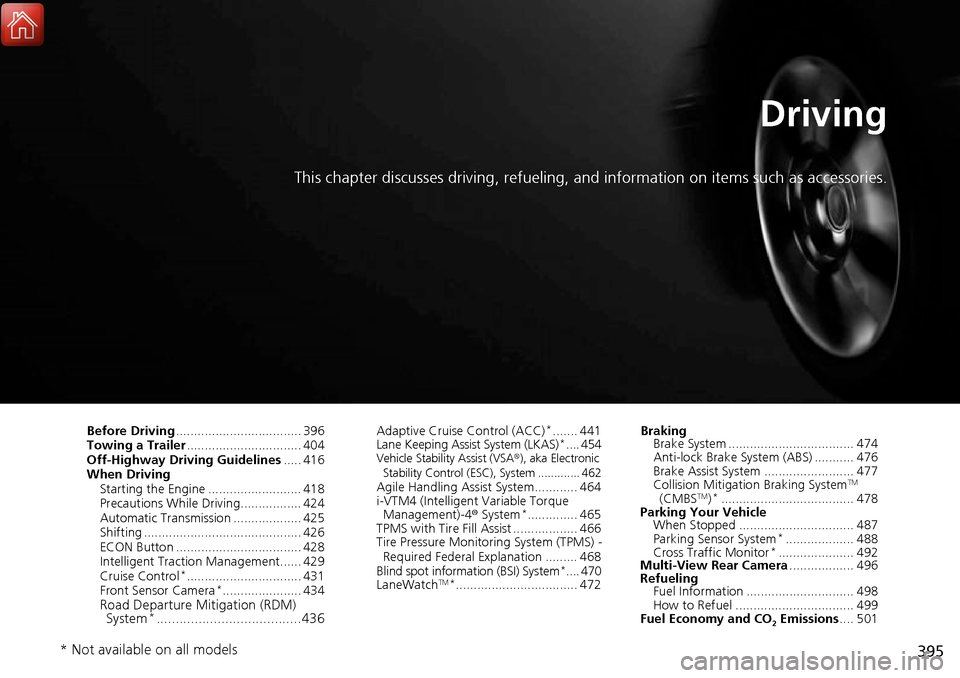
This chapter discusses driving, refueling, and information on items such as accessories.
Before Driving................................... 396
Towing a Trailer ................................ 404
Off-Highway Driving Guidelines ..... 416
When Driving Starting the Engine .......................... 418
Precautions While Driving................. 424
Automatic Transmission ................... 425
Shifting ............................................ 426
ECON Button ................................... 428
Intelligent Traction Management...... 429
Cruise Control
*................................ 431
Front Sensor Camera*...................... 434Road Departure Mi tigation (RDM)
System*...................................... 436
Adaptive Cruise Control (ACC)*....... 441
Lane Keeping Assist System (LKAS)*.... 454Vehicle Stability Assist (VSA ®), aka Electronic
Stability Control (ESC), System ............. 462
Agile Handling Assist System............ 464
i-VTM4 (Intelligent Variable Torque
Management)-4 ® System
*.............. 465
TPMS with Tire Fill Assist .................. 466
Tire Pressure Monitoring System (TPMS) -
Required Federal Explanation ......... 468
Blind spot inform ation (BSI) System
*.... 470
LaneWatchTM*.................................. 472 Braking
Brake System ................................... 474
Anti-lock Brake System (ABS) ........... 476
Brake Assist System ......................... 477
Collision Mitigation Braking System
TM
(CMBSTM)*..................................... 478
Parking Your Vehicle When Stopped ................................ 487
Parking Sensor System
*................... 488
Cross Traffic Monitor*..................... 492
Multi-View Rear Camera .................. 496
Refueling Fuel Information .............................. 498
How to Refuel ................................. 499
Fuel Economy and CO
2 Emissions .... 501
* Not available on all models
Page 416 of 606
415
uuTowing a Trailer uTowing Your Vehicle
Driving
• Monitor your temperature gauge. If it nears the mark, turn off the heating
and cooling system*/climate control system* and reduce speed. Pull to the side of
the road safely to cool down the engine if necessary.
• Shift to the position if the transmission shifts frequently.
If the vehicle tires slip when retrieving a boat from the water, keep the transmission
in
(D. This prevents damage to the transmission.
Towing Your Vehicle
Your vehicle is not designed to be towed behind a motorhome. If your vehicle needs
to be towed in an emergency, refer to the emergency towing information.
2Emergency Towing P. 580
■Driving in Hilly Terrain
■Retrieving a Boat
H
D4
* Not available on all models
Page 418 of 606
417
uuOff-Highway Driving Guidelines uAvoiding Trouble
Driving
Avoiding Trouble
• Check Out Your Vehicle before you leave the pavement and make sure that all
scheduled maintenance has been completed. Pay special attention to the
condition of the tires, and check the tire pressures.
• Remember the route you choose presents limi ts (too steep or bumpy), you have
limits (driving skill and comfort), and your ve hicle has limits (traction, stability, and
power). Failing to recognize these limits will likely put you and your passengers in
a hazardous situation.
• Accelerating and Braking should be done slowly and gradually. Trying to start
or stop too fast can cause a loss of traction and you could lose control.
• Avoiding Obstacles and Debris in the road reduces the likelihood of a rollover
or damage to your suspension or other components.
• Driving on Slopes increases your risk of a rollover, particularly if you attempt to
drive across a slope that is too steep. Goin g straight up or down a slope is usually
the safest. If you can’t clearly see all cond itions or obstacles on a slope, walk it
before you drive it. If there is any doubt whether you can safely pass, don’t try it.
Find another route. If you get stuck when climbing, do not try to turn around.
Back down slowly following the same route you took up the hill.
• Crossing a Stream - Avoid driving through deep water. If you encounter water
in your route (a small stream or large pu ddle, for example), evaluate it carefully
before going ahead. Make sure it is shallow, flowing slowly, and has firm ground
underneath. If you are not sure of the de pth or the ground, turn around and find
another route. Driving through deep water can also damage your vehicle. The
water can get into the transmission and di fferential, diluting the lubricant and
causing an eventual failure. It can also wash the grease out of the wheel bearings.
• If You Get Stuck , carefully go in the direction that you think will get you
unstuck. Do not spin the tires as this will only make things worse and could
damage the transmission. If you are unable to free yourself, your vehicle will need
to be towed. Front and rear tow ho oks are provided for this purpose.
Page 425 of 606
424
uuWhen Driving uPrecautions While Driving
Driving
Precautions While Driving
Utility vehicles have a significantly higher ro llover rate than other types of vehicles.
To prevent rollovers or loss of control:
• Take corners at slower speeds than yo u would with a passenger vehicle.
• Avoid sharp turns and abrupt maneuvers whenever possible.
• Do not modify your vehicle in any way that you would raise the center of gravity.
• Do not carry heavy cargo on the roof.
Never carry more than 165 lbs (75 kg) of cargo on the roof rack (Honda accessory).
Avoid driving in deep water and on flooded roads. This can damage the engine,
driveline, or cause electrical component failure.
If there is a strong impact with something un der the vehicle, stop in a safe location.
Check the underside of the vehicle for damage or any fluid leaks.
■Driving Guidelines for Your Utility Vehicle
■In Rain
■Other Precautions
1 Precautions While Driving
NOTICE
Do not change the shift lever while pressing the
accelerator pedal. You could damage the
transmission.
NOTICE
If you repeatedly turn the steering wheel at an
extremely low speed, or hold the steering wheel in
the full left or right position for a while, the system
heats up. The system goes into a protective mode,
and limits its performa nce. The steering wheel
becomes harder and harder to operate. Once the
system cools down, the EPS system is restored.
Repeated operation under these conditions can
eventually damage the system.
If the power mode is set to ACCESSORY or VEHICLE
OFF (LOCK) while driving, the engine will shut down
and all steering and brake pow er assist functions will
stop, making it difficult to control the vehicle.
Do not put the shift lever in
( N, as you will lose
engine braking (and acce leration) performance.
During the first 600 miles (1,000 km) of operation,
avoid sudden acceleration or full throttle operation so
as not to damage the engine or powertrain.
Avoid hard braking for the first 200 miles (300 km).
You should also follow this when the brake pads are
replaced.