sensor HONDA RIDGELINE 2018 (in English) Owner's Guide
[x] Cancel search | Manufacturer: HONDA, Model Year: 2018, Model line: RIDGELINE, Model: HONDA RIDGELINE 2018Pages: 623, PDF Size: 25.85 MB
Page 100 of 623
98
uuIndicators uMulti-Information Display Warn ing and Information Messages
Instrument Panel
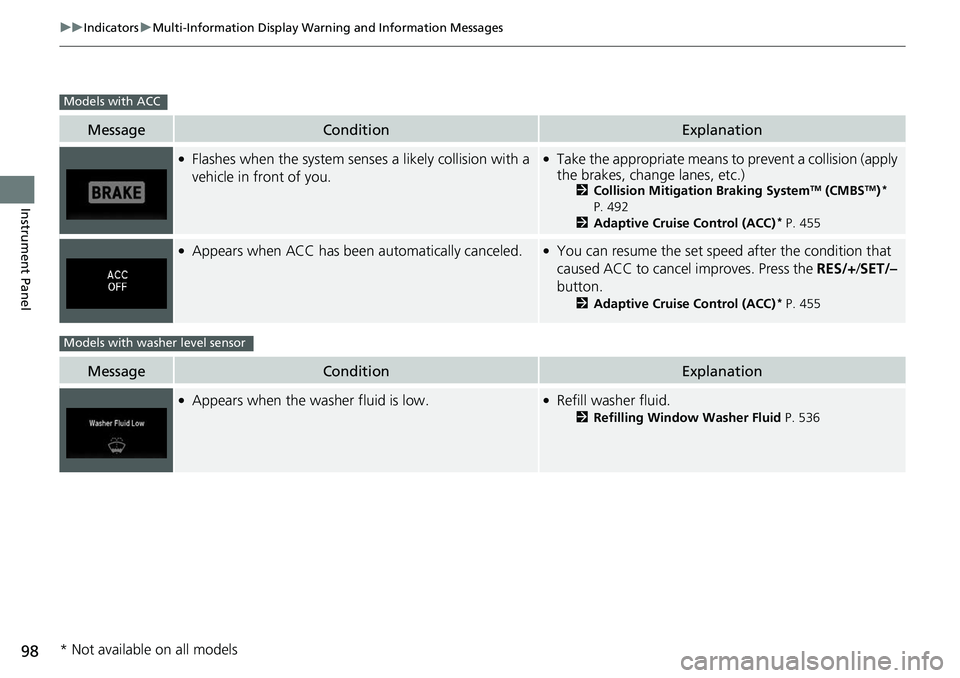
MessageConditionExplanation
●Flashes when the system senses a likely collision with a
vehicle in front of you.●Take the appropriate means to prevent a collision (apply
the brakes, change lanes, etc.)
2 Collision Mitigation Braking SystemTM (CMBSTM)*
P. 492
2 Adaptive Cruise Control (ACC)
* P. 455
●Appears when ACC has been automatically canceled.●You can resume the set speed after the condition that
caused ACC to cancel improves. Press the RES/+/SET/–
button.
2 Adaptive Cruise Control (ACC)* P. 455
MessageConditionExplanation
●Appears when the washer fluid is low.●Refill washer fluid.
2Refilling Window Washer Fluid P. 536
Models with ACC
Models with washer level sensor
* Not available on all models
Page 103 of 623
101
uuIndicators uMulti-Information Display Warning and Information Messages
Continued
Instrument Panel
MessageConditionExplanation
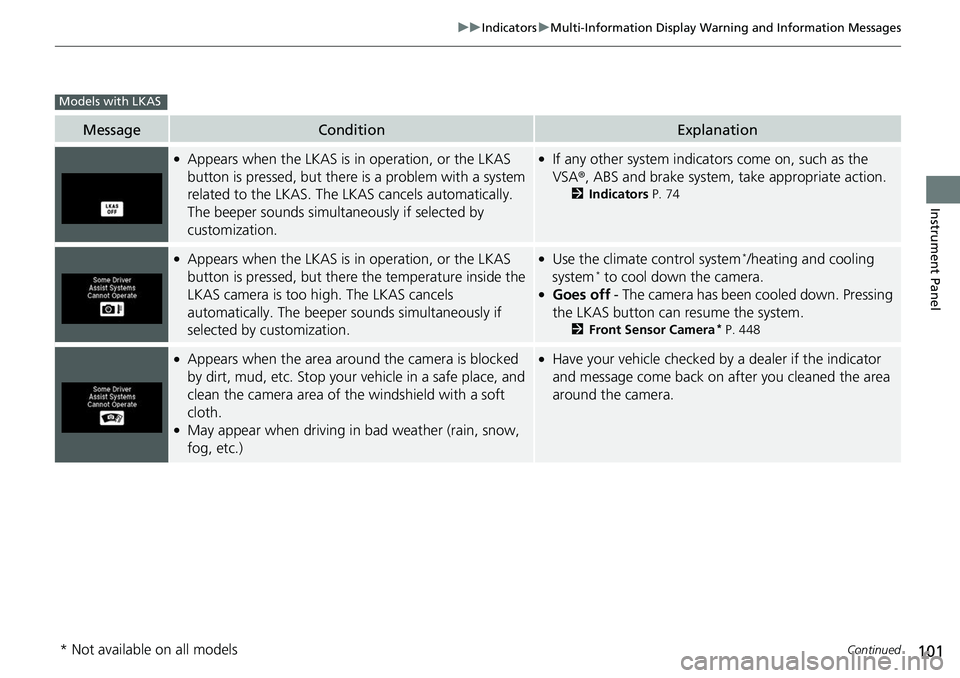
●Appears when the LKAS is in operation, or the LKAS
button is pressed, but there is a problem with a system
related to the LKAS. The LKAS cancels automatically.
The beeper sounds simultaneously if selected by
customization.●If any other system indicators come on, such as the
VSA ®, ABS and brake system, take appropriate action.
2Indicators P. 74
●Appears when the LKAS is in operation, or the LKAS
button is pressed, but there the temperature inside the
LKAS camera is too high. The LKAS cancels
automatically. The beeper sounds simultaneously if
selected by customization.●Use the climate control system*/heating and cooling
system* to cool down the camera.●Goes off - The camera has been cooled down. Pressing
the LKAS button can resume the system.
2 Front Sensor Camera* P. 448
●Appears when the area arou nd the camera is blocked
by dirt, mud, etc. Stop your vehicle in a safe place, and
clean the camera area of the windshield with a soft
cloth.
●May appear when driving in bad weather (rain, snow,
fog, etc.)
●Have your vehicle checked by a dealer if the indicator
and message come back on after you cleaned the area
around the camera.
Models with LKAS
* Not available on all models
Page 108 of 623
uuGauges and Multi-Information Display uMulti-Information Display
106
Instrument Panel
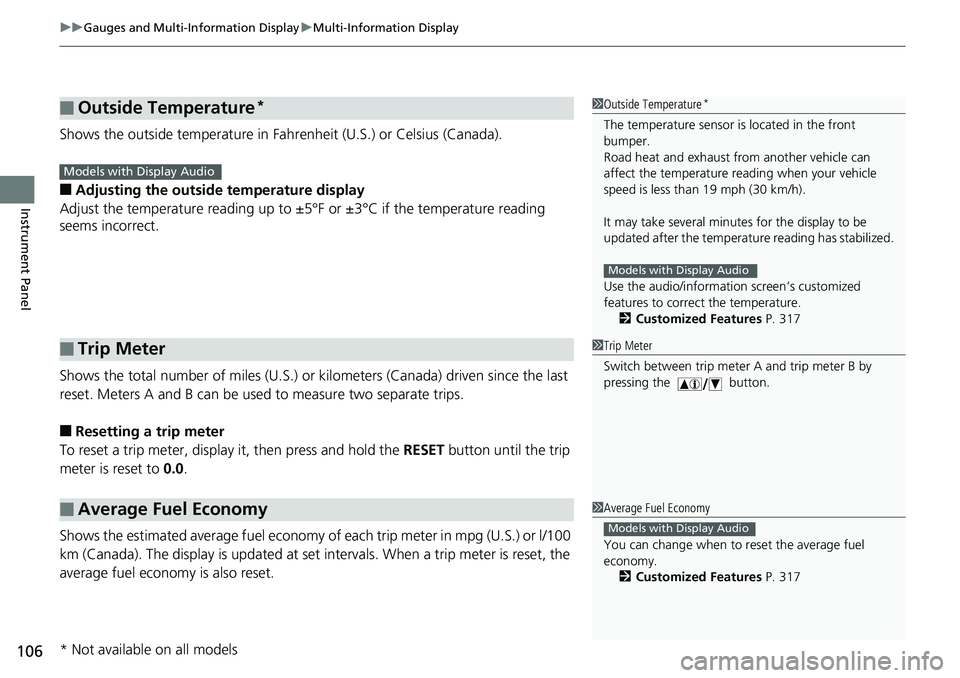
Shows the outside temperature in Fahr enheit (U.S.) or Celsius (Canada).
■Adjusting the outside temperature display
Adjust the temperature reading up to ±5°F or ±3°C if the temperature reading
seems incorrect.
Shows the total number of miles (U.S.) or kilometers (Canada) driven since the last
reset. Meters A and B can be used to measure two separate trips.
■Resetting a trip meter
To reset a trip meter, displa y it, then press and hold the RESET button until the trip
meter is reset to 0.0.
Shows the estimated average fuel economy of each trip meter in mpg (U.S.) or l/100
km (Canada). The display is updated at set intervals. When a trip meter is reset, the
average fuel economy is also reset.
■Outside Temperature*
■Trip Meter
■Average Fuel Economy
1 Outside Temperature*
The temperature sensor is located in the front
bumper.
Road heat and exhaust fr om another vehicle can
affect the temperature reading when your vehicle
speed is less than 19 mph (30 km/h).
It may take several minutes for the display to be
updated after the temperature reading has stabilized.
Use the audio/information screen’s customized
features to correct the temperature.
2 Customized Features P. 317
Models with Display Audio
Models with Display Audio
1Trip Meter
Switch between trip meter A and trip meter B by
pressing the button.
1Average Fuel Economy
You can change when to reset the average fuel
economy.
2 Customized Features P. 317
Models with Display Audio
* Not available on all models
Page 117 of 623
Continued115
uuLocking and Unlocking the Doors uLocking/Unlocking the Doors from the Outside
Controls
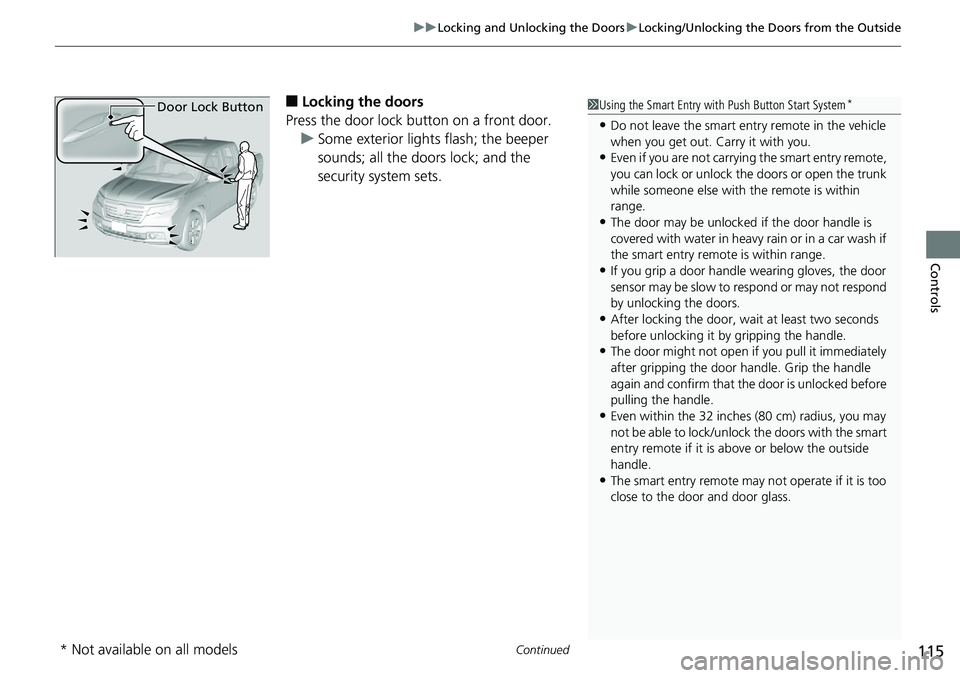
■Locking the doors
Press the door lock button on a front door. u Some exterior lights flash; the beeper
sounds; all the doors lock; and the
security system sets.1Using the Smart Entry with Push Button Start System*
•Do not leave the smart entry remote in the vehicle
when you get out. Carry it with you.
•Even if you are not carrying the smart entry remote,
you can lock or unlock the doors or open the trunk
while someone else with the remote is within
range.
•The door may be unlocked if the door handle is
covered with water in heavy rain or in a car wash if
the smart entry remote is within range.
•If you grip a door handle wearing gloves, the door
sensor may be slow to respond or may not respond
by unlocking the doors.
•After locking the door, wait at least two seconds
before unlocking it by gripping the handle.
•The door might not open if you pull it immediately
after gripping the door handle. Grip the handle
again and confirm that th e door is unlocked before
pulling the handle.
•Even within the 32 inches (80 cm) radius, you may
not be able to lock/unlock the doors with the smart
entry remote if it is a bove or below the outside
handle.
•The smart entry remote may not operate if it is too
close to the door and door glass.
Door Lock Button
* Not available on all models
Page 149 of 623
Continued147
uuOperating the Switches Around the Steering Wheel uLight Switches
Controls
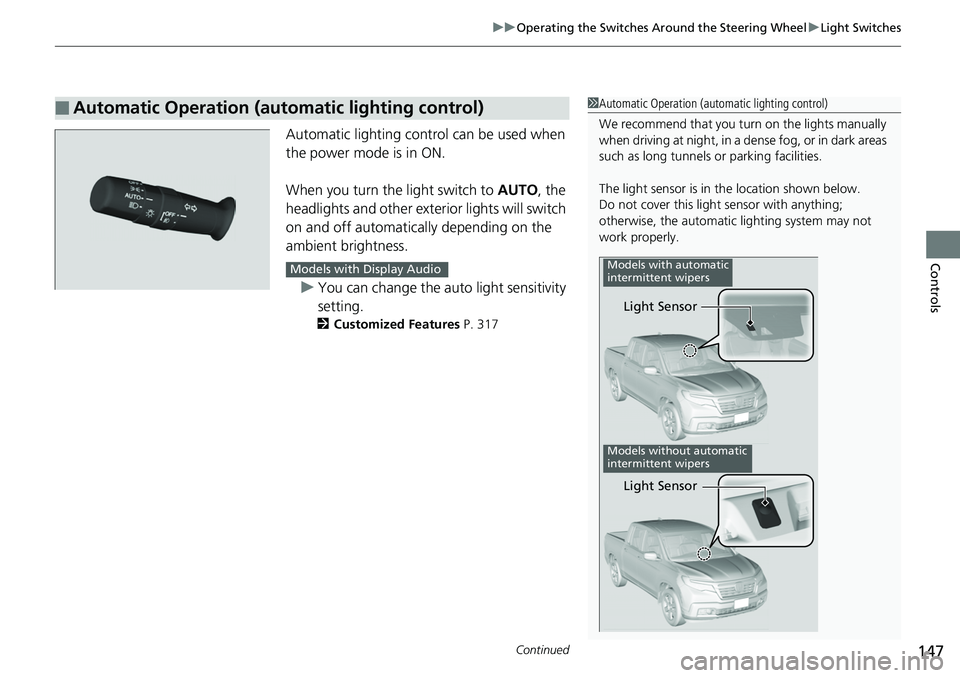
Automatic lighting contro l can be used when
the power mode is in ON.
When you turn the light switch to AUTO, the
headlights and other exterior lights will switch
on and off automatically depending on the
ambient brightness.
u You can change the auto light sensitivity
setting.
2 Customized Features P. 317
■Automatic Operation (automatic lighting control)1Automatic Operation (aut omatic lighting control)
We recommend that you tu rn on the lights manually
when driving at night, in a dense fog, or in dark areas
such as long tunnels or parking facilities.
The light sensor is in the location shown below.
Do not cover this light sensor with anything;
otherwise, the automatic lighting system may not
work properly.
Light Sensor
Models with automatic
intermittent wipers
Models without automatic
intermittent wipers
Light Sensor
Models with Display Audio
Page 157 of 623
155
uuOperating the Switches Around the Steering Wheel uWipers and Washers
Controls
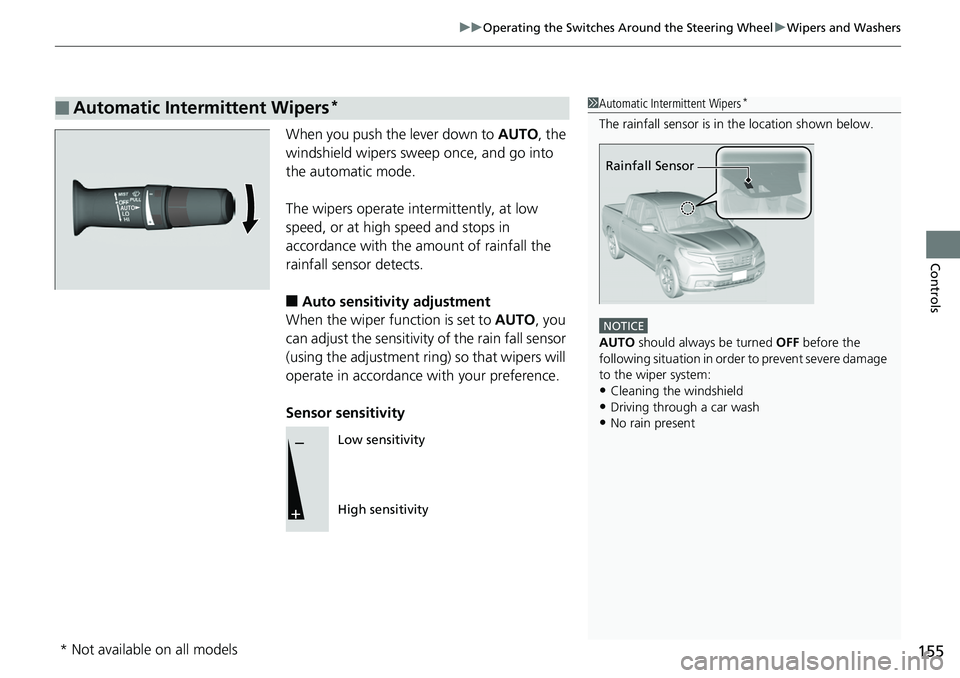
When you push the lever down to AUTO, the
windshield wipers sweep once, and go into
the automatic mode.
The wipers operate intermittently, at low
speed, or at high speed and stops in
accordance with the amount of rainfall the
rainfall sensor detects.
■Auto sensitivity adjustment
When the wiper function is set to AUTO, you
can adjust the sensitivity of the rain fall sensor
(using the adjustment ring) so that wipers will
operate in accordance with your preference.
Sensor sensitivity
■Automatic Intermittent Wipers*1 Automatic Intermittent Wipers*
The rainfall sensor is in the location shown below.
NOTICE
AUTO should always be turned OFF before the
following situation in order to prevent severe damage
to the wiper system:
•Cleaning the windshield•Driving through a car wash
•No rain present
Rainfall Sensor
Low sensitivity
High sensitivity
* Not available on all models
Page 163 of 623
161
Controls
Adjusting the Mirrors
Interior Rearview Mirror
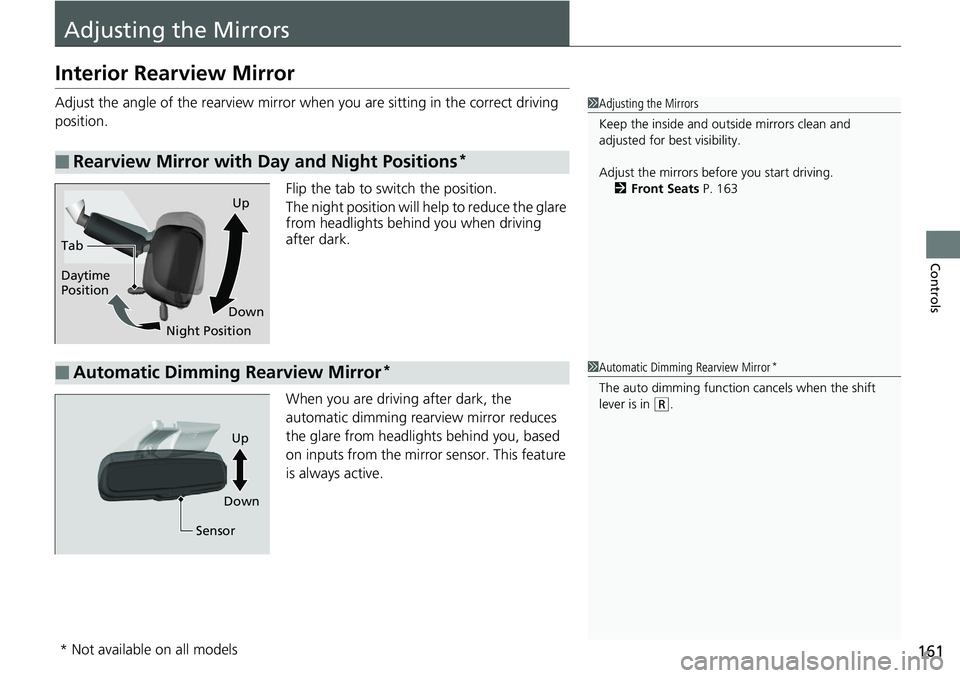
Adjust the angle of the rearview mirror when you are sitting in the correct driving
position.
Flip the tab to switch the position.
The night position will help to reduce the glare
from headlights behind you when driving
after dark.
When you are driving after dark, the
automatic dimming rear view mirror reduces
the glare from headlights behind you, based
on inputs from the mirror sensor. This feature
is always active.
■Rearview Mirror with Day and Night Positions*
1 Adjusting the Mirrors
Keep the inside and out side mirrors clean and
adjusted for best visibility.
Adjust the mirrors befo re you start driving.
2 Front Seats P. 163
Tab
Daytime
Position
Night PositionUp
Down
■Automatic Dimming Rearview Mirror*1 Automatic Dimming Rearview Mirror*
The auto dimming function cancels when the shift
lever is in
(R.
Sensor
Up
Down
* Not available on all models
Page 186 of 623
184
uuInterior Lights/Convenience Items uIn-Bed Convenience Items
Controls
In-Bed Convenience Items
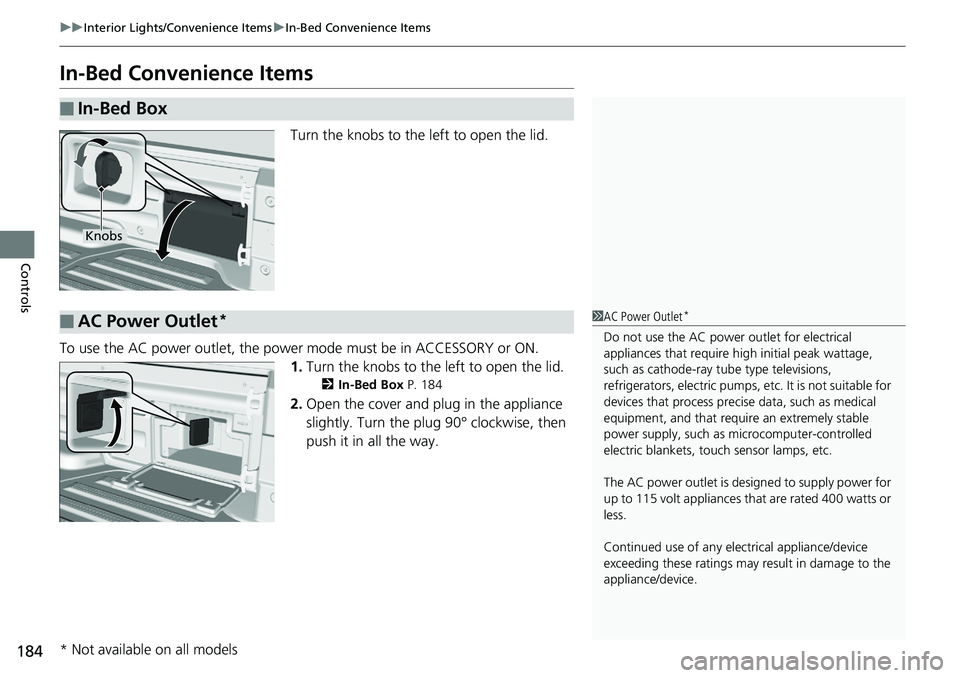
Turn the knobs to the left to open the lid.
To use the AC power outlet, the powe r mode must be in ACCESSORY or ON.
1. Turn the knobs to the left to open the lid.
2 In-Bed Box P. 184
2.Open the cover and plug in the appliance
slightly. Turn the plug 90° clockwise, then
push it in all the way.
■In-Bed Box
Knobs
■AC Power Outlet*1 AC Power Outlet*
Do not use the AC power outlet for electrical
appliances that require hi gh initial peak wattage,
such as cathode-ray tube type televisions,
refrigerators, electric pumps, etc. It is not suitable for
devices that process precis e data, such as medical
equipment, and that require an extremely stable
power supply, such as microcomputer-controlled
electric blankets, touc h sensor lamps, etc.
The AC power outlet is desi gned to supply power for
up to 115 volt appliances that are rated 400 watts or
less.
Continued use of any elec trical appliance/device
exceeding these ratings may result in damage to the
appliance/device.
* Not available on all models
Page 196 of 623
194
uuClimate Control System*uAutomatic Climate Control Sensors
Controls
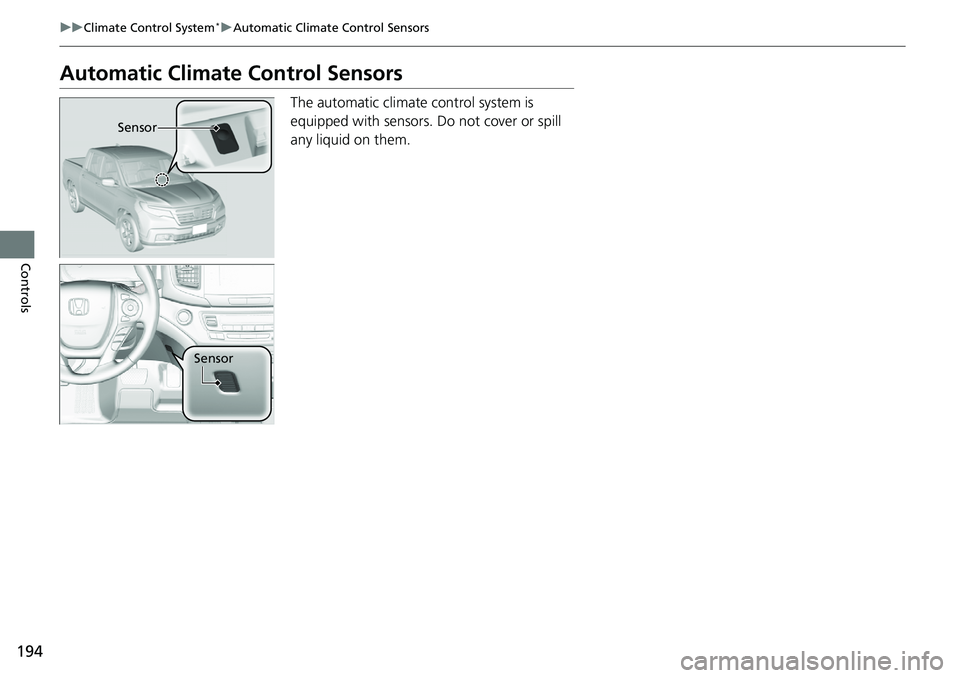
Automatic Climate Control Sensors
The automatic climate control system is
equipped with sensors. Do not cover or spill
any liquid on them.
Sensor
Sensor
Page 411 of 623
409
Driving
This chapter discusses driving and refueling.
Before Driving................................... 410
Towing a Trailer ................................ 418
Off-Highway Driving Guidelines ..... 430
When Driving Starting the Engine .......................... 432
Precautions While Driving................. 438
Automatic Transmission ................... 439
Shifting ............................................ 440
ECON Button ................................... 442
Intelligent Traction Management...... 443
Cruise Control
*................................ 445
Front Sensor Camera*...................... 448Road Departure Mi tigation (RDM)
System*...................................... 450
Adaptive Cruise Control (ACC)*....... 455
Lane Keeping Assist System (LKAS)*.... 468Vehicle Stability Assist (VSA ®), aka Electronic
Stability Control (ESC), System ............. 476
Agile Handling Assist ....................... 478
i-VTM4 (Intelligent Variable Torque
Management)-4 ® System
*.............. 479
TPMS with Tire Fill Assist .................. 480
Tire Pressure Monitoring System (TPMS) -
Required Federal Explanation ......... 482
Blind spot inform ation (BSI) System
*.... 484
LaneWatchTM*.................................. 486 Braking
Brake System ................................... 488
Anti-lock Brake System (ABS) ........... 490
Brake Assist System ......................... 491
Collision Mitigation Braking System
TM
(CMBSTM)*..................................... 492
Parking Your Vehicle When Stopped ................................ 501
Parking Sensor System
*................... 502
Cross Traffic Monitor*..................... 506
Multi-View Rear Camera .................. 510
Refueling Fuel Information .............................. 512
How to Refuel ................................. 513
Fuel Economy and CO
2 Emissions .... 515
* Not available on all models