HONDA S2000 2008 2.G Manual Online
S2000 2008 2.G
HONDA
HONDA
https://www.carmanualsonline.info/img/13/6058/w960_6058-0.png
HONDA S2000 2008 2.G Manual Online
Trending: rear view mirror, headlight bulb, spare wheel, charging, hood release, lane assist, jump cable
Page 81 of 268
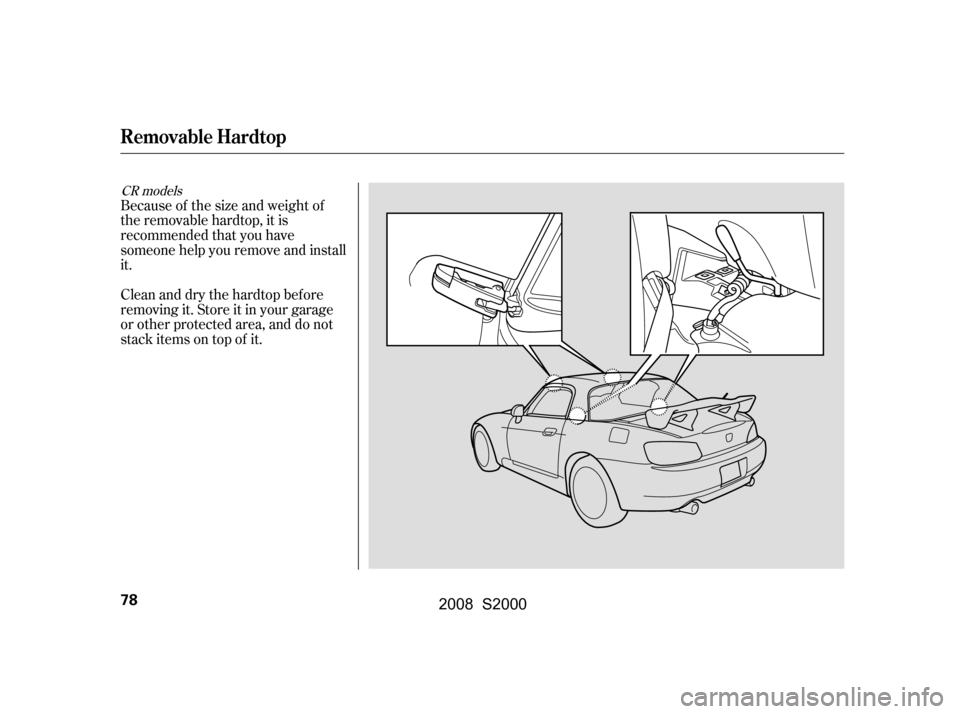
Because of the size and weight of
the removable hardtop, it is
recommended that you have
someone help you remove and install
it.
Clean and dry the hardtop bef ore
removing it. Store it in your garage
or other protected area, and do not
stack items on top of it.
CR models
Removable Hardtop
78
�\f���—�\f���—�����y�
���������\f�\f�y���
�(���������\f�y�\f�\f�����y
2008 S2000
Page 82 of 268
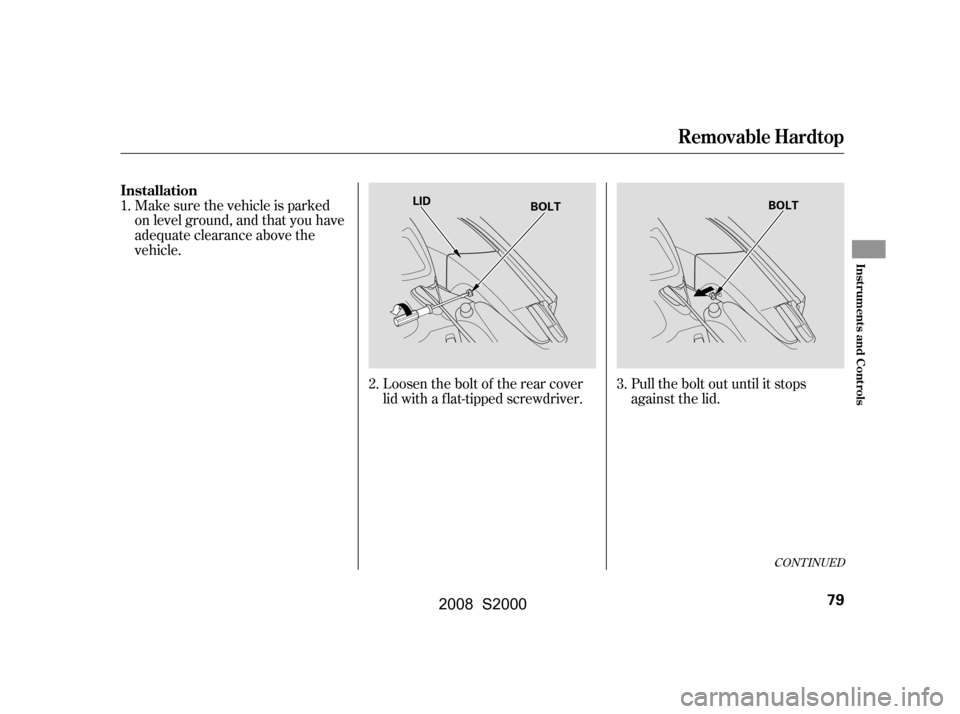
Loosen the bolt of the rear cover
lid with a f lat-tipped screwdriver.Pull the bolt out until it stops
against the lid.
Make sure the vehicle is parked
on level ground, and that you have
adequate clearance above the
vehicle.
2. 3.
1.
CONT INUED
Removable Hardtop
Installation
Inst rument s and Cont rols
79
LID
BOLT BOLT
�\f���—�\f���—�����y�
���������\f���y���
�(���������\f�y�\f�\f�����y
2008 S2000
Page 83 of 268
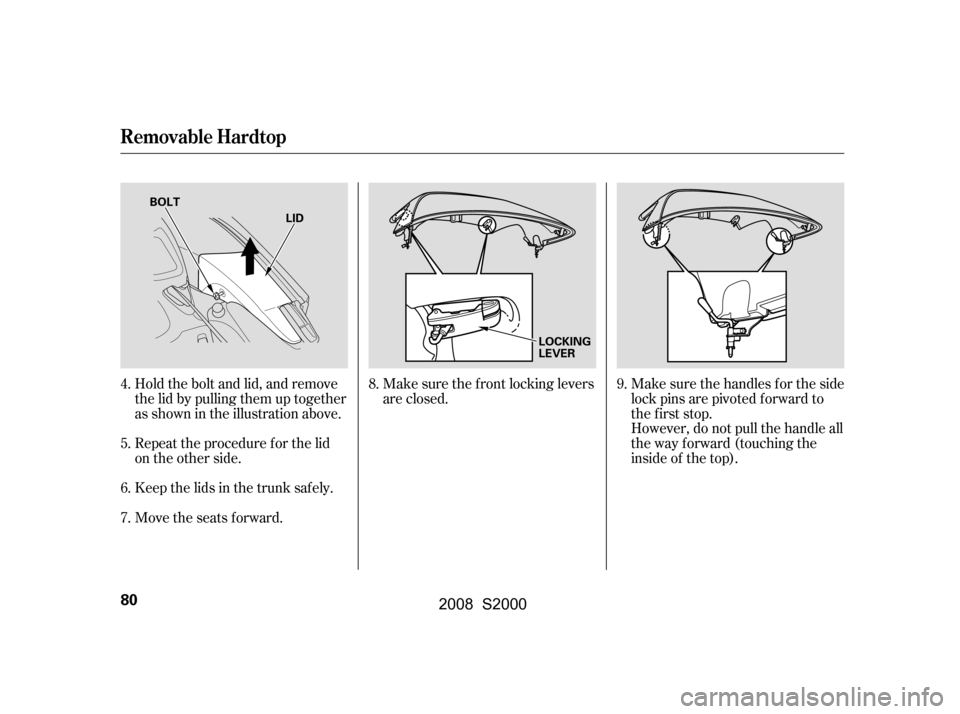
Hold the bolt and lid, and remove
the lid by pulling them up together
as shown in the illustration above.
Repeattheprocedureforthelid
on the other side.
Keep the lids in the trunk saf ely.
Move the seats forward.Make sure the f ront locking levers
are closed.
Make sure the handles f or the side
lock pins are pivoted f orward to
the f irst stop.
However, do not pull the handle all
the way forward (touching the
inside of the top).
4.
5.
6.
7. 8. 9.
Removable Hardtop
80
LOCKING
LEVER
LID
BOLT
�\f���—�\f���—�����y�
���������
���y���
�(���������\f�y�\f�\f�����y
2008 S2000
Page 84 of 268
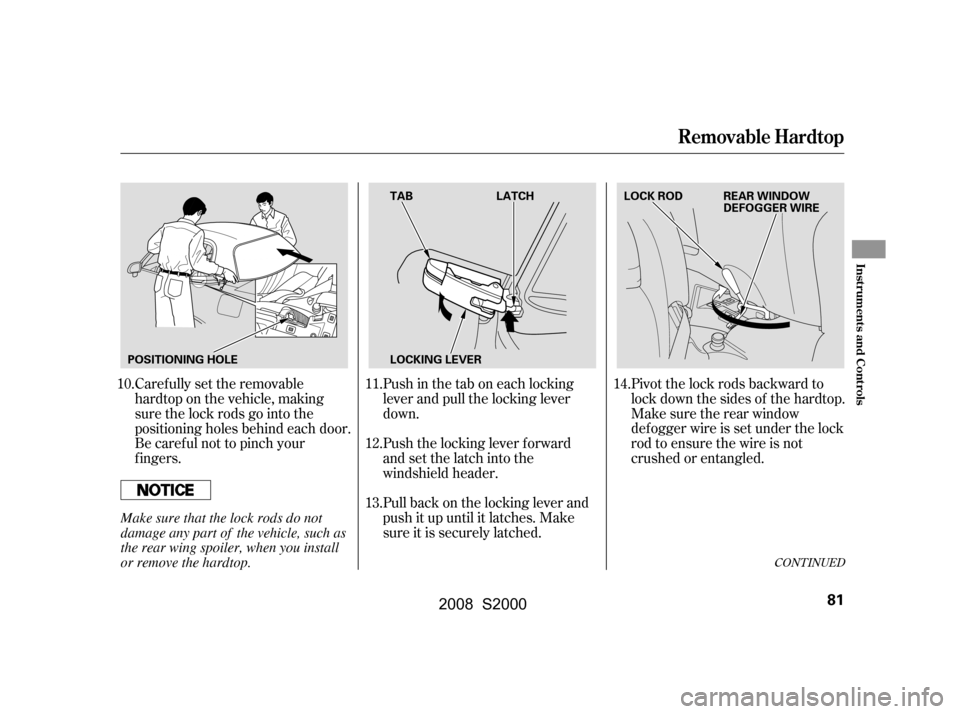
Caref ully set the removable
hardtop on the vehicle, making
sure the lock rods go into the
positioning holes behind each door.
Be caref ul not to pinch your
f ingers.Push in the tab on each locking
lever and pull the locking lever
down.
Push the locking lever f orward
and set the latch into the
windshield header.
Pull back on the locking lever and
push it up until it latches. Make
sure it is securely latched.Pivot the lock rods backward to
lock down the sides of the hardtop.
Make sure the rear window
def ogger wire is set under the lock
rod to ensure the wire is not
crushed or entangled.
10. 11.
12.
13.14.
CONT INUED
Removable Hardtop
Inst rument s and Cont rols
81
POSITIONING HOLE LOCKING LEVER TAB LATCH LOCK ROD REAR WINDOW
DEFOGGER WIRE
Make sure that the lock rods do not
damage any part of the vehicle, such as
the rear wing spoiler, when you install
or remove the hardtop.
�\f���—�\f���—�����y�
�������������y���
�(���������\f�y�\f�\f�����y
2008 S2000
Page 85 of 268
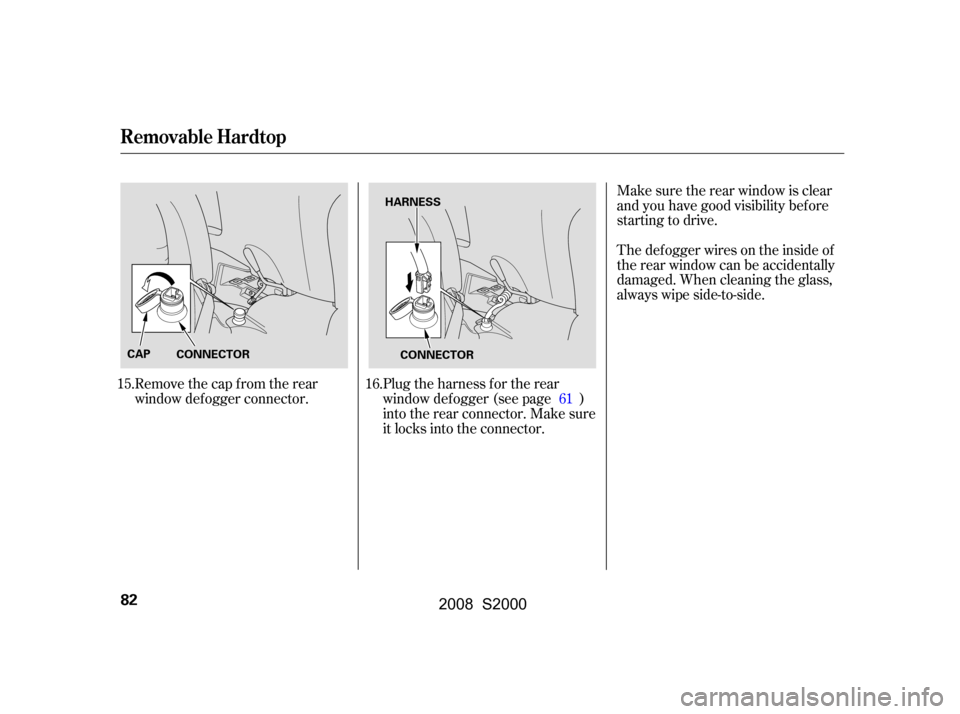
Plug the harness f or the rear
window def ogger (see page )
into the rear connector. Make sure
it locks into the connector.
Remove the cap from the rear
window def ogger connector. Make sure the rear window is clear
and you have good visibility bef ore
starting to drive.
Thedefoggerwiresontheinsideof
the rear window can be accidentally
damaged. When cleaning the glass,
always wipe side-to-side.
15. 16. 61
Removable Hardtop
82
CAPCONNECTOR
CONNECTOR
HARNESS
�\f���—�\f���—�����y�
�����������
�y���
�(���������\f�y�\f�\f�����y
2008 S2000
Page 86 of 268
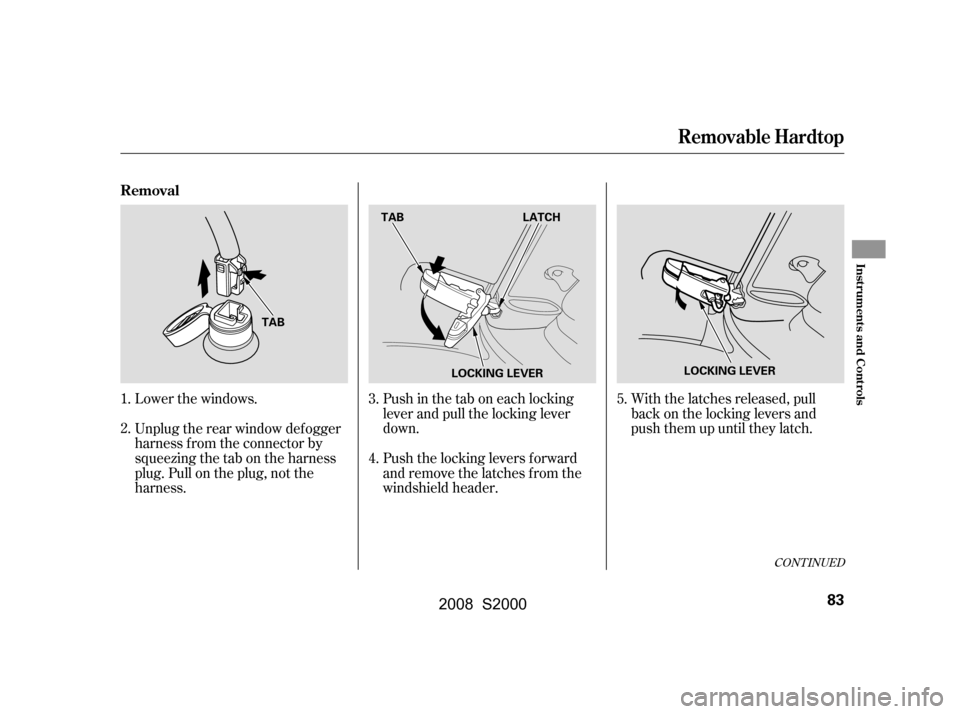
Lower the windows.
Unplug the rear window def ogger
harness f rom the connector by
squeezingthetabontheharness
plug. Pull on the plug, not the
harness.Push in the tab on each locking
lever and pull the locking lever
down.
Push the locking levers f orward
and remove the latches f rom the
windshield header.With the latches released, pull
back on the locking levers and
push them up until they latch.
1.
2. 3.
4.5.
CONT INUED
Removable Hardtop
Removal
Inst rument s and Cont rols
83
TABTAB LATCH
LOCKING LEVER LOCKING LEVER
�\f���—�\f���—�����y�
�����������\f�y���
�(���������\f�y�\f�\f�����y
2008 S2000
Page 87 of 268
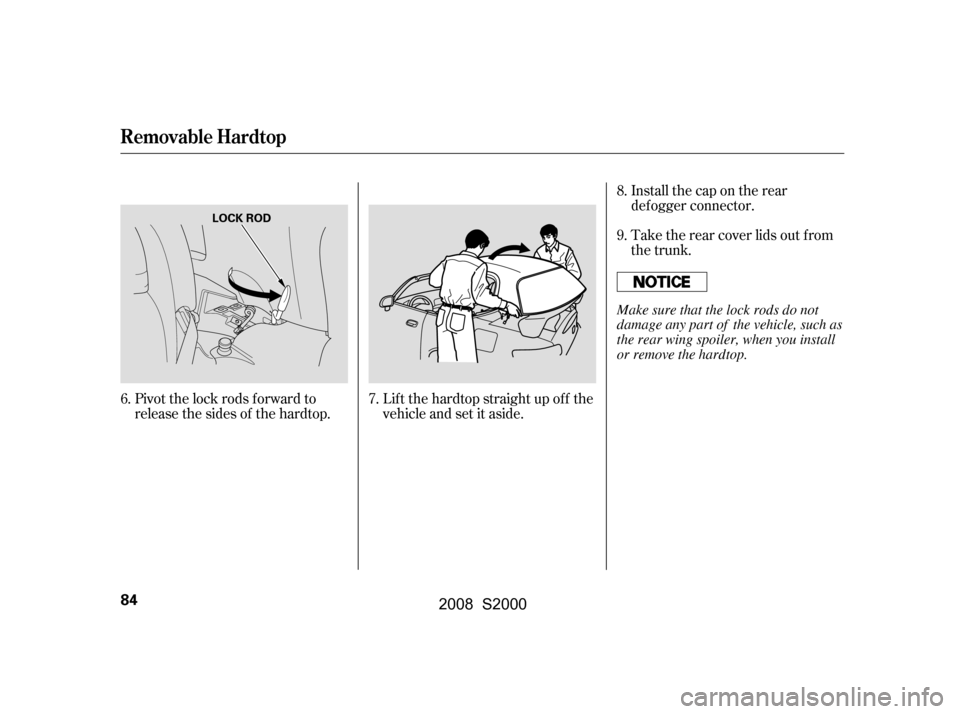
Pivot the lock rods forward to
release the sides of the hardtop.Lif t the hardtop straight up of f the
vehicleandsetitaside.Install the cap on the rear
def ogger connector.
Take the rear cover lids out f rom
the trunk.
6. 7. 8.
9.
Removable Hardtop
84
LOCK ROD
Make sure that the lock rods do not
damage any part of the vehicle, such as
the rear wing spoiler, when you install
or remove the hardtop.
�\f���—�\f���—�����y�
�������������y���
�(���������\f�y�\f�\f�����y
2008 S2000
Page 88 of 268
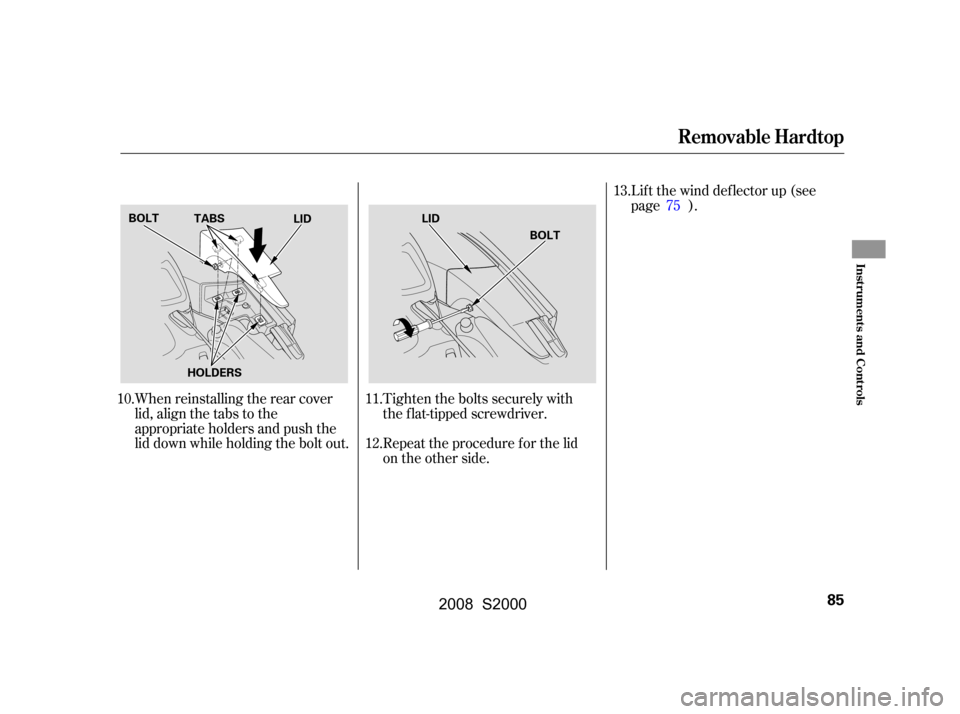
When reinstalling the rear cover
lid, align the tabs to the
appropriate holders and push the
lid down while holding the bolt out.Tighten the bolts securely with
the flat-tipped screwdriver.
Repeat the procedure for the lid
on the other side.Lif t the wind def lector up (see
page ).
10. 11. 12.13.
75
Removable Hardtop
Inst rument s and Cont rols
85
LID
HOLDERS
BOLT
BOLT
TABS LID
�\f���—�\f���—�����y�
�������������y���
�(���������\f�y�\f�\f���\f�y
2008 S2000
Page 89 of 268
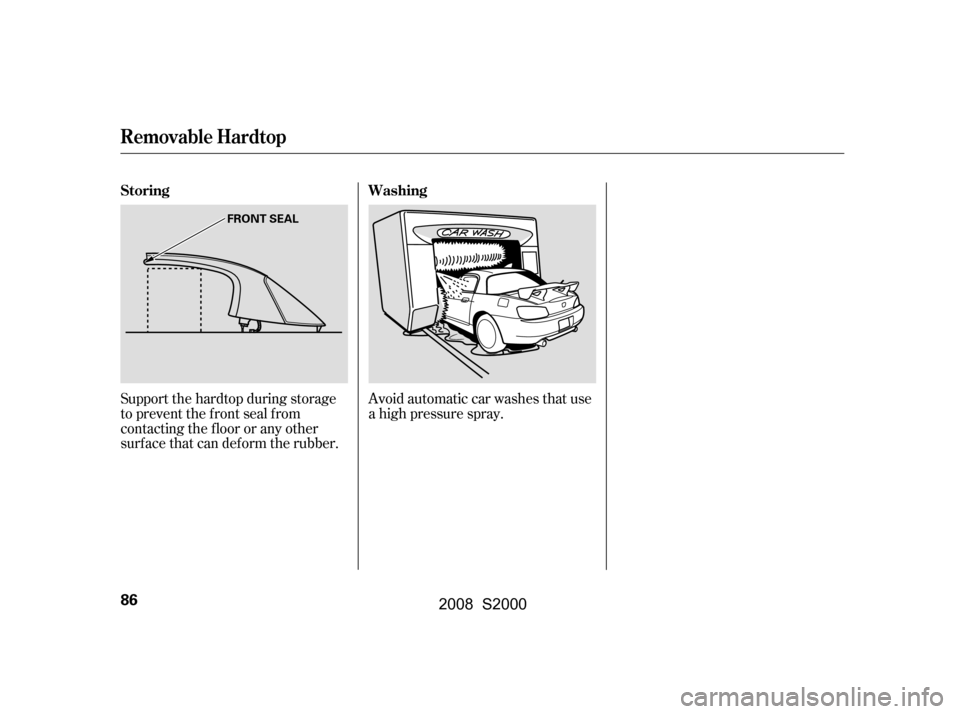
Support the hardtop during storage
to prevent the f ront seal f rom
contacting the floor or any other
surf ace that can def orm the rubber.Avoid automatic car washes that use
a high pressure spray.
Removable Hardtop
Storing Washing
86
FRONT SEAL
�\f���—�\f���—�����y�
�������������y���
�(���������\f�y�\f�\f���
�y
2008 S2000
Page 90 of 268
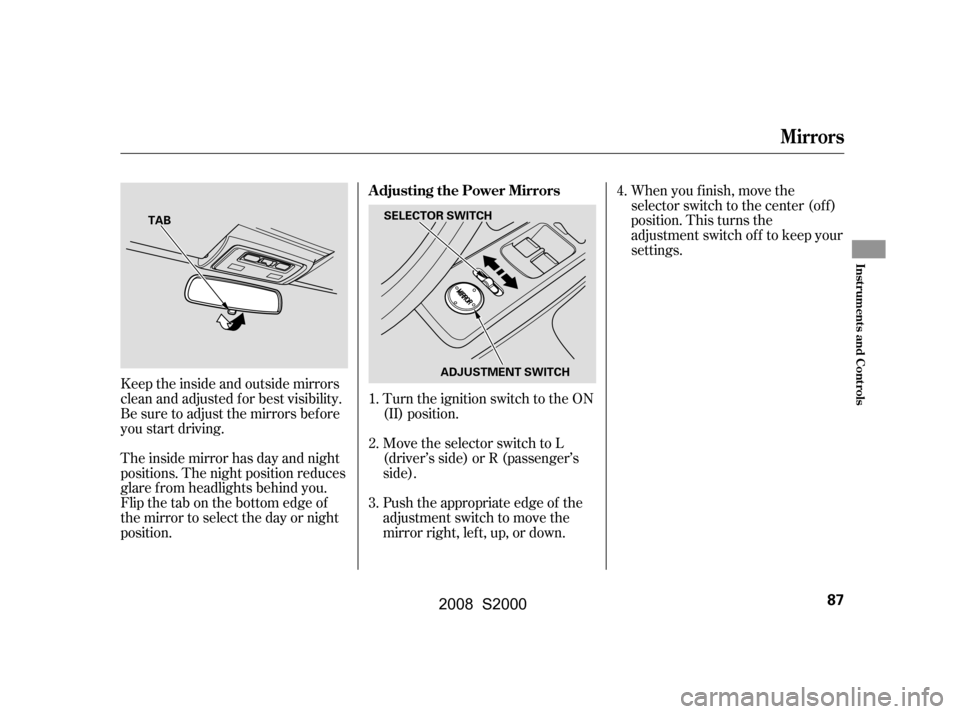
Keeptheinsideandoutsidemirrors
clean and adjusted f or best visibility.
Be sure to adjust the mirrors bef ore
you start driving.
The inside mirror has day and night
positions. The night position reduces
glare f rom headlights behind you.
Flip the tab on the bottom edge of
the mirror to select the day or night
position.Turn the ignition switch to the ON
(II) position.
Move the selector switch to L
(driver’s side) or R (passenger’s
side).
Push the appropriate edge of the
adjustment switch to move the
mirrorright,left,up,ordown.When you f inish, move the
selector switch to the center (off)
position. This turns the
adjustment switch of f to keep your
settings.
1.
2.
3. 4.
Mirrors
Adjusting the Power Mirrors
Inst rument s and Cont rols
87
TAB
SELECTOR SWITCH
ADJUSTMENT SWITCH
�\f���—�\f���—�����y�
���������\f���y���
�(���������\f�y�\f�\f�����y
2008 S2000
Trending: torque, trip computer, spark plugs, child seat, recommended oil, engine oil, fuel pump
