radio controls HUMMER H2 2005 Owners Manual
[x] Cancel search | Manufacturer: HUMMER, Model Year: 2005, Model line: H2, Model: HUMMER H2 2005Pages: 468, PDF Size: 3.21 MB
Page 142 of 468
Fuel Gage...................................................3-42
Low Fuel Warning Light.................................3-43
Driver Information Center (DIC).......................3-43
DIC Operation and Displays...........................3-44
DIC Warnings and Messages.........................3-47
DIC Vehicle Personalization............................3-54
Audio System(s).............................................3-60
Setting the Time...........................................3-61
Radio with Cassette and CD..........................3-61
Radio with Six-Disc CD.................................3-74Navigation/Radio System...............................3-87
Rear Seat Audio (RSA).................................3-87
Theft-Deterrent Feature..................................3-89
Audio Steering Wheel Controls.......................3-89
Radio Reception...........................................3-90
Care of Your Cassette Tape Player.................3-91
Care of Your CDs.........................................3-92
Care of Your CD Player................................3-92
Fixed Mast Antenna......................................3-92
Chime Level Adjustment................................3-92
Section 3 Instrument Panel
3-2
Page 145 of 468
The main components of your instrument panel are the following:
A. Air Outlets. SeeOutlet Adjustment on page 3-25.
B. Exterior Lamps Control. SeeExterior Lamps
on page 3-13.
C. OnStar
®and Radio Steering Wheel Buttons (If
Equipped). SeeOnStar®System on page 2-48and
Audio Steering Wheel Controls on page 3-89.
D. Instrument Panel Cluster. SeeInstrument Panel
Cluster on page 3-27.
E. Locking Rear Axle and All-wheel Drive Buttons. See
Locking Rear Axle on page 4-10andAll-Wheel
Drive on page 2-32.
F. Audio System. SeeAudio System(s) on page 3-60.
G. Airbag Switch. SeeAirbag Off Switch on page 1-65.
H. Glove Box. SeeGlove Box on page 2-54.
I. Midgate Glass Up/Down Switch (SUT). SeeMidgate
(SUT) on page 2-14. Rear Wiper/Washer Switch
(SUV). SeeWindshield Washer on page 3-9.
J. Dome Override Button. SeeDome Lamps on
page 3-17.
K. Turn Signal/Multifunction Lever. SeeTurn
Signal/Multifunction Lever on page 3-7.
L. Tilt Lever. SeeTilt Wheel on page 3-6.
M. Driver Information Center (DIC) Buttons. SeeDriver
Information Center (DIC) on page 3-43.N. Parking Brake Release. SeeParking Brake on
page 2-36.
O. Traction Control Button. SeeTraction Control
System (TCS) on page 4-9.
P. Tow/Haul Selector Button. SeeTow/Haul Mode Light
on page 3-42.
Q. Ride Height Selector Button (If Equipped). See
Selectable Extended Rear Ride Height on page 4-65.
R. Cigarette Lighter or Accessory Power Outlet (If
Equipped). SeeAshtrays and Cigarette Lighter on
page 3-18 Accessory Power Outlets on page 3-18.
S. Shift Lever. SeeAutomatic Transmission Operation
on page 2-28.
T. Accessory Power Outlets. SeeAccessory Power
Outlets on page 3-18.
U. OnStar Buttons. SeeOnStar
®System on page 2-48.
V. Rear Window Defogger Button. See “Rear Window
Defogger” underDual Automatic Climate Control
System on page 3-19.
W. Comfort Control System. SeeDual Automatic
Climate Control System on page 3-19.
3-5
Page 200 of 468
Display Units
Press the personalization button until DISPLAY UNITS
appears in the display. To select English or metric,
press the select button while DISPLAY UNITS is
displayed on the DIC. Pressing the select button will
scroll through the following choices:
DISPLAY UNITS: ENGLISH
DISPLAY UNITS: METRIC
If you choose English, all information will be displayed
in English units. For example, distance in miles and fuel
economy in miles per gallon.
Choose one of the available options and press the
personalization button while it is displayed on the DIC to
select it and end out of the personalization options.
Audio System(s)
Notice:Before adding any sound equipment to
your vehicle, like a tape player, CB radio, mobile
telephone, or two-way radio, make sure that it can
be added by checking with your dealer. Also,
check federal rules covering mobile radio and
telephone units. If sound equipment can be added,
it is very important to do it properly. Added
sound equipment may interfere with the operation
of your vehicle’s engine, radio, or other systems,
and even damage them. Your vehicle’s systems may
interfere with the operation of sound equipment
that has been added improperly.
Figure out which audio system is in your vehicle, �nd
out what your audio system can do, and how to operate
all of its controls.
Your vehicle has a feature called Retained Accessory
Power (RAP). With RAP, the audio system can be
played even after the ignition is turned off. SeeRetained
Accessory Power (RAP) on page 2-26for more
information.
3-60
Page 204 of 468
To store an equalization setting to a preset station
perform the following:
1. Tune to the preset station.
2. Press and release the AUTO EQ button to select
the equalization setting.
Once the equalization no longer appears on the
display, the equalization will be set for that preset
station.
Setting the Tone (Bass/Treble)
AUDIO:Push and release the AUDIO knob until BASS
or TREB appears on the display. Turn the knob to
increase or to decrease. The display will show the bass
or treble level. If a station is weak or noisy, decrease
the treble.
To adjust the bass and treble to the middle position,
push and hold the AUDIO knob. The radio will produce
one beep and adjust the display level to the middle
position.
To adjust all tone and speaker controls to the middle
position, push and hold the AUDIO knob when no tone
or speaker control is displayed. ALL CENTERED will
appear on the display, you will hear a beep, and
the display level will be adjusted to the middle position.AUTO EQ (Automatic Equalization):Press this button
to select customized equalization settings designed
for country/western, jazz, talk, pop, rock, and classical.
The radio will save separate AUTO EQ settings for
each preset and source.
If the radio is equipped with the Bose audio system, the
equalization settings are either CUSTOM or TALK.
Adjusting the Speakers (Balance/Fade)
AUDIO:To adjust the balance between the right
and the left speakers, push and release the AUDIO
knob until BAL appears on the display. Turn the knob to
move the sound toward the right or the left speakers.
To adjust the fade between the front and the rear
speakers, push and release the AUDIO knob until FADE
appears on the display. Turn the knob to move the
sound toward the front or the rear speakers.
To adjust the balance and fade to the middle position,
push the AUDIO knob, then push it again and hold
it until the radio produces one beep. The balance and
fade will be adjusted to the middle position and the
display will show the speaker balance.
To adjust all tone and speaker controls to the middle
position, push and hold the AUDIO knob when no tone
or speaker control is displayed. ALL CENTERED will
appear on the display, you will hear a beep, and
the display level will be adjusted to the middle position.
3-64
Page 209 of 468
Playing a Cassette Tape
The tape player is built to work best with tapes that are
up to 30 to 45 minutes long on each side. Tapes
longer than that are so thin they may not work well in
this player. The longer side with the tape visible should
face to the right. If you hear nothing or hear a garbled
sound, the tape may not be in squarely. Press the eject
button to remove the tape and start over.
If the ignition and radio are off, press the eject button or
the INFO knob to insert and to begin play of a tape.
If the ignition is on and the radio is off, the tape can be
inserted and will begin playing.
While the tape is playing, use the VOL, AUDIO, and
SEEK controls just as you do for the radio. The cassette
tape symbol will appear on the display and an arrow
showing which side of the tape is playing. The tape
player will play the other side of the tape when it
reaches the end.
Cassette tape adapter kits for portable CD players will
work in the cassette tape player. See “CD Adapter Kits”
later for more information.
The tape bias is set automatically when a metal or
chrome tape is inserted.
If an error appears on the display, see “Cassette Tape
Messages” later in this section.1 PREV (Previous):The tape must have at least
three seconds of silence between each selection for
previous to work. Press this pushbutton to go to the
previous selection on the tape if the current selection has
been playing for less than three seconds. If pressed when
the current selection has been playing from three to
13 seconds, it will go to the beginning of the previous
selection or the beginning of the current selection,
depending on the position on the tape. If pressed when
the current selection has been playing for more than
13 seconds, it will go to the beginning of the current
selection.
SEEK and a negative number will appear on the display
while the cassette player is in the previous mode.
Pressing this pushbutton multiple times will increase the
number of selections to be searched back, up to -9.
2 NEXT:The tape must have at least three seconds of
silence between each selection for next to work.
Press this pushbutton to go to the next selection on the
tape. Pressing this pushbutton multiple times, in next
mode, will increase the number of selections to be
searched forward. SEEK and a positive number
will appear on the display.
3 REV (Reverse):Press this pushbutton to quickly
reverse the tape. The radio will play while the tape
reverses. Press it again to return to playing speed. The
station frequency and REV will appear on the display.
Select stations during reverse operation by using TUNE
and SEEK.
3-69
Page 217 of 468

To adjust all tone and speaker controls to the middle
position, push and hold the AUDIO knob when no tone
or speaker controls are displayed. CENTERED will
appear on the display and you will hear a beep.
AUTO EQ (Automatic Equalization):Press this button
to select customized equalization settings designed
for country/western, jazz, talk, pop, rock, and classical.
The radio will save separate AUTO EQ settings for
each preset and source.
If the radio is equipped with the Bose audio system, the
equalization settings are either CUSTOM or TALK.
Adjusting the Speakers (Balance/Fade)
AUDIO:To adjust the balance between the right
and the left speakers, push and release the AUDIO
knob until BAL appears on the display. Turn the knob to
move the sound toward the right or the left speakers.
To adjust the fade between the front and rear speakers,
push and release the AUDIO knob until FADE appears
on the display. Turn the knob to move the sound toward
the front or the rear speakers.
To adjust the balance and fade to the middle position,
push and hold the AUDIO knob. The radio will produce
one beep and adjust the display level to the middle
position.To adjust all tone and speaker controls to the middle
position, push and hold the AUDIO knob when no tone or
speaker controls are displayed. CENTERED will appear
on the display and you will hear a beep.
Finding a Program Type (PTY) Station
(RDS and XM™)
To select and �nd a desired PTY perform the following:
1. Press the TYPE button to activate program type
select mode. P-TYPE and the last selected PTY
will appear on the display.
2. Turn the TYPE knob or press and release the
TYPE button to select a PTY.
3. Once the desired PTY is displayed, press either the
TYPE or the SEEK arrows to select and to take you
to the PTY’s �rst station.
4. To go to another station within that PTY and the
PTY is displayed, press either the TYPE or the
SEEK arrows once. If the PTY is not displayed, go
back to Step 1.
5. Press either the TYPE or the SEEK arrows to exit
program type select mode.
3-77
Page 227 of 468
CD Messages
CHECK CD:If this message appears on the display
and/or the CD comes out, it could be for one of the
following reasons:
It is very hot. When the temperature returns to
normal, the CD should play.
You are driving on a very rough road. When the
road becomes smoother, the CD should play.
The CD is dirty, scratched, wet, or upside down.
The air is very humid. If so, wait about an hour and
try again.
There may have been a problem while burning
the CD.
The label may be caught in the CD player.
If the CD is not playing correctly, for any other reason,
try a known good CD.
If any error occurs repeatedly or if an error cannot be
corrected, contact your GM dealer. If the radio displays
an error message, write it down and provide it to
your GM dealer when reporting the problem.
Navigation/Radio System
Your vehicle may have a navigation radio system that
includes Radio Data System (RDS) with Program Type
(PTY) selections that will seek out the kind of music you
want to listen to and XM™ Satellite Radio Service
capabilities (if equipped). The radio can also
communicate with the navigation system to broadcast
announcements on traffic, weather, and emergency alert
communications. For information on how to use this
system, see the “Navigation System” manual.
Rear Seat Audio (RSA)
This feature allows rear seat passengers to listen to any
of the sources: radio, cassette tapes, or CDs. However,
the rear seat passengers can only control the sources
that the front seat passengers are not listening to. For
example, rear seat passengers may listen to and control
cassette tapes or CDs through the headphones while the
driver listens to the radio through the front speakers. The
rear seat passengers have control of the volume for each
set of headphones.
The front seat audio controls always have priority over
the RSA controls. If the front seat passengers switch the
source for the main radio to a remote source, the RSA will
not be able to control the source. You can operate the
rear seat audio when the main radio is off.
3-87
Page 228 of 468

P(Power):Press this button to turn the system on or
off. The rear speakers will be muted when the power
is turned on unless your vehicle is equipped with
the Bose
®audio system.
u(Volume):Turn this knob to increase or to
decrease the volume. The left knob controls the left
headphones and the right knob controls the right
headphones.SRC (Source):Press this button to select a source:
radio, cassette tape, or CD.
xSEEKw:When listening to FM1, FM2, AM, or XM1
or XM2 (if equipped), press the up or the down arrow to
go to the next or to the previous station and stay there.
This function is inactive if the front seat passengers are
listening to the radio.
When a cassette tape is playing, press the up or the
down arrow to go to the next or the previous selection.
This function is inactive if the front seat passengers are
listening to a cassette tape.
When a CD is playing, press the up arrow to got to the
next track on the CD. Press the down arrow to go to the
start of the current track if more than eight seconds have
played. This function is inactive if the front seat
passengers are listening to a CD.
PROG (Program):Press this button to go to the next
preset radio station set on the pushbuttons on the main
radio. This function is inactive if the front seat passengers
are listening to the radio.
When a cassette tape is playing, press this button to go to
the other side of the tape. This function is inactive if the
front seat passengers are listening to a cassette tape.
3-88
Page 229 of 468
When a CD is playing, press this button to go to the
beginning of the CD. This function is inactive if the front
seat passengers are listening to a CD.
When a CD is playing in the six-disc CD changer, press
this button to select the next CD, if multiple CDs are
loaded. This function is inactive if the front seat
passengers are listening to a CD.
Theft-Deterrent Feature
THEFTLOCK®is designed to discourage theft of your
vehicle’s radio. The feature works automatically by
learning a portion of the Vehicle Identi�cation Number
(VIN). If the radio is moved to a different vehicle, it
will not operate and LOCKED will appear on the display.
When the radio and vehicle are turned off, the blinking
red light indicates that THEFTLOCK
®is armed.
With THEFTLOCK
®activated, the radio will not operate
if stolen.
Audio Steering Wheel Controls
If your vehicle has this feature, some audio controls can
be adjusted at the steering wheel. They include the
following:
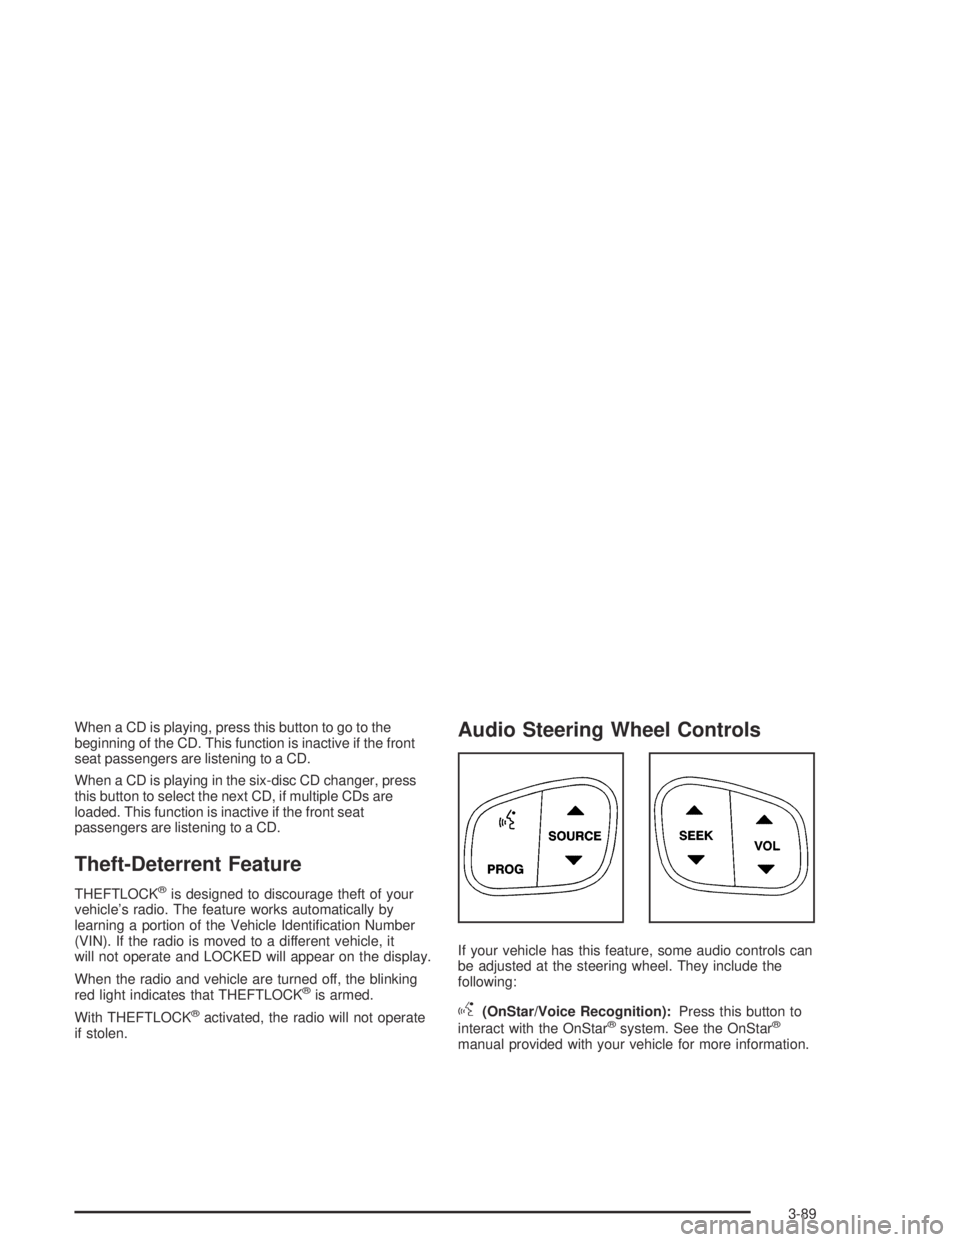
g(OnStar/Voice Recognition):Press this button to
interact with the OnStar®system. See the OnStar®
manual provided with your vehicle for more information.
3-89
Page 463 of 468
Outside (cont.)
Heated Mirrors............................................2-47
Power Mirrors.............................................2-46
Overheated Engine Protection Operating Mode.....5-28
Owner Checks and Services.............................. 6-9
Owners, Canadian............................................... ii
P
Park (P)
Shifting Into................................................2-37
Shifting Out of............................................2-38
Parking
Brake........................................................2-36
Over Things That Burn.................................2-38
Passing.........................................................4-13
Passlock
®......................................................2-24
Personalization, Climate Controls......................3-25
Power
Accessory Outlets........................................3-18
Door Locks.................................................. 2-9
Electrical System.......................................5-102
Lumbar Controls........................................... 1-3
Retained Accessory (RAP)............................2-26
Seat............................................................ 1-2
Steering Fluid.............................................5-33
Windows....................................................2-19
Power Winch Platform.....................................4-57Programmable Automatic Door Locks.................2-10
Programming the HomeLink
®Transmitter...........2-51
Q
Questions and Answers About Safety Belts.........1-21
R
Radios..........................................................3-60
Care of Your Cassette Tape Player................3-91
Care of Your CD Player...............................3-92
Care of Your CDs........................................3-92
Navigation/Radio System..............................3-87
Radio with Cassette and CD.........................3-61
Radio with Six-Disc CD................................3-74
Rear Seat Audio..........................................3-87
Setting the Time..........................................3-61
Theft-Deterrent............................................3-89
Understanding Reception..............................3-90
Reading Lamps..............................................3-17
Rear Axle......................................................5-44
Locking......................................................4-10
Rear Door Security Locks................................2-12
Rear Heated Seats........................................... 1-7
Rear Safety Belt Comfort Guides......................1-33
Rear Seat Armrest..........................................2-59
9