ignition HUMMER H2 2006 Repair Manual
[x] Cancel search | Manufacturer: HUMMER, Model Year: 2006, Model line: H2, Model: HUMMER H2 2006Pages: 502, PDF Size: 3.35 MB
Page 224 of 502
To insert multiple CDs, do the following:
1. Turn the ignition on.
2. Press and hold the LOAD button for two seconds.
You will hear a beep and the indicator light, located
to the right of the slot, will begin to �ash and
MULTI LOAD # will appear on the display.
3. Once the light stops �ashing and turns green,
INSERT CD # will appear on the display, load
a CD. Insert the CD partway into the slot, label side
up. The player will pull the CD in.
Once the CD is loaded, the indicator light will begin
�ashing again. Once the light stops �ashing and
turns green, you can load another CD. The
CD player takes up to six CDs. Do not try to load
more than six.
To load more than one CD but less than six, complete
Steps 1 through 3. When �nished loading CDs,
press the LOAD button to cancel the loading function.
The radio will begin to play the last CD loaded.
If more than one CD has been loaded, a number for
each CD will appear on the display.Playing a Speci�c Loaded CD
For every CD loaded, a number will appear on the
display. To play a speci�c CD, �rst (if not in CD mode)
press the CD AUX button, then press the numbered
pushbutton that corresponds to the CD. A small bar will
appear under the CD number that is playing and the
track number will appear on the display.
If an error appears on the display, see “CD Messages”
later in this section.
CD
Z(Eject):Press this button to eject CD(s).
To eject the CD that is currently playing, press and
release this button.
To eject multiple CDs, do the following:
1. Press and hold the CD eject button for �ve seconds.
You will hear a beep and the indicator light, located
to the right of the slot, will begin to �ash and
EJECT ALL will appear on the display.
2. Once the light stops �ashing REMOVE CD # will
appear on the display. The CD will eject and can
be removed.
Once the CD is removed, the indicator light will
begin �ashing again and another CD will eject.
To stop ejecting the CDs, press the LOAD or the
eject button.
3-84
Page 246 of 502

Problem Recommended Action
The fast forward, fast
reverse, previous,
and next functions
do not work.
Some commands that
do one thing for
DVDs will not always
work or perform the
same function for
audio, audio discs, or
games. These
functions may also be
disabled when the
DVD is playing the
copyright information
or the previews.
Picture color is poor.
Spots or dotted
lines/stripes appear.
Set brightness/
color/tint controls to
the proper settings.
Change the location
of the vehicle. Poor
picture color can be
caused by neon
signs, high-voltage
power lines, CB
transmitter, and
neighboring vehicle’s
ignition plugs, cell
phones, etc.
Problem Recommended Action
No remote control
operation or unstable
operation.
Remove any obstacle
between the system
remote control and
the remote sensor on
the monitor.
Replace batteries
with new ones.
� Make sure the
batteries are
inserted correctly.
No rear seat
entertainment audio
sound from vehicle radio.
Turn on the POWER
to the radio, turn up
the volume.
Turn on the POWER
to the FM Modulator.
Tune FM Modulator
and vehicle radio to
the same FM
frequency.
Make sure the
driver’s side monitor
is switched to on.
3-106
Page 252 of 502
The tape player should be cleaned regularly after every
50 hours of use. The radio may display CLEAN to
indicate that the tape player has been used for 50 hours
without resetting the tape clean timer. If this message
appears on the display, the cassette tape player
needs to be cleaned. It will still play tapes, but it should
be cleaned as soon as possible to prevent damage
to the tapes and player. If there is a reduction in sound
quality, try a known good cassette to see if the tape
or the tape player is at fault. If this other cassette has no
improvement in sound quality, clean the tape player.
For best results, use a scrubbing action, non-abrasive
cleaning cassette with pads which scrub the tape
head as the hubs of the cleaner cassette turn. The
recommended cleaning cassette is available through
your dealer.When cleaning the cassette tape player with the
recommended non-abrasive cleaning cassette, it is
possible that the cassette may eject, because the cut
tape detection feature on the radio may recognize it as a
broken tape, in error. To prevent the cleaning cassette
from being ejected, use the following steps:
1. Turn the ignition on.
2. Turn the radio off.
3. Press and hold the TAPE DISC button for
�ve seconds. READY will appear on the display and
the cassette symbol will �ash for �ve seconds.
4. Insert the scrubbing action cleaning cassette.
5. Eject the cleaning cassette after the manufacturer’s
recommended cleaning time.
When the cleaning cassette has been ejected, the
cut tape detection feature will be active again.
3-112
Page 254 of 502
Fixed Mast Antenna
The �xed mast antenna can withstand most car washes
without being damaged. If the mast should ever
become slightly bent, straighten it out by hand. If the
mast is badly bent, replace it.
Check occasionally to make sure the mast is still
tightened.
XM™ Satellite Radio Antenna
System
The XM™ Satellite Radio antenna is located on the roof
of your vehicle. Keep this antenna clear of snow and
ice build up for clear radio reception.
If your vehicle has a sunroof, the performance of the
XM™ system may be affected if the sunroof is open.
Loading items onto the roof of your vehicle can interfere
with the performance of the XM™ system. Make sure
the XM™ Satellite Radio antenna is not obstructed.
Chime Level Adjustment
The radio is used to adjust the vehicle’s chime level. To
change the volume level of the chime, press and hold
pushbutton 6 with the ignition on and the radio power off.
The volume level will change from the normal level to
loud, and LOUD CHIME will appear on the radio display.
To change back to the default or normal setting, press
and hold pushbutton 6 again. The volume level will
change from the loud level to normal, and NORMAL
CHIME will appear on the radio display. Removing the
radio and not replacing it with a factory radio or chime
module will disable vehicle chimes.
3-114
Page 263 of 502
Traction Control System (TCS)
Your vehicle has a Traction Control System (TCS) that
limits wheel spin. This is especially useful in slippery
road conditions. The system operates only if it senses
that any of the wheels are spinning or beginning to lose
traction. When this happens, the system applies the
brakes to limit wheel spin.
The Traction Control System may operate on dry roads
under some conditions. When this happens, you may
notice a reduction in acceleration or a pumping sound.
This is normal and doesn’t mean there’s a problem with
your vehicle. Examples of these conditions include hard
acceleration in a turn, an abrupt upshift or downshift of
the transmission or driving on rough roads.
If your vehicle is in cruise control when the TCS begins
to limit wheel spin, the cruise control will automatically
disengage. When road conditions allow you to safely
use it again, you may re-engage the cruise control. See
Cruise Control on page 3-11.
Another feature of this system is the Traction
Control 2 (TC2) mode. TC2 should be selected for
improved traction and system performance when the
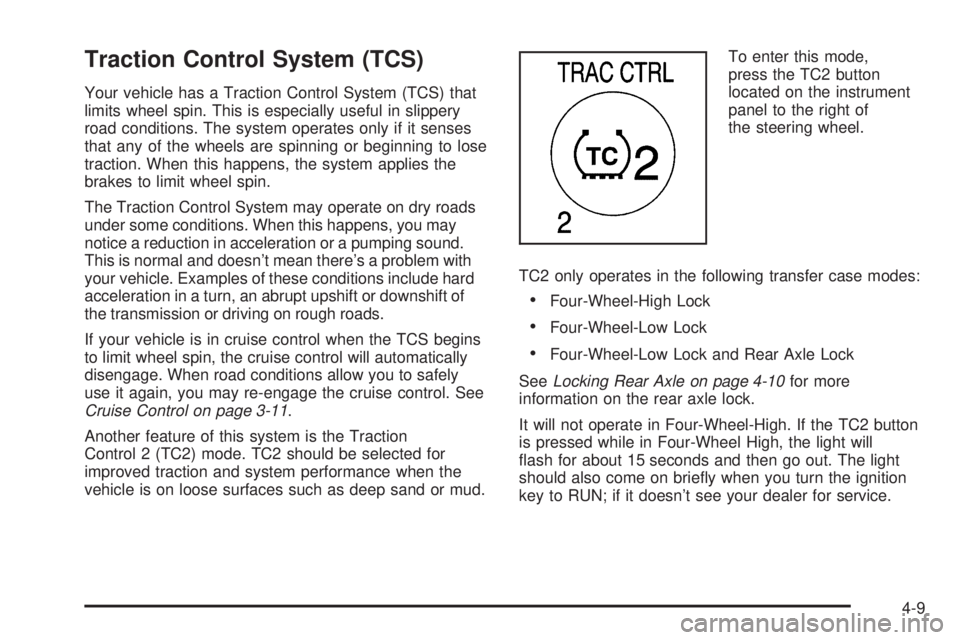
vehicle is on loose surfaces such as deep sand or mud.To enter this mode,
press the TC2 button
located on the instrument
panel to the right of
the steering wheel.
TC2 only operates in the following transfer case modes:
Four-Wheel-High Lock
Four-Wheel-Low Lock
Four-Wheel-Low Lock and Rear Axle Lock
SeeLocking Rear Axle on page 4-10for more
information on the rear axle lock.
It will not operate in Four-Wheel-High. If the TC2 button
is pressed while in Four-Wheel High, the light will
�ash for about 15 seconds and then go out. The light
should also come on brie�y when you turn the ignition
key to RUN; if it doesn’t see your dealer for service.
4-9
Page 287 of 502

Hard packed snow and ice offer the worst tire traction.
On these surfaces, it is very easy to lose control.
On wet ice, for example, the traction is so poor that you
will have difficulty accelerating. And if you do get
moving, poor steering and difficult braking can cause
you to slide out of control.
{CAUTION:
Driving on frozen lakes, ponds, or rivers can
be dangerous. Underwater springs, currents
under the ice, or sudden thaws can weaken the
ice. Your vehicle could fall through the ice and
you and your passengers could drown. Drive
your vehicle on safe surfaces only.
Driving in Water
Heavy rain can mean �ash �ooding, and �ood waters
demand extreme caution.
Find out how deep the water is before you drive through
it. If it is deep enough to cover your wheel hubs, axles, or
exhaust pipe, do not try it — you probably will not get
through. Also, water that deep can damage your axle and
other vehicle parts. Your vehicle is capable of depths up
to 20 inches. Know how to judge whether the water is
deeper than this before proceeding into it.If the water is not too deep, drive slowly through it. At
faster speeds, water splashes on your ignition
system and your vehicle can stall. Stalling can also
occur if you get your tailpipe under water. And, as long
as your tailpipe is under water, you will never be
able to start your engine. When you go through water,
remember that when your brakes get wet, it may
take you longer to stop.
{CAUTION:
Driving through rushing water can be
dangerous. Deep water can sweep your
vehicle downstream and you and your
passengers could drown. If it is only shallow
water, it can still wash away the ground from
under your tires, and you could lose traction
and roll the vehicle over. Do not drive through
rushing water.
SeeDriving in Rain and on Wet Roads on page 4-39for
more information on driving through water.
4-33
Page 299 of 502
{CAUTION:
Coasting downhill in NEUTRAL (N) or with the
ignition off is dangerous. Your brakes will have
to do all the work of slowing down. They could
get so hot that they would not work well. You
would then have poor braking or even none
going down a hill. You could crash. Always
have your engine running and your vehicle in
gear when you go downhill.
Know how to go down hills. The most important
thing to know is this: let your engine do some of
the slowing down. Shift to a lower gear when you go
down a steep or long hill.
Know how to go uphill. You may want to shift down to
a lower gear. The lower gears help cool your engine
and transmission, and you can climb the hill better.
Stay in your own lane when driving on two-lane
roads in hills or mountains. Do not swing wide or cut
across the center of the road. Drive at speeds that let
you stay in your own lane.
As you go over the top of a hill, be alert. There
could be something in your lane, like a stalled car or
an accident.
You may see highway signs on mountains that
warn of special problems. Examples are long
grades, passing or no-passing zones, a falling rocks
area, or winding roads. Be alert to these and take
appropriate action.
4-45
Page 314 of 502

Recreational Vehicle Towing
Recreational vehicle towing means towing your vehicle
behind another vehicle – such as behind a motorhome.
The two most common types of recreational vehicle
towing are known as “dinghy towing” (towing your vehicle
with all four wheels on the ground) and “dolly towing”
(towing your vehicle with two wheels on the ground and
two wheels up on a device known as a “dolly”).
With the proper preparation and equipment, many
vehicles can be towed in these ways. See “Dinghy
Towing” and “Dolly Towing,” following.
Here are some important things to consider before you
do recreational vehicle towing:
What’s the towing capacity of the towing vehicle?
Be sure you read the tow vehicle manufacturer’s
recommendations.
How far will you tow? Some vehicles have
restrictions on how far and how long they can tow.
Do you have the proper towing equipment?
See your dealer or trailering professional for
additional advice and equipment recommendations.
Is your vehicle ready to be towed? Just as you
would prepare your vehicle for a long trip, you’ll
want to make sure your vehicle is prepared to be
towed. SeeBefore Leaving on a Long Trip on
page 4-43.
Dinghy Towing
Use the following procedure to tow your vehicle:
1. Shift the transmission to PARK (P).
2. Turn the engine off, but leave the ignition in
ACCESSORY.
3. Firmly set the parking brake.
4. Securely attach the vehicle being towed to the
tow vehicle.
{CAUTION:
Shifting a full-time four-wheel-drive vehicle’s
transfer case into NEUTRAL can cause your
vehicle to roll even if the transmission is in
PARK (P). You or others could be injured.
Make sure the parking brake is �rmly set
before you shift the transfer case to NEUTRAL.
5. Shift the transfer case to NEUTRAL (N). See
Full-Time Four-Wheel Drive on page 2-30for
the proper procedure to select the NEUTRAL
position for your vehicle.
4-60
Page 315 of 502
6. Release the parking brake only after the vehicle
being towed is �rmly attached to the towing
vehicle. You can use your vehicle’s front mounted
receiver with the proper accessories to tow it.
See “Front Mounted Receiver” underIf Your Vehicle
is Stuck in Sand, Mud, Ice or Snow on page 4-50.
7. Turn the ignition to ACCESSORY.
8. Disconnect the battery if you are going to tow for
long distances or long periods of time.
When towing your vehicle for extended periods of time,
start your vehicle as often as possible to prevent
battery drain. This should only be done when the tow
vehicle is parked.
Dolly Towing
Your vehicle cannot be dolly towed. If you must tow
your vehicle behind another, use the dinghy towing
procedure listed previously.
Notice:Dolly towing your vehicle will damage
drivetrain components. Do not dolly tow your
vehicle.
Selectable Extended Rear
Ride Height
If your vehicle has this feature it comes as part of the
electronically controlled air suspension system.
The selectable rear ride height allows you to raise the
rear of the vehicle about 2 inches (5 cm) over the normal
ride height. This can be helpful when driving off-road
where you may need more ground clearance to clear an
obstacle.
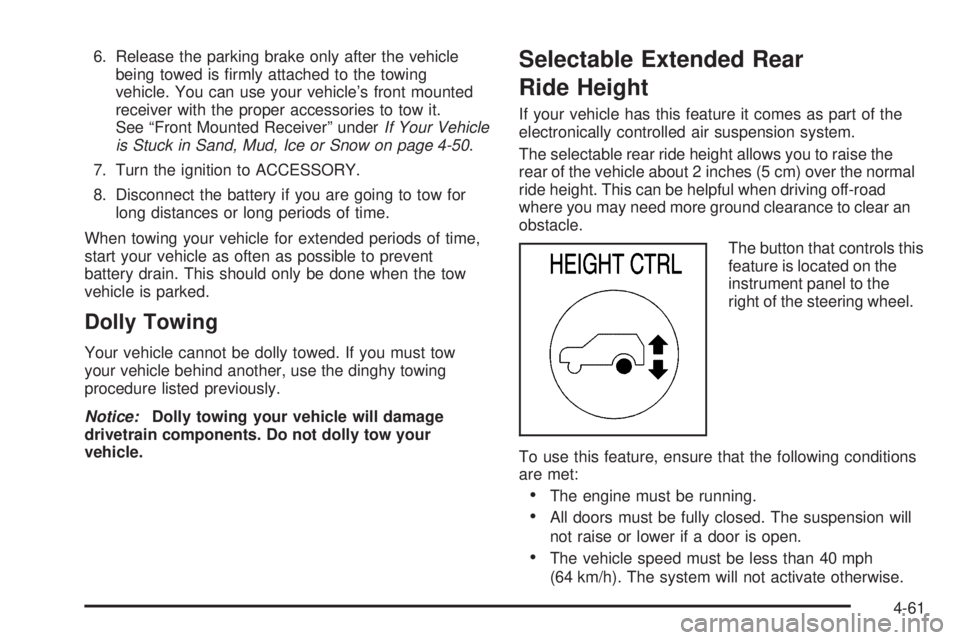
The button that controls this
feature is located on the
instrument panel to the
right of the steering wheel.
To use this feature, ensure that the following conditions
are met:
The engine must be running.
All doors must be fully closed. The suspension will
not raise or lower if a door is open.
The vehicle speed must be less than 40 mph
(64 km/h). The system will not activate otherwise.
4-61
Page 317 of 502
Overload and Overheat Protection
Overload protection is designed to protect the air
suspension system and is an indication to the driver that
the vehicle is overloaded.
If the rear suspension remains at a low height, the rear
axle load has exceeded GAWR (Gross Axle Weight
Rating). When the overload protection mode is activated,
the compressor operates for about 30 seconds to one
minute without raising the vehicle depending on the
amount of overload. This will continue each time
the ignition is turned on until the rear axle load is
reduced below GAWR.
If the total rear GAWR (Gross Axle Weight Rating) is
reached, the suspension may be slightly less than level.
This is normal and does not mean there is a problem
with the air suspension.
If the system overheats, it will shut down and stop all
leveling functions until the system cools down.
During this time the SERVICE AIR SUSPENSION
message will appear in the DIC. SeeDIC Warnings and
Messages on page 3-48for more information.
Towing a Trailer
{CAUTION:
If you do not use the correct equipment and
drive properly, you can lose control when you
pull a trailer. For example, if the trailer is too
heavy, the brakes may not work well — or even
at all. You and your passengers could be
seriously injured. Pull a trailer only if you have
followed all the steps in this section. Ask your
dealer for advice and information about towing
a trailer with your vehicle.
Notice:Pulling a trailer improperly can damage
your vehicle and result in costly repairs not covered
by your warranty. To pull a trailer correctly, follow
the advice in this part, and see your dealer for
important information about towing a trailer with
your vehicle.
To identify the trailering capacity of your vehicle, you
should read the information in “Weight of the Trailer” that
appears later in this section.
4-63