tow HUMMER H2 2007 Owner's Manual
[x] Cancel search | Manufacturer: HUMMER, Model Year: 2007, Model line: H2, Model: HUMMER H2 2007Pages: 570, PDF Size: 3.34 MB
Page 139 of 570
{CAUTION:
Full-time four-wheel drive vehicles with
the transfer case in NEUTRAL will allow
the vehicle to roll, even if your shift lever
is in PARK (P). So, be sure the transfer
case is in a drive gear — not in NEUTRAL.
Always set your parking brake.
Follow the proper steps to be sure your vehicle
will not move. SeeShifting Into Park (P) on
page 134.
If you are pulling a trailer, seeTowing a Trailer on
page 374.
Mirrors
Automatic Dimming Rearview
Mirror with Compass and
Temperature Display
If your vehicle is equipped with an automatic
mirror, it will, when on, automatically dim to the
proper level to minimize glare from lights behind
you after dark.
The mirror also includes a display in the upper
right corner of the mirror face. The compass
reading and the outside temperature will both
appear in the display at the same time. The dual
display can be turned on or off by brie�y
pressing the compass/temperature button.
O:This is the button for the automatic dimming
and compass/temperature functions.
Your vehicle may also have a Rear Vision
Camera. SeeRear Vision Camera on page 192
for more information.
139
Page 141 of 570

Compass Variance
The mirror is set in zone eight upon leaving the
factory. It will be necessary to adjust the compass
to compensate for compass variance if you live
outside zone eight. Under certain circumstances,
as during a long distance cross-country trip, it
will be necessary to adjust for compass variance.
Compass variance is the difference between
earth’s magnetic north and true geographic north.
If not adjusted to account for compass variance,
your compass could give false readings.
To adjust for compass variance:
1. Find your current location and variance zone
number on the following zone map.
2. Press and hold the compass/temperature
button for �ve seconds until a zone number
appears in the display.
Cleaning the Mirror
When cleaning the mirror, use a paper towel or
similar material dampened with glass cleaner.
Do not spray glass cleaner directly on the mirror
as that may cause the liquid cleaner to enter
the mirror housing.
141
Page 172 of 570
Traction Off Light...................................... 212
Engine Coolant Temperature Gage............ 213
Transmission Temperature Gage............... 213
Malfunction Indicator Lamp........................ 215
Oil Pressure Gage..................................... 218
Security Light............................................ 219
Cruise Control Light.................................. 220
Highbeam On Light................................... 220
Tow/Haul Mode Light................................ 220
Fuel Gage................................................. 221
Low Fuel Warning Light............................ 221
Driver Information Center (DIC).................. 222
DIC Operation and Displays...................... 222
DIC Warnings and Messages.................... 226
DIC Vehicle Customization........................ 234Audio System(s)......................................... 241
Setting the Time........................................ 243
Radio with Cassette and CD..................... 243
Radio with Six-Disc CD............................. 256
XM Radio Messages................................. 269
Navigation/Radio System........................... 271
Rear Seat Entertainment System............... 271
Rear Seat Audio (RSA)............................. 294
Theft-Deterrent Feature............................. 295
Audio Steering Wheel Controls.................. 296
Radio Reception........................................ 297
Care of the Cassette Tape Player............. 297
Care of Your CDs and DVDs.................... 299
Care of the CD and DVD Player............... 300
Fixed Mast Antenna.................................. 300
XM™ Satellite Radio Antenna System....... 300
Chime Level Adjustment............................ 300
Section 3 Instrument Panel
172
Page 175 of 570
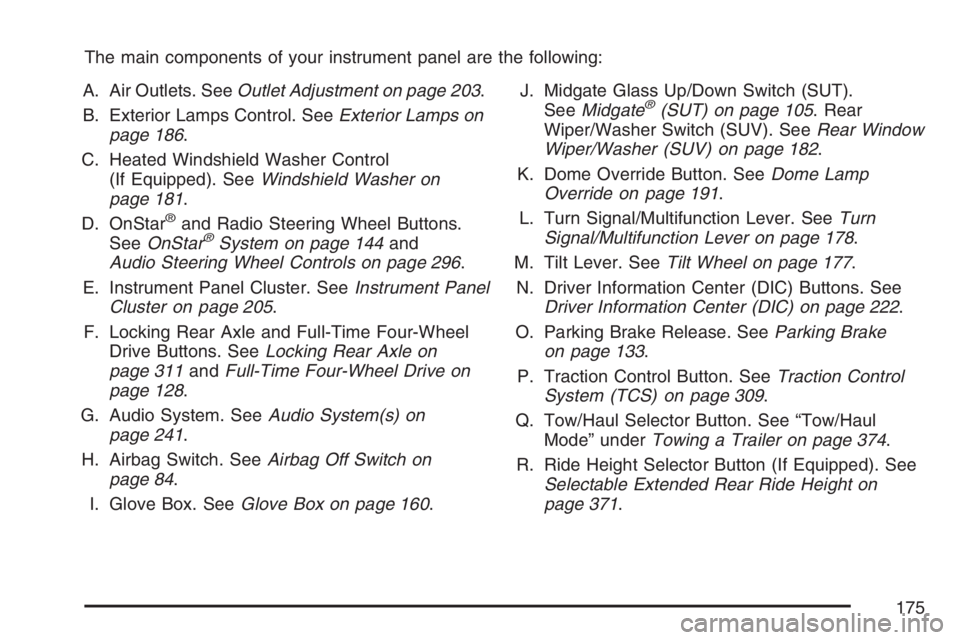
The main components of your instrument panel are the following:
A. Air Outlets. SeeOutlet Adjustment on page 203.
B. Exterior Lamps Control. SeeExterior Lamps on
page 186.
C. Heated Windshield Washer Control
(If Equipped). SeeWindshield Washer on
page 181.
D. OnStar
®and Radio Steering Wheel Buttons.
SeeOnStar®System on page 144and
Audio Steering Wheel Controls on page 296.
E. Instrument Panel Cluster. SeeInstrument Panel
Cluster on page 205.
F. Locking Rear Axle and Full-Time Four-Wheel
Drive Buttons. SeeLocking Rear Axle on
page 311andFull-Time Four-Wheel Drive on
page 128.
G. Audio System. SeeAudio System(s) on
page 241.
H. Airbag Switch. SeeAirbag Off Switch on
page 84.
I. Glove Box. SeeGlove Box on page 160.J. Midgate Glass Up/Down Switch (SUT).
SeeMidgate
®(SUT) on page 105. Rear
Wiper/Washer Switch (SUV). SeeRear Window
Wiper/Washer (SUV) on page 182.
K. Dome Override Button. SeeDome Lamp
Override on page 191.
L. Turn Signal/Multifunction Lever. SeeTurn
Signal/Multifunction Lever on page 178.
M. Tilt Lever. SeeTilt Wheel on page 177.
N. Driver Information Center (DIC) Buttons. See
Driver Information Center (DIC) on page 222.
O. Parking Brake Release. SeeParking Brake
on page 133.
P. Traction Control Button. SeeTraction Control
System (TCS) on page 309.
Q. Tow/Haul Selector Button. See “Tow/Haul
Mode” underTowing a Trailer on page 374.
R. Ride Height Selector Button (If Equipped). See
Selectable Extended Rear Ride Height on
page 371.
175
Page 178 of 570
Turn Signal/Multifunction Lever
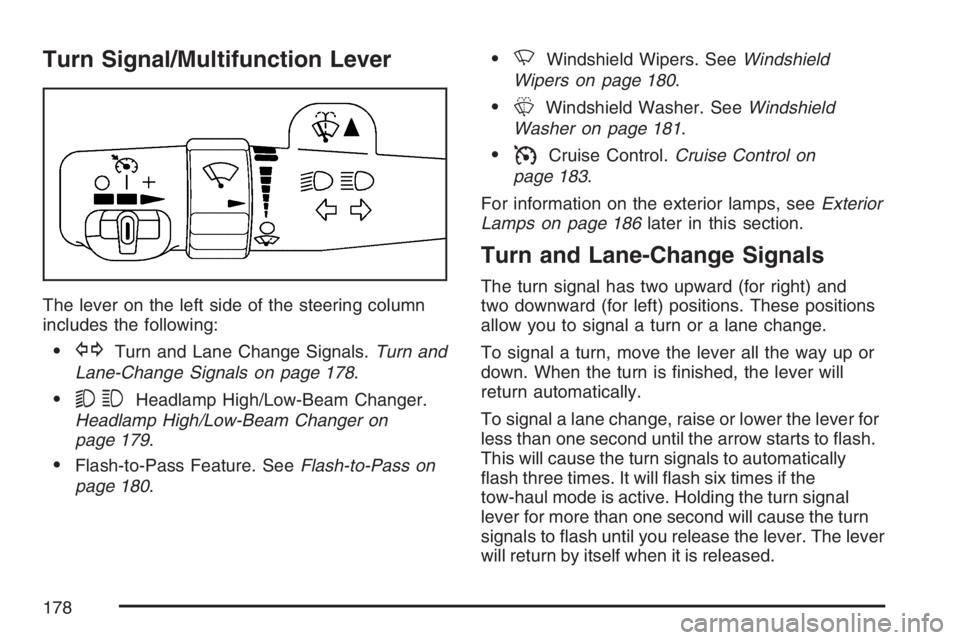
The lever on the left side of the steering column
includes the following:
GTurn and Lane Change Signals.Turn and
Lane-Change Signals on page 178.
53Headlamp High/Low-Beam Changer.
Headlamp High/Low-Beam Changer on
page 179.
Flash-to-Pass Feature. SeeFlash-to-Pass on
page 180.
NWindshield Wipers. SeeWindshield
Wipers on page 180.
LWindshield Washer. SeeWindshield
Washer on page 181.
ICruise Control.Cruise Control on
page 183.
For information on the exterior lamps, seeExterior
Lamps on page 186later in this section.
Turn and Lane-Change Signals
The turn signal has two upward (for right) and
two downward (for left) positions. These positions
allow you to signal a turn or a lane change.
To signal a turn, move the lever all the way up or
down. When the turn is �nished, the lever will
return automatically.
To signal a lane change, raise or lower the lever for
less than one second until the arrow starts to �ash.
This will cause the turn signals to automatically
�ash three times. It will �ash six times if the
tow-haul mode is active. Holding the turn signal
lever for more than one second will cause the turn
signals to �ash until you release the lever. The lever
will return by itself when it is released.
178
Page 179 of 570
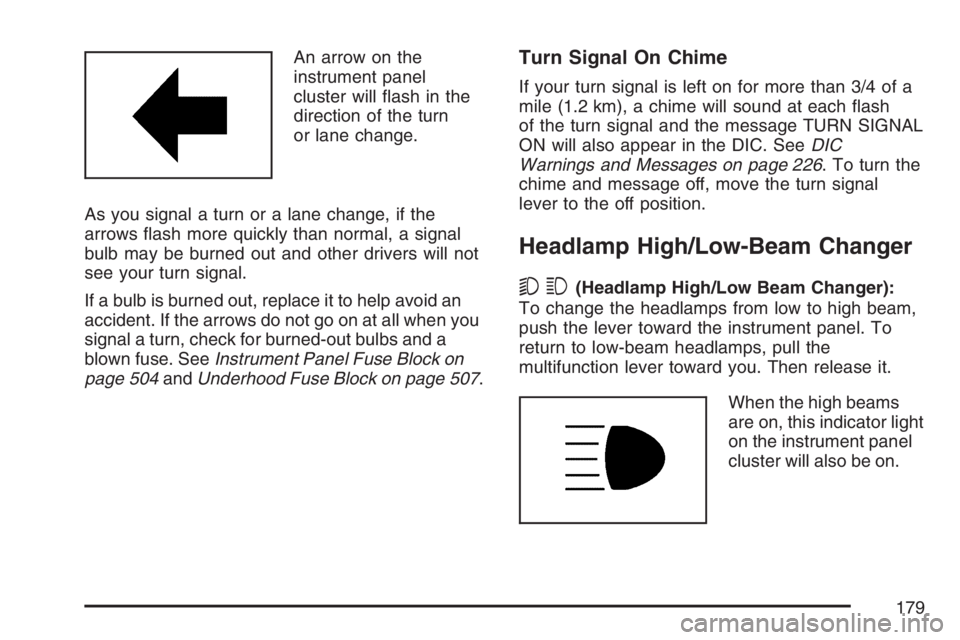
An arrow on the
instrument panel
cluster will �ash in the
direction of the turn
or lane change.
As you signal a turn or a lane change, if the
arrows �ash more quickly than normal, a signal
bulb may be burned out and other drivers will not
see your turn signal.
If a bulb is burned out, replace it to help avoid an
accident. If the arrows do not go on at all when you
signal a turn, check for burned-out bulbs and a
blown fuse. SeeInstrument Panel Fuse Block on
page 504andUnderhood Fuse Block on page 507.Turn Signal On Chime
If your turn signal is left on for more than 3/4 of a
mile (1.2 km), a chime will sound at each �ash
of the turn signal and the message TURN SIGNAL
ON will also appear in the DIC. SeeDIC
Warnings and Messages on page 226. To turn the
chime and message off, move the turn signal
lever to the off position.
Headlamp High/Low-Beam Changer
53(Headlamp High/Low Beam Changer):
To change the headlamps from low to high beam,
push the lever toward the instrument panel. To
return to low-beam headlamps, pull the
multifunction lever toward you. Then release it.
When the high beams
are on, this indicator light
on the instrument panel
cluster will also be on.
179
Page 180 of 570
Flash-to-Pass
This feature lets you use your high-beam
headlamps to signal a driver in front of you that
you want to pass. It works even if your headlamps
are in the automatic position.
To use it, pull the turn signal lever toward you,
then release it.
If your headlamps are in the automatic position or
on low beam, your high-beam headlamps will
turn on. They will stay on as long as you hold the
lever toward you. The high-beam indicator on
the instrument panel cluster will come on. Release
the lever to return to normal operation.
Windshield Wipers
You control the windshield wipers by turning the
band with the wiper symbol on it.
8(Mist):For a single wiping cycle, turn the
band to mist. Hold it there until the wipers
start. Then let go. The wipers will stop after
one wipe. If you want more wipes, hold the
band on mist longer.
6(Delay):You can set the wiper speed for a long
or short delay between wipes. This can be very
useful in light rain or snow. Turn the band to
choose the delay time. The closer to the top of the
lever, the shorter the delay.
6(Low Speed):For steady wiping at low
speed, turn the band away from you to the
�rst solid band past the delay settings.
1(High Speed):For high-speed wiping, turn
the band further, to the second solid band past the
delay settings.
9(Off):To stop the wipers, move the band
to off.
Be sure to clear ice and snow from the wiper
blades before using them. If they are frozen to the
windshield, carefully loosen or thaw them. If
your blades do become worn or damaged, get
new blades or blade inserts.
180
Page 188 of 570

2(Headlamps):Turn the control to this position
to turn on the headlamps, together with the
previously listed lamps and lights.
When the vehicle is turned off and the headlamps
are in AUTO, the headlamps may automatically
remain on for a set time. You can change
this delay time using the DIC. SeeDriver
Information Center (DIC) on page 222.
You can switch your headlamps from low to
high-beam by pushing the turn signal/multifunction
lever toward the instrument panel.
Headlamps on Reminder
If a door is open, a reminder chime will sound
when your headlamps or parking lamps are
manually turned on and your key is out of the
ignition. To turn off the chime, turn the headlamp
switch to off or AUTO and then back on, or
close and re-open the door. In the AUTO mode,
the headlamps turn off once the ignition is in LOCK
or may remain on until the headlamp delay ends
(if enabled in the DIC). See “Exit Lighting”
underDIC Vehicle Customization on page 234.
Daytime Running Lamps (DRL)
Daytime Running Lamps (DRL) can make it easier
for others to see the front of your vehicle during
the day. DRL can be helpful in many different
driving conditions, but they can be especially
helpful in the short periods after dawn and before
sunset. Fully functional daytime running lamps
are required on all vehicles �rst sold in Canada.
The DRL system will come on when the following
conditions are met:
The ignition is on.
The exterior lamps control is in AUTO.
The transmission is not in PARK (P).
The light sensor determines it is daytime.
When the DRL are on, only your DRL lamps will
be on. The taillamps, sidemarker, and other lamps
will not be on. The instrument panel will not be
lit up either.
When it begins to get dark, the automatic
headlamp system will switch from DRL to the
headlamps.
188
Page 211 of 570

Brake System Warning Light
With the ignition on, the brake system warning
light will �ash when you set the parking brake.
The light will �ash if the parking brake does
not release fully. If you try to drive with the parking
brake engaged, a chime will sound when the
vehicle speed is greater than 3 mph (5 km/h).
Your vehicle’s hydraulic brake system is divided
into two parts. If one part is not working, the other
part can still work and stop you. For good
braking, though, you need both parts working well.
If the warning light comes on and a chime
sounds there could be a brake problem. Have
your brake system inspected right away.This light should come on brie�y when you turn
the ignition key to RUN. If it does not come
on then, have it �xed so it will be ready to warn
you if there’s a problem.
If the light comes on while you are driving, pull off
the road and stop carefully. You may notice
that the pedal is harder to push or may go closer
to the �oor. It may take longer to stop. If the
light is still on, have the vehicle towed for service.
SeeTowing Your Vehicle on page 369.
{CAUTION:
Your brake system may not be working
properly if the brake system warning light
is on. Driving with the brake system
warning light on can lead to an accident.
If the light is still on after you have pulled
off the road and stopped carefully, have
the vehicle towed for service.
United StatesCanada
211
Page 214 of 570
At approximately 265°F (130°C), the Driver
Information Center (DIC) will display a
TRANSMISSION HOT message and the
transmission will enter a transmission protection
mode. When the transmission enters the protection
mode, you may notice a change in the transmission
shifting patterns. The transmission will return to
normal shifting patterns when the transmission �uid
temperature falls below 260°F (125°C).
If the transmission �uid reaches temperatures of
approximately 275°F (135°C) or greater, the DIC
will display a TRANS HOT IDLE ENGINE warning
message and a chime will sound. Pull the vehicle
off the roadway when it is safe to do so. Set the
parking brake, place the transmission in PARK (P)
and allow the engine to idle until the transmission
temperature falls below 260°F (125°C). If the
transmission continues to operate above 265°F
(130°C), please contact your nearest dealer or the
GM Roadside Assistance Center.
SeeDriver Information Center (DIC) on page 222
for further information.Notice:If you drive your vehicle with the
transmission temperature gage above normal
operating range, you can damage the
transmission. This could lead to costly repairs
that would not be covered by your warranty.
Do not drive your vehicle while the
transmission temperature gage reading is
above normal. See your dealer for service.
The following situations can cause the
transmission to operate at higher temperatures:
Towing a trailer,
hot outside air temperatures,
hauling a large or heavy load,
low transmission �uid level,
high transmission �uid level,
restricted air �ow to the radiator.
A temporary solution to hotter transmission
operating temperatures may be to let the
transmission cool down. If the transmission is
operated at higher temperatures on a frequent
basis, seeScheduled Maintenance on page 517
for the proper transmission maintenance intervals.
214